Joyner JNSZ650UV User manual

READ THIS MANUALCAREFULLY
It contains important safety information
Owner’s manual
JNSZ650UV
0

INTRODUCTION
Thank you for choosing JOYNER JNSZ650UV. It represents the result of many years
of JOYNER experience in the production of utility vehicles. With the purchase of this
JOYNER, you can now appreciate the high degree of craftsmanship and reliability
that have made JOYNER a leader in this field .This manual will provide you with a
good basic understanding of the features and operation of this vehicle. It also includes
basic maintenance and inspection procedures. If you have any questions regarding the
operation or maintenance of your vehicle, please consult a JOYNER dealer.
Please read this manual carefully before operating this vehicle. Do not attempt to
operate this vehicle until you have attained adequate knowledge of its controls and
operating features. Regular inspections and careful maintenance, along with good
operating techniques, will help ensure that you safely enjoy the capabilities and
reliability of this vehicle.
CONTENTS
LOCATION OF THE WARNINGAND SPECIFICATION LABELS
VEHICLE DESCRIPTION
CONTROL FUNCTIONS
ARE YOU READY TO DRIVE
IS YOUR VEHICLE READYTO DRIVE
SAFE DRIVING PRECAUTIONS
SPECIFICATIONS
OPERATION
SERVICE INSTRUCTION
REPAIR
PERIODIC MAINTENANCE
CLEANINGAND STORAGE
WIRING DIAGRAM
JNSZ650UV LIMITIED WARRANTY
1

LOCATION OF THE WARNING AND
SPECIFICATION LABELS
Read and understand all of the labels on your vehicle. They contain important
information for safe and proper operation of your vehicle.
Never remove any labels from your vehicle. If a label becomes difficult to read or
comes off, a replacement label is available from your Joyner dealer.
WARNI NG
The enclosure cannot protect occupants in
all foreseeable accidents,including rollover.
JOYNER
!
BT- S650- 01
2

WARNI NG
!
IMPROPER TIRE PRESSURE OR OVERLOADING CAN
CAUSE LOSS OF CONTROL.
LOSS OF CONTROL CAN RESULT IN SEVER INJURY
OR DEATH.
OPERATING TIRE PRESSURE:Set with tires cold.
RECOMMENDED:FRONT:210kPa, 2.1kg/cm2,30psi
REAR: 210kPa, 2.1kg/cm2,30psi
Never set tire pressure below minimun.Tire may
dislodge from rim.
Gross Vehicle Weight Rating:1200kg(2640lbs)
maximum including weight of operator,passenger,
accessories,cargo,and trailer tongue weight.
JOYNER BT-S650-02
WARNI NG
!
Keep hands,body,other persons
away when closing bed.
Do not operate the vehicle
with bed up.
JOYNER BT- S650- 03
3

JOYNER
WARNI NG
!
Severe INJURY or DEATH can result if you ignore the following:
Maximum Load in Cargo Bed:350kg.(770lbs).
Never carry passengers in cargo bed.
Cargo can affect handling and stability.Read Owner's Manual before
loading or towing.
When loading with cargo or towing a trailer:Reduce speed and allow
more room to stop.Avoid hills and rough terrain
Be sure cargo is secured,a loose load could change handling
unexpectedly.
Keep weight in the cargo bed centered,and as low an far forward as
possible.
Top-heavy loads increase the risk of overturn.
BT- S650- 04
JOYNER
MAX3. 9I NCH
(100MM)
BT- S650- 05
4

JOYNER
WARNI NG
Improperly loading a trailer
and failure to use extra care
when pulling trailer can
cause an accident or injury.
Never load more than 50kg
(110lbs) tongue weight on
the towing bracket. Do not
tow more than 550kg
(1212lbs) rolling weight
(trailer plus cargo). Operate
in low-range gears only,
allow far increased braking
distance,and use extreme
caution when operating on
inclines.Read carefully the
loading information and
trailer hitch sections in the
owners manual. JOYNER
WARNI NG
Turning the off road vehicle in 4WD
takes more effort.
Operate at a slow speed and allow
extra time and distance for
maneuvers to avoid loss of control.
BT- S650- 06
BT- S650- 07
WARNI NG
This off-highway utility vehicle will
handle and maneuver differently from
an ordinary passenger car or other
vehicle.
Vehicle capacity: 1 operator and 1 passenger
.Passenger must be able to reach
and hold the handgrip inside enclosure.
This vehicle is recommended only for
operators 16 and older with a valid motor
vehicle license.Adults must supervise use
by minors. Check state laws for minimum
age requirements.
Gross Vehicle Weight Rating:1200kg(2640lbs)
maximurn Including operator, passenger,
accessories, cargo and trailer tongue weight.
Passenger and cargo can affect vehicle
handling
ALWAYS
wear a seat belt when riding in the
vehicle.
keep your hands and feet
inside the vehicle at all times-watch
for branches, brush, or other hazards
that could enter the vehicle.
drive straight up and down
inclines-driving across the side of an
incline increase the risk of overturn.
NEVER
operate through water deeper than
12"(305mm) or fast flowing water-if
you must cross shallow, slow
moving water, choose your path
carefully to avoid sharp drop-offs
large rocks, or slippery surfaces that
could cause the vehicle to overturn.
make sharp, high-speed turns-the
vehicle could roll over or go out
of control.
Improper use can result in Severe INJURY or DEATH.
LOCATE AND READ THE OWNER'S MANUAL. FOLLOW ALL INSTRUCTIONS AND WARNINGS.
BT- S650- 08
JOYNER
5

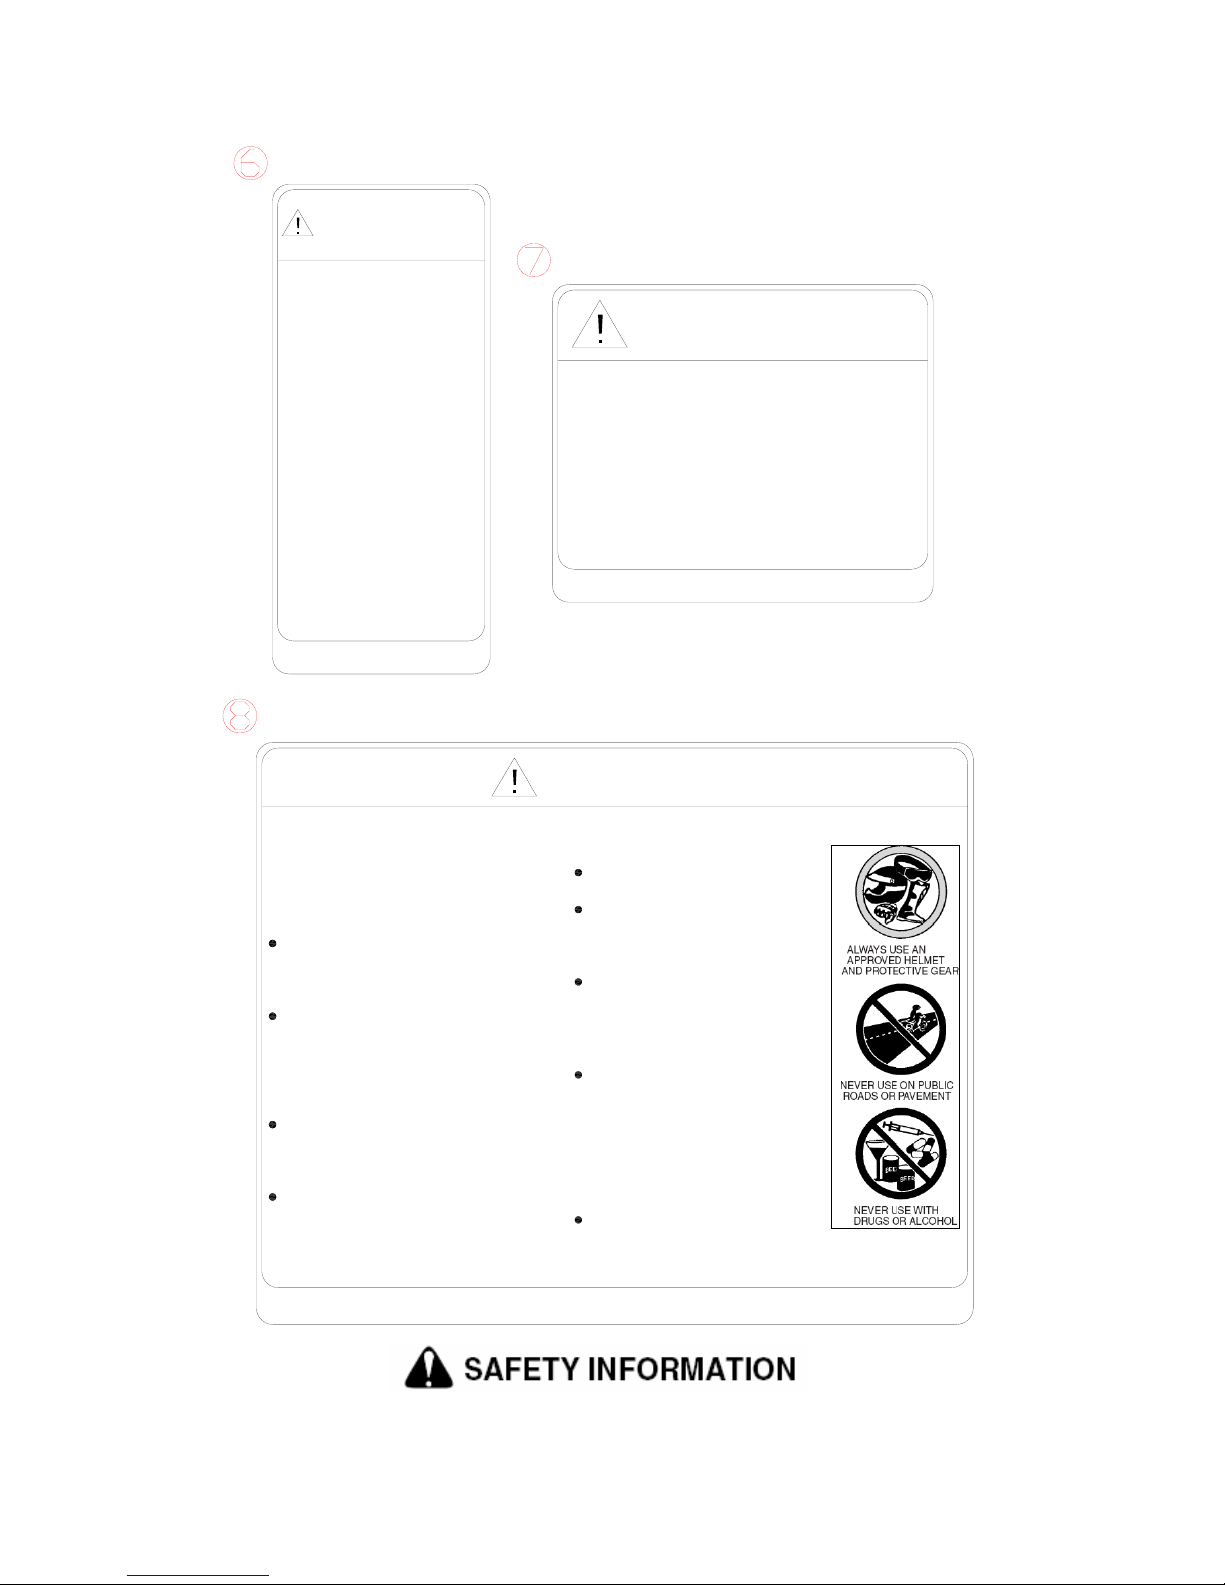
This off-highway utility vehicle handles differently from other vehicles including cars
and ATVs. SEVERE INJURY OR DEATH can result if you do not follow these
instructions:
Read this manual and all labels carefully and follow the operating procedures
described.
This vehicle is designed to carry the driver and one passenger. Never carry
passengers in the cargo bed.
Always be sure the driver and passenger are wearing seat belts.
Never give a ride to a passenger who is too small to reach and hold the handgrip on
the enclosure.
Always avoid operating the vehicle on any paved surfaces, including sidewalks,
driveways, parking lots, and streets.
Never operate this vehicle on any public street, road, or highway, even a dirt or
gravel one.
Never operate this vehicle without wearing an approved motorcycle helmet that fits
properly. You should also wear eye protection (goggles or a face shield), gloves,
over-the-ankle boots, long-sleeved shirt or jacket, and long pants.
Never consume alcohol or drugs before or while operating this vehicle.
Never operate at speeds too fast for your skills or the conditions. Always go at a
speed that is proper for the terrain, visibility, operating conditions, and your
experience.
Never attempt jumps or other stunts.
Always inspect your vehicle each time you use it to be sure it is in safe operating
condition. Always follow the inspection and maintenance procedures and schedules
described in this manual.
Always keep both hands, arms, feet, and legs inside the vehicle at all times during
operation. Keep your feet on the floorboard. Never hold onto the enclosure except
when using the handgrip inside the enclosure. Otherwise, your hand could be injured
if it is caught between the enclosure and an obstacle outside the vehicle.
Always keep both hands on the steering wheel when driving.
Never wrap your thumbs and fingers around the steering wheel. This is particularly
important when driving in rough terrain. The front wheels will move right and left as
they respond to the terrain, and this movement will be felt in the steering wheel. A
sudden jolt could wrench the steering wheel around, and your thumbs or fingers
could be injured if they are in the way of the steering wheel spokes.
Always go slowly and be extra careful when operating on unfamiliar terrain. Always
be alert to changing terrain conditions when driving the vehicle.
Never operate on excessively rough, slippery, or loose terrain until you have learned
and practiced the skills necessary to control the vehicle on such terrain. Always be
especially cautious on these kinds of terrain.
Never turn at excessive speed. Practice turning at slow speeds before attempting to
turn at faster speeds. Do not attempt turns on steep inclines.
Never operate the vehicle on hills that are too steep for it or for your abilities. Go
straight up and down hills where possible. Maximum slope angle: 15º
6

Never operate on hills that are slippery or ones where you will not be able to see far
enough ahead of you. Never go over the top of a hill at speed if you cannot see what
is on the other side.
Always follow proper procedures for going uphill. If you lose momentum and cannot
continue up a hill, back down the hill with the engine in reverse gear. Use engine
braking to help you go slowly. If necessary, use the brakes gradually to help you go
slowly.
Always check terrain carefully before going down hills. Go as slowly as possible.
Never go down a hill at high speed.
Always check for obstacles before operating in a new area.
Never operate the vehicle in fast flowing water or water deeper than the floorboards
on this model. Remember that wet brakes may have reduced stopping ability. Test
your brakes after leaving water. If necessary, apply them several times to let friction
dry out the linings.
Always be sure there are no obstacles or people behind you when you operate in
reverse. When it is safe to proceed in reverse, go slowly. Do not brake abruptly when
carrying loads in the cargo bed.
Always use the size and type of tires specified in this manual.
Always maintain proper tire pressure as described in this manual.
Never exceed the stated load capacity. Cargo should be as far forward in the bed as
possible, and distributed evenly from side to side. Be sure cargo is secured so that it
cannot move around during operation. Reduce speed and follow instructions in this
manual for carrying cargo or pulling a trailer. Allow greater distance for braking.
VEHICLE DESCRIPTION
1Headlights
2 Front shock absorber assembly adjusting nut
3Brakefluidreservoir
4Driverseat
5Driverseatbelt
6Cargobed
7 Tail/brake lights
8 Rear shock absorber assembly adjusting nut
9 Cargo bed release levers
10 Passenger seat belt
11 Passenger seat
12Battery Figure 1
13 Coolant reservoir
14 Fuel tank cap
15 Light switch
7

16 Steering wheel
17 Starter (choke)
18 Main switch
19 On-Command four-wheel drive switch
20 Multi-function meter unit
21 Drive select lever
22 Parking brake lever
23 Accelerator pedal
24Brakepedal Figure 2
25 Clutch pedal
26 CD player
CONTROL FUNCTIONS
Main switch
Functions of the respective switch positions
are as follows:
ON 1:
All electrical circuits are supplied with power, except
the ignition system and fuel system, the headlights and
taillights come on when the light switch is on.
ON 2:
The ignition system and fuel system are supplied with power.
OFF:
All electrical circuits are switched off. The key can be removed in this position.
START:
The electric starter is engaged by turning and holding the key in this position. Release
the key when the engine starts.
Do not operate the electric starter continuously for more than 5 seconds, or starter
damage could occur. Wait at least 5 seconds between each operation of the electric
starter to let it cool.
Do not turn the key to the "START" position with the engine running, or
damage to the electric starter can result.
See starting instructions prior to starting the engine.
8

Multi-function meter unit
1. turn left indicator 2. coolant temperature indicator 3. power indicator
4. turn right indicator 5. speedometer 6. gasoline quantity meter
7. coolant thermometer 8. 2WD/4WD indicator 9. odometer/ hour meter
10. tachometer 11. button 1 12. button 2
The multi-function meter unit is equipped with the following:
● a speedometer (which shows the riding speed)
● an odometer (which shows the total distance traveled)
● a tachometer (which shows the engine rotate speed )
● a gasoline quantity meter (which shows the current gasoline quantity)
● a coolant thermometer (which shows the coolant temperature)
● an hour meter (which shows the total time the key has been turn to “ON”)
Pushing button 1 the display between the odometer and the hour meter.
Pushing button 2 the display of unit between the Metric system and English system.
Switches
Light switch " /"
9

Set the switch to “ ” to turn on the low beam
and the taillights.
Set the switch to “ ” to turn on the high
beam and the taillights.
Do not use the headlights with the engine turned off for an extended period of
time.The battery may discharge to the point that the starter motor will not operate
properly. If this should happen, remove the batter and recharge it.
Turning light switch“/”
Set the switch to “ ” when turn left
Set the switch to “ ” when turn right
Four-wheel drive switch “2WD/4WD”
Two-wheel drive ("2WD"): Power is supplied to the rear wheels only.
Four-wheel drive ("4WD"): Power is supplied to the rear and front wheels.
To change from 2WD to 4WD, stop the vehicle, and then set the switch to “4WD”,or
vice versa.
Capstan switch “in/out”
Set the switch to “in” to reel rope in.
Set the switch to “out” to reel rope out.
Indicator lights
Reverse indicator light "R"
This indicator light comes on when the drive select lever is in the "R" reverse
position.
Battery indicator lighter “ ”
This indicator light comes on when set main switch to “on”
10

Push button
Speaker push button
Press the button, speaker sound.
Pedal
Clutch pedal
Press the clutch pedal before you shift by moving the drive select lever.
Brake pedal
Press the brake pedal to slow or stop the vehicle.
Accelerator pedal
Press the accelerator pedal down to increase engine speed. Spring pressure returns the
pedal to the rest position when released. Always check that the accelerator pedal
returns normally before starting the engine.
Before starting the engine, check the accelerator pedal to be sure it is operating
smoothly. Make sure the accelerator pedal fully returns to the idle position as soon as
it is released.
Driveselectlever
The drive select lever is used to shift your
vehicle into the 1,2,3,4 and reverse positions.
Fueltankcap
Remove the fuel tank cap by turning
11

counterclockwise.
Seats belts
This vehicle is equipped with three-point seat belts for both the operator and
passenger. Always wear the seat belt while riding in the vehicle.
To wear the seat belt properly, do the following
1.Hold the latch plate as you pull the bell across your lap and chest. Make sure the
belt is not twisted and is not caught on any portion of the vehicle, your clothing, or
any equipment you are carrying.
2.Push the latch plate into the buckle until it clicks. Pull up on the latch plate to make
sure it is secure.
3. Put the lap portion of the belt low on your hips. Push down on the buckle end of the
belt as you pull up on the shoulder part so the belt is snug across your hips.
4.Position the shoulder belt over your shoulder and across your chest. The shoulder
belt should fit against your chest. If it is loose, pull the belt out all the way and then let
it retract.
5.To release the buckle, firmly press the release button.
Glove compartment
To protect from damage, do not put metal products, like tools or sharply edged
products directly in the glove compartment. If they must be stored, wrap them in
appropriate cushion material.
12

Cargobed
Opening and closing the tailgate
To open
Unhook the latches, and then lower the tailgate.
To close
Place the tailgate in the original position, and then hook the latches
Lifting and lowering the cargo bed
To lift
Unhook the cargo bed latches on the left or right side of the vehicle, and then slowly
lift up the cargo bed until it stops.
To lower
Lower the cargo bed slowly to its original position and be sure the it is locked into
place.
ARE YOU READYTO DRIVE
Before each drive, you need to make sure you and your UV650 are both ready to drive.
To help get you prepared, this section discusses how to evaluate your driving
readiness, what items you should check on your UV650, and adjustments to make for
your comfort, convenience, or safety.
Before you drive your UV650 for the first time, we urge you to:
■ Read this owner’s manual and the labels on your UV650 carefully.
■ Make sure you understand all the safety messages.
■ Know how to operate all the controls.
■ Never drive this UV650 if under 16 years old.
Before each drive, be sure:
■ You feel well and are in good physical and mental condition.
■ You are wearing an approved motorcycle helmet (with chin strap tightened
securely), eye protection, and other protective clothing.
■ You don’t have any alcohol or drugs in your system.
ProtectiveApparel
For your safety, we strongly recommend that you always wear an approved
motorcycle helmet, eye protection, boots, gloves, long pants, and long-sleeved shirt or
13

jacket whenever you drive.
Although complete protection is not possible, wearing proper gear can reduce the
chance of injury when you drive.
The following suggestions will help you choose the proper driving gear.
Helmets and Eyes Protection
Your helmet is your most important piece of driving gear because it offers the best
protection against head injuries. A helmet should fit your head comfortably and
securely.
An open-face helmet offers some protection, but a full-face helmet offers more.
Regardless of the style, look for a DOT (Department of Transportation) sticker in any
helmet you buy. Always wear a face shield or goggles to protect your eyes and help
your vision.
Operating this UV650 without wearing an approved motorcycle helmet, eye protection,
and protective clothing could increase your chances of head and/or eye injury, possibly
death in the event of severe accident.
Always wear approved motorcycle helmet that fits properly and wear eye protection
(goggles or face shield), gloves, boots, long-sleeved shirt or jacket and long pants.
Additional Driving Gear
In addition to a helmet and eye protection, we also recommend:
■ Sturdy off-road motorcycle boots to help protect your feet, ankles, and lower legs.
■ Off-road motorcycle gloves to help protect your hands.
■ Driving pants with knee and hip pads, a driving jersey with padded elbows, and a
chest/shoulder protector.
Drive Training
Developing your driving skills is an on-going process. Even if you have driven other
UV650s, take time to become familiar with how this UV650 works and handles.
Practice driving the UV650 in a safe area to build your skills. Do not drive in rough
terrain until you get accustomed to the UV650’s controls, and feel comfortable with
its size and weight.
Operating UV650 without proper instruction could increase your risk of an accident
which could lead to serious injury or death.
14

Attempt supporting with your hands to the ground when the Go-cart turning over could lead
to serious injury or death.
Never support with your hands to ground when the Go-cat will turn over.
Age Recommendation
It is strongly recommended that no one under the age of 16 be permitted this UV650
without adult supervision.
A child driving a UV650 that is not recommended for his/her age could lose UV650
control and result in severe injury or death.
A child under 16 should have adult supervision when operate on the UV650.
NoAlcohol or Drugs
Alcohol, drugs and UV650s don’t mix. Even a small amount of alcohol can impair
your ability to operate a UV650 safely. Likewise, drugs, even if prescribed by a
physician, can be dangerous while operating a UV650. Consult your doctor to be sure
it is safe to operate a vehicle after taking medication.
Operating this UV650 after consuming alcohol or drugs can seriously affect your
judgment, cause you to react more slowly, affect your balance and perception, and could
result in serious injury or death.
Never consume alcohol or drugs before or while operating this UV650.
IS YOUR VEHICLE READY TO DRIVE
Before each drive, it is important to inspect your UV650 and make sure any problems
15

you find are corrected. A pre-drive inspection is a must, not only for safety, but
because having a breakdown, or even a flat tire, can be a major inconvenience.
If your UV650 has overturned or has been involved in a collision, do not drive it until
your UV650 has been inspected by your dealer, There may be damages or other
problems you can not see.
Improperly maintaining this UV650 or failing to correct a problem before driving can
cause a crash in which you can be seriously hurt or dilled.
Always perform a pre-drive inspection before every drive and correct any problems.
Pre-drive Inspection
Check the following items before you get on the UV650:
■Engine Oil
Check the level and add oil if needed. Check for leaks.
■Coolant
Check the coolant and add coolant if need. Check for the leaks.
■Fuel
Check the level and add fuel if needed. Also make sure the fuel fill cap is securely
fastened. Check for leaks.
■Tires
Use a gauge to check the air pressure. Adjust if needed. Also look for signs of
damages or excessive wear.
■Nuts & Bolts
Check the wheels to see that the axle nuts are tightened, Use a wrench to make sure
all accessible nuts, bolts, and fasteners are tight.
Pre-drive Inspection
■Underbody & Exhaust System
Check for, and remove any dirt, vegetation or other debris that could be fire hazard
or interfere with the proper operation of the UV650.
■Air Cleaner
Check the air filter. Replace it if needed.
■Leaks, Loose Parts
Walk around you UV650 and look for anything that appears unusual, such as a leak
or loose cable.
16

■ Lights
Make sure the headlight, brake light and tail light are working properly.
■ Throttle
Check the free play and adjust if needed. Press the throttle to make sure it moves
smoothly without sticking, and snaps back automatically when it is released.
■Clutch cable
Check the free play of clutch cable and adjust if needed. Press the clutch cable to
make sure it moves smoothly without sticking, and snaps back automatically when it
is released.
■ Brakes
Press the brake pedal several times, check for proper brake pedal free play. Make
sure there is no brake fluid leakage.
■ Engine Stop
When engine is running, turn the switch key counterclockwise. Make sure engine
stops.
■ Steering Wheel
Check that the wheels turn properly as you turn the steering wheel.
■ Cable
Check the cable housing for wear. Check the fittings are tight. Replace or tighten as
needed.
■ Tie rod
Check the tie rod housing for wear. Check the fittings are tight. Replace or tighten
as needed
SAFE DRIVING PRECAUTIONS
Off-Road Use Only
Your UV650 and its tires are designed and manufactured for off-road use only, not for
pavement. Driving on pavement can affect handling and control. You should not drive
your UV650 on pavement.
Operating this UV650 on paved surfaces may seriously affect handling and control of
the UV650, and may cause the vehicle to go out of control.
Never operate the UV650 on any paved surfaces, including sidewalks, driveways,
parking lots and streets.
17

When driving off-road, also remember to always obey local off-road driving laws and
regulations. Obtain permission to drive on private property. Avoid posted areas and
obey “no trespassing” signs.
You should never drive your UV650 on public streets, roads or highways, even if they
are not paved. Drivers of street vehicles may have difficulty seeing and avoiding you,
which could lead to a collision. In many states it is illegal to operate UV650 on public
streets, roads and highways.
Operating this UV650 on public streets, roads or highways can cause collision with
other vehicle.
Never operate this UV650 on any public streets, roads or highways, even a dirt or
gravel one.
Keep Hands and Feet on Controls
Always keep both hands on the steering wheel and both feet on the foot controls.
When driving your UV650. It is important to maintain your balance and control of the
UV650. Removing hands or feet away from the controls can reduce your ability to
react and control the kart.
Removing hand from Steering wheel or feet from foot controls during operation can
reduce your ability to control the UV650 or could cause you to lose your balance and fall off
the UV650.
Always keep both hand on the steering wheel and both feet on the foot controls of your
UV650 during operation.
Control Speed
Driving at excessive speed increases the chance of an accident. In choosing a proper
speed, you need to consider the capability of your UV650, the terrain, visibility and
other operating conditions, plus your own skills and experience.
18

Operating this UV650 at excessive speeds increases your changes of losing control of the
UV650, which can result in an accident.
Always drive at a speed that is proper for your UV650, the terrain, visibility and other
operating conditions, and your experience.
Use Care on Unfamiliar or Rough Terrain
Before driving in a new area, always check the terrain thoroughly. Don’t drive fast on
unfamiliar terrain or when visibility is limited. (it sometimes difficult to see
obstructions like hidden rocks, bumps, or holes in time to react).
Failure to use extra care when Operating this UV650 on unfamiliar terrain could result
in the UV650 overturning or going out of control.
Go slowly and be extra careful when operating on unfamiliar terrain. Always be alert to
changing terrain conditions when operating the UV650.
Never drive past the limit of visibility. Maintain a safe distance between your UV650
and other off-road vehicles. Always exercise caution and use extra care on rough,
slippery and loose terrain.
Failure to use extra care when operating on excessively rough, slippery or loose terrain
could cause loss of traction or vehicle control, which could result in an accident,
including an overturn.
Do not operate on excessively rough, slippery or loose terrain until you have learned
and practiced the skills necessary to control the UV650 on such terrain. Always be
especially cautious on these kinds of terrain.
Do Not Perform Stunts
You should always operate your UV650 in a safe and reasonable manner. When
driving, always keep all four wheels on the ground.
Attempting wheelies, and other stunts increases the chance of an accident, including an
overturn.
Never attempt stunts, such as wheelies or jumps. Don’t try to show off.
19
Table of contents
Other Joyner Offroad Vehicle manuals

Joyner
Joyner TROOPER-T2 User manual

Joyner
Joyner SZ250DI User manual

Joyner
Joyner JNSZ1600QL User manual

Joyner
Joyner JNSZ1100SVB User manual

Joyner
Joyner JNSZ800UV-R4 User manual

Joyner
Joyner JNSZ650DL User manual

Joyner
Joyner JNSZ800MV User manual

Joyner
Joyner JNSZ800MVA User manual

Joyner
Joyner JNSZ250DN User manual

Joyner
Joyner JNSZ1100TR-T4 User manual
Popular Offroad Vehicle manuals by other brands

Yamaha
Yamaha 2016 Grizzly yfm700gplg Service manual

Baja motorsports
Baja motorsports BR150-D owner's manual

Shengqibao
Shengqibao Quadard SQ series user manual

Can-Am
Can-Am DS 450 Series Operator's guide

Polaris
Polaris 120 XC SP Universal owner's safety and maintenance manual

Hammerhead Off-Road
Hammerhead Off-Road GTS 150 manual