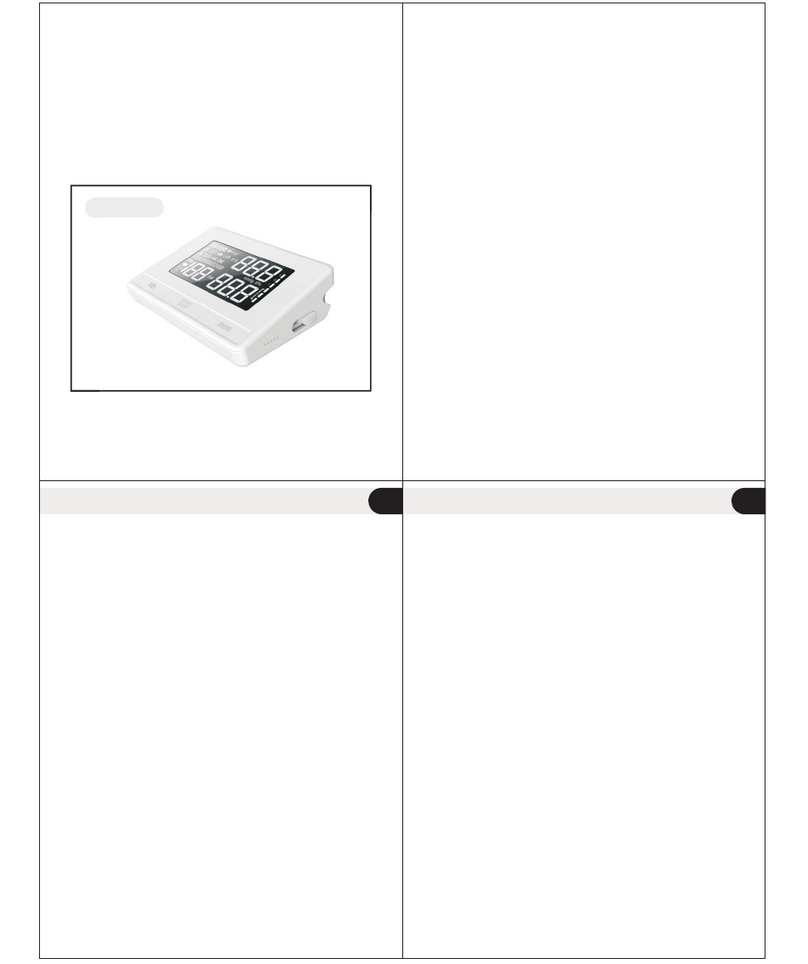
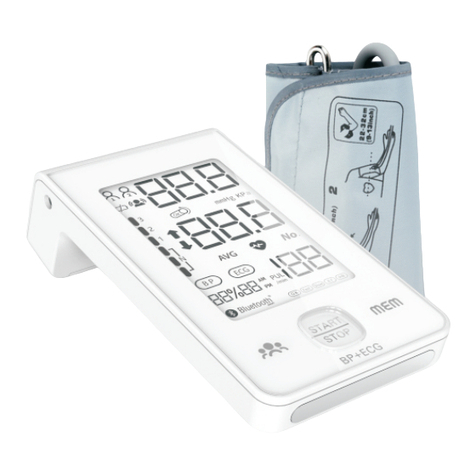
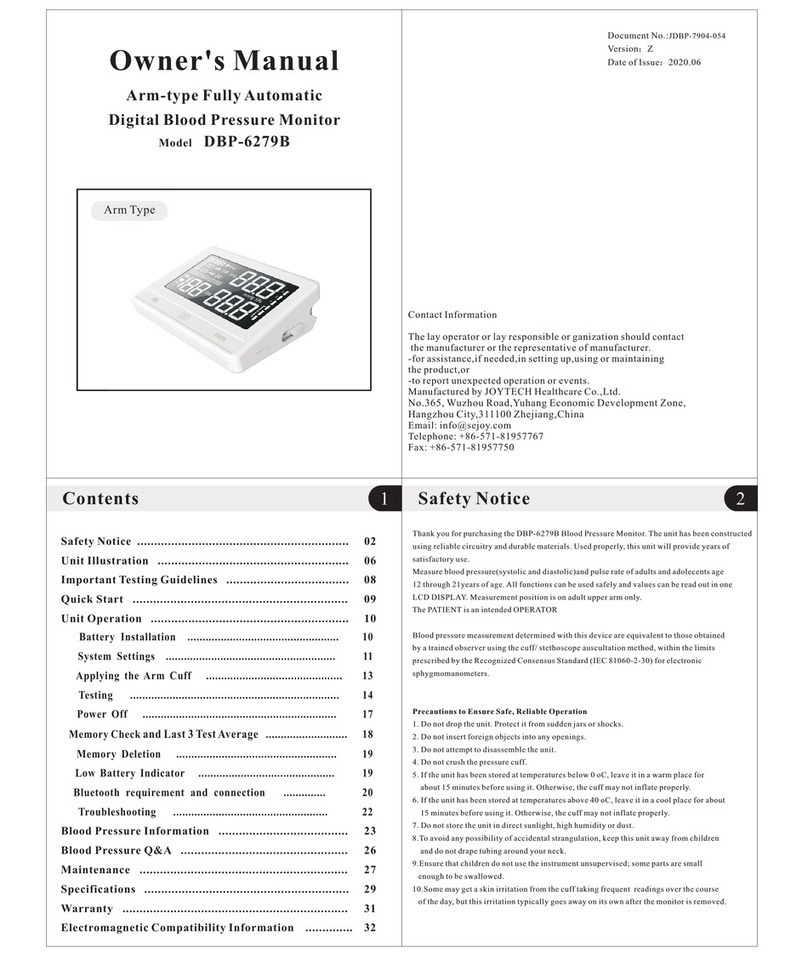
JOYTECH Owlhealth DBP-1359 User manual

DBP-1359
USER
MANUAL
Arm-type Fully Automatic
Blood Pressure Monitor
MANUFACTURED BY JOYTECH HEALTHCARE Co.,Ltd.
No.365,Wuzhou Rood,Yuhang Economic Development zone
Hangzhou City, 311100 Zhejiang, China
Made in China Date of Issue: 2023.02
01 02 03 04 05 06
07 08 09 10 11 12 13 14 15 16
17 18 19 20 21 22 23 24 25 26
27 28

EN
English
• • • • • • • • • • • • • • • • • • • • • • • • • • • • • • • • • • • • • • • • • • • • • • • •
01
EN
English
• • • • • • • • • • • • • • • • • • • • • • • • • • • • • • • • • • • • • • • • • • • • • • • •
01
EN
English
• • • • • • • • • • • • • • • • • • • • • • • • • • • • • • • • • • • • • • • • • • • • • • • •
05
EN
English
• • • • • • • • • • • • • • • • • • • • • • • • • • • • • • • • • • • • • • • • • • • • • • • •
EN
English
• • • • • • • • • • • • • • • • • • • • • • • • • • • • • • • • • • • • • • • • • • • • • • • •
19
EN
English
• • • • • • • • • • • • • • • • • • • • • • • • • • • • • • • • • • • • • • • • • • • • • • • •
FR
Francais
• • • • • • • • • • • • • • • • • • • • • • • • • • • • • • • • • • • • • • • • • • • • • • • •
03
FR
Francais
• • • • • • • • • • • • • • • • • • • • • • • • • • • • • • • • • • • • • • • • • • • • • • • •
13
01 02 03 04 05 06
07 08 09 10 11 12 13 14 15 16
17 18 19 20 21 22 23 24 25 26
27 28

INTRODUCTION AND INTENDED USE
Thank you for purchasing the DBP-1359 Blood Pressure Monitor. The unit has been
constructedusing reliable circuitry and durable materials. Used properly, this unit will provide
years of satisfactory use. Please read this manual thoroughly before using the unit.
Please retain this manual for future reference. For specific information about your blood
pressure, please CONSULT YOUR DOCTOR.
To avoid risk and damage follow all warning precautions. Operate unit only as intended.
Read all instructions prior to use.
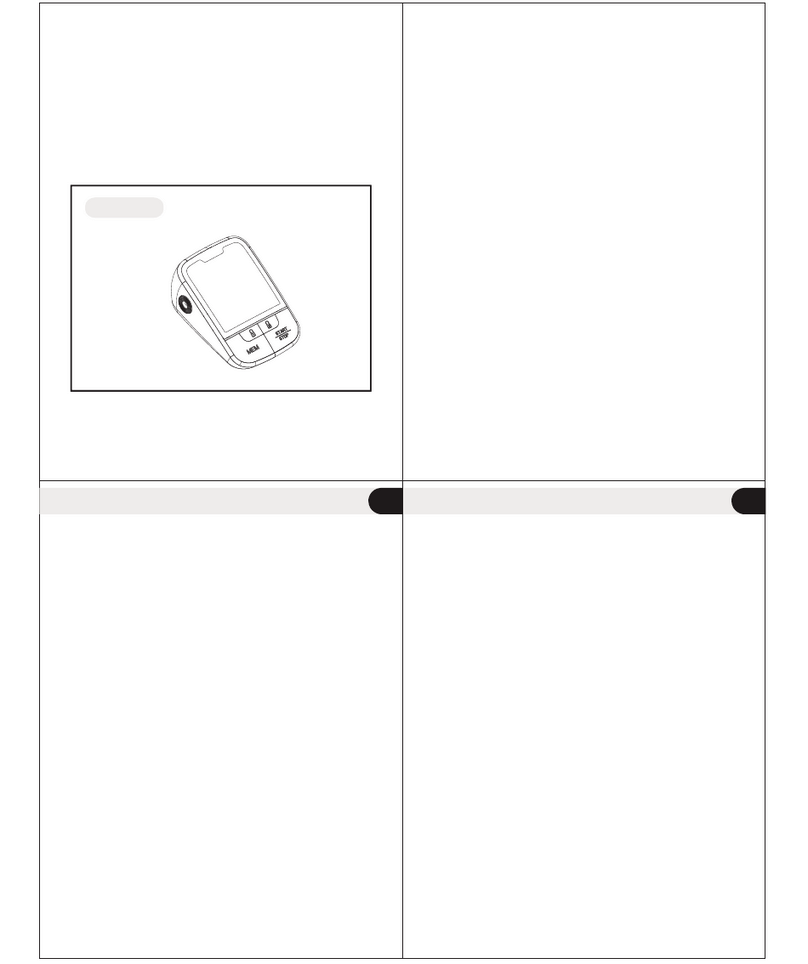
1 Arm-type Fully Automatic Digital Blood Pressure Monitor
1 Cuff 22-42 cm
1 Operating Manual
1 Storage Case
4 Batteries(AAA)
1. Do not confuse self-monitoring with self-diagnosis. Blood pressure measurements should
only be interpreted by a health professional who is familiar with your medical history.
2. Contact your physician if test results regularly indicate abnormal readings.
3. If you are taking medication, consult with your physician to determine the most
appropriate time to measure your blood pressure. NEVER change a prescribed medication
without first consulting with your physician.
4. Individuals with serious circulation problems may experience discomfort. Consult your
physician prior to use.
5. For persons with irregular or unstable circulation resulting from diabetes, liver disease,
arteriosclerosis or other medical conditions, there may be variations in blood pressure values
measured at the wrist versus at the upper arm. Monitoring the trends in your blood pressure
taken at either the arm or the wrist is nevertheless useful and important.
6. People suffering from vascular constriction, liver disorders or diabetes, people with cardiac
pacemakers or a weak pulse, and women who are pregnant should consult their physician
before measuring their blood pressure themselves. Different values may be obtained due to
their condition.
7. People suffering from arrhythmias such as atrial or ventricular premature beats or atrial
fibrillation only use this blood pressure monitor in consultation with your doctor. In certain
cases oscillometric measurement method can produce incorrect readings.
8. Too frequent measurements can cause injury to the patient due to blood flow interference.
9. The cuff should not be applied over a wound as this can cause further injury.
10. DO NOT attach the cuff to a limb being used for IV infusions or any other intravascular
access, therapy or an arterio-venous (A-V) shunt. The cuff inflation can temporarily block
blood flow, potentially causing harm to the patient.
11. The cuff should not be placed on the arm on the side of a mastectomy. In the case of a
double mastectomy use the side of the least dominant arm.
12. Pressurization of the cuff can temporarily cause loss of function of simultaneously used
monitoring equipment on the same limb.
13. A compressed or kinked connection hose may cause continuous cuff pressure resulting
in blood flow interference and potentially harmful injury to the patient.
14. Check that operation of the unit does not result in prolonged impairment of the circulation
of the patient.
Intended Use
The device is intended for adults and adolescents over the age of 12 to measure systolic and
diastolic blood pressure and pulse rate. All functions can be used safely and values can also
be read out on the LCD DISPLAY. The measurement position is placed only on the upper wrist
of an adult. This PATIENT is an intended OPERATOR.
Package Contents
Contraindications, Precautions, Warnings
15. Product is designed for its intended use only. Do not misuse in any way.
16. Product is not intended for infants or individuals who cannot express their intentions.
17. Prolonged over-inflation of the bladder may cause ecchymoma of your arm.
18. Do not disassemble the unit or arm cuff. Do not attempt to repair.
19. Use only the approved arm cuff for this unit. Use of other arm cuffs may result in incorrect
measurement results.
20. The system might produce incorrect readings if stored or used outside the manufactur-
er's specified temperature and humidity ranges. Make sure to store the blood pressure
monitor, children, pets and pests are outside of accessible range.
21. Do not use the device near strong electrical or electromagnetic fields generated by cell
phones or other devices, they may cause incorrect readings and interference or become
interference source to the device.
22. Do not mix new and old batteries simultaneously.
23. Replace batteries when Low Battery Indicator “ ” appears on screen. Replace both
batteries at the same time.
24. Do not mix battery types. Long-life alkaline batteries are recommended.
25. Remove batteries from device when not in operation for more than 3 months.
26. Do not insert the batteries with their polarities incorrectly aligned.
27. Dispose batteries properly; observe local laws and regulations.
28. Only use a recommended AC adaptor double-insulated complying with EN 60601-1 and
EN 60601-1-2. An unauthorized adapter may cause fire and electric shock.
29. Advising operator that Instruction manual/ Booklet must be consulted .
30. The PC with connection to the device with USB shall meet the requirements of standard
IEC 60601-1 or IEC 60950-1.
31. Do not use the device during transport vehicles for influencing measurement accuracy,
such as patient transport in an ambulance or helicopter.
32. Contains small parts that may cause a chocking hazard if swallowed by infants.
33. Please align the polarities of each battery with the +ve and -ve signs imprinted on the
battery housing when you replace the batteries .
34. The time required for the device to warm from the minimum storage temperature (-25°C)
between use until the device is ready for use at Ambient Temperature 20°C: about 2 hours.
35. The time required for the device to cool from the maximum storage temperature (70°C)
between use until the device is ready for use at ambient temperature (20 °C) : about 2 hours
EN
01 02 03 04 05 06
07 08 09 10 11 12 13 14 15 16
17 18 19 20 21 22 23 24 25 26
27 28

1. Forveksle ikke egenkontrol med selvdiagnose. Blodtryksmålinger bør kun fortolkes af en
sundhedspersonale, der er bekendt med din sygehistorie.
2. Kontakt din læge, hvis testresultater regelmæssigt indikerer unormale målinger.
3. Hvis du tager medicin, skal du rådføre dig med din læge for at bestemme det mest
passende tidspunkt til at måle dit blodtryk. Skift ALDRIG en ordineret medicin uden først at
konsultere din læge.
4. Personer med alvorlige kredsløbsproblemer kan opleve ubehag. Rådfør dig med din læge
før brug.
5. For personer med uregelmæssig eller ustabil cirkulation som følge af diabetes,
leversygdom, åreforkalkning eller andre medicinske tilstande, kan der være variationer i
blodtryksværdier målt ved håndleddet versus ved overarmen. Overvågning af tendenserne i
dit blodtryk taget ved enten armen eller håndleddet er ikke desto mindre nyttigt og vigtigt.
6. Personer, der lider af vaskulær konstriktion, leversygdomme eller diabetes, personer med
pacemakere eller svag puls, og kvinder, der er gravide, bør konsultere deres læge, før de selv
måler deres blodtryk. Forskellige værdier kan opnås på grund af deres tilstand.
7. Personer, der lider af arytmier såsom atrielle eller ventrikulære præmature slag eller
atrieflimren, bruger kun denne blodtryksmåler i samråd med din læge. I visse tilfælde kan
oscillometrisk målemetode give ukorrekte aflæsninger.
8. For hyppige målinger kan forårsage skade på patienten på grund af interferens med
blodgennemstrømningen.
9. Manchetten bør ikke påføres over et sår, da dette kan forårsage yderligere skade.
10. Fastgør IKKE manchetten til en lem, der bruges til IV-infusioner eller anden intravaskulær
adgang, terapi eller en arterio-venøs (A-V) shunt. Manchettens oppustning kan midlertidigt
blokere blodgennemstrømningen, hvilket potentielt kan forårsage skade på patienten.
11. Manchetten bør ikke placeres på armen på siden af en mastektomi. I tilfælde af en dobbelt
mastektomi skal du bruge siden af den mindst dominerende arm.
12. Tryk på manchetten kan midlertidigt forårsage funktionstab af samtidig brugt
overvågningsudstyr på samme lem.
13. En sammenpresset eller knækket forbindelsesslange kan forårsage kontinuerligt
manchettryk, hvilket resulterer i blodgennemstrømningsinterferens og potentielt skadelig
skade på patienten.
14. Kontroller, at driften af enheden ikke resulterer i langvarig svækkelse af patientens
cirkulation.
15. Produktet er kun designet til dets tilsigtede brug. Misbrug ikke på nogen måde.
16. Produktet er ikke beregnet til spædbørn eller enkeltpersoner, der ikke kan udtrykke deres
hensigter.
17. Langvarig overoppustning af blæren kan forårsage ekkyom i din arm.
18. Skil ikke enheden eller armmanchetten ad. Forsøg ikke at reparere.
19. Brug kun den godkendte armmanchet til denne enhed. Brug af andre armmanchetter kan
resultere i forkerte måleresultater.
20. Systemet kan producere forkerte aflæsninger, hvis det opbevares eller bruges uden for
producentensspecificerede temperatur- og luftfugtighedsintervaller. Sørg for at opbevare
blodtryksmåleren,børn, kæledyr og skadedyr er uden for tilgængelig rækkevidde.
21. Brug ikke enheden i nærheden af stærke elektriske eller elektromagnetiske felter, der
genereres af mobiltelefoner eller andre enheder, de kan forårsage ukorrekte aflæsninger og
interferens eller blive en interferenskilde for enheden.
22. Bland ikke nye og gamle batterier samtidigt.
23. Udskift batterierne, når lavt batteriindikato’’ “vises på skærmen. Udskift begge
batterier på samme tid.
24. Bland ikke batterityper. Alkaline-batterier med lang levetid anbefales.
25. Fjern batterierne fra enheden, når den ikke er i drift i mere end 3 måneder.
26. Indsæt ikke batterierne med deres polaritet forkert justeret.
27. Bortskaf batterier korrekt; overholde lokale love og regler.
28. Brug kun en anbefalet AC-adapter, der er dobbeltisoleret, der overholder EN 60601-1 og EN
Kontraindikationer, forholdsregler, advarsler 60601-1-2. En uautoriseret adapter kan forårsage brand og elektrisk stød.
29. Adviser operatøren om, at brugsanvisningen/hæftet skal konsulteres.
30. Pc'en med tilslutning til enheden med USB skal opfylde kravene i standard IEC 60601-1 eller
IEC 60950-1.
31. Brug ikke enheden under transportkøretøjer for at påvirke målenøjagtigheden, såsom
patienttransport i en ambulance eller helikopter.
32. Indeholder små dele, der kan forårsage en fare for ophobning, hvis de sluges af
spædbørn.
33. Juster venligst polariteterne for hvert batteri med +ve og -ve tegnene trykt på
batterihuset, når du udskifter batterierne.
34. Den tid, det tager for enheden at varme op fra den mindste opbevaringstemperatur
(-25°C) mellem brug, indtil enheden er klar til brug ved en omgivende temperatur på 20°C:
ca. 2 timer.
35. Den tid, det tager for enheden at afkøle fra den maksimale opbevaringstemperatur
(70°C) mellem brug, indtil enheden er klar til brug ved omgivende temperatur (20°C): ca. 2
timer
FR
01 02 03 04 05 06
07 08 09 10 11 12 13 14 15 16
17 18 19 20 21 22 23 24 25 26
27 28
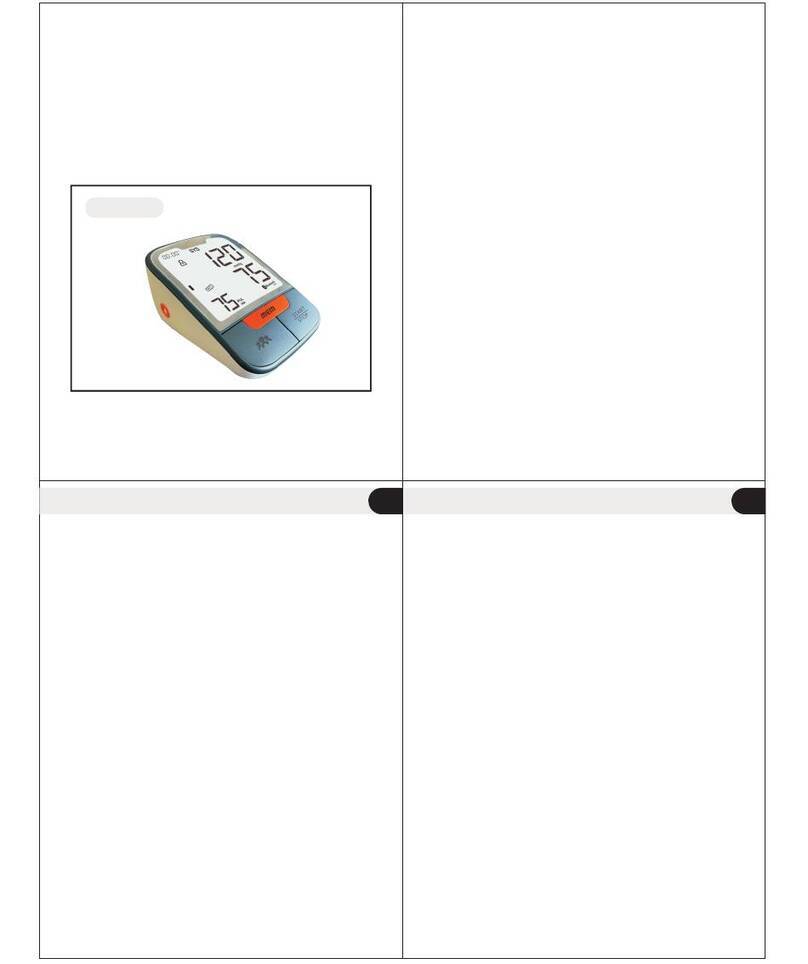
PRODUCT INFORMATION
Product Information
Display description
art 3 Results Average
WHO Blood Pressure
Classification Indicator
Groups
Systolic
Blood Pressure
Pulse Rate
Time and Data
Diastolic
Blood Pressure
Low Battery Indicator
Irregular Heartbeat
Indicator
ACC/AHA 2017 Hypertension guidelines define categories of BP in adults as below.
• Individuals with Systolic BP and Diastolic BP in 2 categories should be designated to the
higher BP category. BP indicates blood pressure (based on an average of ≥ 2 careful readings
obtained on ≥ 2 occasions).Source: ACC/AHA 2017 High Blood Pressure Clinical Practice
Guideline.
Categories of BP in Adults*
CLASSIFICATION OF BP (BLOOD PRESSURE)
BP classification Systolic (mmHg) Diastolic(mmHg)
Optimal blood pressure < 120 and < 80
Normal blood pressure 120~129 and < 80
High-normal blood pressure 130~139 and < 80
Grade 1 hypertension (Mild) 140~159 or 90~99
Grade 2 hypertension (Moderate) 160~179 or 100~109
Grade 3 hypertension (Severe) ≥ 180 or ≥ 110
01 02 03 04 05 06
07 08 09 10 11 12 13 14 15 16
17 18 19 20 21 22 23 24 25 26
27 28
1. Avoid eating, exercising, and bathing for 30 minutes prior to testing.
2. Sit in a calm environment for at least 5 minutes prior to testing.
3. Do not stand while testing. Sit in a relaxed position while keeping your arm level with
your heart.
4. Avoid speaking or moving body parts while testing.
5. While testing, avoid strong electromagnetic interference such as microwave oven
and cell phones.
6. Wait 3 minutes or longer before re-testing.
7. Try to measure your blood pressure at the same time each day for consistency.
8. Test comparisons should only be made when monitor is used on the same arm, in
the same position, and at the same time of day.
9. This blood pressure monitor is not recommended for people with severe
arrhythmia.
10. Do not use this blood pressure monitor if the device is damaged.
Any blood pressure recording can be affected by the following factors:
1. The position of the subject, his or her physiologic condition;
2. The performance and accuracy of the device;
3. Cuff size: too small cuff (bladder) will produce a higher blood pressure value than
usual, too big cuff (bladder) will produce a lower blood pressure value;
4. Measuring position does not keep level with your heart;
5. Speaking or moving body parts while testing;
6. Not relaxing for about 5 minutes before taking the measurement
Install the battery
1. Install batteries. (See Figure A )
2. Insert cuff air plug into the left side of monitor unit. (See Figure B)
Applying the arm cuff
1. Firmly insert air plug into opening located on left side of monitor unit.
2. With sticky nylon section facing outward, insert end of cuff underneath metal ring of
cuff.
3. Fasten cuff about 1-2cm (0.4-0.8'') above the elbow joint. For best results apply cuff
to bare arm and keep level with heart while testing.
Note: Do not insert air plug into opening located on right side of monitor unit.
This opening is designed for an optional power supply only.
AC Adapter jack is on the back side of the monitor. Medical AC adapter(DC 6.0
V,600mA) can be used with the device (recommended, not provided). The adapter
connect pin should be positive inside and negtive outside with a 2.1mm coaxial joint.
Do not use any other type of AC adapter as it may harm the unit.
Taking a measurement
1. Press and hold button to turn the unit on" “ The LCD screen will appear for one
second as unit performs a quick diagnosis. A long tone will indicate when unit is ready
for testing.
Note: Unit will not function if residual air from previous testing is present in cuff.
The LCD will flash “ ” until pressure is stabilized.
How to Take Proper Measurements
Preparation before measurement
HOW TO USE YOUR DEVICE
EN
01 02 03 04 05 06
07 08 09 10 11 12 13 14 15 16
17 18 19 20 21 22 23 24 25 26
27 28
Function Setting
System Settings
4. Three short beeps sound when testing is complete. The screen will display
measurements for systolic and diastolic blood pressure. An indicator representing
the current measurement will appear next to the corresponding WHO Classification.
Note: Refer to Page 6 for detail WHO Blood Pressure Classification Information. Irregular
Heartbeat Indicator
With power off, press "SET" button to activate System Settings. The Memory Group icon
flashes.
1. Select Memory Group
While in the System Setting mode, you may accumulate test results into 2 different
groups. This allows multiple users to save individual test results (up to 60 memories per
group.) Press " M " button to choose a group setting. Test results will automatically store in
each selected group.
2. Time/Date setting
Press“SET” button again to set the Time/Date mode. Set the year first by adjusting the “M”
button. Press“SET” button again to confirm curret month. Continue setting the date, hour
and minute in the same method. Every time the “SET” button is pressed, it will lock in your
seletion and continue in succession ( month,date,hour, minute)
3. Saved Settings
While in any setting mode, press “ ” button to turn the unit off. All information will be
saved.
Note: If unit is left on and not in use for 3 minutes, it will automatically save all information
and shut off.
Indicator
2. The unit will automatically inflate to the proper pressure value and stop inflating.
During this time, please keep quiet.
Note: Pressurization will gradually subside and ultimately stop when cuff is not
properly applied to the arm. If this occurs, press“ ”button to turn the unit off.
3. After cuff inflation, air will slowly subside as indicated by the corresponding cuff
pressure value. A flashing “ ” will appear simultaneously on screen signaling heart
beat detection.
Note: Keep relaxed during testing. Avoid speaking or moving body parts.
EN
1 2
If the monitor detects an irregular heart rhythm two or more times during the measuring
process, the Irregular Heartbeat Symbol “ ”appears on screen along with
measurement results. Irregular heartbeat rhythm is defined as rhythm that is either 25%
slower or faster than the average rhythm detected while measuring systolic blood
pressure and diastolic blood pressure. Consult your physician if the Irregular Heartbeat
Symbol “ ” frequently appears with your test results.
01 02 03 04 05 06
07 08 09 10 11 12 13 14 15 16
17 18 19 20 21 22 23 24 25 26
27 28
Memory Deletion
Memory for a selected group may be deleted while in Memory Check mode. Press
and hold the " SET " button for approximately 3 seconds to delete all memory records
from the selected group. The monitor will beep indicating successful deletion and
then transfer into testing mode. Press the " " button to turn the unit off.
Note: Memory cannot be recovered once it has been deleted.
Low Battery Indicator
4 short warning beeps sound when battery life is depleting and unable to inflate cuff
for testing. The “ ”appears simultaneously for approximately 5 seconds prior to
shutting off. Replace batteries at this time. No memory loss will occur throughout this
process.
1
Deleting/Storing Test Results
User may delete their current test result due to unfavorable testing conditions or for any
other reason. To delete the last test result, press the "SET" button after result is displayed. If
result is not deleted, it will automatically store by date within the previously configured
Memory Group.
Note: Be sure the appropriate Memory Group selection is made prior to testing.
If the number of tests surpasses the allotted 60 memories per group, the most recent
tests will appear first, thus eliminating the oldest readings.
Power Off
The” ”button can be pressed to turn off the unit in any mode. The unit can turn off the
power itself in about 3 minutes if no operation in any mode.
Safety Precaution: If pressure in arm cuff becomes too extreme while testing, press the
“ ” button to turn power off. The cuff pressure will rapidly dissipate once the unit is off.
Note: Previous test results will only be displayed from the most recently used memory
group. To check previous test results in other memory groups, you must first select the
desired group and then turn monitor off. (See "Select Memory Group" )
Memory Check
With power off, you may check past test results by using the " M " buttons. The most recent
test result and oldest test result in memory can be viewed by pressing and holding the "
M " button upon activating test results you can press the “ M ”button to scroll through all
test results stored in memory.
Last 3 Tests Average
With power off, press the " M " button to activate screen display. After the unit performs
a self diagnosis, the screen will display the average test results from the last 3
readings of the last group used with voice broadcast. The "AVG" symbol will appear
along with the corresponding WHO Blood Pressure Indicator. The Memory Check
mode can be accessed by pressing the "M " buttons. To check the average results
from other groups, select the desired group first prior to activating the " M " button in
the off position. (See Select Memory Group)
EN
01 02 03 04 05 06
07 08 09 10 11 12 13 14 15 16
17 18 19 20 21 22 23 24 25 26
27 28
Pose du brassard
1. Insérez fermement le bouchon d'air dans l'ouverture située sur le côté gauche du
moniteur.
2. Avec la section en nylon collant tournée vers l'extérieur, insérez l'extrémité du
brassard sous l'anneau métallique du brassard.
3. Fixez le brassard à environ 1-2 cm (0,4-0,8 '') au-dessus de l'articulation du coude.
Pour de meilleurs résultats, appliquez le brassard sur le bras nu et maintenez-le au
niveau du cœur pendant le test.
Remarque : N'insérez pas le bouchon d'air dans l'ouverture située sur le côté droit du
moniteur.
Cette ouverture est conçue pour une alimentation en option uniquement.
Prendre une mesure
1. Allumer“ ”L'écran LCD s'affiche pendant une seconde pendant que l'appareil
effectue un diagnostic rapide. Une longue tonalité indiquera quand l'unité est prête pour
le test.
Remarque : L'appareil ne fonctionnera pas si l'air résiduel des tests précédents est
présent dans le brassard.
L'écran LCD clignotera “ ” jusqu'à ce que la pression soit stabilisée.
Comment prendre des mesures appropriées
Préparation avant la mesure
1. Évitez de manger, de faire de l'exercice et de se baigner pendant 30 minutes avant
le test.
2. Asseyez-vous dans un environnement calme pendant au moins 5 minutes avant le
test.
3. Ne vous tenez debout pas pendant les tests. Asseyez-vous dans une position
détendue tout en gardant votre poignet au niveau de votre cœur.
4. Évitez de parler ou de déplacer des parties du corps pendant les tests.
5. Pendant le test, évitez les fortes interférences électromagnétiques telles que les
fours à micro-ondes et les téléphones portables.
6. Attendez 3 minutes ou plus avant de refaire le test.
7. Essayez de mesurer votre tension artérielle à la même heure chaque jour pour plus
de cohérence.
8. Les comparaisons de test ne doivent être effectuées que lorsque le moniteur est
utilisé sur le même poignet, dans la même position et au même moment de la
journée.
9. Ce tensiomètre n'est pas recommandé pour les personnes souffrant d'arythmie
grave.
10. N'utilisez pas ce tensiomètre lorsque l'appareil est endommagé.
Installer la batterie
1. Installez les piles. (Voir Figure A)
2. Insérez le bouchon d'air du brassard dans le côté gauche du moniteur. (Voir Figure B)
La prise de l'adaptateur secteur se trouve à l'arrière du moniteur. Un adaptateur
secteur médical (DC 6,0 V, 600 mA) peut être utilisé avec l'appareil (recommandé,
non fourni). La broche de connexion de l'adaptateur doit être positive à l'intérieur et
négative à l'extérieur avec un joint coaxial de 2,1 mm.
N'utilisez aucun autre type d'adaptateur secteur car cela pourrait endommager
l'appareil.
FR
01 02 03 04 05 06
07 08 09 10 11 12 13 14 15 16
17 18 19 20 21 22 23 24 25 26
27 28
Paramètres système
3. Après le gonflage du brassard, l'air diminuera lentement comme indiqué par la
pression correspondante du brassardvaleur. Un clignotant “ ”apparaîtra simultané-
ment sur l'écran pour signaler la détection des battements cardiaques.
Remarque: Restez détendu pendant le test. Évitez de parler ou de bouger des parties
du corps.
4. Trois bips courts retentissent lorsque le test est terminé. L'écran afficheramesure de
la tension artérielle systolique et diastolique. Un indicateur représentant la mesure
actuelle apparaîtra à côté de la classification OMS correspondante.
Indicator
2. L'unité se gonfle automatiquement à la valeur de pression appropriée et arrête de
gonfler. Pendant ce temps, merci de vous taire.
Remarque : La pressurisation diminuera progressivement et finira par s'arrêter lorsque le
brassard n'est pas
correctement appliqué sur le bras. Si cela se produit, appuyez sur “ ”pour éteindre
l'appareil.
FR
Réglage de la fonction
Remarque : Reportez-vous aux pages 23 à 24 pour obtenir des informations
détaillées sur la classification de la pression artérielle de l'OMS.
Indicateur de rythme cardiaque irrégulier
Avec l'alimentation éteinte, appuyez sur le bouton "SET" pour activer les paramètres
système. L'icône du groupe de mémoire clignote.
1. Sélectionnez le groupe de mémoire
En mode de réglage du système, vous pouvez accumuler les résultats des tests dans
2 groupes différents. Cela permet à plusieurs utilisateurs d'enregistrer des résultats
de test individuels (jusqu'à 60 mémoires par groupe.) Appuyez sur le bouton " M " pour
choisir un paramètre de groupe. Les résultats des tests seront automatiquement
stockés dans chaque groupe sélectionné.
2. Réglage heure/date
Appuyez à nouveau sur le bouton "SET" pour régler le mode Heure/Date. Réglez
d'abord l'année en ajustant le bouton "M". Appuyez à nouveau sur le bouton "SET" pour
confirmer le mois en cours. Continuez à régler la date, l'heure et les minutes de la
même manière. Chaque fois que le bouton "SET" est enfoncé, il verrouille votre
sélection et continue successivement (mois, date, heure, minute)
3. Paramètres enregistrés
Dans n'importe quel mode de réglage, appuyez sur ” ” pour éteindre l'appareil.
Toutes les informations seront enregistrées.
Remarque : Si l'appareil reste allumé et non utilisé pendant 3 minutes, il enregistrera
automatiquement toutes les informations et s'éteindra.
1 2
Si le moniteur détecte un rythme cardiaque irrégulier deux fois ou plus pendant la
mesure
processus, le symbole de rythme cardiaque irrégulier “ ”pparaît à l'écran avec
les résultats de mesure. Un rythme cardiaque irrégulier est défini comme un rythme
25 % plus lent ou plus rapide que le rythme moyen détecté lors de la mesure de la
pression artérielle systolique et de la pression artérielle diastolique. Consultez votre
médecin si le symbole de rythme cardiaque irrégulier” ”apparaît fréquemment
avec vos résultats de test.
01 02 03 04 05 06
07 08 09 10 11 12 13 14 15 16
17 18 19 20 21 22 23 24 25 26
27 28
Indicateur de batterie faible
4 courts bips d'avertissement retentissent
lorsque la durée de vie de la batterie s'épuise et
qu'il est impossible de gonfler le brassard pour
le test. Le” ”apparaît simultanément
pendant environ 5 secondes avant de
s'éteindre. Remplacez les piles à ce moment.
Aucune perte de mémoire ne se produira tout
au long de ce processus.
Effacement de la mémoire
La mémoire d'un groupe sélectionné peut être
supprimée en mode de vérification de la
mémoire. Appuyez sur le bouton " SET " et
maintenez-le enfoncé pendant environ 3
secondes pour supprimer tous les
enregistrements de mémoire du groupe
sélectionné. Le moniteur émettra un bip
indiquant la suppression réussie, puis passera
en mode test. Appuyez sur le bouton " "
pour éteindre l'appareil.
Remarque : La mémoire ne peut pas être
récupérée une fois qu'elle a été supprimée.
- - -
1
1
Réglage de la fonction
Suppression/stockage des résultats de test
L'utilisateur peut supprimer son résultat de test actuel en raison de conditions de test
défavorables ou pour toute autre raison. Pour supprimer le dernier résultat de test,
appuyez sur le bouton "SET" après l'affichage du résultat. Si le résultat n'est pas
supprimé, il sera automatiquement stocké par date dans le groupe de mémoire
précédemment configuré.
Remarque : assurez-vous que la sélection du groupe de mémoire approprié est
effectuée avant le test.
Si le nombre de tests dépasse les 60 mémoires attribuées par groupe, les tests les
plus récents apparaîtront en premier, éliminant ainsi les lectures les plus anciennes.
Mise hors tension
Le “ ” peut être pressé pour éteindre l'appareil dans n'importe quel mode. L'appareil
peut s'éteindre lui-même en 3 minutes environ si aucune opération n'est effectuée
dans aucun mode.
Précaution de sécurité : si la pression dans le brassard devient trop extrême pendant
le test,
appuie sur le “ ”pour éteindre. La pression du brassard augmentera rapidement
se dissiper une fois l'appareil éteint.
Vérification de la mémoire
Lorsque l'appareil est éteint, vous pouvez vérifier les résultats des tests passés en
utilisant les boutons " M ". Le résultat de test le plus récent et le résultat de test le plus
ancien en mémoire peuvent être visualisés en appuyant sur le bouton " M " et en le
maintenant enfoncé lors de l'activation des résultats de test, vous pouvez appuyer
sur le bouton " M " pour faire défiler tous les résultats de test stockés en mémoire.
Moyenne des 3 derniers tests
Lorsque l'appareil est éteint, appuyez sur le bouton “ M ” pour activer l'affichage à
l'écran. Une fois que l'appareil a effectué un autodiagnostic, l'écran affiche les
résultats moyens des tests des 3 dernières lectures du dernier groupe utilisé avec la
diffusion vocale. Le symbole "AVG" apparaîtra avec l'indicateur de tension artérielle
de l'OMS correspondant. Le mode de vérification de la mémoire est accessible en
appuyant sur les boutons "M". Pour vérifier les résultats moyens des autres groupes,
sélectionnez d'abord le groupe souhaité avant d'activer le bouton " M " en position
d'arrêt. (Voir Sélectionner un groupe de mémoire)
Remarque : Les résultats des tests précédents ne seront affichés que pour le groupe
de mémoire utilisé le plus récemment. Pour vérifier les résultats des tests précédents
dans d'autres groupes de mémoire, vous devez d'abord sélectionner le groupe
souhaité, puis éteindre le moniteur.
(Voir "Sélectionner un groupe de mémoire" )
FR
01 02 03 04 05 06
07 08 09 10 11 12 13 14 15 16
17 18 19 20 21 22 23 24 25 26
27 28
Low Battery Indicator
Situation
Symbols
SITUATION AND SYMBOLS
Problem Possible Cause Solution
Blood pressure results
are not within typical
range
“ ”displayed
Cuff is too tight or not
properly positioned on the
arm
Inaccurate test results due
to body ovement or
monitor movement
Cuff fails to inflate properly
Improper operation
Pressurization is over cuff
rated pressure 300mmHg
Firmly replace cuff approximately 1-2cm
( 1/2") above the elbow joint ( See Page 8)
Make sure hose is properly fastened to
cuff and monitor unit
Read user manual carefully and re-test
properly.
Read user manual carefully and re-test
properly.
Sit in a relaxed position with arm
placed near heart. Avoid
speaking or moving body parts
while testing. Make sure the
monitor unit is placed in a
stationary position throughout
the testing period.
S
N
WARNING SIGNS AND SYMBOLS USED
Caution
Mandatory
Prohibited
Type BF Equipment
Attention, consult accompanying documents
Serial Number
Discard the used product to the recycling
collection point according to local
regulations
Manufacturer
Keep Dry
Keep off Sunlight
Manufacturing Date
RoHS mark
Q1: What is the difference between measuring blood pressure at
home or at a professional healthcare clinic?
A: Blood pressure readings taken at home are now seen to give a more accurate
account as they better reflect your daily life. Readings can be elevated when taken
in a clinical or medical environment. This is known as White Coat Hypertension and
may be caused by feeling anxious or nervous.
Note: Abnormal test results may be caused by:
1. Improper cuff placement. Make sure cuff is snug-not too tight or too loose. Make
sure bottom of the cuff is approximately 1-2cm (1/2'') above the elbow joint.
2. Improper body position. Make sure to keep your body in an upright position.
3. Feeling anxious or nervous. Take 2-3 deep breaths, wait a few minutes and
resume testing.
Q2: What causes different readings?
A: Blood pressure varies throughout the course of a day. Many factors including diet,
stress, cuff placement, etc. may affect an individual's blood pressure.
Q3: Should I apply the cuff to the left or right arm?
What is the difference?
A: Either arm can be used when testing, however, when comparing results, the same
arm should be used. Testing on your left arm may provide more accurate results as
it is located closer to your heart.
Q4: What is the best time of day for testing?
A: Morning time or any time you feel relaxed and stress free.
COMMON Q & A ON BLOOD PRESSURE
EN
01 02 03 04 05 06
07 08 09 10 11 12 13 14 15 16
17 18 19 20 21 22 23 24 25 26
27 28

1. Avoid dropping, slamming, or throwing the unit.
2. Avoid extreme temperatures. Do not expose unit directly under sunshine.
3. When cleaning the unit, use a soft fabric and lightly wipe with mild detergent. Use
a damp cloth to remove dirt and excess detergent.
Maintenance
CARE AND CLEANING
EN
Caution
Individuals with serious circulation problems may experience
discomfort. Consult your physician prior to use.
Product is designed for its intended use only. Do not misuse in any way.
Product is not intended for infants or individuals who cannot express
their intentions.
Do not disassemble or attempt to repair.
Only use a recommended AC adapto complying with EN 60601-1 and
EN 60601-1-2 (see Page 6). An unauthorized adapter may cause fire
and electric shock.
Battery Precautions
Do not mix new and old batteries simultaneously.
Be sure battery polarity is correct.
Do not mix battery types. Long-life alkaline batteries are recommended.
Remove batteries from device when not in operation for more than 3 months.
Dispose batteries properly; observe local laws and regulations.
Replace batteries when Low Battery Indicator " " appears on screen.
Do not use cell phones and other devices, which generate strong
electrical or electromagnetic fields, near the device, as they may
cause incorrect readings and interference or become interference
source to the device.
Contact your physician if test results regularly indicate abnormal
readings. Do not attempt to self-treat these symptoms without
consulting your physician first.
01 02 03 04 05 06
07 08 09 10 11 12 13 14 15 16
17 18 19 20 21 22 23 24 25 26
27 28

Product name
Model
Display mode
Measuring part
Measuring range
Accuracy
Auto power-off Medical AC Adapter(DC6.0V, 600mA) (recommended, not provided)
DBP-1359
LCD Digital Display Size:69mm×67mm
Upper arm
Systolic Pressure 60mmHg~260 mmHg
Diastolic Pressure 30mmHg~200 mmHg
Pressure 0mmHg~300 mmHg
Pressure ±3mmHg
Pulse 30 ~ 180 Beats/Minute
Pulse
Pressure value ±3mmHg (±0.4kPa)
Pulse rate ±5% of display value
±5%
Arm-type Fully Automatic Blood Pressure Monitor
The device satisfies the EMC requirements of the international standard IEC 60601-1-2.
The requirements are satisfied under the conditions described in the table below. The
device is an electrical medical product and is subject to special precautionary
measures with regard to EMC which must be published in the instructions for use.
Portable and mobile HF communications equipment can affect the device. Use of the
unit in conjunction with non-approved accessories can affect the device negatively
and alter the electromagnetic compatibility. The device should not be used directly
adjacent to or between other electrical equipment.
SPECIFICATIONS
ELECTROMAGNETIC COMPATIBILITY INFORMATION
Power source 4xAAA, DC6V or DC5V type C cable
Applied part Type BF
Operation mode Continuous operation
IP classification IP20, Indoor Use Only
Item weight Approx.480g (16.93oz.) (excluding battery)
Dimension Approx.131.2 x 101.8 x 44.1mm (L x W x H)
Cuff size 22-42 cm (8.66-16.53 inches)
Service life 2 years
Temperature 10°C ~ 40°C (50 °F~104 °F)
Humidity 15% ~ 93% RH
Pressure 700hPa~1060hPa
Protection against
electric shock
Working environment
Temperature -25°C ~70 °C (-13°F~158 °F)
Humidity ≤93% RH
Storage and
transportation
environment
Internally powered ME equipment (When using only batteries)
Class II ME equipment (AC adapter)
4. Cuff Cleaning: Do not soak cuff in water! Apply a small amount of rubbing alcohol
to a soft cloth to clean cuff's surface. Use a damp cloth (water-based) to wipe clean.
Allow cuff to dry naturally at room temperature. The cuff must be cleaned and
disinfected before use between different users.
5. Do not use petrol, thinners or similar solvents.
6. Remove batteries when not in operation for an extended period of time.
7. Do not disassemble product.
8. It is recommended the performance should be checked every 2 years.
9. Expected service life: Approximately three years at 10 tests per day.
10.No service and maintenance while it is in use and maintenance only be performed
by service personnel. Service and maintenance require parts, repair, technical
support will be provided.
EN
01 02 03 04 05 06
07 08 09 10 11 12 13 14 15 16
17 18 19 20 21 22 23 24 25 26
27 28

Table 1
Guidance and declaration of manufacturer-electromagnetic emissions
The device is intended for use in the electromagnetic environment specified below.The
customer or the user of the device should assure that it is used in such an environmen
Emissions test
Radiated emission
CISPR 11
Group 1, class B.
Group 1, class B.
Class A
Conducted emission
CISPR 11
Harmonic emissions
IEC 61000-3-2
Complies
Voltage fluctuations/ flicker
emissions IEC 61000-3-3
Compliance Electromagnetic environment-guidance
The device uses RF energy only for its
internal function. Therefore, its emissions
are very low and are not likely to cause
any interference in nearby electronic
equipment.
The device is suitable for use in all
establishments, including domestic
establishments and those directly
connected to the public low-voltage
power supply network that supplies
buildings used for domestic purposes.
Table 2
Guidance and declaration of manufacturer-electromagnetic immunity
The device is intended for use in the electromagnetic environment specified below. The customer
or the user of the device should assure that it is used in such an environm- ent.
IMMUNITY test
Electrostatic
discharge (ESD)
IEC 61000-4-2
Voltage dips, short
interruptions and
voltage variations on
power supply input
lines IEC 61000-4-11
Power frequency
(50/60 Hz)magnetic
fieldIEC 61000-4-8
Power frequency magnetic fields
should be at levels charactertic of a
typical location in a typical comme-
rcial or hospital environment.
30 A/m;
50Hz or 60Hz
30 A/m;
50Hz or 60Hz
"0 % UT; 0,5 cycle
At 0°, 45°, 90°, 135°,
180°, 225°, 270° and
315°0 % UT; 1 cycle
and 70 % UT; 25/30
cycles Single
phase:at 0° 0 % UT;
250/300 cycle"
0 % UT;0,5 cycleAt
0°, 45°, 90°,135°,
180°, 225°, 270° and
315°e0 % UT; 1 cycle
and70 % UT;25/30
cycles Single
phase: at 0°0 %
UT;250/300 cycle
Mains power quality should be that
of a typical commercial or hospital
environment.
Electrostatic
transient/burst
IEC 61000-4-4
± 8 kVcontact ± 8 kVcontact Floors should be wood,
concrete or ceramic tile.
If floors are
covered with synthetic
material,
the relative humidity should be
at least 30 %.
±2 kV,±4 kV, ±2 kV,±4 kV,
±8 kV, ±8 kV,
±15 kV air
± 2 kV ,100kHz, for
AC power port
± 2 kV ,100kHz, for
AC power port
Mains power quality should be that
of a typical commercial or hospital
environment.
±15 kV air
IEC 60601test level Compliance level Electromagnetic environment-
guidance
SurgeIEC 61000-4-5 ±0.5kV, ±1kV
(differential mode)
±0.5kV, ±1kV
(differential mode)
Mains power quality should be that
of a typical commercial or hospital
environment.
EN
Table 3
Guidance and declaration of manufacturer-electromagnetic immunity
The device is intended for use in the electromagnetic environment specified below. The customer or
the user of the device should assure that it is used in such an environment.
IMMUNITY test
Conducted RF
IEC 61000-4-6
Radiated RF
IEC 61000-4-3
385MHz, 27V/m 385MHz, 27V/m
450MHz, 28V/m 450MHz, 28V/m
2450MHz, 28V/m 2450MHz, 28V/m
710MHz,745 MHZ,
780MHz9V/m
710MHz,745 MHZ,
780MHz9V/m
810MHz,870 MHZ,
930MHz28V/m
810MHz,870 MHZ,
930MHz28V/m
1720MHz,1845 MHZ,
1970MHz28V/m
1720MHz,1845 MHZ,
1970MH28V/m
5240MHz,5500 MHZ,
5785MHz9V/m
5240MHz,5500 MHZ,
5785MH9V/m
3V for 0.15- 80MHz;
6V in ISM and
amate-ur radio
bands
between0.15-
80MHz
3V for 0.15- 80MHz;
6V in ISM and
amate-ur radio
bands
between0.15-
80MHz
Portable and mobile RF
communications equipment should
be used no closer to any part of the
device, including cables, than the
recommended separation distance
calculated from the equation
applicable to the frequency of the
transmitter.
Recommended seperation
distance
where P is the maximum output
power rating of the transmitter in
watts (W) according to the transm-
itter manufacturer and d is the
recommended separation distance
in metres (m).Field strengths from
fixed RF transmitters, as determined
by an zelectromagnetic site survey,
ashould be less than the
compliance level in each frequency
range.Interference may occur in the
vicinity of equipment marked with
the following symbol:
IEC 60601test level Compliance level Electromagnetic environment-
guidance
800 MHz to 800 MHz
800 MHz to 2.7 Ghz
01 02 03 04 05 06
07 08 09 10 11 12 13 14 15 16
17 18 19 20 21 22 23 24 25 26
27 28

800 MHz to 800 MHz 800 MHz to 2.7 Ghz
Table 4
Recommended separation distances between portable and mobile RFcommunications equipment
and the device
"For transmitters rated at a maximum output power not listed above, the recommended separation
distance d in metres (m) can be estimated using the equation applicable to the frequency of the
transmitter, where P is the maximum output power rating of the transmitter in watts (W) according to
the transmitter manufacturer.
NOTE 1 At 80 MHz and 800 MHz, the separation distance for the higher frequency range applies.
NOTE 2 These guidelines may not apply in all situations. Electromagnetic propagation is affected by
absorption and reflection from structures, objects and people."
The device is intended for use in an electromagnetic environment in which radiated therefore
disturbances are controlled. The customer or the user of the device can help prevent electromagnetic
interference by maintaining a minimum distance between portable and mobile RF communications
equipment (transmitters) and the device as recommended below, according to the maximum output
power of the communications equipment.
Rated maximum output
power of transmitterW
0.01
0.1
1
10
100
0.12
0.38
1.2
3.8
12
0.23
0.73
2.3
7.3
23
Separation distance according to frequency of transmitter m
EN
WARRANTY
Disposal
WARRANTY AND AFTER-SALES SERVICE
The Blood Pressure Monitor is gguaranteed for 2-year from the date of purchase. If
the Blood Pressure Monitor does not function properly due to defective components
or poor workmanship, we will repair or replace it freely. The warranty does not cover
damages to your Blood Pressure Monitor due to improper handling. Please contact
local retailer for details.
Correct Disposal of This Product (Waste Electrical & Electronic Equipment)
This marking shown on the product indicates that it should not be disposed with other
household waste at the end of its life. To prevent potential harm to the environment
or to human health, please separate this product from other types of waste and
recycle it responsibly. When disposing this type of product, contact the retailer where
product was purchased or contact your local government office for details
regarding how this item can be disposed in an environmentally safe recycling center.
Business users should contact their supplier and check the terms and conditions of
the purchasing agreement. This product should not be mixed with other commercial
waste for disposal. This product is free of hazardous materials.
If you suspect any product issues during the warranty period, please contact
01 02 03 04 05 06
07 08 09 10 11 12 13 14 15 16
17 18 19 20 21 22 23 24 25 26
27 28
Table of contents
Languages:
Other JOYTECH Blood Pressure Monitor manuals

JOYTECH
JOYTECH DBP-6273B User manual

JOYTECH
JOYTECH BM 92 User manual

JOYTECH
JOYTECH DBP-6296B User manual

JOYTECH
JOYTECH DBP-6293B User manual

JOYTECH
JOYTECH DBP-1319b User manual

JOYTECH
JOYTECH DBP-6281L User manual

JOYTECH
JOYTECH DBP-6282L User manual

JOYTECH
JOYTECH DBP-1359b User manual

JOYTECH
JOYTECH DBP-6279B User manual

JOYTECH
JOYTECH DBP-6295B User manual