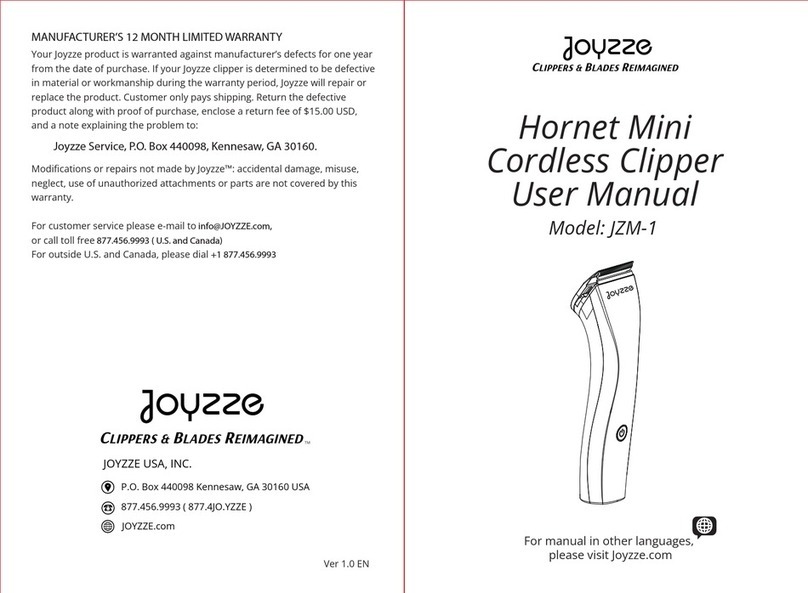
Joyzze Raptor Cordless Plus User manual

JOYZZE USA, INC.
P.O. Box 440098 Kennesaw, GA 30160 USA
877.456.9993 ( 877.4JO.YZZE )
JOYZZE.com
MANUFACTURER’S 12 MONTH LIMITED WARRANTY
Your Joyzze clipper is warranted against manufacturer’s defects for one year from the date of purchase. If your Joyzze
clipper is determined to be defective in material or workmanship during the warranty period, Joyzze will repair or
replace the product. Customer only pays shipping. Return the defective product along with proof of purchase,
enclose a return fee of $15.00 USD, and a note explaining the problem to:
Joyzze Service, P.O. Box 440098, Kennesaw, GA 30160.
Modifications or repairs not made by Joyzze™: accidental damage, misuse, neglect, use of
unauthorized attachments or parts are not covered by this warranty.
For customer service please e-mail [email protected] or call toll free 877.456.9993 (U.S. and Canada)
For outside U.S. and Canada, please dial +1 877.456.9993
Ver 1.0 EN
Raptor Clipper
USER MANUAL
Model: JZA-1
For manual in other languages, please visit Joyzze.com
Item: #0641 Raptor Cordless Plus (2 Baeries)
Item: #0658 Raptor Cordless (1 Baery)
Item: #0665 Raptor Corded
TM
JOY OF GROOMING MADE EASY
JOY OF GROOMING MADE EASYTM

SAFETY INFORMATION
2
Never leave the equipment unsupervised and use it very carefully when children or individuals who cannot assess the dangers are nearby.
Children are not permitted to operate the equipment.
Children should be supervised to ensure that they do not play with the equipment.
To reduce the risk of electric shock:
Do not touch the device if it falls into water. Immediately unplug it from the socket.
Do not use while bathing or showering.
Do not place or store the appliance where it may fall or be pulled into a tub or sink. Do not place it in or drop it into water or other liquids.
Always unplug the appliance from the electrical outlet immediately after use, except when charging.
Unplug the appliance before cleaning.
To reduce the risk of burns, fire, electric shock, or injury to persons:
Never leave the appliance unattended when it is plugged in.
Do not use attachments not specified by the manufacturer.
Never use the device if the cable or outlet is damaged or if it does not work properly after falling, sustaining damage or landing in water.
1.5 Power Supply The device must only be operated with the provided power supply unit.
Keep the cord away from heated surfaces.
Keep the air openings free of lint, hair, and similar objects.
Never drop or insert any object into any opening.
Do not use outdoors or operate while aerosol (spray) products are being used.
Do not use this appliance with a damaged or broken comb, as it has the potential to result in injury.
First, insert the plug into the device before plugging it into the outlet. To disconnect, turn all controls to the off position and then remove
the plug from the outlet.
1.4 Personal Protective Equipment
Anti-slip shoes are required to protect against slipping on slippery surfaces.
KEEP AWAY FROM CHILDREN
SAFETY INFORMATION
It is essential to follow basic safety precautions, including thoroughly reading and understanding all provided instructions,
before operating your Joyzze clipper.
Failure to comply with the safety instructions and regulations outlined in this manual could lead to equipment malfunctions
or cause serious personal harm.
1.2 Personal
Only individuals experienced in handling the animals to be clipped should operate the clipper.
Children are NOT permitted to operate the equipment.
Individuals who may be under the influence of drugs, alcohol, or medication should not use the equipment.
1.1 Symbols and Warning Notes
The operating instructions contain various symbols indicating possible hazards or technical information that, if not followed,
may result in personal injury, material damage, or uneconomical operation.
To prevent a potential hazard, it is essential to take appropriate precautions.
Failure to do so can result in serious injury, and in some cases, even death.
1.3 Intended Usage
The equipment is intended for the specific use described in this manual.
The equipment is intended for use only on dogs, cats, cattle, and horses.
Compliance with all instructions in this manual is part of the intended use.
Any other use of the equipment is expressly prohibited.
NOTE:
SAFETY:
HAZARD SYMBOLS
WARNING/DANGER!
1
DO NOT use the clipper:
• On humans
• To clip other animals (other than dogs, cats, cattle, and horses)

4
1.1 Guarantee Condition
The guarantee conditions are included in the manufacturer's general terms and conditions.
1.2 Customer Service
For technical information, our customer service and authorized service centers are available to you.
In addition, our staff is interested in new information and experiences resulting from the operation, which could be useful for improving
our products.
1.3 Limitation of Liability
The manufacturer assumes no liability for disadvantages due to:
Non-compliance with the instruction manual.
Operation of the clipper for unintended use.
Use of unauthorized personnel.
Technical modifications.
Use of unauthorized spare parts.
The actual scope of delivery may differ from specially designed models, additional ordering options, or due to the latest state of the art from
the annotations and illustrations described here.
This product has been developed and assembled using the best individual components available. It is designed to provide longevity
and high performance.
If spare parts are used during the life of this product, please ensure that they are genuine Joyzze parts. Failure to use genuine Joyzze spares
may reduce the performance of this precision-engineered product and will void any warranty claim.
This manual is designed to help you handle the machine safely and efficiently.Before operating the equipment,
carefully read and understand these instructions.
The safe operation of the equipment requires compliance with all safety and operating information in this manual.
Keep this manual at all times. If you hand over the equipment to other individuals, provide them with this manual.
GENERAL
SAFETY INFORMATION
3
The clipper's battery pack may vent or rupture if crushed, heated, incinerated, short-circuited, or immersed in any liquid.
Do not insert metallic objects into the battery cavities of the charging station.
To clean external parts of the charging station, use a soft brush or damp cloth. Do not use harsh abrasives, detergents, or solvents.
Do not use this lithium-ion battery to power any product other than the Joyzze Raptor clipper.
The battery contains an overload protection feature. In extreme cases, overload protection may cause the battery to become inoperable.
For maximum battery life, do not store clipper, charging station or battery pack under 50°F or over 104°F.
Do not expose the clipper, charging station or battery pack to excessively damp conditions.
Take care not to drop the clipper, charging station or battery pack. Do not attempt to use a damaged charging station or battery pack.
1.6 Battery Pack and Charging Station
SAFETY INFORMATION
The device must ONLY be operated with a Joyzze Battery Pack and Charging Station
1.7 Animals
The appliance is intended for trimming purposes only.
The noise of the clipper can disturb animals.
The animal should be fixed and calmed sufficiently before clipping.
Do not charge, install or leave the device in places where it may be exposed to damage from an animal.
Moving blades and sharp edges of the blades can cause injuries to the skin.
Work carefully.
Avoid any contact with the moving blades.
WARNING! KEEP THE DEVICE DRY.
1.8 Clipping Blades

CLIPPER REPAIR SERVICE
Please call Joyzze Customer Service at 877.456.9993 or email us at [email protected] for assistance resolving any issues you’re experiencing
with your Joyzze Clipper. If your issues cannot be resolved over the phone or via email we will assist you with the return for repair service
process. If you wish your clipper to be serviced as well it should be carefully packed, mailed and insured ONLY via United States Postal Service:
See Manufacturer’s 12 Month Limited Warranty, Warranty Card, and Repair Service Instructions.
6
JOYZZE
P.O. Box 440098
Kennesaw, GA 30160
SAFETY INFORMATION
J
FAILURE TO CHARGE
Make sure the outlet is working and plugs are well seated in the clipper and outlet. If clipper still fails to charge return for maintenance
(see Manufacturer’s 12 Month Limited Warranty).
LITHIUM-ION BATTERY USE, STORAGE, AND DISPOSAL
1. The Joyzze Raptor Cordless Clipper comes with a rechargeable lithium-ion battery pack. The battery does not develop a "memory effect".
You can return the battery pack to the charger at any time for a full charge, or even use the battery before a charge cycle is complete.
Like most rechargeable batteries, lithium-ion batteries perform best when used frequently.
2. For maximum battery life, if the battery pack will be in storage from several months or longer, store with a partial battery charge of about 40%.
3. Store battery pack in temperatures between 50°F/10°C and 104°F/40°C. Do not store in damp conditions.
4. Do not place the clipper and the battery pack near heat vents, radiators, or in direct sunlight. Optimal charging requires stable temperature
conditions while sudden increases in temperature will reduce battery charge capacity.
5. Initially, new lithium-ion batteries, unused for a period of time, may not accept a full charge. This is normal and does not indicate a problem
with the battery or charger. The battery will accept a full charge after several cycles of clipper use and recharging.
6. When not in use for extended periods, disconnect the adapter cord from the AC outlet.
7. Many factors influence lithium-ion battery life. A battery that has received heavy use or is more than a year old may not give the same
run-time performance as a new battery pack.
8. Check with your municipal solid waste organizations for details on lawful disposal and recycling options.
5
SAFETY INFORMATION

8
Multi-function Button
Press and HOLD the button
for 0.6sec to switch
the clipper ON/OFF
SHORT press the button
again to adjust the Speed.
Blade
Battery / Direct Operation Adaptor
Power / Speed Indicator LED
Accessories:
Cleaning Brush
Charging Station Battery Pack
Power Adaptor
Lubricant Oil
Direct Operation Adaptor
Manual
USAGE
Non-Slip Sleeve
Universal Plug(s)
* Different adapter & plugs in the packaging for different countries and regions.
Item pictured may differ from actual product.
7
Clipper Specificati
CLIPPER SPECIFICATIONS
Model
Clipper Body (with #10 A5 style blade*1) Battery Pack (Item: #0672)
Charging Station (Item: #0689)
(Item: #0931)
(Item: #0924) *2
Li-ion Battery
Charging Time
Running Time
Speed (3-Speed)
Noise
120 minutes
220-300 minutes
2500 - 3100 - 3800 SPM
≤ 70 dB
JZA-1 7.4V 3500mAh
Input 9V 3A
Input
Wall Hanging Hole
9V 3A
Power Adaptor (Input: 100-240V ~ 50/60Hz)
* Different adapter & plugs in the packaging for different countries and regions.
USA Adaptor
Universal
Raptor Cordless Plus
Package Includes
Item
Clipper Body
Power Adaptor
Cleaning Brush
Manual
Charging Station
Direct Operation Adaptor
Non-Slip Sleeve
Battery Pack
Lubricant Oil
Power 27W Max
Raptor Corded Raptor Cordless
*1
/
/
/
/
*2
(Depending on the speed)
With the purchase of a charging station and battery pack, the corded version of the clipper can be upgraded to a cordless version.

10
Short press the power button again to adjust the speed.
*When the battery level is lower then 25%, the high speed (3800SPM)
will be reduced to avoid over exhaustion of the battery.
OPERATION
High speed rolling light: 3800 SPM
Always on: 3100 SPM
Low speed rolling light: 2500 SPM
Multi-function Button
2500
3800
3100
① Press and hold the button for 0.6 sec to switch the clipper ON/OFF.
After the clipper is powered on, the default speed is 3100 SPM.
② Short press to switching the speed: 3100 - 3800 - 2500,
which can be cyclic switching.
Power / Speed Indicator LED
9
OPERATION
①Slide the Direct Operation Adaptor into the Clipper Body.
②Insert the power adapter output plug to the Direct Operation Adaptor.
③Connect the power adapter to the wall outlet.
④Press and hold the Multi-function button for 0.6sec to switch the clipper ON.
Power Input Port
Release Button
Direct Operation Adaptor
RAPTOR CORDED
Slide the charged battery pack into the clipper body.
Press and hold the Multi-function button for 0.6sec to switch the clipper ON.
* The battery pack and the direct operation adaptor are removable from the clipper.
press the release button and push them slide out.
RAPTOR CORDLESS
Power Adaptor
②
③
①

12
BATTERY POWER INDICATE
CHARGING OPERATION
BATTERY AND CHARGING
On the bottom of the power adaptor, hold down the button to view
the battery charge level.
Primary Cavity and Indicator
*Batteries will not simultaneously charge
Secondary Cavity and Indicator
BATTERY CHARGING INDICATOR
The red light is always on when the battery is charging,
and the green light is always on after the battery is fully charged.
No LED light up: Exhausted or faulty battery - Try recharge.
There are two cavities in the charging station,
which can intelligently charge the two battery packs.*
①When the two battery packs are placed in the two
cavities at a same time, the battery pack in the primary
cavity will be charged first.
②When the battery pack in the primary cavity is
fully charged, or removed from of the primary
cavity, it will continue to charge the spare battery pack
in the secondary cavity.
Blinking one LED: Battery level ca. 0-10% – Recharge immediately.
One LED lights up: Battery level ca. 11-35%
Two LEDs light up: Battery level ca. 36-66%
Three LEDs light up: Battery level ca. > 66%
* LEDs will be off automatically after 5 seconds after release the button.
11
The clipper, which already has an installed battery pack,
can be directly put in the primary cavity for charging.
Or only put a battery pack in the primary cavity for charging.
* Store charging station in a clean location.
If the battery cavities becomes clogged with dust or hair, unplug the adaptor and gently
remove hair or other debris with a soft brush or vacuum cleaner.
RAPTOR CORDLESS / PLUS
Power Adaptor
CHARGING OPERATION
Release Button

14
1. Blade cleaning: Move the shear blade within a short range
and use the brush to remove hair that is stuck between the
shear blade and the comb blade.
Lubricate the blades sufficiently during the clipping (at least every 15 minutes) or battery drainage can occur.
*Only use Joyzze special lubricant oil. See Joyzze.com for details.
If the blade is not adequately lubricated, it can cause heating and decrease the durability of the clipper,
blades and may reduce the battery runtime
2. Blade oiling: The blades must be oiled before, during
and after every use. When the blades of the clipper are leaving stripes,
this is a signal that oil is required.
Place 1-2 drops of lubricating oil ahead and laterally on the blade
shown below. Wipe off the excessive oil with a smooth, dry cloth.
In order to achieve optimal clipping performance and enhance
the longevity of both the clipper and the blade, it is important to
apply a thin coat of oil between the top and bottom blades.
BLADE MAINTENANCE
MAINTAINING BLADES
If the blade latch is accidentally closed, please use a flat screwdriver,
insert into the latch gap and pry it up as figure suggests.
CAUTION is advised to not damage any components while
conducting the suggested method above.
Blade latch
13
BLADE REMOVAL
CAUTION: Turn OFF the clipper and disconnect from outlet before performing maintenance.
BLADE INSTALLATION/REMOVAL
Push the release button to the end, at the same time, fold the blade backward, pull the blade out of the latch with
another hand to take off the blade.
BLADE REMOVAL
Insert the blade slot into the blade latch, and fold it on to the switched-on clipper by light pressure,
press the blade down and hear a "click".
Blade latch
BLADE INSTALLATION
Blade Release Button
Blade Hinge Assembly

WARRANTY REGISTRATION
Register your clipper within 30 days of purchase to activate its 12-month warranty. Warranty is valid only when this card is completed and
returned within 30 days of purchase. Online registration and mail registration are both available.
REGISTER ONLINE: JOYZZE.COM
REGISTERED BY MAIL:
PLEASE PREPARE:
1. Complete warranty card.
2. Proof of purchase. Cut out UPC from product package.
3. Copy of receipt.
Mail to Joyzze: P.O. Box 440098, Kennesaw, GA 30160
IF RETURNING FOR REPAIR SERVICE:
1. Submit the Required with Registration information if not already registered.
2. Pack clipper in bubble wrap to protect during shipping.
3. Enclose a return shipping fee of $15.00 USD.
Consumer’s Name:
Address: Telephone:
E-mail:
Date of Purchase (MM/DD/YY): Serial Number:
Store / Distributor’s Name: City: State:
16
15
Installation:
To attach the desired plug to the power adapter, align the slots on the
plug to the ribs on the power adapter. Turn clockwise into place.
The plug will “click” into place when properly attached.
Removing:
Simultaneously push the button on the power adaptor and turn the plug counterclockwise to remove it.
The universal power adaptor is equipped with interchangeable wall plugs that support universal AC voltage,
making it suitable for use in most countries worldwide.
UNIVERSAL POWER ADAPTER
LOCK
OPEN
Generally used in
United States
Generally used in
Australia
Generally used in
Great Britain
PUSH
Generally used in
Continental Europe
Note:
That it is normal for the battery pack and power adapter to feel warm to the touch when charging or running. This is especially true
if the battery has been deeply discharged and/or while the clipper is running.
WARRANTY CARD

TROUBLESHOOTING
MALFUNCTION RECTIFICATIONCAUSE
Speed adjustment of the clipper is
not working.
The motor is not functioning or is not
starting up, even if a fully charged battery
pack or the direct operation adaptor is
well connected to the clipper body.
The battery charging indicator of the
charging station is not on, or when the
battery pack is full charged the indicator
does not change from red to green.
Poor contact with power adapter
Motor or Circuit board failure. Contact Joyzze™ service center or local distributor.
Turn off the clipper, clean both the contacts of the clipper and
the battery pack or the direct operation adaptor with a clean cloth
or brush, removing any dirt, dust, or debris that may be
preventing proper electrical contact.
Contact Joyzze™ service center or local distributor.
Replace battery pack
Replace the power adapter.
Contact Joyzze™ service center or local distributor.
Unplug the adaptor and gently remove hair or other debris with
a soft brush or vacuum cleaner.
To address the issue of a blocked or clogged blade, it is necessary
to clean and oil the blade or change a new blade.
The electrical contacts of the clipper is covered in hair, dust,
or other debris, which may prevent them from making
proper contact.
There is a problem with the motor and/or electronics of
the clipper, which is causing it to malfunction or not work
properly.
The blade is obstructed or clogged, preventing it from
functioning properly.
Contacts of battery pack and/ or charging station are dirty.
Contacts of the charging station are deformed or the
charging station is faulty.
Faulty battery pack
The internal power line is broken after a long period of use.
18
For customer service please e-mail to [email protected] or call toll free 877.456.9993 (U.S. and Canada)
For outside U.S. and Canada, please dial +1 877.456.9993
Customer Service
TROUBLESHOOTING
The blade is not functioning or is not
moving as expected.
The clipper cuts badly or not at all
Running time of a fully charged battery is
too short and / or blades are getting hot.
The noise of the clipper becomes louder
when in use even if a new blade is
replaced.
The blade is not properly secured or locked into place.
The blades of the clipper are dull.
The shear and comb blades stick to each other,
or the blade has not been lubricated with oil.
Make sure to properly align and securely attach the blade to the
clipper body while the motor is running.
It is necessary to buy some new blades, or sharpened your old
blades by a trained Joyzze™ technician or authorized service center.
Take off blade, push the shear blade half away from the blade,
take away hair between shear and comb blades.
To avoid damage to the clipper and ensure effective clipping,
it is recommended to only use the clipper on dry coat.
It is necessary to buy some new tension springs and replace it.
Replace a new blade drive or a set of blade fixed components.
Only use Joyzze brand blades in good condition.
The blade drive needs to be replaced by a trained Joyzze™
technician or authorized service center.
Carefully clean the blade and put a few drops of lubricant oil on
the blade according to the suggestions.
The blade drive is not functioning correctly and may be
damaged or overly wear.
MALFUNCTION RECTIFICATIONCAUSE
Hair has become stuck or caught between the shear
and comb blades.
The blade drive is overly worn, or the blade fixed components
is deformed or worn.
The shear and comb blades stick to each other Oil the blade
The pressure of the tension spring on the blades of other
brands used is very high, which causes the blades to heat
quickly and consume battery power more quickly.
The hair of the animal is damp or moist with water or
another liquid.
The tension spring on the blade pressure becomes less,
can’t apply enough pressure to effectively cut through
the hair or fur.
17

AVAILABLE BLADE OPTIONS
FITS JOYZZE A-SERIES & MOST SNAP-ON A5 STYLE CLIPPERS
AW SERIES WIDE BLADE
30W
(Item: #0467)
0.5mm - 1/50” 10W
(Item: #0474)
1.5mm - 1/16” 7FW
(Item: #0481)
3mm - 1/8”
5FW
(Item: #0498)
6mm - 1/4” 4FW
(Item: #0511)
9mm - 3/8” 3FW
(Item: #0504)
13mm - 1/2”
Joyzze wide blades are designed to save you time. These blades are 35% wider than any standard A series blade.
Stateof the art manufacturing technologies and processes are utilized to ensure optimal performance and durability.
A special proprietary coating is applied to further ensure that these blades will run cooler
and get through any heavy-duty job with ease. Suitable for all breed sizes.
20
AVAILABLE BLADE OPTIONS
FITS JOYZZE A-SERIES & MOST SNAP-ON A5 STYLE CLIPPERS
A SERIES BLADE
50
(Item: #0016)
0.2mm - 1/125” 40
(Item: #0023)
0.25mm - 1/100” 30
(Item: #0030)
0.5mm - 1/50”
15
(Item: #0047)
1.2mm - 3/64” 10
(Item: #0054)
1.5mm - 1/16”
9
(Item: #0061)
2mm - 5/64” 7F
(Item: #0078)
3mm - 1/8” 5F
(Item: #0085)
6mm - 1/4” 4F
(Item: #0092)
9mm - 3/8” 3F
(Item: #0108)
13mm - 1/2”
Joyzze A Series blades are engineered and calibrated for precision cuing.
State of the art manufacturing technologies and processes are utilized to ensure optimal performance
and durability. A special proprietary coating is applied to ensure these blades will run cooler
and get through any heavy duty job with ease.
If the blades of your Joyzze clipper become dull due to frequent use, it is recommended to purchase a new set of blades
from your Joyzze supplier. Some blade sets may be eligible for resharpening. For more information on resharpening, you can contact your
19

AVAILABLE CLIPPER OPTIONS
8 PIECE STAINLESS STEEL WIDE INDIVIDUAL COMBS
For more product information please visit JOYZZE.com.
8 sizes stainless steel metal comb set specially designed for JOYZZE AW SERIES WIDE BLADES.
*USE COMBS WITH #10, #15, OR #30 BLADES ONLY
FOR BEST RESULTS USE ON UNTANGLED, BRUSHED HAIR.
22
AVAILABLE CLIPPER OPTIONS
8 PIECE STAINLESS STEEL COMB SET (ITEM #: 0207)
For more product information please visit JOYZZE.com.
8 sizes stainless steel metal comb set specially designed for JZD models / Piranha, JZA models / Raptor & Falcon, or other A5 clippers for
additional cutting lengths.
FOR BEST RESULTS USE ON UNTANGLED, BRUSHED HAIR.
*USE COMBS WITH #10, #15, OR #30 BLADES ONLY
21
1/8”- 3mm 1/4” - 6mm 3/8” - 10mm 1/2” - 13mm
5/8”- 16mm 3/4” - 19mm 7/8” - 22mm 1” - 25mm
(Item: #0535) (Item: #0542) (Item: #0559) (Item: #0566)
(Item: #0573) (Item: #0580) (Item: #0597) (Item: #0603)
1/8”- 3mm 1/4” - 6mm 3/8” - 10mm 1/2” - 13mm
5/8”- 16mm 3/4” - 19mm 7/8” - 22mm 1” - 25mm
This manual suits for next models
3
Table of contents
Other Joyzze Commercial Food Equipment manuals
Popular Commercial Food Equipment manuals by other brands

Falcon
Falcon Pro-Lite LD33 Installation, servicing and user instructions

Talsa
Talsa H15 operating instructions

APW Wyott
APW Wyott GCB-24S Installation and operation instructions

Cleveland
Cleveland SZ-4135 Specifications

Diamond
Diamond E9/M15I8 operating instructions

Manufacturas Lenin
Manufacturas Lenin MLR Operator's manual