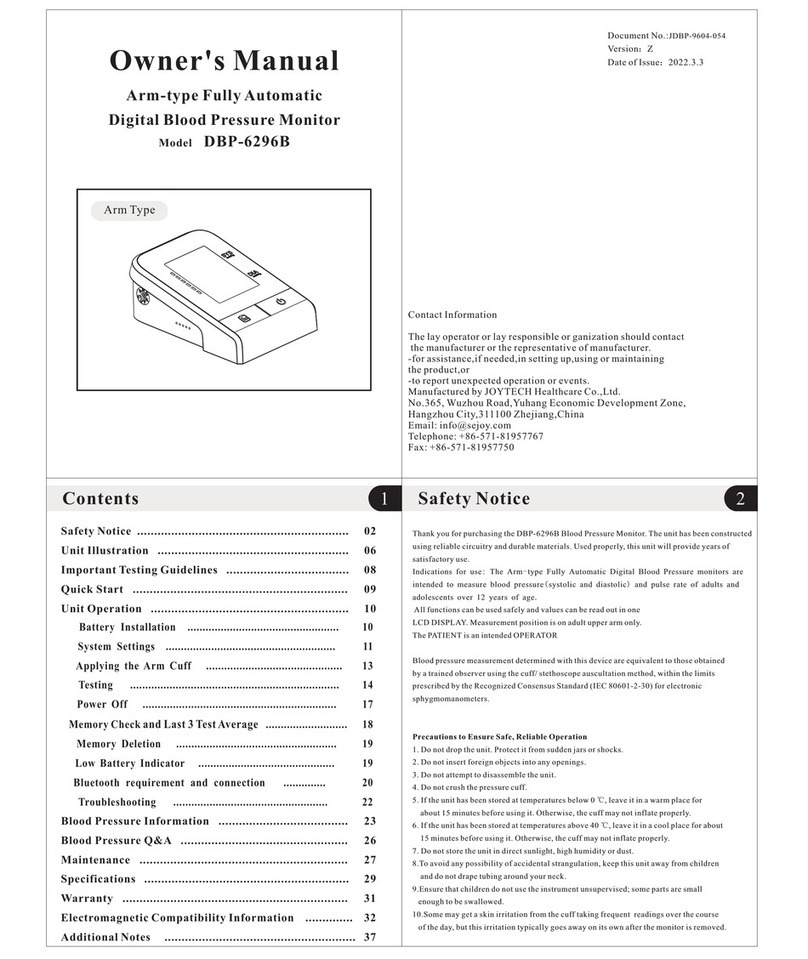
Jumper JPD-HA200 User manual

Version: V2.1
Revision Date: 2021.08
Electronic Blood Pressure Monitor
Tensiomètre électronique
JPD-HA200 User Manual
Manuel d'utilisation du JPD-HA200

- 1 -
Product Composition
The product is comprised of the host machine and the cuff of Electronic
Blood Pressure Monitor.
Application Scope
The Electronic Blood Pressure Monitor is used to measure the diastolic
pressure, systolic pressure and pulse rate of adults by oscillometric
method for diagnostic reference.
Intended use
The Electronic Blood Pressure Monitor is intended to measure the
systolic and diastolic blood pressure as well as the pulse rate of adult
person via non-invasive oscillometric technique at medical facilities or
at home.Utilisation prévue
Utilisation prévue
Le tensiomètre électronique est destiné à mesurer la pression artérielle
systolique et diastolique ainsi que le pouls d'une personne adulte via une
technique oscillométrique non invasive dans des établissements
médicaux ou à domicile.

- 2 -
The warnings and illustrations shown in the User Manual enable you to
use the product safely and correctly, thus preventing you and others
from being injured, specifically as follows:
Legend, mark and meaning
Warning message
Anti-electric shock degree is Type BF of the
application part
When the product life expires and the end users
discard the products, send them to the designated
collecting and separating place for disposal
according to the requirements from the local
environmental protection authority.
Consult the instructions for use.
This product complies with the MDD93/42/EEC
requirements.
IP21
Degree of protection against the ingress of water.
Information of manufacturer
Date of manufacture
Authorized European Representative
Safety Precautions

- 3 -
Avoid smoking, eating, drinking caffeinated drinks or exercising for 30
minutes before taking measurement.
1. Sit upright in a chair with both feet on the floor.
2. Remove tight fitting clothing from your upper arm along with any
thick clothing.
3. Pull on the end of the cuff until it wraps securely
around your upper arm. Place your arm on a table so
that the cuff will be at the same level as your heart.
4. The cuff will automatically inflate and the
measurement will start, upon pressing the “ ”
button.
5. When the measurement is complete, the cuff will automatically
deflate and your systolic and diastolic pressure values and pulse rate will
be displayed.
Quick Start Guide

- 4 -
Monitor
Features
Universal Cuff
Irregular Heartbeat Detector
Average of last 3 readings
99 Readings* 2 Users
Auto-off Power Saving Feature
Operated by 4 AAA batteries (USB 5V optional)
Overview

- 5 -
Display
Packing List
No.
Name
Quantity
1
Electronic Blood Pressure Monitor
1
2
Cuff
1
3
Easy-to-carry Storage Bag 1
4
User Manual
1
5
USB Cable
1

- 6 -
2.1 Battery Installation
a) Open the battery cover as shown in the
picture.
b) Place 4 AAA dry batteries. Pay
attention to the battery electrode indication.
2.2 Battery power indication and replacement
After the product is turned on, if low power symbol appears on
the screen , the measurement cannot be performed, and the battery must
be replaced.
Do not use any expired battery;
If the product is not used for over 3 months, please
take out the batteries.
2.3 USB Power Supply
USB line can be connected for power supply of the product without
battery.
Preparation

- 7 -
2.4 Cuff
The applicable arm circumference range of the cuff is 22-36cm or
22-42cm.
Connection: Insert the air plug of cuff air tube into air jack of the
Electronic Blood Pressure Monitor. Figure shown as above:

- 8 -
3.1 User mode
In the shutdown state, press the “User ” button for 3 seconds, the
screen displays “User 1 ” or “User 2 ”, and flickers continuously.
Press the “Memory ” button to switch to the other user. (default user:
User 1 )
(Note: In the shutdown state, press “User ” button to view the current
time and the current user)
3.2 Year/Month/Date/Time setting
In the shutdown state, press the “User ” button for 3 seconds to enter
the setting mode. Press the “User ” button to enter the year setting
mode ( or automatically enter the year setting mode after the batteries
are reloaded and the device is powered on ), the screen displays 20XX
and flickers continuously. Press the “Memory ” button to increase the
value which can be switched among 2019 and 2039. Press the
“User ” button for confirmation and enter the month setting mode.
After entering the month setting mode, the screen will display xx-xx and
Function Setting Mode

- 9 -
flash on the month. Press the “Memory ” button to increase the value
which can be switched among 1 and 12, press the “User ” button for
confirmation and enter the date setting mode. After entering the date
setting mode, XX-XX is displayed on the screen and flickers on the date
display. Press the "Memory " button to increase the value which can
be switched among 01 and 31, press the “User ” button for
confirmation and enter the time setting mode. After entering the time
setting mode, the screen will display XX: XX and it will flicker
continuously, press the “Memory ” button to increase the value which
can be switched among 0 and 23, press the “User ” button for
confirmation and enter the minute setting mode, press the “Memory ”
button to increase the value which can be switched among 00 and 59,
press the “User ” button for confirmation and enter the talking
function setting.
Note:
When setting time values, continue pressing the “Memory ” button
till the correct values are well set. Value ranges are year (2019~2039),

- 10 -
month (01~ 12), date (01~31), hour (1~12 AM/PM) and minute (00~59).
When the ceiling value of a certain time sector is reached, the relevant
value of the sector will start from the minimum individually.
3.3 Talking function setting (voice version only)
After entering talking function setting mode, “ ” will show up at the
SYS area, with the current voice status “ ” / “ ”and voice icon (not
displayed, when talking function mode is off) at the DIA area. Press the
“Memory ” button to switch the voice status, and press the “User ”
button for confirmation and enter the unit display setting.
3.4 Unit setting
After entering the unit setting mode, the SYS area will display “ ”
and unit area will display mmHg, it means the unit mmHg is selected
(system default unit: mmHg), At this time, press of the “Memory ”
button, the unit will be switched, it means the unit kPa is selected. After
selecting the unit, press the “User ” button again to save the unit
setting.

- 11 -
4.1 How to use the cuff
(1) Place the cuff flat on the table, leave the hook & loop downwards,
and pass the end of cuff through the metal ring to form a loop. The hook
& loop shall point outwards.
(2) Pull the cuff through the upper arm to be measured, and wear the
cuff correctly based on the downward icon “ Φ”, the air tube runs
down the inside of your arm.
(3) Hook up the cuff on the upper arm according to the illustration,
ensure that the lower edge of cuff is 2~3cm away from the elbow joint.
(4) Tighten the free edge of cuff to stick the hook & loop.
(5) The cuff should be wrapped on the upper arm comfortably, with tight
space for two fingers. Before measurement, remove tight fitting clothing
from your upper arm along with any thick clothing.
(6) Place the lower arm flat on the desktop, leaving the center of palm
naturally upwards, sitting upright, and ensuring the center of cuff and
the heart are at the same level. Note that the tube of cuff cannot be
folded or bent.
Note: If you cannot use the left arm for measurement, please use the
right arm for measurement. All the measurements must be performed on
the same arm for comparison.
Correct Method of Use

- 12 -
4.1 Comment utiliser le brassard
(1) Placez le brassard à plat sur la table, laissez le crochet et la boucle
vers le bas et passez l'extrémité du brassard à travers l'anneau métallique
pour former une boucle. Le crochet et la boucle doivent pointer vers
l'extérieur.
(2) Tirez le brassard à travers le haut du bras à mesurer et portez le
brassard correctement en vous basant sur l'icône vers le bas « Φ», le
tube d'air descend à l'intérieur de votre bras.
(3) Accrochez le brassard sur le bras supérieur selon l'illustration,
assurez-vous que le bord inférieur du brassard est à 2 à 3 cm de
l'articulation du coude.
(4) Serrez le bord libre du brassard pour coller le crochet et la boucle.

- 13 -
(5) Le brassard doit être enroulé confortablement sur le haut du bras,
avec un espace restreint pour deux doigts. Avant la mesure, retirez les
vêtements ajustés de votre bras ainsi que tout vêtement épais.
(6) Placez l'avant-bras à plat sur le bureau, en laissant le centre de la
paume naturellement vers le haut, en vous asseyant bien droit et en vous
assurant que le centre du brassard et le cœur sont au même niveau.
Notez que le tube du brassard ne peut pas être plié ou plié.
Remarque : Si vous ne pouvez pas utiliser le bras gauche pour la mesure,
veuillez utiliser le bras droit pour la mesure. Toutes les mesures doivent
être effectuées sur le même bras pour comparaison.
4.2 Starting measurement
After you wear the cuff correctly, you can start the measurement:
(1) Press the "Power " button, and the device will return to zero
automatically, the air pump will start to inflate the cuff, and the screen
will display the change of the pressure in the cuff.
(2) When reaching the stable pressure upon inflation, the air pump will
stop the inflation, and the pressure in the cuff will be reduced gradually
and displayed on the screen. If the inflated pressure is insufficient, the
device will reinflate the cuff automatically for a higher pressure;
(3) When the pulse is measured, the screen will display the "heart"
symbol and start flashing. The flashing “heart” symbol will be displayed

- 14 -
on the screen.
(4) Upon measurement completion, the measured values of systolic
pressure, diastolic pressure and pulse will be displayed on the screen.
(5) The screen will continue to display the measurement results, unless
yourlong-press on the "Power " button to turn off the device. If there
is no operation, the device will be powered off automatically in 30s.
4.2 Démarrage de la mesure
Après avoir correctement porté le brassard, vous pouvez commencer la
mesure :
(1) Appuyez sur le bouton "Power", et l'appareil reviendra
automatiquement à zéro, la pompe à air commencera à gonfler le
brassard et l'écran affichera le changement de pression dans le
brassard.
(2) Lorsque la pression stable est atteinte lors du gonflage, la pompe à
air arrête le gonflage et la pression dans le brassard est
progressivement réduite et affichée à l'écran. Si la pression de
gonflage est insuffisante, l'appareil regonfle automatiquement le
brassard pour une pression plus élevée ;
(3) Lorsque le pouls est mesuré, l'écran affiche le symbole "cœur" et
commence à clignoter. Le symbole « cœur » clignotant s'affichera à
l'écran.
(4) Une fois la mesure terminée, les valeurs mesurées de la pression
systolique, de la pression diastolique et du pouls s'affichent à l'écran.

- 15 -
(5) L'écran continuera à afficher les résultats de mesure, à moins que
vous n'appuyiez longuement sur le bouton "Power" pour éteindre
l'appareil. S'il n'y a pas d'opération, l'appareil s'éteindra
automatiquement dans 30 secondes.
4.3 Using memory function
This blood pressure monitor is available for 2 users with 99 memories
per user. When there are over 3 measurement data, press “Memory ”
button for the average values of the latest 3 measurement data, recorded
as “0”. Track the memory data by pressing “Memory ” button from
the latest measurement, recorded as “1”. Then track “2”, “3” or more via
the same operation.
4.3 Utilisation de la fonction mémoire
Ce tensiomètre est disponible pour 2 utilisateurs avec 99 mémoires par
utilisateur. Lorsqu'il y a plus de 3 données de mesure, appuyez sur le
bouton "Mémoire" pour les valeurs moyennes des 3 dernières données
de mesure, enregistrées comme "0". Suivez les données de la mémoire
en appuyant sur le bouton "Mémoire" à partir de la dernière mesure,
enregistrée comme "1". Puis piste « 2 », « 3 » ou plus via la même
opération.
4.4 Clearing stored measurement data
In the shutdown state, long-press “Memory ” button and “User ”

- 16 -
button for 3 seconds until “ ” shows in the SYS area and “ ”
shows in the low DIA area, thus all the measurement data of the current
user are deleted.
4.4 Effacement des données de mesure enregistrées
Dans l'état d'arrêt, appuyez longuement sur le bouton "Mémoire" et le
bouton "Utilisateur" pendant 3 secondes jusqu'à ce que "" s'affiche dans
la zone SYS et "" s'affiche dans la zone DIA basse, ainsi toutes les
données de mesure de l'utilisateur actuel sont supprimées.
4.5 Classification standard for blood pressure condition
There is no definition of hypotension yet. Generally, if the systolic blood
pressure is less than 100mmHg (13.3kPa), it is hypotension.

- 17 -
(1) Warning:
Keep the device out of the reach of the children under 12 and
people who can’t express their intention. When children of 12~18 use
the device, they should be accompanied by the adults. Pregnant women
shall use under the guidance of doctors.
Do not wrap the cuff over a wound, as this can cause further
injury.
This model of Electronic Blood Pressure Monitor is suitable for
the arm circumference range of 22-36cm or 22-42cm, and if the arm
circumference exceeds this range, you might fail to obtain the correct
measured value of blood pressure;
This model of Electronic Blood Pressure Monitor is not suitable
for newborns or young children;
The blood pressure is constantly changing. You shall not judge
the blood pressure condition with just one measurement result. The
repeated measurement data over a period of time will be more reliable;
Do not make self-diagnosis according to the measurement
results. Please consult your professional doctor with the measurement
result record(s). The treatment based on the self-diagnosis of
Contraindications, Precautions, Warnings and Prompt
Instruction

- 18 -
measurement results is very dangerous;
(2) Precautions:
Do not repair, disassemble or modify the Electronic Blood
Pressure Monitor without permission;
Do not collide or drop the host to avoid collision or strong
impact on the device;
Do not mix old and new batteries of different brands for use.
Indoor temperature, environment, noise, user's body position,
speech or exercise might affect the blood pressure measurements. The
body movement, magnetic field and improper wearing of cuff and
sensor will affect the measurement as well.

- 19 -
* If you have trouble using the device,please check the following
instruction.
Problem
Possible cause
How to correct
No display when
press the Power
button
Low battery
Replace new batteries or use
the USB for power supply.
The polarities of
batteries are
installed
wrongly.
Install the batteries in correct
polarities.
No pressurizing
The air plug is
loosely installed.
Make sure the air plug is
securely inserted in the main
unit.
The air tube is
broken or leaked.
Purchase a new cuff.
“Err 1”displayed
The leakage is
too fast or the
pulse signal is
too weak.
Please check the cuff, tie it up
and try again.
“Err 2”
displayed
The blood
pressure signal
cannot be
detected due to
too much noises.
Please remove the noise
sources and measure again.
“Err 3”
displayed
The test result is
abnormal.
Please measure again.
Troubleshooting
Other manuals for JPD-HA200
1
Table of contents
Other Jumper Blood Pressure Monitor manuals