manuals.online logo
Brands
  1. Home
  2. •
  3. Brands
  4. •
  5. JUNO
  6. •
  7. Ventilation Hood
  8. •
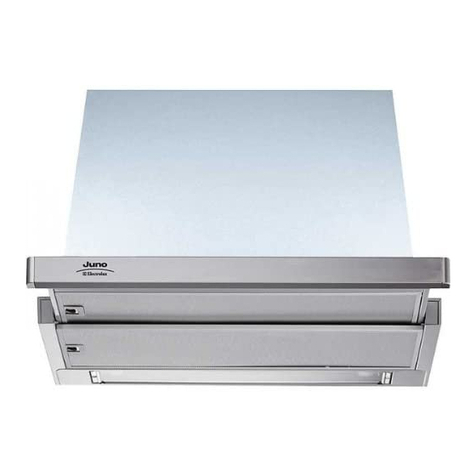
  9. JUNO JDS5320B Technical manual

JUNO JDS5320B Technical manual

This manual suits for next models

2

Other JUNO Ventilation Hood manuals

JUNO JDK9940S Technical manual

JUNO

JUNO JDK9940S Technical manual

JUNO KD6020SWEL Technical manual

JUNO

JUNO KD6020SWEL Technical manual

JUNO JDS3230MF Technical manual

JUNO

JUNO JDS3230MF Technical manual

JUNO JDK7460E User manual

JUNO

JUNO JDK7460E User manual

JUNO FHC62462WA User manual

JUNO

JUNO FHC62462WA User manual

JUNO JDK4230A User manual

JUNO

JUNO JDK4230A User manual

JUNO JFC 90246 X User manual

JUNO

JUNO JFC 90246 X User manual

JUNO JDWK907S0 User manual

JUNO

JUNO JDWK907S0 User manual

JUNO JDK5535-EF User manual

JUNO

JUNO JDK5535-EF User manual

JUNO JDF2940S Technical manual

JUNO

JUNO JDF2940S Technical manual

JUNO JDS3130B Technical manual

JUNO

JUNO JDS3130B Technical manual

JUNO JDA5750E Technical manual

JUNO

JUNO JDA5750E Technical manual

JUNO JDL4130B Technical manual

JUNO

JUNO JDL4130B Technical manual

JUNO JDK7530E Manual

JUNO

JUNO JDK7530E Manual

JUNO JDA 5330 Technical manual

JUNO

JUNO JDA 5330 Technical manual

JUNO JDA3720W Technical manual

JUNO

JUNO JDA3720W Technical manual

JUNO JDF603E6 User manual

JUNO

JUNO JDF603E6 User manual

JUNO JDM6530E Technical manual

JUNO

JUNO JDM6530E Technical manual

JUNO JDK8830A Manual

JUNO

JUNO JDK8830A Manual

JUNO JDIF907E0 User manual

JUNO

JUNO JDIF907E0 User manual

JUNO JDS3530B Technical manual

JUNO

JUNO JDS3530B Technical manual

JUNO JDU1300S Technical manual

JUNO

JUNO JDU1300S Technical manual

JUNO JDF603E5 User manual

JUNO

JUNO JDF603E5 User manual

JUNO JDF904E5 User manual

JUNO

JUNO JDF904E5 User manual

Popular Ventilation Hood manuals by other brands

Gorenje S3 IHGC963S4X manual

Gorenje

Gorenje S3 IHGC963S4X manual

KOBE ISX2136SQB-1 Installation instructions and operation manual

KOBE

KOBE ISX2136SQB-1 Installation instructions and operation manual

U.S. Products ADVANTAGE-100H Information & operating instructions

U.S. Products

U.S. Products ADVANTAGE-100H Information & operating instructions

Kuppersberg DUDL 4 LX Technical Passport

Kuppersberg

Kuppersberg DUDL 4 LX Technical Passport

Framtid HW280 manual

Framtid

Framtid HW280 manual

Thermador HGEW 36 FS installation manual

Thermador

Thermador HGEW 36 FS installation manual

Electrolux LFT769X user manual

Electrolux

Electrolux LFT769X user manual

AEG X69453MVO UK user manual

AEG

AEG X69453MVO UK user manual

Broan B5836SS manual

Broan

Broan B5836SS manual

Heinner HDCH-6060RGBK quick start guide

Heinner

Heinner HDCH-6060RGBK quick start guide

Baumatic AS35SS instruction manual

Baumatic

Baumatic AS35SS instruction manual

Franke FTF 604 XS V2 Instructions for use and installation

Franke

Franke FTF 604 XS V2 Instructions for use and installation

Best UCB3I30SBW installation instructions

Best

Best UCB3I30SBW installation instructions

Gram EFU 503-90 X instruction manual

Gram

Gram EFU 503-90 X instruction manual

CIARRA CBCS6803 Installation and user manual

CIARRA

CIARRA CBCS6803 Installation and user manual

sauter SHG501 Instructions for installation and use

sauter

sauter SHG501 Instructions for installation and use

Franke 392-17 User instructions

Franke

Franke 392-17 User instructions

FALMEC Polar Black 35 Instruction booklet

FALMEC

FALMEC Polar Black 35 Instruction booklet

manuals.online logo
manuals.online logoBrands
  • About & Mission
  • Contact us
  • Privacy Policy
  • Terms and Conditions

Copyright 2025 Manuals.Online. All Rights Reserved.

Electrolux - Hausgeräte GmbH
-Zentraler Ersatzteildienst -
ELPRO electro-service GmbH
Marienhütte 12
57080 Siegen
Dunstabzüge (0271) 319361/62
Bei Ersatzteilbestellellung bitte unbedingt
Geräte-ldent-Nr. und Modellbezeichung
angeben. Sie finden diese Angaben auf
dem Typenschild (nach Abnahme des
Fettfilterhalters sichtbar). Bitte das defekte
Teil möglichst genau beschreiben. Durch
genaue Angaben helfen Sie uns, Ihren
Auftrag schnellstmöglich zu erledigen.
Pack Fettfiltermatte
Bestellnummer 955 101 119
Aktivkohlefilter
Bestellnummer 955 101 116
Rückstauklappe 120 mm Ø
Bestellnummer 955 101 075
5
Montagevorschrift und Gebrauchsanleitung
für die Dunstabzüge
Prescriptions de montage et mode d'emploi de la hotte aspirante
Instructions on mounting and use of the cooker hood
Istruzioni di montaggio e d'uso della cappa aspirante
JDS 5320 W, B
empfehlen daher die folgenden
Anweisungen zu beachten.
Glühlampenwechsel
— Das Gerät vom Stromnetz abschalten.
— Das Gitter abnehmen.
— Die defekten Glühlampen auswechseln
undolivenförmige40Wmax.Glühlampen
(E14) verwenden.
— Falls der technische Kundendienst
angefordert werden soll, weil die
Beleuchtung nicht funktioniert, zuerst
überprüfen, ob die Glühlampen fest
eingeschraubt sind.
Reinigung
Für die Säuberung der Aussenteile der
Dunstabzugshaube ein mit denaturiertem
Alkohol oder neutralem, flüssigen
Reinigungsmittel befeuchtetes Tuch
benutzen.DenGebrauchvonScheuermitteln
vermeiden.
Dieses Gerät entspricht den EWG-
Normen CE 87/308 überFunkentstörung.
L 386 Ed. 09/93
View of the hood
1) Flap
2) Grease filter supporting grill
3) Cooking surface lighting
4) Motor speed
5) Light
Using the hood
The hood can be used as follows:
External exhausting version
Inthiscasethefumesareconveyedoutside
by means of a special pipe connected with
the coupling flange A, placed in the hole B
(fig. 1).
Choosing the exhausting pipe
ThecouplingringBhasadiameterof120mm.
We suggest to use Ø 120 mm exhausting
pipe.
According to your installation the pipe can
be directed either towards the ceiling or
towards the walls (fig. 2).
Using the multi-connector C, Ø100, Ø110
and Ø125 mm exhausting pipes can be
used.
Ø 120 mm exhausting pipe: the multi-
connector has not to be fitted.
Ø 125 mm exhausting pipe: insert the
multi-connector on the coupling ring and
remove, using a proper tool, the upper
unused Ø 100 and Ø 110 mm rings of the
multi-connector.
Ø 110 mm exhausting pipe: same
procedure,but removing theØ 100 mmring
only.
Ø 100 mm exhausting pipe: apply the
multi-connector on the coupling ring.
Internal recycle version
—Theairispurifiedthroughanactivecarbon
filter and returned to the room.
—The use of an active carbon filter is
necessary when an exhaust pipe to the
exterior is not available, or when it is not
possible to install this type of pipe.
In the case of the internal recycle version
proceed as follows:
a)Requestanactivecarbonfiltersuitablefor
this model from your supplier.
b)RemovethegrillEturningthelocksDand
pull it out downwards (fig. 3).
c) To install the filter, fit it in the seat first
upper then lower with the two hooks G
(fig. 4).
d) Re-insert the inlet grill
e) The deflector (fig. 5) must be fitted on the
hole B(fig. 1) fixing it with the screw
provided.
The deflector conveys the air frontwards
avoiding to dirty the rear wall.
Installation
The hood must be installed at least 65 cm
from the hob of electric cookers and at least
75 cm from the hob in the case of gas or
mixed cookers.
Warning!
— If the hood is run at the same time as a
burnerorfireplacethatdependonambient
air(forexamplegas,Diesel,coalorwood
heaters, water heaters, etc.) be careful,
because the hood, when it exhausts the
air, removes the ambient air required by
the burner or fireplace for combustion.
— For secure operation and to prevent
discharged gas from coming back in, the
vacuum must not exceed 0,04 mbr.
This may be done by making sure the air
inlet into the room passes through non-
closing openings such as air recycling
wall boxes, doors, windows or with other
technical measures.
— No food must be cooked flambé
underneath the hood.
The use of an unprotected flame is
dangerousfor the filtersand could cause
fires.
14 15
Fixing the hood
Mounting the hood on the wall
Make use of the scheme N1 provided,
applying it on the wall.
Drill where indicated (fig. 9).
PlacethehooksLprovidedwithscrewsand
blocks in the upper holes.
Place the expansion plugs Msupplied with
the hood in the lower holes (fig. 10).
Fix the angle frame N(using either the long
or the short arm, depending on the depth of
the side cupboards) to the wall at the right
height.
Adjustthepositionoftheupper brackets
O, fix the hood to the hooks L, check
that the hood is at the right height (to
eventuallyadjust the height work onthe
screws P, fig. 11).
Fix the hood to the lower angle frame by
means of the screws Q.
ForafurtheradjustmentactonthescrewsR
through the holes S(fig. 11).
Fixing the front panel
Take off the door H(fig. 6) turning the
rear locking knobs K.
Apply the scheme N3 onthe rear sideof
the front panel, considering that the
arrow indicates the upper side (fig. 7),
drill where indicated by the scheme.
Thenfixthedoortothefrontpanelbymeans
of the screws N(fig. 8).
Fixing the hood to the cupboards
Apply the scheme N2 on the side of the
right cupboard, so that the side B
matches the front part of the cupboard
(disregardthethickness of the flap)and
drill two holes 2,5 mm diameter in the
points B1 and B2 (fig. 12).
Then apply the same scheme on the side of
the left cupboard, matching the side Cwith
the front part of the cupboard (disregard the
thickness of the flap).
Drilltwoholes2,5mmdiameterinthepoints
C1 and C2 (fig. 13).
Fix the hood to the cupboards by means of
the screws T(fig. 14).
Therefore,neveruseanopenflameunder
thehood.When fryingfoods,neverleave
the pan alone because the cooking oil
could flare up.
— The hood must not be connected to fuel
exhaust flues (boilers, heating systems,
water heaters, etc.).
— Please, keep to the provisions of official
directivesregardingthequestionoffume
discharge.
— The manufacturers refuse to accept any
responsibility for damage to the hood or
its catching on fire because of failure to
observe the above instructions.
Suggestions for the installation and
use of the hood
— The horizontal sections of the pipe must
be slanted slightly upwards (about 10%)
toensureaneasyflowoftheairoutwards.
— The best performance of the unit is
obtained in the external exhaust model
(suction), therefore in the limits of the
possibilitiesitisadvisedtousetheexternal
exhaust (suction) type.
—Thebestperformancesare obtained with
short pipes (max. 4 m) and with few
curves.
Electric connection
Before completing any connection, make
surethehousevoltagecorrespondswiththe
voltage indicated on the label affixed inside
the hood.
The hood is supplied with a standard plug;
connect it to a correspondingly standard
socket. In the case is intended to connect
theappliancepermanentlytothemainsafter
having removed the plug supplied, must be
fitted a two-pole switch conforming to
regulations with an opening distance
between contacts of not less than 3mm
The manufacturers are not liable for any
problems caused by the user’s failure to
observe the above instructions.
GB

16 17
Replace the door, inserting it first in the
upper then in the lower slides, turn the rear
locking knobs and then mount the grill,
followinginreverse,theoperationsdescribed
underparagraph“InternalRecycleversion”.
Adjust the angle frame tightly to the
wall,making use of the appositescrews
Q(fig. 11).
Instructions of use
Hood model JDS 5320 is fitted with one
motor.
Thepowerisadjustedbymeansofa3-speed
switch.
To get best efficiency, we suggest to use
slow speeds in normal conditions and the
highest in particular cases of strong smell
and vapour concentration.
Theswitchingplateisfittedwithtwoswitches
one for continuous adjustment of the
ventilator(topswitch)andoneforilluminating
the work surface (bottom switch) .
Itisadvisabletoswitchontheextractorhood
a few minutes before starting cooking and
thentoleave it running forapproximately15
minutesafterwardstoensurethatall odours
are extracted.
Attention!
The hood doesn't light-ON if the flap is
not mounted
Maintenance
Before performing any maintenance
operation, disconnect the hood from the
electricity.
Grease filter
The hood has a metal grease filter.
To clean the filter, proceed as follows:
— Open the grill by turning locks D(fig. 3).
— Extract the filter Vafter removing the
clamps U(fig. 15).
— With normal use, the grease filter should
bewashedonceamonthinadishwasher
orinwarmsoapywaterandshouldbeleft
to dry before being refitted.
When cleaning the grease filter, we
recommend washing the grill too with warm
water and soap.
A thin synthetic filter may be used as an
alternative to the metal filter.
This filter should be replaced when the
colouring of the upper part shows on the
bottom part.
Carbon filter
The active carbon filter serves to dissolve
odours from food that is cooking.
Change the filter at least once every 6-8
months.
It cannot be washed or regenerated.
To remove the carbon filter push the push-
buttons Ginwards and pull the filter
downwards (fig. 4).
Important
Failure to observe the rules for cleaning the
appliance and changing and cleaning the
filters may cause fires. Therefore, we
recommend observing these instructions.
Changing the bulbs
— Disconnect the hood from the electricity.
— Remove the grill.
—Alwaysreplaceburn-outbulbswitholive-
shaped max 40 Watt (E14) bulbs.
—BeforecallingforRepairservicebecause
the hood fails to light up, make sure the
bulbs are screwed in tightly.
Cleaning
To clean the outside of the hood use a cloth
moistenedwithdenatured alcoholorneutral
liquid detergents. Never use products
containing abrasive.
This appliance meets 87/308 EWG radio
and television noise standards.