Juralco DELFINA User manual

www.juralco.co.nz ph (09) 478 8018
™
Juralco Delfina Awning System Issue 10-23 v2
™
JURALCO DELFINA
AWNING SYSTEM
ISSUE 10-23 v2

Page 2
www.juralco.co.nz ph (09) 478 8018
™
Juralco Delfina Awning System Issue 10-23 v2
™
Juralco Delfina Awning System
Juralco Aluminium Building Products Ltd designs and distributes specialist aluminium
joinery systems through a national network of franchised fabricators and agents.
For more than 25 years we have been at the forefront of specialist aluminium door and
window products suitable for New Zealand joinery and building methods. Our
comprehensive product range includes security and insect screens, balustrades and gates,
shutters and awnings, shower screens, wardrobe doors and organisers and internal doors.
™
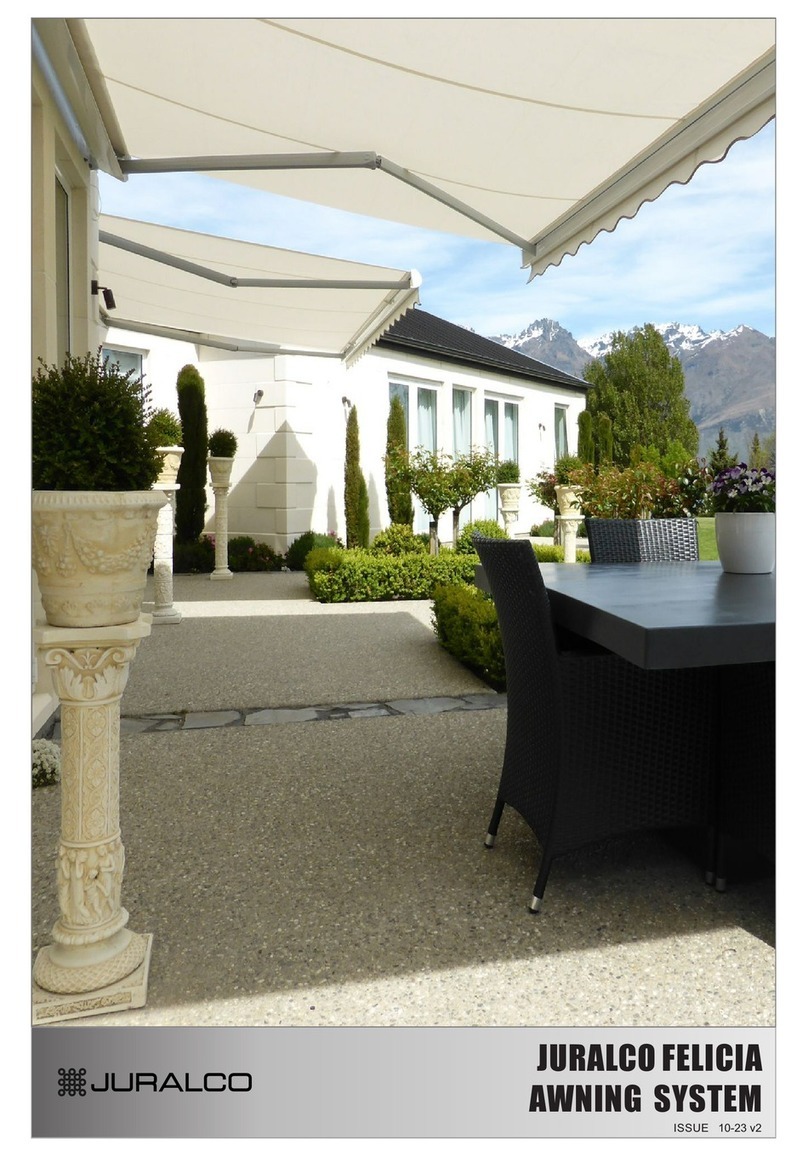
The Juralco Delfina Awning is a compact, ready-to-install, cantilevered folding twin arm
awning system designed for outside use where protection is needed from sun or light rain.
All the components are made from aluminium alloy or stainless steel, all powder coated,
™
forming a highly-resistant, lightweight, rust-proof construction. Delfina Awning operation
is either manual or by an inline tubular electric motor, fitted with a remote control. A wide
range of attractive mildew and UV resistant 100% acrylic fabrics are available, all with a 5
year guarantee. These are also semi-translucent letting through a small percentage of light.
General Description
™
- The Juralco Delfina Awning system is available as a single unit up to 5.9m wide, with a max 3.5m outward awning extension.
When shut enclosed in a weather tight box.
- Typical applications include Decks, Bars, Shops, Terraces, or anywhere needing protection from the sun, or unexpected light rain showers.
- Standard finishes - The Enclosing Box Powdercoated to your choice. All Internal metal parts silver.
The awning is supplied pre assembled, all necessary brackets, awning roll and necessary arm units.
- Roller Assembly - Roller tube axle. End Cap Mounting brackets. Additional roll supports for wide awnings.
- Awning fabric - Over forty styles available, all mildew, UV resistant and Scotchguard treated. All semi-translucent.
- Drive - Manual - A gearbox fitted to the end of the roller tube engages with a Gearbox handle to Open/shut the Awning
- Drive - Motorised - An inline tubular motor retracts the awning.
The motor is wired to a 3 position switch (in-off-out). With an upgraded Motor, remote wireless controls available
including Wind or vibration sensors
- Arms - Factory set spring loaded arms evenly tension the fabric cover, and absorb movement in windy conditions.1.5m to 3.5m projections
- Slope - Awning angle adjustable from straight horizontal to 45 degrees down. 15 deg Standard setting.
- Wind - As for all Awnings, care must be taken when installing in Wind prone areas.
All pages © Copyright Juralco Aluminium Building Products Ltd, 2023

Page 3
www.juralco.co.nz ph (09) 478 8018
™
Juralco Delfina Awning System Issue 10-23 v2
Planosol Awning Fabric. Planosol is manufactured from 100% acrylic fibre and will retain a light fastness rating of 6-8 on a 1-8 scale.
Planosol is very tightly woven, with minimal light transmission, resulting in excellent UV protection. It has Ultraviolet Protection
factor of 50+, maximum value granted for percentage of protection against UV ray and SPF 100. Planosol fabric will remain rot
resistant for 5 years under normal exposure conditions.
™
Juralco Delfina Awning System - Specifications, Powder Coating
Juralco Aluminium Building Products Ltd (JABP)
1. Scope
- This specification details the documents the Juralco Delfina Awning System refers to in relation
™
to the manufacturer's documents, products used in the System, requirements in relation to fixing
and surface finishing.
2. Products
- Only extrusions, components and hardware supplied by or specified by JABP may be used in the Juralco Delfina Awning System
™
- Aluminium extrusions, components and hardware – unless specified are manufactured to 6060 T5 specifications
- Stainless Steel components, hardware, fixings – all components to 316 grade
3.Surface Finishing
- Juralco Aluminium Building Products Ltd is a Dulux Registered Applicator site, registration number 2101.
JABP uses only Dulux branded powder coating materials
®
- Dulux Duralloy powder coating systems are suitable for properties greater than 100m from high tide level
AAMA 2603 performance. Residential buildings, 3 levels max. Warranty 10 yrs
®
- Dulux Duralloy Plus powder coating systems are suitable for properties greater than 10m from high tide level.
AAMA 2603 performance. Residential and Light commercial buildings, 3 levels max. Warranty 15 yrs
®
- Dulux Duratec powder coating systems are suitable for properties greater than 10m from high tide level
AAMA2603 and 2604 performance. All Residential and Commercial buildings. Warranty 25 yrs
4. Installation and Fixing
- The Juralco Delfina Awning System must only be installed in accordance with the Juralco Delfina Awning System manual
™ ™
- The Juralco Delfina Awning System must only be fabricated/installed by a Juralco approved fabricator
™
Specifications for Juralco Delfina Awning System
™
Specifications for Juralco Delfina Awning Fabrics
™
.
® ® ®
Powdercoat Systems is Also Duralloy and Duratec . The new standard Dulux powder coating system used by Juralco Duralloy Plus .
® ® ®
All as per specs above. Juralco Powder coated prices are for Duralloy Plus and Duralloy (same pricing). Duratec prices on application.
Important information - Powder Coating systems.
Attachment to structures A PVC Tape or similar material spacer must be used to separate powder coated aluminium items from all concrete
and steel structures. Failure to do so can lead to the chemicals in the structure affecting the powder coating, leading to corrosion.
Swimming Pools The chlorinated water in swimming pools can cause the deterioration of powder coated surfaces, leading to corrosion
of the underlying surface. It is recommended that Powder coated surfaces be 1200mm min from a pool.
Care The Dulux powder coating warranty period is conditional upon the surface being maintained
in accordance with the Dulux ‘Care and Maintenance Instructions’. Download from Dulux or refer to the back page of this manual.
Heading
Pages
Description
Specifications
3
Juralco specification sheet and Powder coating recommendations
General layout
4
Shows Layout breakdown and Part identification
Extrusions
5
Shows Extrusions used for the Delfina
Components
6 - 9
Shows all Components
Electrical
10 - 11
Shows all Motors and Wireless options, and Wiring Diagrams
Wind Speed
12
Shows Adjustments for Wind Speeds
Awning Dimensions
13
Shows Projection/Angle/Drop and BracketsWidth
Installation
14 - 16
Shows Installation tips
Order Page
17
Shows Order page and options
Building Consents
18
Shows details related to Building consents
PowderCoat
19
Shows details and recommendations re the care of Powdercoated surfaces.
Use the Bookmarks List to jump to selected pages
Index

Page 4
www.juralco.co.nz ph (09) 478 8018
™
Juralco Delfina Awning System Issue 10-23 v2
™
Juralco Delfina Awning System - General Descriptions
General
Mounting Brackets
With Face Fix (std) and optional Soffit fix brackets
Face Fix bracket (Cast aluminum)01
Soffit Bracket (Extruded aluminum)02
Roller
Roller tube 80mm dia (Extruded aluminum)10
Roller Mount and Box End Cap (Plastic)11
Tube end opposite12mm dia axis12
Compensating cradle (Plastic)13
Mounting Bar
40x40x4 mm RHS ( Extruded Aluminium)14
Operation
Gearbox. Motor, switch or remote control
Motor support20
230V Nice electric motor22
Crank (for Gearbox only)25
Folding Arms
Arm in extruded aluminum profile,
hardened aluminum articulation, double stainless steel
cables sheath. Aluminum arm end, stainless screws.
Arms30
Standard arm support (Extruded aluminum) 31
Arm attachment to Front Profile (Cast aluminum) 32
Reinforced Arm adaptor33
Box Profiles
Front Profile (Extruded aluminum) 40
Front Profile End Cap (Plastic)41
Front Profile Closing Seal43
Roller Awning support (Cast Aluminum)52
Bottom Profile (Extruded Aluminum)53
(clips in place as final install, with 54 below attached)
Male/Female Clip set (JOR639)54
Awning Fabric
Acrylic canvas. Planasol Range70
Mounting Brackets, support the whole awning. Made of cast
aluminium for Face fix installation. Up to 5 x needed for larger/windy
situations. Add extruded aluminium brackets for 80mm dia,with a groove
to fix the fabrics cover. One end equipped with the operating system
All held on place by moulded End Caps mounted to the 40mm sq bar
Mounting bar, 40sq x 4mm wall Aluminium RHS
Held in position with a minimum of two mounting brackets.
Operation by means of a gearbox/handle, R1/7 and R1/4.4 (with
limit stop) or tubular motor (with or without manual override).
Controls for the tubular motor; switch or wireless controls can be
mounted alongside or at a remote location. Also available are remote
wind actuated controls.
Folding arms, made of two extruded aluminium profiles connected
by means of a central cast aluminium hinge. One or two tension
springs (depending on the model) integrated in the back arm
guarantee the automatic extension of the arm and a perfect tension of
the fabrics in all positions.
The arms are linked to the Mounting Bar by means of aluminium
attachments. Four different arm projections are available, between
Box Profiles, Front profile extruded aluminium with arm attach
groove. Top and Bottom Profiles from extruded aluminium.
Weatherproof Seals when closed.
Bottom profile clips in place as final install
Slope adjustment; the awning can be adjusted between the
horizontal and 45 deg down. Factory setting is15deg down
Awning fabric Planasol Range.A selection of many fabrics in
various colourways.
Awning fabrics will withstand wind, rain and pollution.
The fabrics are colour durable and resistant to most common
chemicals, mildew, and UV degradation; all have a minimum
five-year guarantee.
Finishes, Enclosing Box, custom Powder coated. Arms Silver.
532
30
22
21
11
32
41
51
121
5254 14
33 31
7010
43
13 40
25

Page 5
www.juralco.co.nz ph (09) 478 8018
™
Juralco Delfina Awning System Issue 10-23 v2
™
Juralco Delfina Awning System - Extrusions
40
40
202
TOP PROFILE
JDA/403 9029/4
JDA/403 9029/5
JDA/403 9029/5.82
156
122
FRONT PROFILE
JDA/403 9052/4
JDA/403 9052/5
JDA/403 9052/5.82
BOTTOM PROFILE
JDA/403 9066/4
JDA/403 9066/5
JDA/403 9066/5.82
78/80 dia
BACK BAR
JDA/110 75/4
JDA/110 75/5.92
ROLLER TUBE, 78/80mm dia
JDA/110 74/4
JDA/110 74/5.82

Page 6
www.juralco.co.nz ph (09) 478 8018
™
Juralco Delfina Awning System Issue 10-23 v2
™
Juralco Delfina Awning System - Components
Face Fix Bracket
JDA/403 1241
Folding Arm Bracket
JDA/403 1276
Set = 2 off
175
60
40
Folding Arm Reinforced Bracket
JDA/403 2825
Locks the Arm Angle. Required (and Included)
for Awnings 2.5m Projection and over.
One per Arm
Fits on to the Folding Arm Bracket
5
80mm dia
13mmsq shaft
Roller Tube End Cap, Square
JDA/403 1325
80mm dia
12mm dia shaft
Roller Tube End Cap Round
JDA/403 1326
Soffit Fixing Bracket
JFA/SFBRKT
To be ordered ex factory individually
850mm
Manufactured ex 100mm x 50mm x 3mm (JA314/5.8).
Kit includes Bracket as above and 2 x End Caps
- Installer to cut down to size to suit
- Installer to drill own holes to suit
- Installer to RTV End Caps in place
- Installer to supply own Bolts/Coachscrews and JVB125 spacers if required.
End caps - 100 x 50
60
Ceiling Fix Bracket
JDA/403 9297 Bottom Profile Attach Clip Set
JOR639
300mm
Face Fix brkt attaches at front
Pelmet Clip
Female
Pelmet Clip
Male
MALE + FEMALE CLIP SET
3 pairs for Widths<4699
4 pairs for Widths>4700

Page 7
www.juralco.co.nz ph (09) 478 8018
™
Juralco Delfina Awning System Issue 10-23 v2
™
Juralco Delfina Awning System - Components
HeadBox End Caps
JDA/403 9041
Seals
Front Profile
Closing Seal
JPA/403 9388
Top BoardSeal
JDA/403 9089
Front Profile End Caps
JDA/403 9058(RAW)
Centre Support Set
JDA/403 3910
Roller Tube Bracket Set
JDA/403 3798
Front Hand Set
JDA/403 9021
Top Profile Support Bracket
JDA/403 9035
HeadBox End Caps Logo Holder
JFA/FDS/LOGOHOLDER
Logo
Use 3 for up to 3999mm wide
Use 4 for 4000mm and wider
Use 2 for up to 4699mm wide
Use 3 for 4700mm and wider

Page 8
www.juralco.co.nz ph (09) 478 8018
™
Juralco Delfina Awning System Issue 10-23 v2
™
Juralco Delfina Awning System - Components
JDA/403 9708/1.5 - 1500mm Projection (Single Wire)
JDA/403 9716/2.0 - 2000mm Projection (Single Wire)
JDA/403 9720/2.5 - 2500mm Projection (Double Wire)
JDA/403 9724/3.0 - 3000mm Projection (Double Wire)
JDA/403 9728/3.5 - 3500mm Projection (Double Wire)
Folding Arms
Set = Pair, 1 x RH, 1 x LH
Gearbox Handle
Gearbox Handle
Clip
JDA 4026500
JDA/403 0431 - 1200mm
JDA/403 0592 - 1400mm
JDA/403 0593 - 1600mm
JDA/403 0595 - 2000mm
Gear Ratio 1:9
Incorporates a Limit Stop
Manual 1:9Gearbox
/JDA 4032424
145 C/L gearbox
to bottom of Ring
65 dia
35
Gearbox Handle
connector Extension
/4032425JDA
100 high x 16 dia
Gearbox Handle
connector

Page 9
www.juralco.co.nz ph (09) 478 8018
™
Juralco Delfina Awning System Issue 10-23 v2
™
Juralco Delfina Awning System - Face Fix, Closed
215
40
121
240
Face Fix
Bracket
Top Profile Seal
Top Profile Support Bracket
Top Profile
Bottom Profile
(clip in) Folding Arms
Front
Profile
Awning
Optional
Front Profile
Valence attach
Front Profile
Closing Seal
Front
Bar

Page 10
www.juralco.co.nz ph (09) 478 8018
™
Juralco Delfina Awning System Issue 10-23 v2
™
Juralco Delfina Awning System - In Line Motors and Controls
Tubular Motors
JNICE ERA M 3017 and 5012
Tubular Motors 45mm dia
Mechanical Limit switches
Motor 3017 - 30Nm, 17rpm
Motor 5012 - 50Nm, 12rpm
Nice
Tubular Motors
JNICE ERA PLUS 3017 and 5012
Tubular Motors 45mm dia
Push Button Limit switches
Built in Wireless Receiver
& TTBus Technology
Motor 3017 - 30Nm, 17rpm
Motor 5012 - 50Nm, 12rpm
Nice
Motor Mount Brackets
JNICE/BRKT/ERAM
For 45mm dia Motors
Compact aluminium
support. 2 x holes M6 at
48 and 60mm CL
JNICE/WIND/S
Volo Wind Sensor
Wind Sensor threshold has
3 wind speed settings
15, 30, 45 Kph
Motor Remote
Control Sensors
JNICE/NEMOVIBE
Vibration Sensor
NEMO VIBE does not require
any additional connections
because it is battery powered.
It screw attaches to the front
of the awning. During windy
conditions, a signal (adjustable)
is sent via radio sensor to the
motor mounted in the awning,
which then retracts the awning.
Drive Wheel and Crown
JNICE/45ROUND78
For Switch Control For Remote Control
Wall Controls
3 position Rotary Wall Switch
Up - Off - Close
Cover Plate - SSW 770 CPSM
Switch - SSW 770 RSB
Manual Controls
Switch Controls
Wireless
Remote Controls
Wireless Receiver
Portable Wireless
Transmitters
P1 P6 P18
P1 Portable transmitter to control 1 electrical load system
or automation group
P6 Portable transmitter to control 6 electrical load systems or
automation groups for activation in single or multigroup mode
P18 Portable transmitter to control 18 electrical load systems or
automation groups for activation in single or multigroup mode
JNICE/BIDIAWNING. Nice controller for
Wireless operation.Can be added to
Switch operation and Manual override
Motors to make for wireless control
Wireless
Remote Controls

Page 11
www.juralco.co.nz ph (09) 478 8018
™
Juralco Delfina Awning System Issue 10-23 v2
Yellow
Label
Green
Label
Motor Power Cable
Connections at Motor
Remote Control
Wireless Controls
TTBus Motor fully tested
and Limits set at factory
Volo Wind Sensor 15kph Limit set at factory
(set limits available 5,10,15,30,45kph)
Mains
230V
50HZ
Active
Neutral
Earth
Brown
Blue
Yellow
Green
Brown
Blue
Yellow
Green
Black
White
Orange
White
White (only used at Factory)
JNICE/WIND/S
Volo Wind Sensor
Black
White
Orange
White
Manual Control
HPM Rotary
Switch Controls
Tubular Motors
JNICE ERA M 3017 and 5012
Motor Power Cable
Connections at Rotary Switch
3
C
1
2
Connections at Motor
Mains
230V
50HZ
Active
Neutral
Earth
Black - Down (or Up)
Black
Brown - Up (or Down)
Brown
Green/Yellow
Blue
One switch per Single Motor only.
Use relays if more than single Motor
Motor fully tested
and Limits set at factory
™
Juralco Delfina Awning System - In Line Motors and Controls
Wireless Remote Control
Portable Wireless Transmitters
P1 P6 P18

Page 12
www.juralco.co.nz ph (09) 478 8018
™
Juralco Delfina Awning System Issue 10-23 v2
Wind Speed Adjustment - Awning Retraction settings
01. Keep the n key pressed and wait for the motor to perform 2 movements. Upon completion, release the key.
02. Keep the t key pressed and wait for the motor to perform 3 movements. Upon completion, release the key.
03. Briefly press the s key a few times, depending on the level you want to set for wind threshold.
1 press = wind, 5 km /h
2 presses = wind, 10 km /h
3 presses = wind, 15 km/h (factory setting s)*
4 presses = wind, 30 km /h
5 presses = wind, 45 km/h
After about 10 seconds, the motor performs the number of movements indicated by the level number selected
Note – If this does not occur, cancel the procedure.
This way, the adjustment is completed without changing the factory setting.
.
04. Keep the n key pressed and wait for the motor to perform 3 movements. Upon completion, release the key.
Notes.
- When performing the procedure, you can cancel it at any time by keeping the n and t keys pressed
simultaneously for 4 seconds.
- Otherwise, do not press any key and wait 60 seconds for the motor to perform 6 movements.
- If you use a sensor equipped with a “trimmer”, you must read the sensor instructions and adjust the
threshold directly on the sensor.
5
sec.
01 02
5
sec.
04
1/
2/
3/
4/
5/
10
sec.
03
0,5
sec.
x 1 = vento a 5 Km/h
x 2 = vento a 10 Km/h
x 3 = vento a 15 Km/h (*)
x 4 = vento a 30 Km/h
x 5 = vento a 45 Km/h
5
sec.
3
2
?
3
x 1 = wind at 5 Km/h
x 2 = wind at 10 Km/h
x 3 = wind at 15 Km/h (*)
x 4 = wind at 30 Km/h
x 5 = wind at 45 Km/h
At the factory, the intervention threshold to is set at level 3 and to change it you must take the following steps
™
Juralco Delfina Awning System - Awning Retraction Wind Settings

Page 13
www.juralco.co.nz ph (09) 478 8018
™
Juralco Delfina Awning System Issue 10-23 v2
Measuring
Awning on site Check List:
1 - Check the desired width and installation area, making sure
there are no obstructions.
2 - Check that the desired number of wall/ceiling attach brackets
all have secure fixing points.
Note - the maximum separation of a fixing bracket
and the folding arm bracket is 150mm.
3 - Check the desired projection and angle, making sure there are
no obstructions. Standard horizontal to 45deg down.
Factory setting 15 deg down.
4 - Check the desired awning material.
5 - Check the desired method of operation.
Manual, choice of 2 x gearboxes.
Std Motor, switch operation
Premium Motor, wireless operation
and optional extra sensors - wind or vibration
Angle down
from Horizontal
Table showing Drop for various angles and Projections
Note - at 45 deg, Coverage = Drop
™
Juralco Delfina Awning System - Measuring, Brackets
Angle
deg 2000 2250 2500 2750 3000
10 347 391 434 477 521
Factory 15 518 582 647 712 776
20 684 770 855 941 1026
25 845 951 1057 1162 1268
30 1000 1125 1250 1375 1500
35 1147 1291 1434 1577 1721
40 1296 1458 1621 1783 1945
45 1414 1591 1768 1945 2121
Projection, mm
Drop
Coverage
Projection
Table showing Projections and Widths
Projection, mm
Width mm
Arm
Max
Min
Max
1500
1500
2000
5960
2000
2000
2500
2500
2500
3000
3000
3000
3600
3500
3500
4100
Bracket Numbers Depending on width and projection
attach brackets numbers and Compensator will differ.
Up to 4699mm Width.
2 x Brackets
4700mm+ Width.
3 x Brackets
+ Compensator kit
Attach Brackets
Wall (or Ceiling) attach
Bracket Position
As shown the maximum separation
of Mounting Bracket (Wall or Face)
and the Arm Mounting Bracket
in any system 150mm.
Arm Mounting
Brackets
150mm
Compensator Kit
at centre
2380 to 4699
Width Projection Max
3000
= 2 x Brackets
4700 to 5920 3000
= 3 x Brackets + Compensator

Page 14
www.juralco.co.nz ph (09) 478 8018
™
Juralco Delfina Awning System Issue 10-23 v2
™
Juralco Delfina Awning System - Installation
7-13-19mm
2 - 4 - 6mm
™
Juralco Delfina Awning System
For Wall or Soffit mounting
™
Juralco Delfina Awning System
Tools needed
1
1 - Use of the automatic wind system is strongly recommended. Adjust the Awning folding threshold, as indicated on the User manual.
2 - Recommendations for installing the Awning:
- The products must be installed in accordance with DTU 34.4 (available from AFNOR).
- The Awning must be placed on a facade, a roof return or a balcony. It must not be placed on a free structure.
- The winding tube must be perfectly horizontal.
- It is forbidden to modify the awning, to make holes in it not provided for in the installation instructions and to fix a screw, a rivet or any other
fixing element, on an area of the product not intended for this purpose. Strictly observe what is described on the product installation instructions.
Non compliance may cause premature degradation of the product or malfunction which will not be supported by Juralco
2
3 - Conditions to be able to carry out product maintenance and after-sales service:
- Provide as far as possible easy access to the Awning. In the case of installation of a product at height, provide access passageways or
a cradle available permanently without the need to set up scaffolding or a lifting platform.
- The peripheral covering around the product must not prevent easy access to the product, when opening and removing it.
4 - Fixing of the Awning:
- Taking into account the diversity of the supports (brick, concrete block, ...) and their difficulty of identification, you must observe precautions
particular during installation, in order to use the plug and the M12 threaded rod appropriate to the nature of the support.
Be careful not to set an Awning too near a wall corner to prevent the support from bursting during fixing or during loads to be supported.
Ask your dealer for advice.
- In the case of installation on insulation from the outside, check the conformity of installation according to DTU 34.4 then, if compatible, use fasteners
specific products developed for exterior insulation that are fixed to the load-bearing wall (brick, concrete block, concrete, etc.).
These are often equipped of a thermal break system. Ask your dealer for advice. Be careful not to apply pressure on the wall exterior and ensure
a perfect seal between the fasteners and the exterior wall using a UV resistant silicone cartridge, to prevent air and water leakage into the lining.
- Preferably use stainless steel rods, which are more durable over time, especially in corrosive environments (seaside, etc.)
- Prefer, as far as possible, the installation on a concrete Wall.
- If the support is brick or a crumbly stone, be careful not to use percussion when drilling the holes so as not to weaken the wall.
- In the case of laying on hollow materials (concrete block, bricks, etc.), these must be plastered or coated with
beforehand in order to increase the holding power. Use specific chemical anchors allowing you
the widest grip possible behind the first wall.
- Insert the rod with its nut using the awning installation support as a template.
Do not let the threaded rod protrude more than 2mm bin front of the nut.
In the case of chemical seals, allow the resin to set for the time indicated on the cartridge and
fix the supports by tightening the nuts by a hand tool.
WARNING
when unpacking the product
the Awning must always
be supported on
its bottom Face
For a 4-arm awning, the Awning is delivered in several separate packages
CONTENTS OF THE PACKAGE
Face Fix Soffit Fix
Compensators
Table of the maximum forces applied to each fixing pin: Fc (fyi, 1daN
≈ 1kg).
Make sure that the tensile load Fr of the wall complies with the condition Fr
≥ 2*Fc.
Awning Width (m) Width to 4.78m 4.785 to 11.82m
Face Fix 800 daN 900 daN
Soffit Fix 1100 daN 1100 daN

Page 15
www.juralco.co.nz ph (09) 478 8018
™
Juralco Delfina Awning System Issue 10-23 v2
™
Juralco Delfina Awning System - Installation
PREPARATION
2
1 - Place your awning in position at the foot of the installation location. The installation height must allow
a passage under the load bar of 1800 mm minimum (2100 mm recommended.)
The ideal slope is 300 mm per meter of fall
2 - Set up a level string simulating the final position of the Awning
3 - Temporarily position the Mounting Brackets on the 40mm sq square tube,
at the maximum distances from the arms as shown.
4 - Measure the respective position of the Mounting Brackets in order to
transfer these dimensions to the wall.
3FIXING MOUNTING BRACKETS
1 - Position the Brackets on the same
axis, at least 50 mm from a roof return.
50
1
22
2 - Mark the 122 mm center distance, drill. Then attach the brackets and shims if necessary.
Before complete tightening, check the vertical position of the supports and shims, playing
with the latitude allowed by the oblong holes.
It is imperative to use M12 screws in the 2 outer holes (122 mm apart)
Use the other hole in the center if needed
.
Warning - Awning with Soffit: do not mount the Soffit brackets immediately.
.
70
122
2
43
1
4ASSEMBLE TO WALL
1 - Present your awning to the front of the Mounting Brackets
Rest the bottom side of the 40mm sq square tube on the bottom lip of the Mounting Bracket (1)
2 - Engage the Awning assembly by rotating it and pushing it home (2).
3 - With reinforced arm support, insert a spacer (delivered separately in the package) through the screw into the support on the square tube.
The spacer (3) makes it it possible to limit the play between the tube and the screw and to prevent the latter from deformation.
4 - Install the hardware on each Mounting Bracket. Tighten the screw (4)
50 mm 50 mm
Inside
of Arm
100 max
30 min 100 max
45 min
Outside
of Arm
Note: The Bracket Screw (4)
MUST be installed and tightened
before the Awning can be extended

Page 16
www.juralco.co.nz ph (09) 478 8018
™
Juralco Delfina Awning System Issue 10-23 v2
™
Juralco Delfina Awning System - Installation
5SPECIAL ADJUSTMENTS AND RECOMMENDATIONS
ARM ADJUSTMENT WITH AWNINGS OVER 3615mm WIDE (REINFORCED ARM SUPPORTS)
The tilt and horizontality of the Front bar is adjusted with the Awning unfolded.
In the case of a motorized Awning, first connect to the mains to unroll the fabric.
To fit properly, the Front bar and Arms must be aligned with the 40mm sq tube.
This adjustment is made in the factory. If, however, adjustment is necessary, extend the awning approximately 300 to 500 mm and:
1 - Loosen nuts A and B using a size 19 wrench.
To adjust the inclination, relieve the stress on the arm by supporting it (operation to be performed by two people)
2 - Adjust the Inclination by adjusting Screw C
3 - Retighten Nuts A and B
Front
Bar
B
A
C

Page 17
www.juralco.co.nz ph (09) 478 8018
™
Juralco Delfina Awning System Issue 10-23 v2
1
Available
Projections
Select
Projection
Widths
Minimum
Enter Overall
Width
1500
2000
2000
2500
2500
3000
3000
3600
3500
4100
Specify Awning Fabric Colour and Code
3
Customer
Date
WO SO
Contact
Order No
$
Juralco Juralco Juralco
Select/Enter Dimensions below. Enter details/selections into all boxes. Then scan and send to [email protected]
AW #
DELFINA Awning System - Order Form
Delfina Awning
For Motor or Gearbox operation
Projection
Width Maximums = All 5900mm
4 Select Mounting Brkts+ No
Face Ceiling + Face
No Needed
7
5
Select Gear Box or Motor
Gearbox
Extended Soffit
Fixing Brackets.
Number, if required
JFA/SFBRKT
6
Select Motor
or Gearbox End,
viewed from Front
LH RH
Motor + Switch
Motor + Remote
Select
Fabric
Type
and Colour
Planasol
Dickson
Specify PC Colour and Code
Duralloy Plus
Duratec
Note: Arms Silver finish only
Select
Powder
Coat Type
and Colour
2
1200mm 1400mm
8
Notes:
1600mm 2000mm
Wall clip?
Volo Wind
sensor?
Yes
No
If Motor + Remote selected, these options apply
9
12
If Gearbox selected, Handle length
11 Additional Motor Remote Control?
BIDI/Awning + Portable controller.
Tick to select
P1 P6
P18
NemoVibe
sensor?
Yes
No
10
Select Projection
then enter desired
Overall Width
dimension
Unsuitable for use in Strong Wind Areas

Page 18
www.juralco.co.nz ph (09) 478 8018
™
Juralco Delfina Awning System Issue 10-23 v2
™
Juralco Delfina Awning System- Building Consents
These two pages are an extract from the Department of Building and Housing
- Building Work that does not require a Building consent - pages 21 to 24. Online at www.dbh.govt.nz/bc-no-consent
- These are new exemptions dated Dec 2010
While every effort has been made to ensure that this information is correct at time of writing, it is provided for guidance only and Juralco will accept
no liability for, nor warrants the accuracy of this guidance. It is the sole responsibility of the of the purchaser to confirm current status of consent
requirements with the relevant territorial authority before purchase and installation.
Awnings
Awnings.
Exemption (ja) of Schedule 1
A building consent is not required for the following building work:
(ja) the construction, alteration, or removal of any fabric, glass, or metal awning on any building that-
(i) is on the ground or first storey level; and
(ii) does not exceed 20 sqmt in size.
Guidance:
Awnings are usually coverings that are fabric, glass or metal. They are normally attached to the exterior of a building and are commonly used for
protection from sun, rain or as a wind buffer (eg, a shadesail or window awning). The installation of awnings that are 20 sqmt or less on any
building at a ground floor or first floor level will comply with this exemption.
Size is a factor for large awnings, as they can damage the walls they are attached to or adjacent property or potentially injure people in high winds.
Accordingly, any awnings larger than 20 sqmt require a building consent.
This exemption relates to awnings which are currently attached or are to be attached to a building’s external envelope or exterior surfaces.
Awnings may be removed, altered and constructed, providing this work complies with the Building Code. Particular emphasis should be placed on
weather tightness detailing when removing, altering and constructing such structures. All mechanical connections (eg, nuts, bolts, coach screws
etc) which penetrate the building envelope and provide support to awnings must provide adequate resistance to moisture getting into the structure.
Please note, this exemption does not relieve the owner of any other requirements under the Resource Management Act 1991 and or local district plan
rules and provisions.
Examples where this exemption could apply:
A shadesail is to be attached above a deck at first floor level of a dwelling. The proposed shadesail has a total area of 18 sq mt, and meets
all Building Code requirements.
The removal of an existing 12 sqmt awning providing shade at the entry to a building (situated at first floor level).
Examples where building consent is required:
A glass awning is to be fitted to an apartment on the sixth floor of the building. Though the awning has a total coverage of 14 sqmt, it is not
exempt because of its height above ground and a building consent is required.
Territorial authority discretionary exemptions
Exemption (k) of Schedule 1
A building consent is not required for the following building work:
(k) any other building work in respect of which the territorial authority (or, as the case requires, the regional authority) considers that a building
consent is not necessary for the purposes of this Act because that building work-
(i) is unlikely to be carried out otherwise than in accordance with the building code; or
(ii) if carried out otherwise than in accordance with the building code, is unlikely to endanger people or any building, whether on the same
land or on other property.
Guidance:
Exemption (k) allows a discretionary decision to made by a territorial authority (city or district council) or regional authority (regional council) to exempt
proposed building work from the requirement to obtain a building consent in the circumstances specifed in (i) and (ii), above.
Members of the public may ask their local council to consider their proposed building work under this exemption. However, the decision to allow any
exemption under this part of Schedule 1 is totally at the council's discretion, based on the risk of building work not complying with the Building Code or
endangering people or property.
Local councils should have procedures for making formal decisions under exemption (k) to exempt building work, that meet the specific criteria of (i)
and (ii) above, from the requirement to obtain a building consent.
In all cases, the Department recommends that the decision, reason for the decision and the outcome of the decision be recorded by the local council
and placed on the property file that relates to the building work.
Territorial Authority discretionary exemptions

Page 19
www.juralco.co.nz ph (09) 478 8018
™
Juralco Delfina Awning System Issue 10-23 v2
Warning re use of solvents:
- In some cases strong solvents are recommended for thinning various types of paints and also for cleaning up mastics and sealants.
- These can be harmful to the extended life of the powder coated surface, and must not be used for cleaning purposes.
- It is important to note that the damage will not be visible immediately and may take up to l2 months to develop.
If paint splashes or sealants and mastics need to be removed then the following may be safely used:
Methylated Spirits, Ethyl Alcohol, lsopropanol or preferably a mild detergent in warm water.
Joinery Protection during Installation:
All the activity on a construction site means that your powder coated items
may get knocked or scratched, splattered with mortar,
plaster, textured coating or paint during the later stages of construction.
Please ensure that all powder coated articles are masked or covered at this time.
It is far easier to prevent accidents than to try and correct them.
Should your joinery receive mortar or paint splashes see that these are removed
before cure and follow the instructions contained in this brochure.
“IMPORTANT ALL TRADES”
This valuable aluminium joinery will suffer
permanent damage from: plaster, mortar
and paint splashes - Protect if splashes
occur - Immediately wash down joinery
with water or meths - Do not allow
splashes to harden! ~ Do not use solvents!
- Do not remove this label until final clean
completed.
This photograph display damage that has occurred on site, post
installation. The photo of the masked joinery displays clear signs
of damage that could have occurred were it not masked. Please ensure that
your joinery is protected right through the entire construction process.
External - Maintenance Program:
To extend the life of external powder coated articles and to comply with warranty
requirements for powder coated aluminium joinery, a simple, regular
maintenance program must be implemented.
The effects of ultra violet light, atmospheric pollution, dirt, grime and
airborne salt deposits will all accumulate over time and must be removed
or surface staining and weathering will occur, leading to an unsightly appearance.
For external coatings, cleaning should take place every six months. ln areas
where pollutants are more prevalent, such as beachfront houses and
industrial or geothermal areas, then a cleaning program should be carried
out on a more frequent basis ie. every one to three months.
Cleaning your powder coating:
1. Carefully remove any loose surface deposits with a wet sponge.
2. Use a soft brush (non abrasive) and a mild household detergent (do
not use solvents) in warm water, remove dust, salt and other deposits.
3. Rinse off with clean fresh water.
Restoring weathered or scratched surfaces:
Repair of Scuffed or Scratched surfaces
Dulux Spray Cans are available in all colour card colours.
Repair of Small Scratches or Chips.
Dulux Dabsticks are ideally suited for the repair of small scratches.
Dabsticks may not be available in all colour card colours.
Repair of Weathered areas .
Dulux Gloss Up is a light to medium cutting cream ideally
suited for gloss restoration and has been specifically designed for this purpose.
Gloss Up contains no waxes or silicone and is a one step system.
Typical sticker used to warn
other trades of the need to
protect and mask off
powder coated joinery
(applies to anodised joinery also)
Contact Dulux Powder Coatings , ph 0064 9 441 8244
Powder Coating Maintenance
Powder Coating Installation Care
™
Juralco Delfina Awning System - Powder Coating Care and Maintenance
All pages © Copyright Juralco Aluminium Building Products Ltd, 2023
Table of contents
Other Juralco Lawn And Garden Equipment manuals