Issue 2/19
www.juralco.co.nz ph (09) 478 8018 Juralco Venette™ Retractable Pleated, Insect Screen Systems Page 2
Juralco Aluminium Building Products Ltd designs and distributes specialist aluminium
joinery systems through a national network of franchised fabricators and agents.
For more than 25 years we have been at the forefront of specialist aluminium door and
window products suitable for New Zealand joinery and building methods. Our
comprehensive product range includes security and insect screens, balustrades and gates,
shutters and awnings, shower screens, wardrobe doors and organisers and internal doors.
Juralco Sheer Retractable Pleated Insect Screens are suitable for Window
or Door openings. The Doors have low profile tracks to guide and retain the mesh making
the Juralco retractable pleated insect screens the ultimate in insect screening solutions.
Custom made in a variety of powder-coat colours.
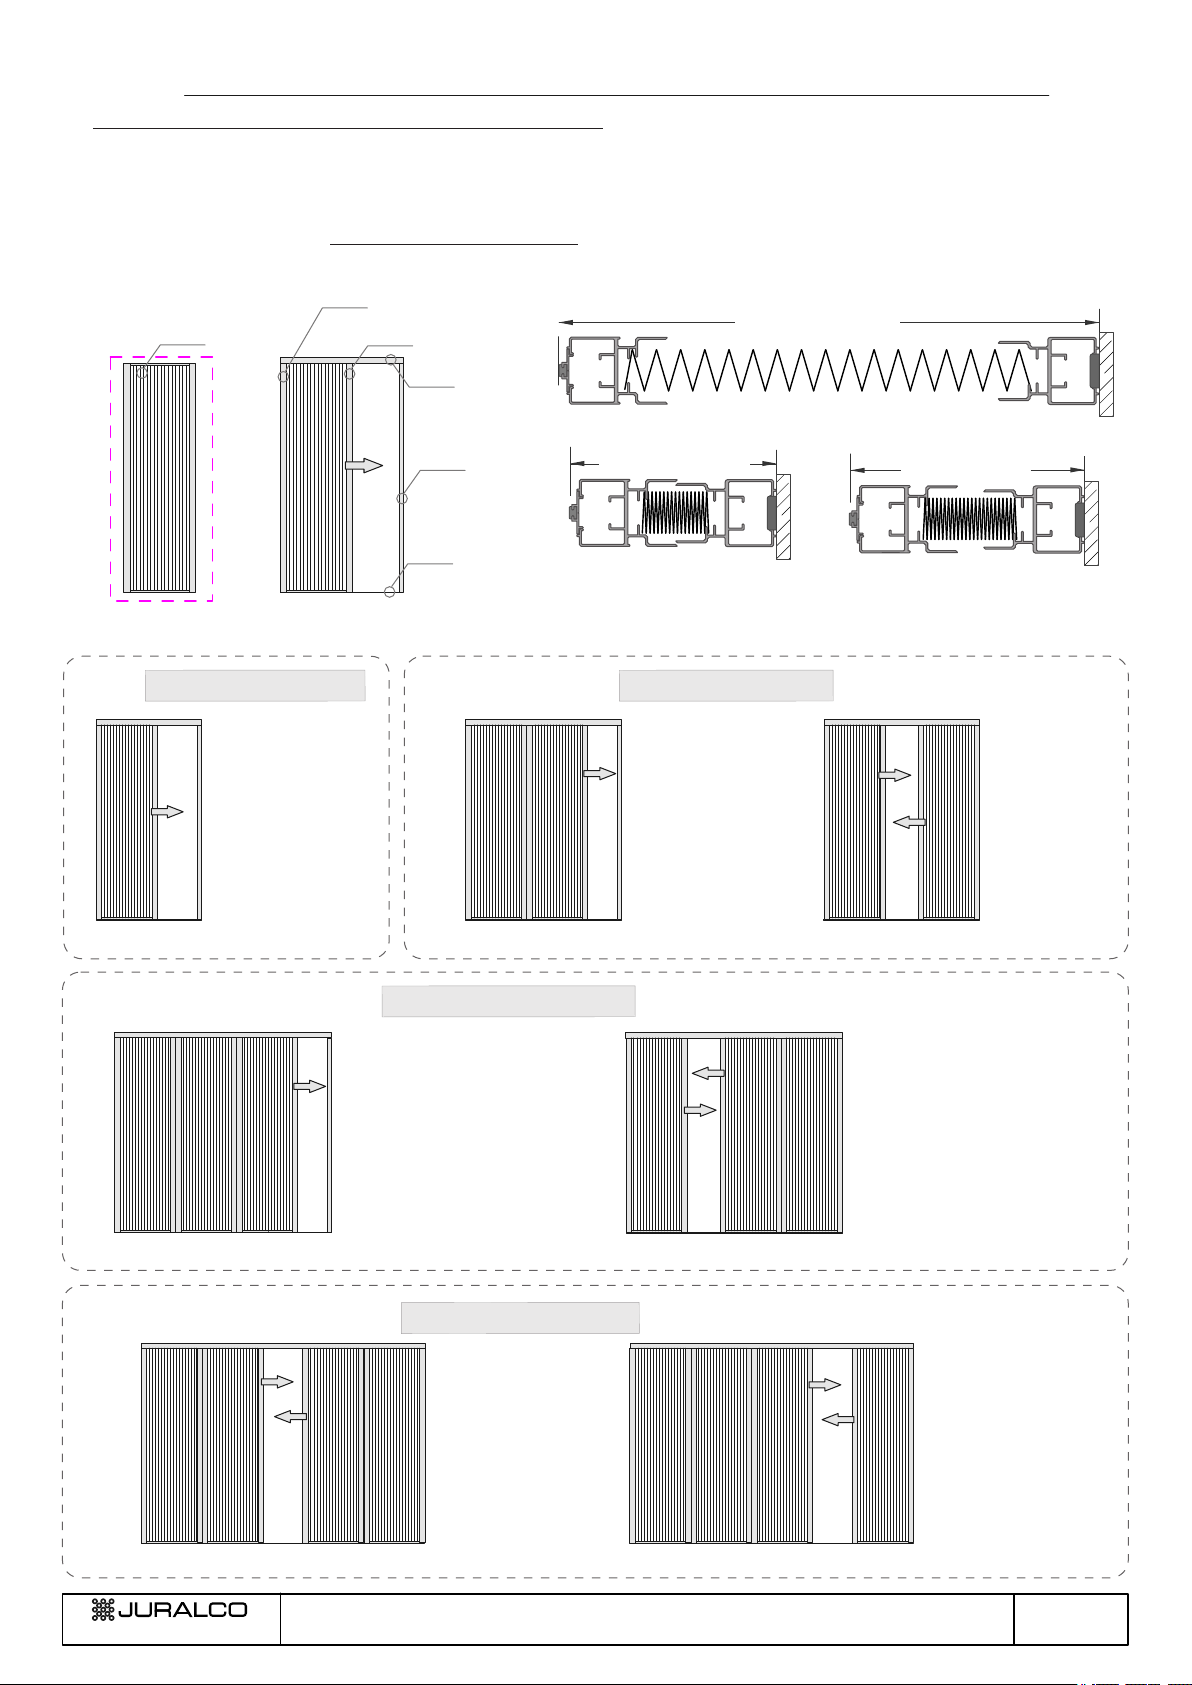
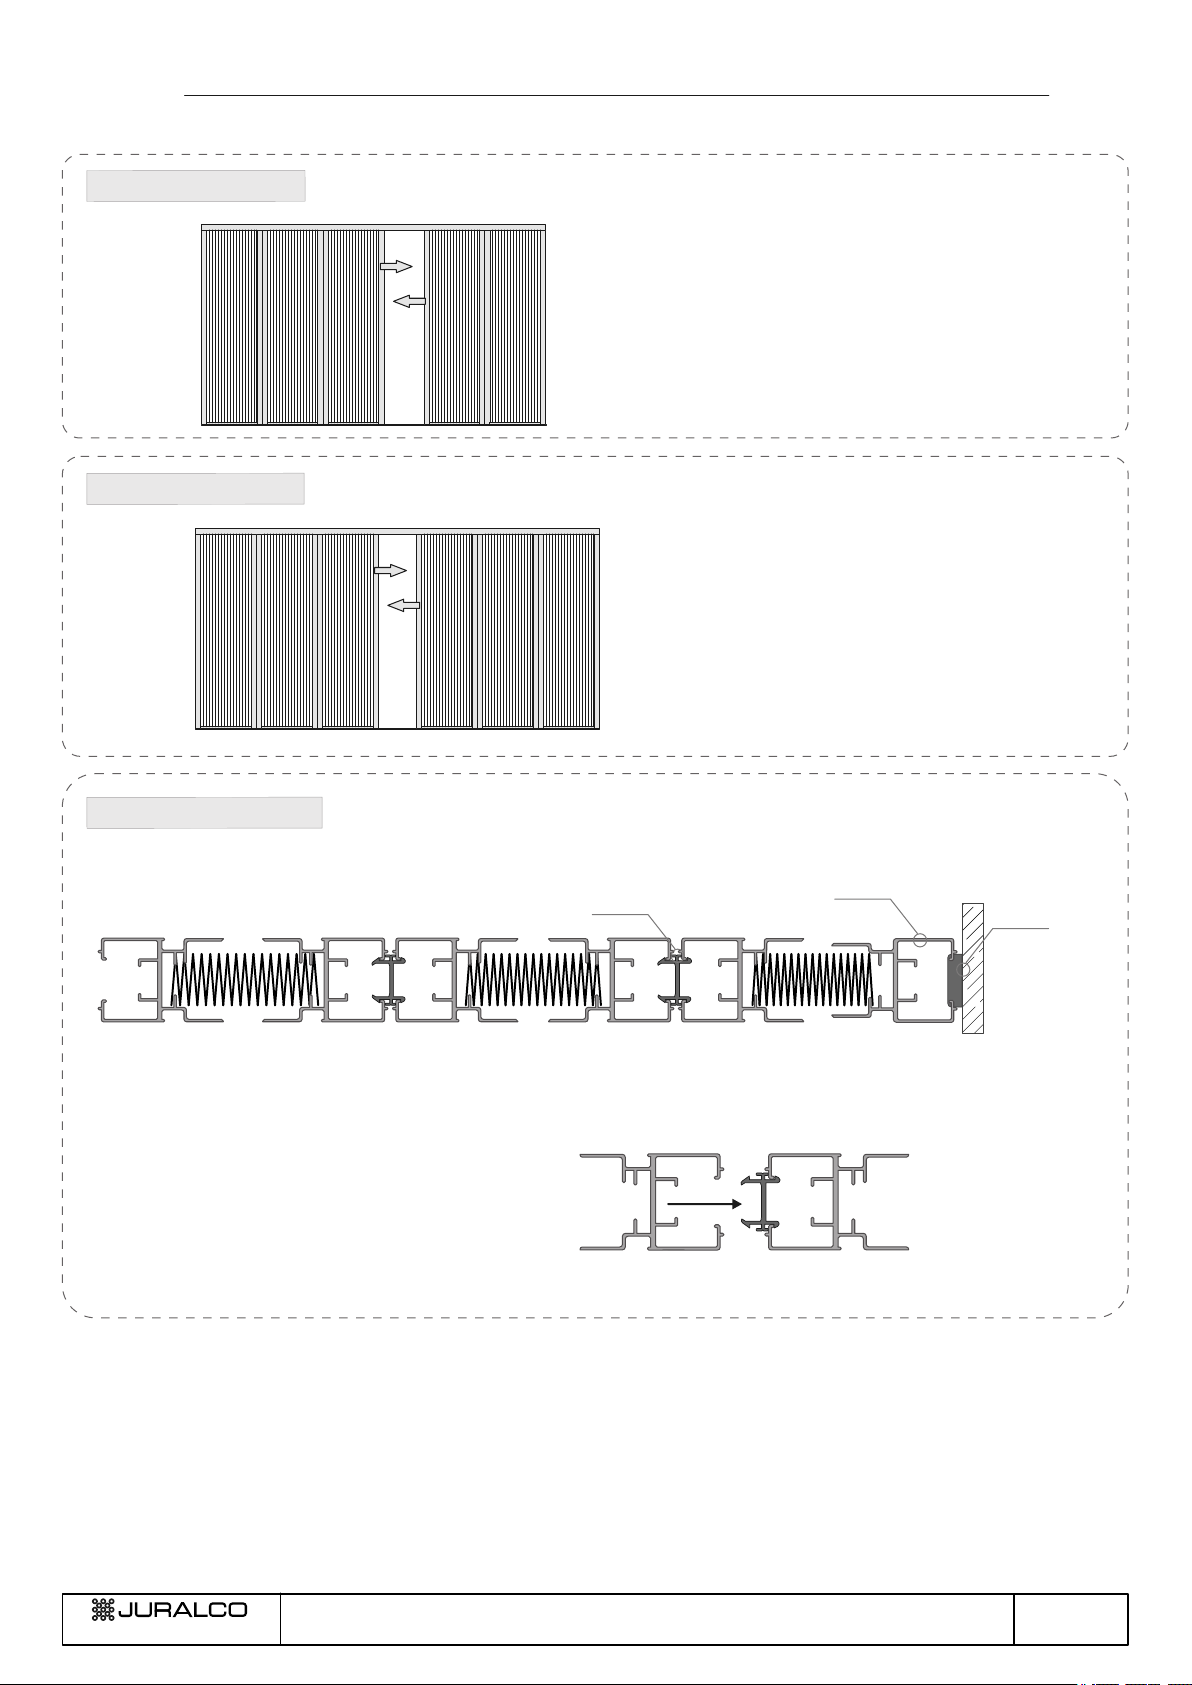
Juralco Venette™ Retractable Pleated Insect Screen Systems
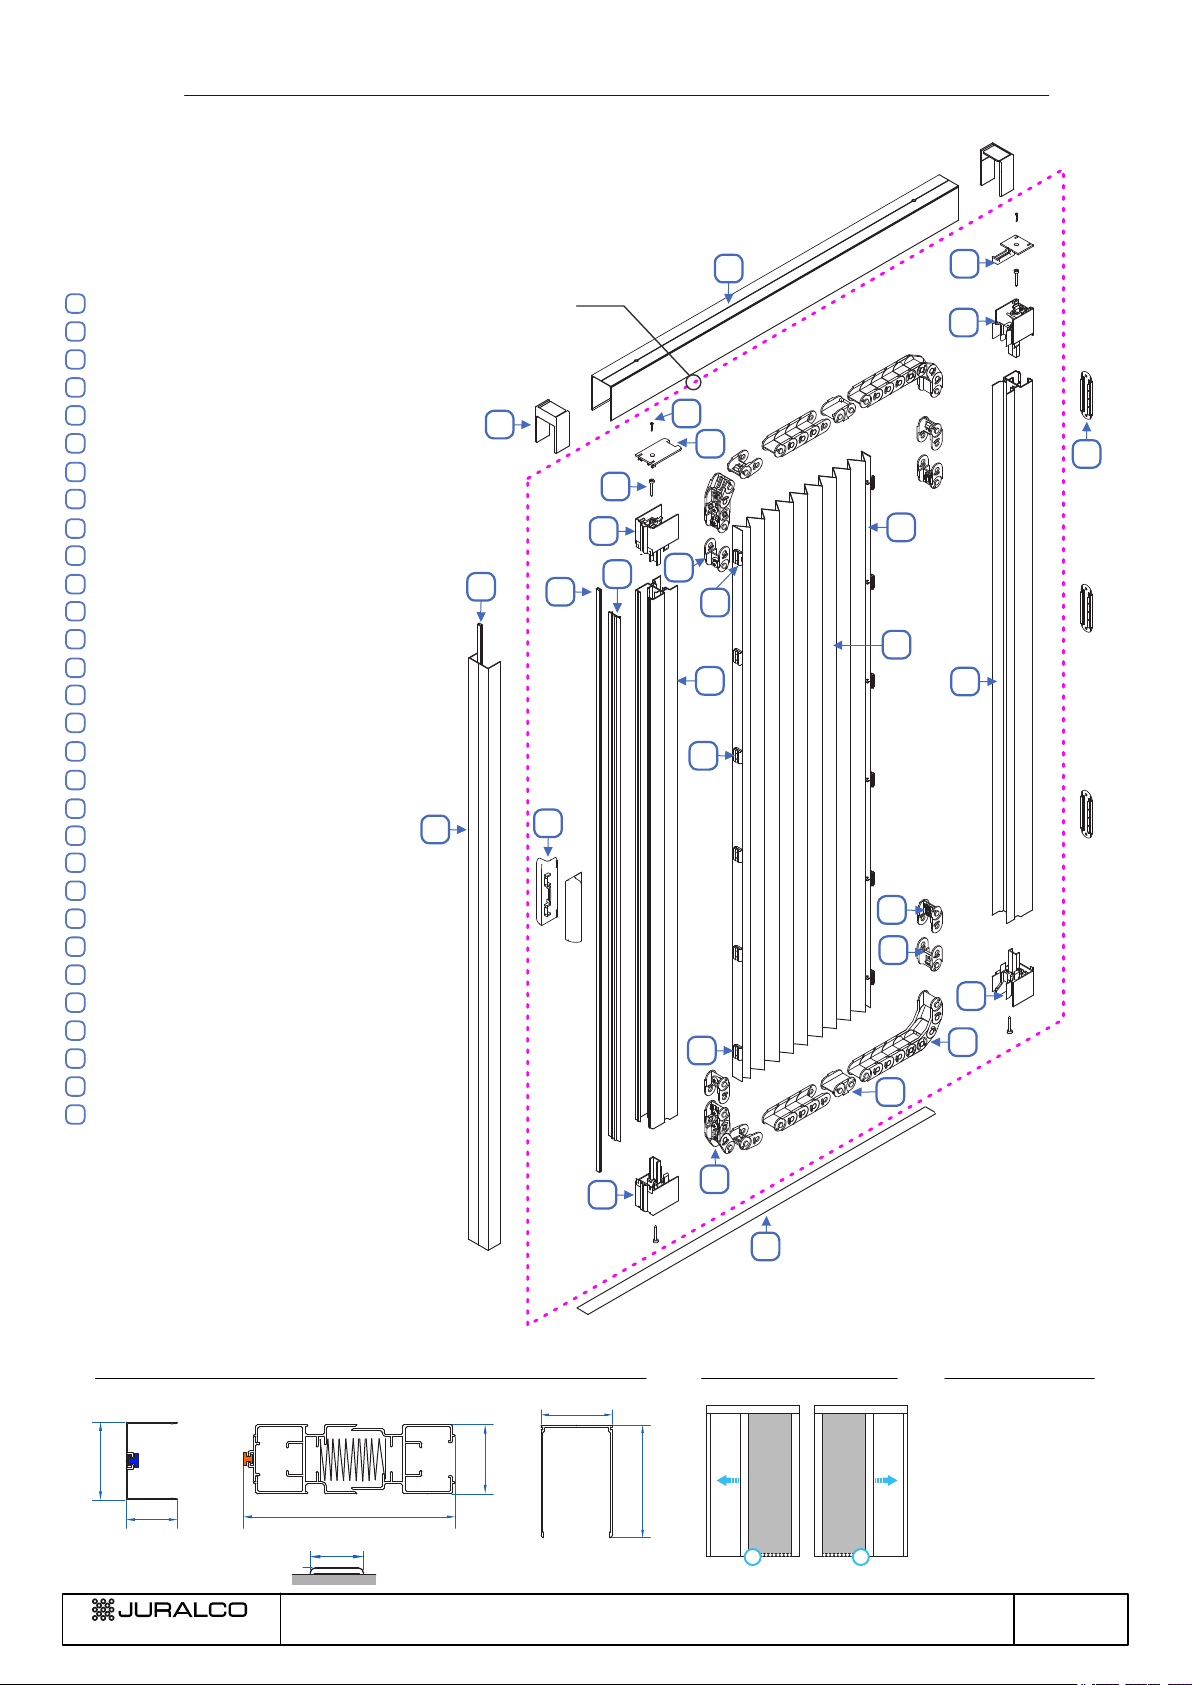
Section 1 - Venette™ Retractable Pleated Insect Screen - Single + Multiple Doors
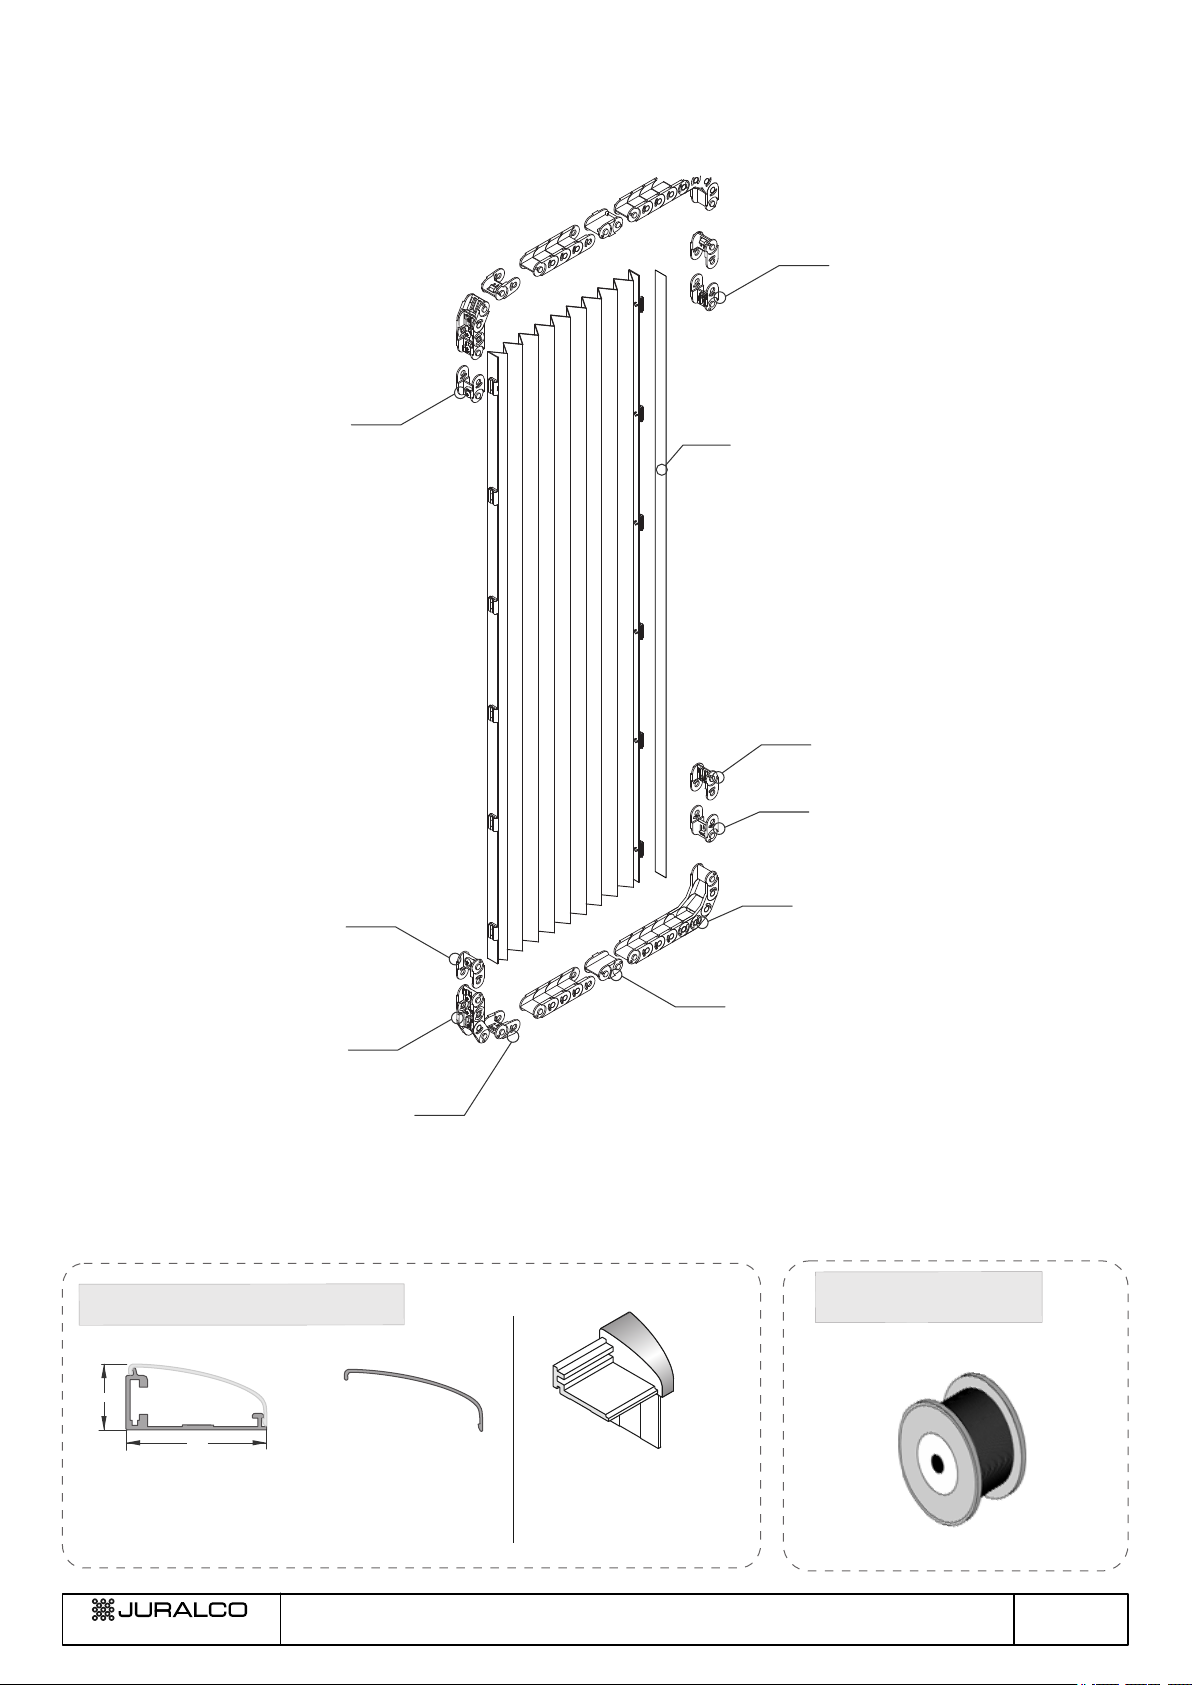
Showing typical component layouts
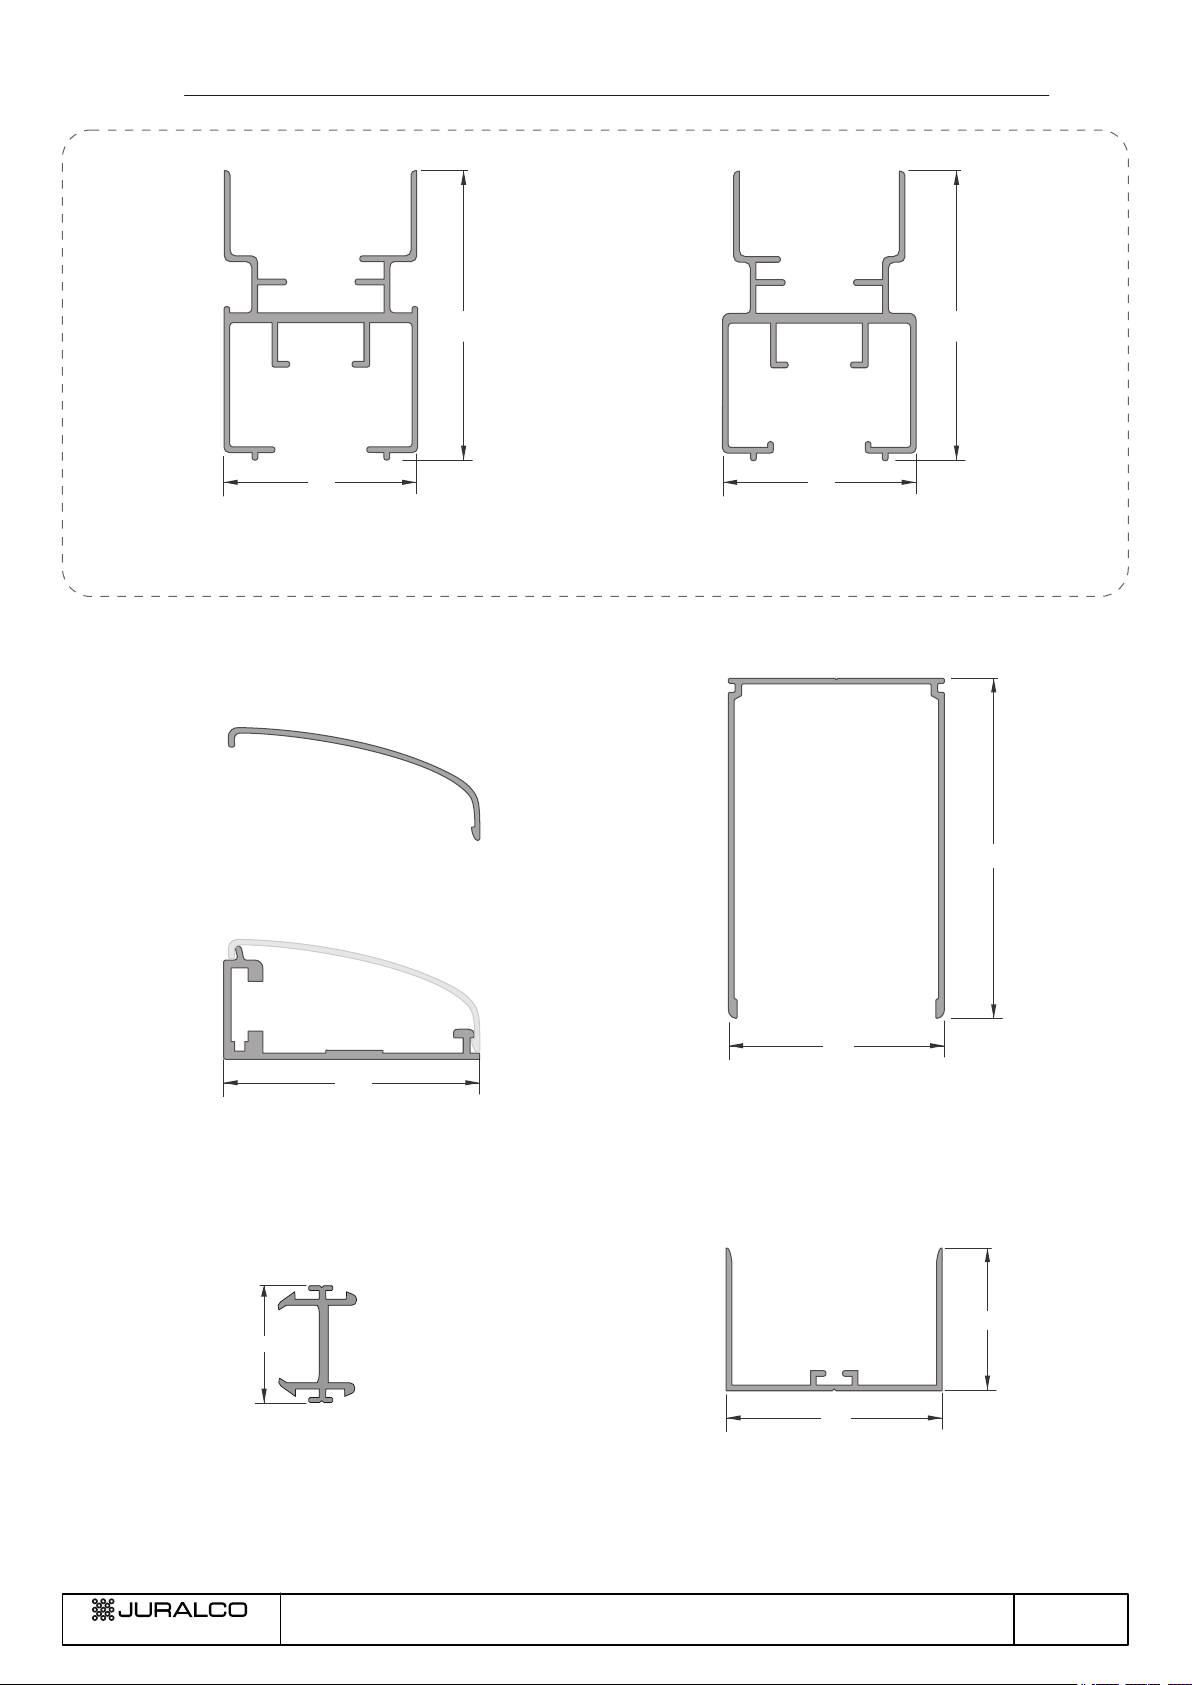
All Extrusions and Components
Shows construction of a Build out Frame
Detailed step by step by guide to cut, install and adjust
Instructions for Cleaning a Venette screen - Applies to all Pleated Screens
Juralco Order Form - Venette Doors
Section 2 - Venette™ Retractable Pleated Insect Screen - Vertical Window
Showing typical component layouts
All Extrusions and Components
Detailed Installation instructions
Juralco Order Form - Venette Vertical Windows
Section 3 - Venette™ Retractable Pleated Insect Screen - Horizontal Window
Showing typical component layouts
All Extrusions and Components
Detailed Installation instructions
Juralco Order Form - Venette Horizontal Windows
Care of Powder Coated surfaces
All pages© Copyright Juralco Aluminium Building Products Ltd, 2019
Index