manuals.online logo
Brands
  1. Home
  2. •
  3. Brands
  4. •
  5. Juralco
  6. •
  7. Lawn And Garden Equipment
  8. •
  9. Juralco SOLEIA User manual

Juralco SOLEIA User manual

Page 1
Juralco Soleia Awning System
www.juralco.co.nz ph (09) 478 8018
Issue 10-23 v2
ISSUE 8/15
Page 1
Juralco Glass Pool Gate System
www.juralco.co.nz ph (09) 478 8018
Issue 8/15
JURALCO SOLEIA
AWNING SYSTEM
ISSUE 10-23 v2
Page 2
Juralco Soleia Awning System
www.juralco.co.nz ph (09) 478 8018
Issue 10-23 v2
Juralco Soleia Awning System
Juralco Aluminium Building Products Ltd designs and distributes specialist aluminium
joinery systems through a national network of franchised fabricators and agents.
0
For more than 25 years we have been at the forefront of specialist aluminium door and
window products suitable for New Zealand joinery and building methods. Our
comprehensive product range includes security and insect screens, balustrades and gates,
shutters and awnings, shower screens, wardrobe doors and organisers and internal doors.
0
The Juralco Soleia Awning is a compact, ready-to-install, cantilevered folding twin arm
awning system designed for outside use where protection is needed from sun or light rain.
All the components are made of aluminium alloy, ABS plastic or stainless steel, forming a
highly-resistant, lightweight, rust-proof construction.
General Description
- The Juralco Soleia Awning system is available as a single unit up to 5.92m wide, with a max 4.0m arm extension.
- Typical applications include Decks, Bars, Shops, Terraces, or anywhere needing protection from the sun, or light rain.
The awning is supplied pre assembled, with all necessary brackets, fabric roll and twin folding arms.
- Box - Supplied as a single, enclosed unit complete with mounting brackets. Attachment by brackets, either wall or soffit mount.
- Awning fabric - Many colours available, all mildew and UV resistant.
- Drive - Motorised - An inline tubular motor extends/retracts the awning automatically.
Remote wireless controls to operate the Awning. Optional wind or vibration sensor.
- Arms - Factory set spring loaded arms evenly tension the fabric cover, and absorb movement in windy conditions.
- Slope - Awning angle adjustable.
- Finish - All Aluminium, powder coated colour of your choice. Arms powder coat Silver only.
- Wind - As for all Awnings, care must be taken when installing in Wind prone areas. A Volo wind sensor is strongly recommended.
All pages © Copyright Juralco Aluminium Building Products Ltd, 2023
Heading
Pages
Description
Specifications
3
General arrangements and Powder coating + Awning Fabric specifications
Extrusions
4
Shows Extrusions used for the Delfina
Components
5
Shows all Components
Electrical
6 - 7
Shows all Motors and Wireless options, and Wiring Diagrams and Wind settings
Assemblies
8 - 9
Shows Assemblies
Awning Dimensions
10 - 14
Shows Projection/Angle/Drop and BracketsWidth
Installation
15 - 17
Shows Installation tips
Order Page
18
Shows Order page and options
Building Consents
19 - 21
Shows Factory asslemby tips
PowderCoat
22
Shows details and recommendations re the care of Powdercoated surfaces.
Index
Page 3
Juralco Soleia Awning System
www.juralco.co.nz ph (09) 478 8018
Issue 10-23 v2
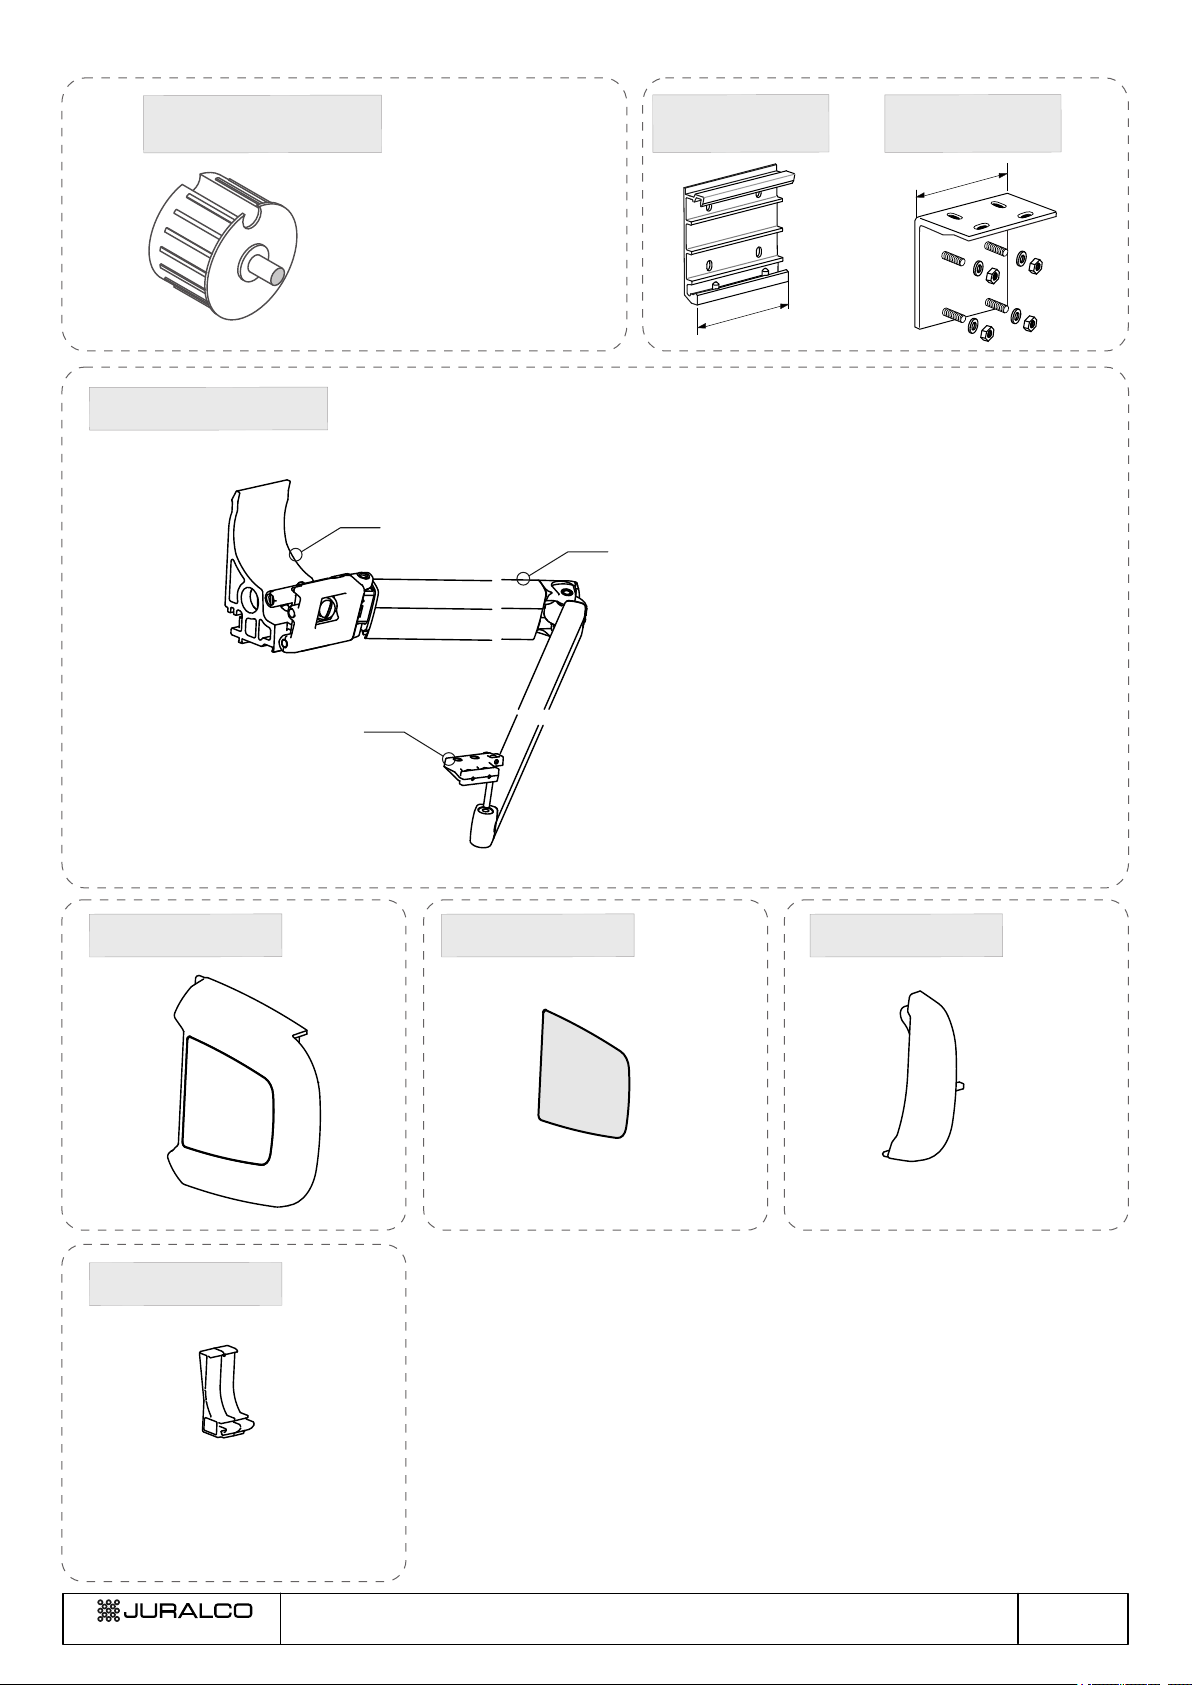
Juralco Soleia Awning System - General Arrangement
General Arrangement
30
11
10
1
2 (if needed)
12
20 LH
24RH 25
21LH
26
Fixings
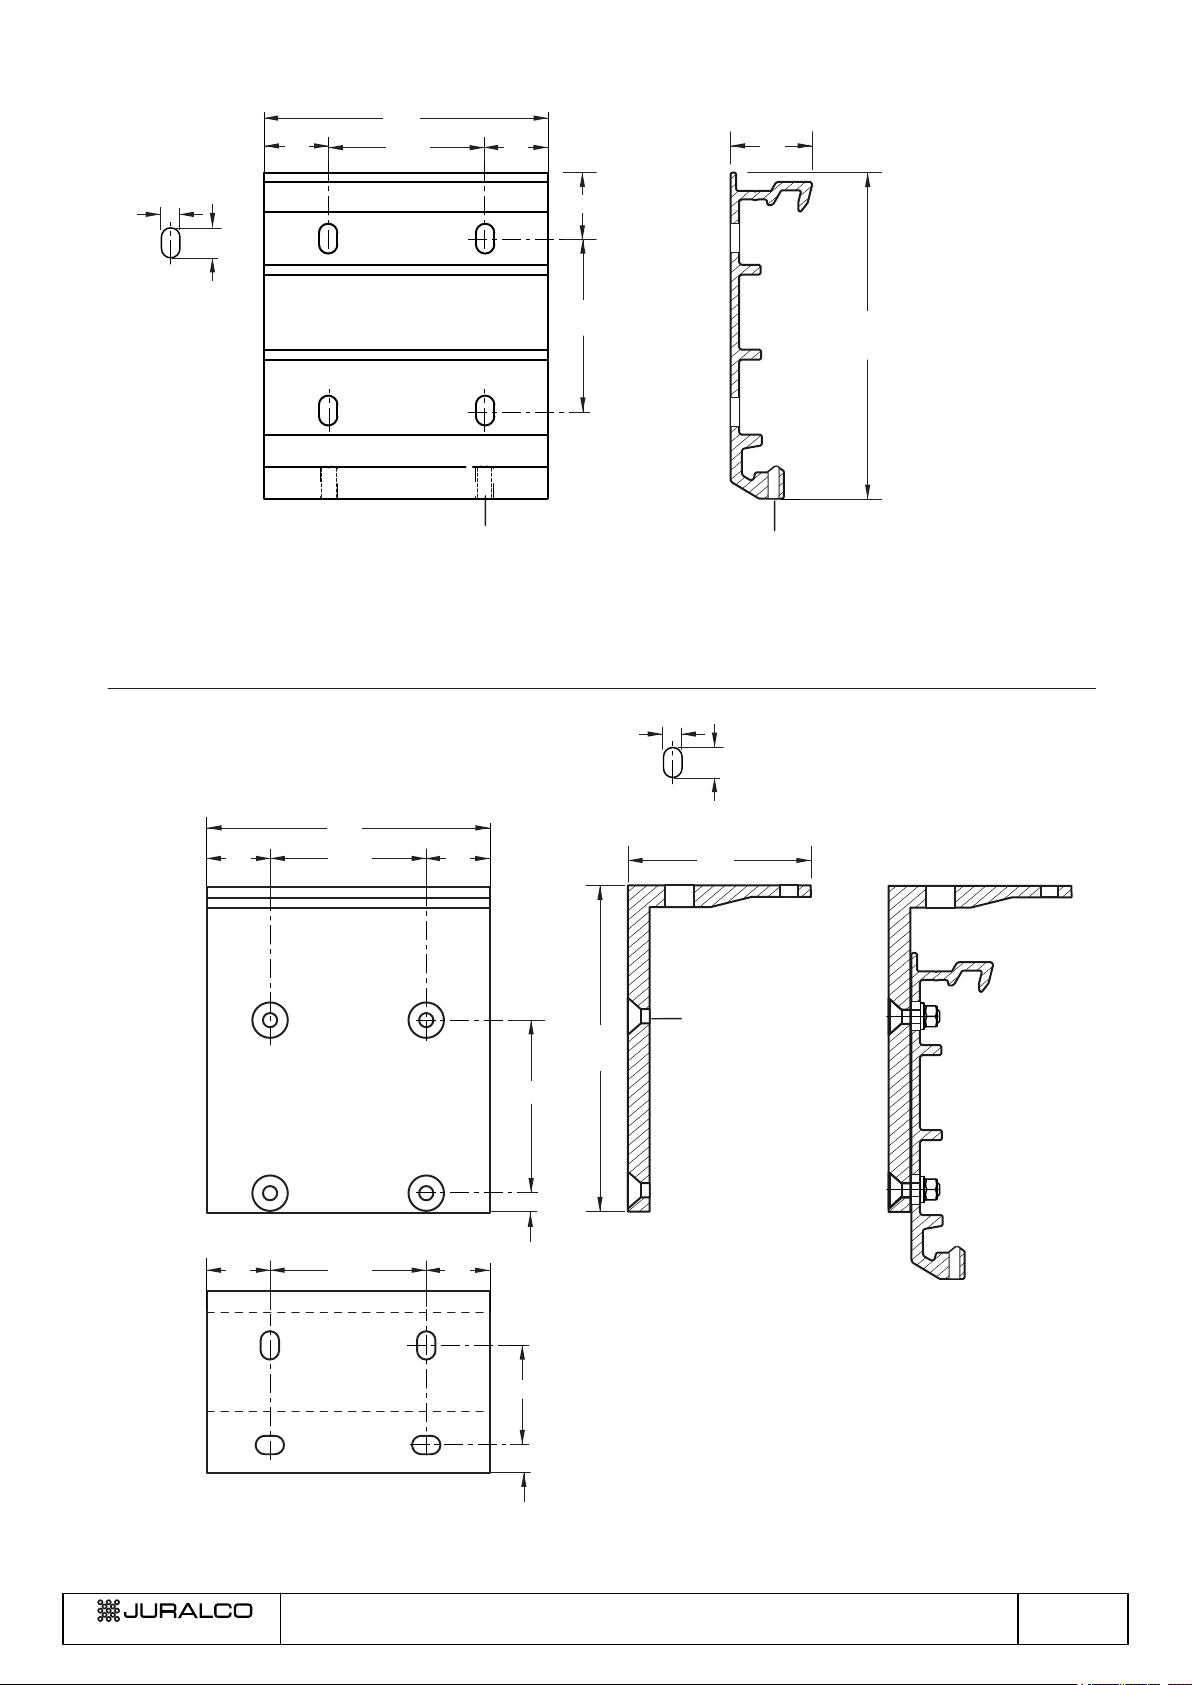
Face Mounting 200mm (always needed)1 - Brackets
c/w M8 clamping screws
- Soffit Mounting Brackets (if eeded)2 n
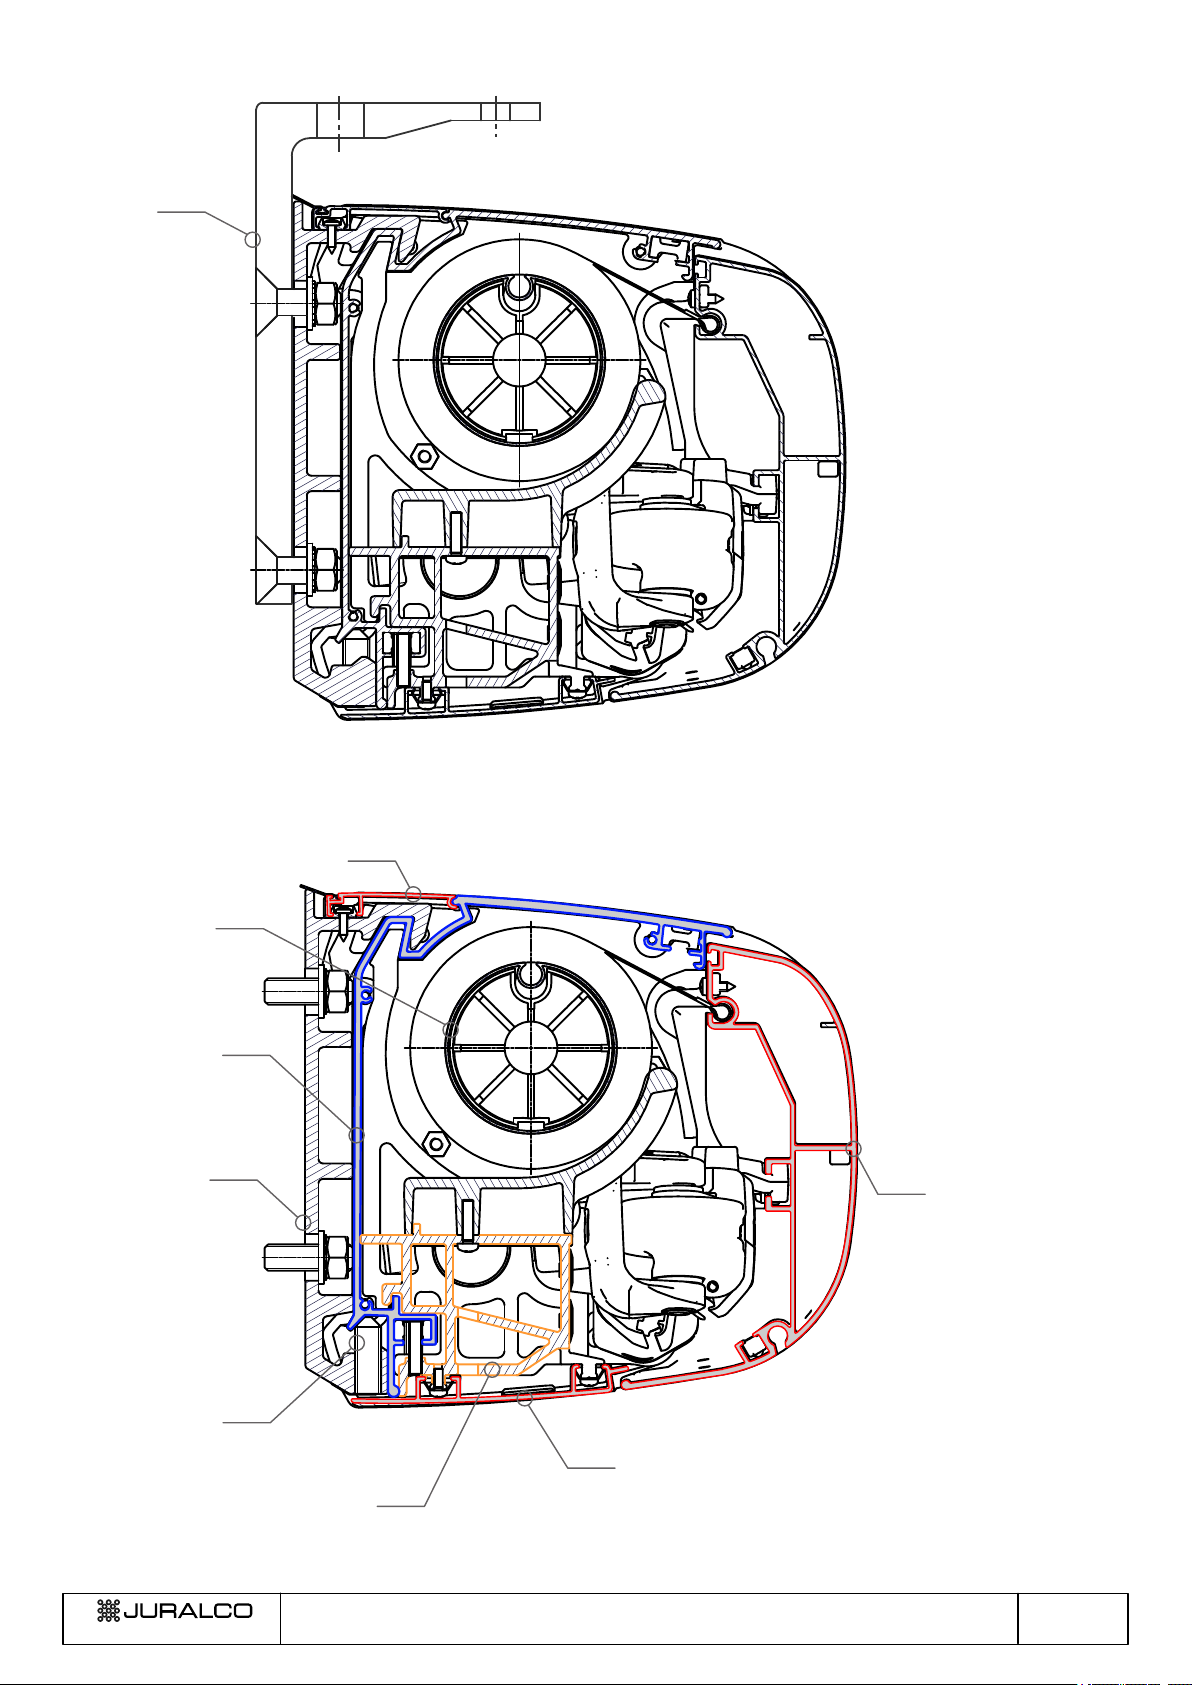
Headbox
- Top Profile10 Headbox
11 - Headbox Finishing Profile
12 - Headbox Underface Profile Bracket
13 - Headbox Underface Profile
14 - End Caps
30 - Roller Tube and Motor
27
Folding Arms and Front Profile
20 - Folding Arm Headbox Attach Bracket
21 - Folding Arms
23 - Folding Arm Front Profile Attach Bracket
24 - Front Profile End Caps
25 - Front Profile Aligning cams
26 - Headbox Front Profile
27 - Fabric Awning. Dixon or Planosol
Electrical and Controllers
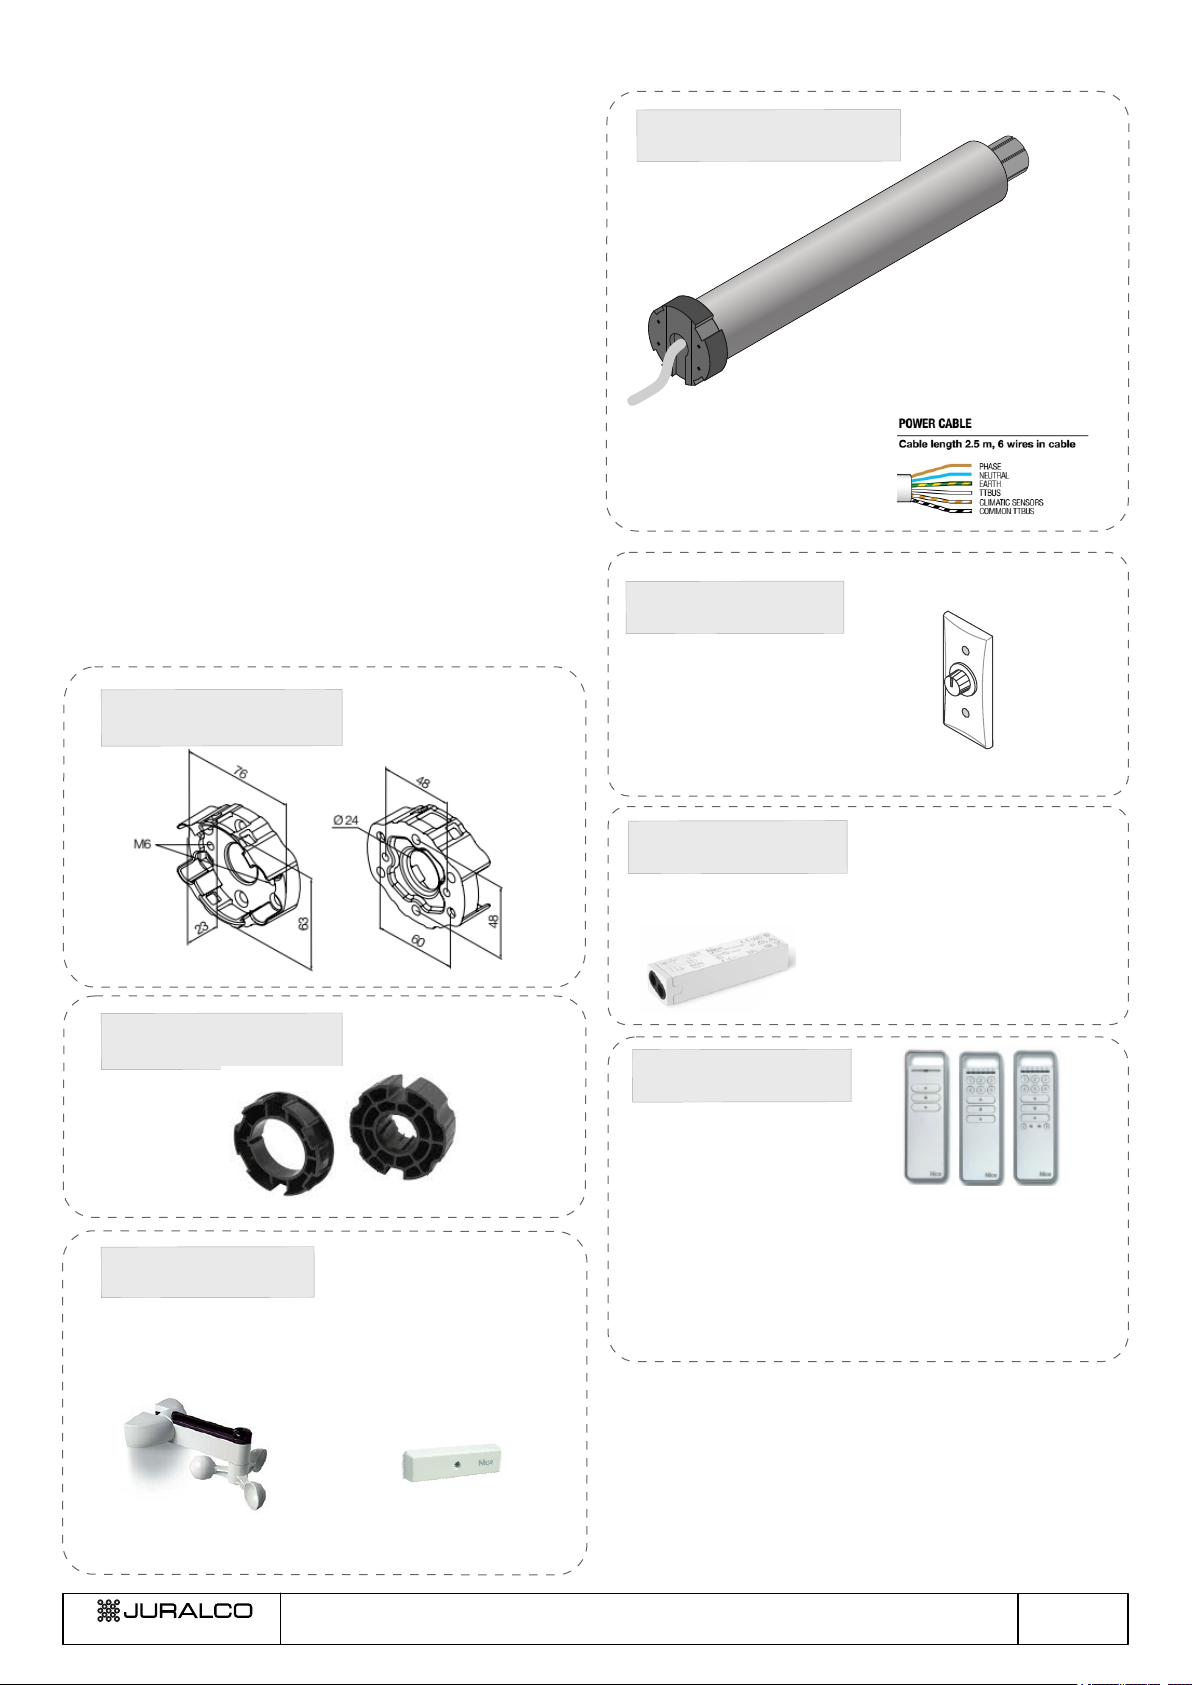
Tubular Motor
Portable Wireless Remote control
Optional Volo Wind Sensor
Optional NemoVibe Sensor
Option extra Motor Control
23
13
14LH
Note: It is recommended that eyelets are fitted to the front edge of the fabric, to promote draining.
20 RH
14RH
21RH
24RH
Planosol Awning Fabric
Planosol is manufactured from 100% acrylic fibre and will retain a light fastness rating of 6-8 on a 1-8 scale.
Planosol is very tightly woven, with minimal light transmission, resulting in excellent UV protection. It has Ultraviolet Protection
factor of 50+, maximum value granted for percentage of protection against UV ray and SPF 100. Planosol fabric will remain rot
resistant for 5 years under normal exposure conditions.
® ® ®
Powdercoat Systems is Also Duralloy and Duratec . The new standard Dulux powder coating system used by Juralco Duralloy Plus .
® ® ®
Juralco Powder coated prices are for Duralloy Plus and Duralloy (same pricing). Duratec prices on application.
The following specs apply to Building Exteriors.
®
- Dulux Duralloy Plus powder coating systems are suitable for properties greater than 10m from high tide level.
Residential and Light commercial buildings, 3 levels max. Warranty 15 yrs
®
- Dulux Duratec powder coating systems are suitable for properties greater than 10m from high tide level
All Residential and Commercial buildings. Warranty 25 yrs.
Important information - Powder Coating systems.
Attachment to structures A PVC Tape or similar material spacer must be used to separate powder coated aluminium items from all concrete
and steel structures. Failure to do so can lead to the chemicals in the structure affecting the powder coating, leading to corrosion.
Swimming Pools The chlorinated water in swimming pools can cause the deterioration of powder coated surfaces, leading to corrosion
of the underlying surface. It is recommended that Powder coated surfaces be 1200mm min from a pool.
Care The Dulux powder coating warranty period is conditional upon the surface being maintained
in accordance with the Dulux ‘Care and Maintenance Instructions’. Download from Dulux or refer to the back page of this manual.
Page 4
Juralco Soleia Awning System
www.juralco.co.nz ph (09) 478 8018
Issue 10-23 v2
Juralco Soleia Awning System - Extrusions
227
172
202
106.7
124.5
HEADBOX
FRONT PROFILE
JPA/403 9252/4
JPA/403 9252/5.8
HEADBOX TOP PROFILE
JPA/403 9250/4
JPA/403 9250/5.8
HEADBOX UNDERFACE PROFILE
JPA/403 9251/5.8
HEADBOX FINISHING PROFILE
JPA/403 9280/5.8
60.5
78/80 dia
ROLLER TUBE, 78/80mm dia
JDA/110 74/4
JDA/110 74/5.82
Page 5
Juralco Soleia Awning System
www.juralco.co.nz ph (09) 478 8018
Issue 10-23 v2
Juralco Soleia Awning System - Components
200
200
80mm dia
12mm dia shaft
Roller Tube End Cap Round
JDA/403 1327
Face Mount Plate
JPA/403 9287
Soffit Mount Plate
JPA/403 9297
Soleia Arm Sets
Arm Support x 2 Sizes
FranciaTec Arm x 5 sizes
Arm Hand x 2 Sizes
FranciaTec Arms
JPA/BRAS2000 2000mm Projection
JPA/BRAS2500 2500mm Projection
JPA/BRAS3000 3000mm Projection
JPA/BRAS3500 3500mm Projection
JPA/BRAS4000 4000mm Projection
Arm Support
JPA/403 9319 Left - 2000-3000 arms
JPA/403 9323 Right - 2000-3000 arms
JPA/403 9327 Left - 3500-4000 arms
JPA/403 9331 Right - 3500-4000 arms
Arm Hand
JPA/405 0010 Left - 2000-3000 arms
JPA/405 0014 Right - 2000-3000 arms
JPA/405 0018 Left - 3500-4000 arms
JPA/405 0022 Right - 3500-4000 arms
Headbox End Cap
JPA/403 8185
Front Profile End Cap
JPA/403 9345
Headbox End Trim
JPA/403 9313
Focus Cam Black
JPA/409 3127
Page 6
Juralco Soleia Awning System
www.juralco.co.nz ph (09) 478 8018
Issue 10-23 v2
Juralco Soleia Awning System - Installation
1 - Any installation must comply to current regulations. Connect a 230 V
supply to the motor.PLUS manual for specific instructions.
2 - Check for correct operation of the Awning. To change direction,
reverse the wires of the motor cable.
3 - Make a loop on the power supply to avoid rain water getting into
the motor head, if necessary
4 - The 230w connection can be at either end (specify on Order Form)
5 - Ex factory each Soleia Awning is supplied with a 1 Channel remote,
(unless specified otherwise) all set up to operate the Awning as
Open, Stop and Close
Tubular motor ideal for all types of awnings. With built-in receiver,
push button limit switch and encoder controlled movement
with TTBus technology.
RDC: Function settable on multiple levels with TTP programmer; torque
reduction system to gently block movement without stress on the fabric
when reaching the closure position, avoiding unsightly sagging.
Tubular Motors
JNICE ERA PLUS 5012
Tubular Motors 45mm dia
Push Button Limit switches
Built in Wireless Receiver
& TTBus Technology
Motor 5012 - 50Nm, 12rpm
Nice
Motor Mount Brackets
JNICE/BRKT/ERAM
For 45mm dia Motors
Compact aluminium
support. 2 x holes M6 at
48 and 60mm CL
JNICE/WIND/S
Volo Wind Sensor
Wind Sensor threshold has
3 wind speed settings
15, 30, 45 Kph
Motor Remote
Control Sensors
JNICE/NEMOVIBE
Vibration Sensor
NEMO VIBE does not require
any additional connections
because it is battery powered.
It screw attaches to the front
of the awning. During windy
conditions, a signal (adjustable)
is sent via radio sensor to the
motor mounted in the awning,
which then retracts the awning.
Drive Wheel and Crown
JNICE/45ROUND78
For Remote Control
Wall Controls
3 position Rotary Wall Switch
Up - Off - Close
Cover Plate - SSW 770 CPSM
Switch - SSW 770 RSB
Manual Controls
Switch Controls
Wireless
Remote Controls
Wireless Receiver
Portable Wireless
Transmitters
P1 P6 P18
P1 Portable transmitter to control 1 electrical load system
or automation group
P6 Portable transmitter to control 6 electrical load systems or
automation groups for activation in single or multigroup mode
P18 Portable transmitter to control 18 electrical load systems or
automation groups for activation in single or multigroup mode
JNICE/BIDIAWNING. Nice controller for
Wireless operation.Can be added to
Switch operation and Manual override
Motors to make for wireless control
Wireless
Remote Controls
Page 7
Juralco Soleia Awning System
www.juralco.co.nz ph (09) 478 8018
Issue 10-23 v2
Juralco Soleia Awning System - Motor Controls
Yellow
Label
Green
Label
Tubular Motor, 45mm dia
JNICE ERA PLUS 5012
Motor Power Cable
Connections at Motor
Remote Control
Wireless Controls
TTBus Motor fully tested
and Limits set at factory
Volo Wind Sensor 15kph Limit set at factory
(set limits available 5,10,15,30,45kph)
Mains
230V
50HZ
Active
Neutral
Earth
Brown
Blue
Yellow
Green
Brown
Blue
Yellow
Green
Black
White
Orange
White
White (only used at Factory)
JNICE/WIND/S
Volo Wind Sensor
Black
White
Orange
White
Wind Speed Adjustment - Awning Retraction settings
01. Keep the n key pressed and wait for the motor to perform 2 movements. Upon completion, release the key.
02. Keep the t key pressed and wait for the motor to perform 3 movements. Upon completion, release the key.
03. Briefly press the s key a few times, depending on the level you want to set for wind threshold.
1 press = wind, 5 km /h
2 presses = wind, 10 km /h
3 presses = wind, 15 km/h (factory setting s)*
4 presses = wind, 30 km /h
5 presses = wind, 45 km/h
After about 10 seconds, the motor performs the number of movements indicated by the level number selected
Note – If this does not occur, cancel the procedure.
This way, the adjustment is completed without changing the factory setting.
.
04. Keep the n key pressed and wait for the motor to perform 3 movements. Upon completion, release the key.
Notes.
- When performing the procedure, you can cancel it at any time by keeping the n and t keys pressed
simultaneously for 4 seconds.
- Otherwise, do not press any key and wait 60 seconds for the motor to perform 6 movements.
- If you use a sensor equipped with a “trimmer”, you must read the sensor instructions and adjust the
threshold directly on the sensor.
5
sec.
01 02
5
sec.
04
1/
2/
3/
4/
5/
10
sec.
03
0,5
sec.
x 1 = vento a 5 Km/h
x 2 = vento a 10 Km/h
x 3 = vento a 15 Km/h (*)
x 4 = vento a 30 Km/h
x 5 = vento a 45 Km/h
5
sec.
3
2
?
3
x 1 = wind at 5 Km/h
x 2 = wind at 10 Km/h
x 3 = wind at 15 Km/h (*)
x 4 = wind at 30 Km/h
x 5 = wind at 45 Km/h
At the factory, the intervention threshold to is set at level 3 and to change it you must take the following steps
Wireless Remote Control
Portable Wireless Transmitters
P1 P6 P18
Page 8
Juralco Soleia Awning System
www.juralco.co.nz ph (09) 478 8018
Issue 10-23 v2
Juralco Soleia Awning System - Face Fix and Soffit Fix
251
Juralco Soleia Awning
Face Fix
Juralco Soleia Awning
Soffit Fix
Soffit Mount Bracket
251.0
47.0
121.0
236.0
267.0
128.0
280.0
38.0 70.0
45.0
Page 9
Juralco Soleia Awning System
www.juralco.co.nz ph (09) 478 8018
Issue 10-23 v2
Juralco Soleia Awning System - Cross Section
Juralco Soleia Awning
Headbox
Front Profile
Part no JPA/4039252
Headbox Finishing Profile
Part no JPA/4039280
Headbox Under Face Profile
Part no JPA/4039251
Headbox Top Profile
Part no JPA/4039250
Juralco Soleia Awning
showing Major Parts
Mounting Brackets
200mm
Attach Brackets
M8 Clamp screws
Headbox Bottom Cover
Attach Bracket
Roller Tube
and Tubular Motor
Soffit Mount Bracket
(if needed)
Page 10
Juralco Soleia Awning System
www.juralco.co.nz ph (09) 478 8018
Issue 10-23 v2
Juralco Soleia Awning System - Mounting Brackets
M8 Clamp
screw holes M8 Clamp
screw holes
M12 C/s tapped holes M12 x 35 SS C/s
machine screw
Soffit Bracket and
Mounting Bracket
45
47
121
230
57
200
226
128
21
Attach Hole
dimensions
13
JPA/4039287
FACE MOUNTING PLATE 200mm
JPA/4039297
SOFFIT MOUNT BRACKET 200mm
110 45
45 110 45
21
Attach Hole
dimensions
13
200
121
15
45 110 45
20
70
Page 11
Juralco Soleia Awning System
www.juralco.co.nz ph (09) 478 8018
Issue 10-23 v2
- 3 x 200mm BracketsMounting
- Standard Arm Supports
1
1
- 4 x 200mm BracketsMounting
- 1 x 200mm Intermediate support
- Standard arm supports
Juralco Soleia Awning System - Installation - Size, Type and Bracket selection
- 4 x 200mm BracketsMounting
- 1 x 200mm Intermediate support
- Reinforced Arm supports
Width
Projection
Width
R
R
Width
1
2
1
3
4 x Mounting
Brackets
(mount 10mm apart)
1 x Intermediate
Mounting bracket
5 x Soffit
Brackets
(if needed)
3 x Mounting
Brackets
Projection
Projection
3 x Soffit
Brackets
(if needed)
4 x Mounting
Brackets
(200 mm ea, mount 10mm apart)
1 x Intermediate
Mounting bracket
5 x Soffit
Brackets
(if needed)
Page 12
Juralco Soleia Awning System
www.juralco.co.nz ph (09) 478 8018
Issue 10-23 v2
Juralco Soleia Awning System - Installation - Setouts
Attach Brackets, Width setouts
Overall Width, incl End Caps
2 x Mounting
Brackets
or
Overall Width,
incl End Caps
-160mm
1 - Mark out the Mounting bracket mounting holes on the wall or ceiling.
- All holes must have an appropriate fastener. Do not leave any out.
- Observe the clearances as below
- There must be a PVC layer between base plate and structure (if not Timber)
- All fixings must be SS
Wall Mount
50
Nominal End Clearances
to End Wall
45 minimum
47
121
Soffit Mount
45
38 70
PVC layer if needed
Package
Awning Roll, Head Box,
Arms, and Front Profile.
plus inline motor and Wireless controller
1 - Be very careful opening the package.
It is large and heavy. Best done on a table
if possible
- Be careful with knives, not scratch the
surface of the awning.
Intermediate
Mounting Bracket
Mounting
Brackets
200 mm
Soffit Brackets
(if required)
Intermediate
Mounting Bracket
4 x Mounting
Brackets
(200 mm ea,
mount 10mm apart)
PVC layer if needed
Page 13
Juralco Soleia Awning System
www.juralco.co.nz ph (09) 478 8018
Issue 10-23 v2
7
Chalk line
and large level
(or Laser level)
Mounting Brackets setouts
1 - Mark out on Wall suitable holes for Wood/concrete/steel installation.
- Use packers to pack off Wall, if necessary.
- When finished all the Attach Brackets must be level, square and in line.
- Provide the appropiate electrical connection.
Juralco Soleia Awning System - Installation - Setouts
Electrical
connection
(nominate end)
1 - The installation height of the awning must allow a passage under the bar, at full extension.
1800 mm min (2100 recommended).
Mounting Brackets, Height setout
5 Degree Tilt
10 Degree Tilt
15 Degree Tilt
20 Degree Tilt
25 Degree Tilt
Projection
Dimension ‘D’ measured to Centre Line Bottom Mounting Hole
2000
175
350
520
680
840
2500
220
430
650
850
1060
3000
260
520
780
1025
1270
3500
300
610
910
1200
1480
4000
350
700
1040
1350
1690
Tables giving a nominal Dimension ‘D’, from various Projections at various angles
Projection
45 minimum
Walk under Height
1.8m Min
Dimension ‘D’
(measured to c/l
bottom fixing hole)
Awning Fabric Awning Fabric
Tilt Angle
For a Soffit Mount
This dimension will
be 45mm
170
Add desired Walk under Height to Dimension ‘D’ to get total Height Floor, to C/l bottom Hole
Page 14
Juralco Soleia Awning System
www.juralco.co.nz ph (09) 478 8018
Issue 10-23 v2
Juralco Soleia Awning System - Installation
20
Attach Bolts, studs
2 - Table of maximum forces applied to each anchor: Fc (in daN) (FYI 1daN ≈ 1kg)
Make sure that the tensile load Fr of the wall meets the condition Fr ≥ 2xFc
Force Fc (in daN - dekaNewtons). Awning Face Mount 700
800
Force Fc (in daN - dekaNewtons). Awning Soffit Fix
Important notes for fixing to Concrete - M12 SS Studs + Fischer FIS V 300T
1 - All fixings must engage into the structural slab
2 - A PVC Tape layer must be installed between the Bracket and Concrete
3 - All fixings must be Stainless steel
Important notes for Fixing to Timber - M12 SS Coachscrews (or M12 SS Bolts)
1 - Coachscrews 90mm min engagement into joists
2 - Bond all coachscrews with SIKA Supergrip to full depth
3 - All fixings must be Stainless steel
Important notes for fixing to Steel - M12 SS Bolts
1 - A PVC Tape layer must be installed between the Bracket and Steel
2 - All fixings must be Stainless steel
1 - Max Fastener dimension, proud of wall or packers is 20mm
Wall
Packer (if necessary)
Mounting Bracket
Max Fastener dimension,
proud of wall or packers is 20mm
Page 15
Juralco Soleia Awning System
www.juralco.co.nz ph (09) 478 8018
Issue 10-23 v2
Juralco Soleia Awning System - Installation
a
5
Mounting to Wall
1 - Present your Awning from
below the Mounting Brackets.
2 - Engage upper groove
in the Wall bracket.
Fit the Headbox by pressing upwards
3 - Rotate downwards to clip in
at bottom
4 - Make sure the Back of the Headbox
is hard against the Top and Bottom
of the Mounting bracket
.
1 - Screw up all 8mm Clamp Screws on all wall brackets..
When finished the screw should be flush at the base.
Attaching to BracketsMounting
6mm Allen Key.
Over tightened. Under tightened. Recommened
Page 16
Juralco Soleia Awning System
www.juralco.co.nz ph (09) 478 8018
Issue 10-23 v2
9
A
B
450 mm
1
2
Juralco Soleia Awning System - Installation - Awning Slope Adjust
Setting the Inclination
1- Roll the blind up to about 450 mm from the wall,
this allows to enter the access Screw A, to release the function
and facilitate the tilt adjustment.
2 - Lifting the Front profile allows
easier adjustment of the inclination angle
3 - The adjustment is made by acting on the screw B
located on the front of the arm support,
screw in to raise the Front Profile and unscrew to lower it.
Important : To obtain the same setting for both arms, rotate adjusting screw B all the way in, then
unscrew counting the number of turns out.
Proceed in the same way with the other arm and check the level. Fine tune the setting if necessary.
4 - Adjust the inclination to suit the walk under height, if necessary. Normal inclinations are 10-20deg.
Refer to the Mounting Brackets, Height Setout page.
.
5 - When you are sure of your setting, lock the adjusting screw B
by slightly tightening screw A located behind
the arm pivot (see drawing opposite)
Page 17
Juralco Soleia Awning System
www.juralco.co.nz ph (09) 478 8018
Issue 10-23 v2
Juralco Soleia Awning System - Installation - Final
1 -Fix the Headbox Bottom Cover by clipping in at front first
then raising and clipping in rear.
Final adjustments.
2 - Attach supplied clips to the mounting Brackets.
Then fix the Headbox Top Cover by clipping in at front first
then dropping and clipping in rear.
3 - Open and close the blind a few times to check that it is working properly, and the Inclination and Walk under height
is satisfactory.
Page 18
Juralco Soleia Awning System
www.juralco.co.nz ph (09) 478 8018
Issue 10-23 v2
1
9Notes:
3Specify Fabric Colour and Code
Select
Fabric
Type
and Colour
4
Planasol
Dickson
Select Motor connection End,
viewed from Front
LH RH
Width Maximums = All 5900mm
Volo Wind sensor,
if required
YesNo
6
5
NemoVibe
sensor, if required
Available
Projections
Select
Projection
Widths
Minimum
Enter Overall
Width
2000
2400
2500
3070
3000
3540
3500
4030
4000
4600
Soffit Brackets
needed?
8
YesNo
Yes x3
No Yes x5
Customer
Date
WO SO
Contact
Order No
$
Juralco Juralco Juralco
Select/Enter Dimensions below. Enter details/selections into all boxes. Then scan and send to [email protected]
AW #
SOLEIA Awning System - Order Form
JPA/4039297
7
Projection
Soleia Awning
Motorised Operation only
Specify PC Colour and Code
Duralloy Plus
Duratec
Note: Arms Silver finish only
Select
Powder
Coat Type
and Colour
2
Additional Motor Remote Control?
BIDI/Awning + Portable controller. Tick to select
P1 P6 P18
Unsuitable for use in Strong Wind Areas
Select Projection
then enter desired
Overall Width
dimension
Page 19
Juralco Soleia Awning System
www.juralco.co.nz ph (09) 478 8018
Issue 10-23 v2
Juralco Soleia Awning System - FACTORY Assemble
2 -Unscrew to disassemble and disengage the arm
and remove the Front Profile.
WARNING :
Leave Bracelets on the Arms
to keep them Closed.
2
3
1 - Before mounting the Roller tube in the Headbox
remove the End Cap at the the motor end (3 screws)
2 - To mount the Roller tube more easily,
rotate the arms forward by unscrewing the screw A
3 - 1 Pass the Roller tube over the Arm supports
2 Insert the Roller tube on the motor
3 Replace the Headbox End Cap
1 - FOLDING ARMS; disengage the front arm from the
Front Profile. Keep the Bracelet in place and tie back
to the Headbox bottom cover brackets.
A
Remove the Front Profile
Mounting the Roller Tube
These pages apply to FACTORY Assembly only
Page 20
Juralco Soleia Awning System
www.juralco.co.nz ph (09) 478 8018
Issue 10-23 v2
1 m
1 - Roller Tube - Wrap the fabric so that it hangs about 1m from the ground.
Important: Guide the fabric onto the Roller tube so that it stays smooth
and does not wrinkle.
400 mm
1 - Leave about 400 mm of fabric hanging free.
2 - Untie the arms from the Headbox Bottom Cover brackets
and reattach the Front Profile to the Arms.
3 - Remove the bracelets from the arms
.
Tighten and lock the screw A
Assembling Fabric
Juralco Soleia Awning System - FACTORY Assemble
2 - Front Profile - Slide the Front profile onto the Fabric
Arm assembly, to the Front Profile
A
A
13mm spanner
These pages apply to FACTORY Assembly only

Other Juralco Lawn And Garden Equipment manuals

Juralco VENETTE User manual

Juralco

Juralco VENETTE User manual

Juralco FELICIA User manual

Juralco

Juralco FELICIA User manual

Juralco DELFINA User manual

Juralco

Juralco DELFINA User manual

Popular Lawn And Garden Equipment manuals by other brands

Snapper 21SST instructions

Snapper

Snapper 21SST instructions

ROTOSHOVEL ROTOSHOVEL Operation manual

ROTOSHOVEL

ROTOSHOVEL ROTOSHOVEL Operation manual

Suncast MPHC210 manual

Suncast

Suncast MPHC210 manual

ubbink Air 2000 Outdoor Instructions for use

ubbink

ubbink Air 2000 Outdoor Instructions for use

BSVILLAGE TRIGANO J-87906 manual

BSVILLAGE

BSVILLAGE TRIGANO J-87906 manual

Kelkay EasyFountain 45020L instructions

Kelkay

Kelkay EasyFountain 45020L instructions

CAMPAGNOLA Professional MASTER quick guide

CAMPAGNOLA

CAMPAGNOLA Professional MASTER quick guide

PestSenz Visu Suspended Series instruction manual

PestSenz

PestSenz Visu Suspended Series instruction manual

ETI FL-GS-BZ Use and care guide

ETI

ETI FL-GS-BZ Use and care guide

Applica VX0562-L5P Use and care book

Applica

Applica VX0562-L5P Use and care book

Corradi Bioclimatics Maestro user manual

Corradi

Corradi Bioclimatics Maestro user manual

WOLFF FasTrimmer Translation of the original manual

WOLFF

WOLFF FasTrimmer Translation of the original manual

Stihl BF-MM instruction manual

Stihl

Stihl BF-MM instruction manual

DYNAsteam DS1600 Operation manual

DYNAsteam

DYNAsteam DS1600 Operation manual

Rowlinson Garden Products Overlap Patio Chest Assembly instructions

Rowlinson Garden Products

Rowlinson Garden Products Overlap Patio Chest Assembly instructions

hillvert HT-TWIN 300 user manual

hillvert

hillvert HT-TWIN 300 user manual

Land Pride Drag Harrows DRG Series features and benefits

Land Pride

Land Pride Drag Harrows DRG Series features and benefits

Hydra HydraMax installation guide

Hydra

Hydra HydraMax installation guide

manuals.online logo
manuals.online logoBrands
  • About & Mission
  • Contact us
  • Privacy Policy
  • Terms and Conditions

Copyright 2025 Manuals.Online. All Rights Reserved.