8
excluded). Starting timing, timing indicator lights. And when setting
time out, machine will be turned on automatically.
7
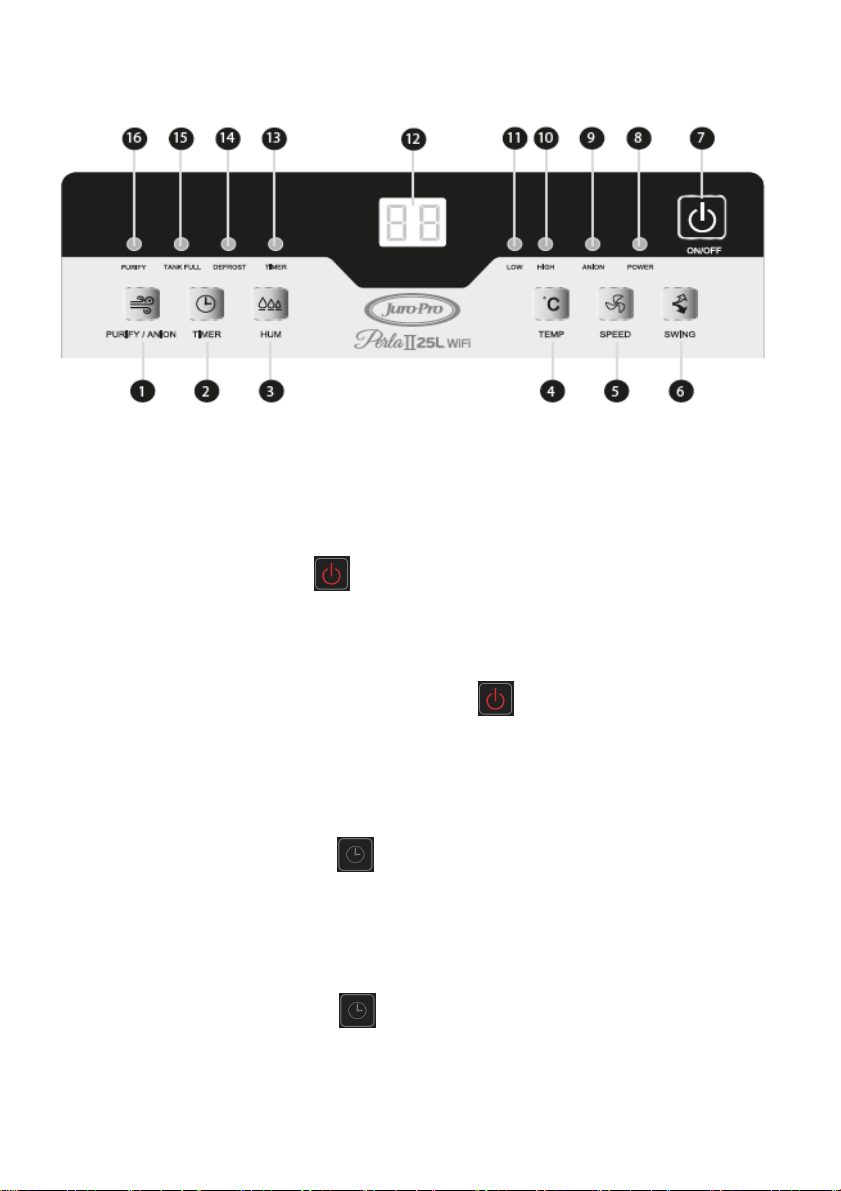
Humidity setting
Acquiescent setting humidity of machine is RH55%, press “ ”
button, displaying the current setting of humidity, press “ ” button
again to set humidity at the range of RH40%~80%(5% for one
level),CO is continuous. These settings can be recycled.
Temperature display
Press“ ”button, the monitor displays the ambient temperature.
Seconds later, it will show ambient humidity again.
Choice of airflow speed
Press “ ” button to choose high or low airflow speed. Corresponding
Indicator lights show the corresponding airflow speed.
Setting swing (optional)
When machine is on work, press “ ” button to let air flow back and
front, and press this button again to stop this function.
Anion (optional)
When machine is on work, Long pressing “ ” button for 3 minutes
can open or close the anion function.
◆
Long press for more than 3 seconds to enter the Wifi distribution network (see
the description of the rear network connection for details)
◆Defrosting function
Machine has defrosting function. When defrosting, corresponding
indicator will light, compressor stops and fan still works.
Detection of full water