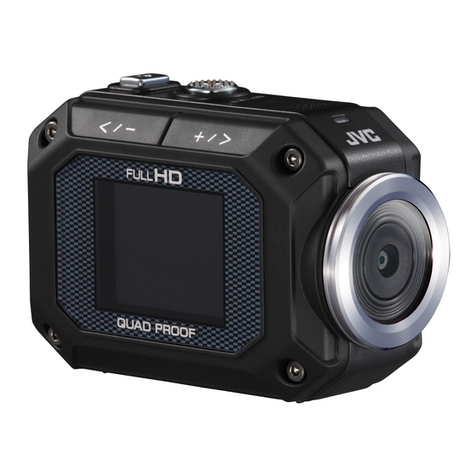
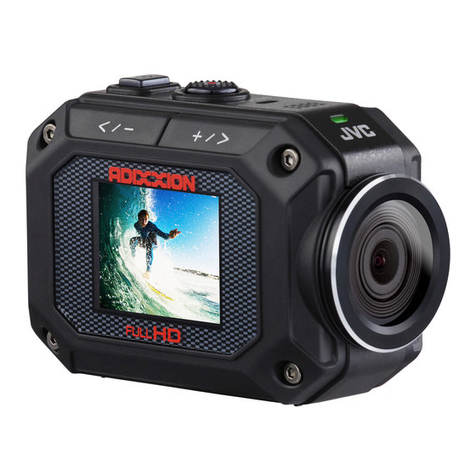
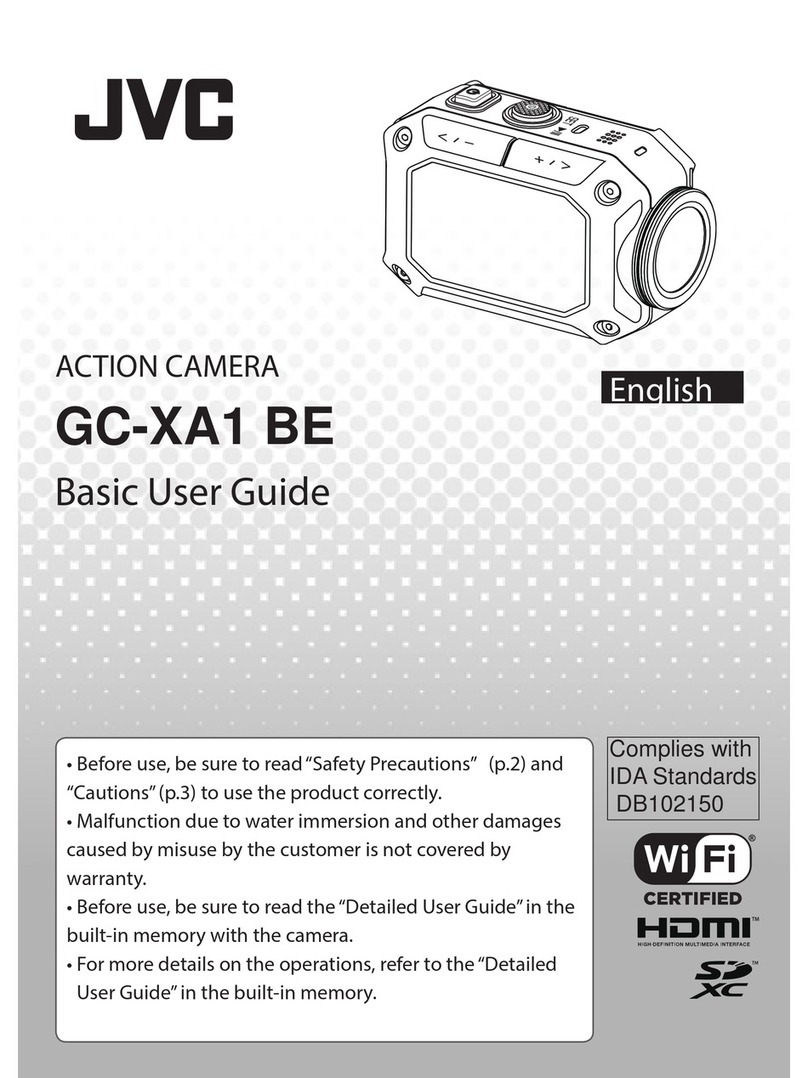
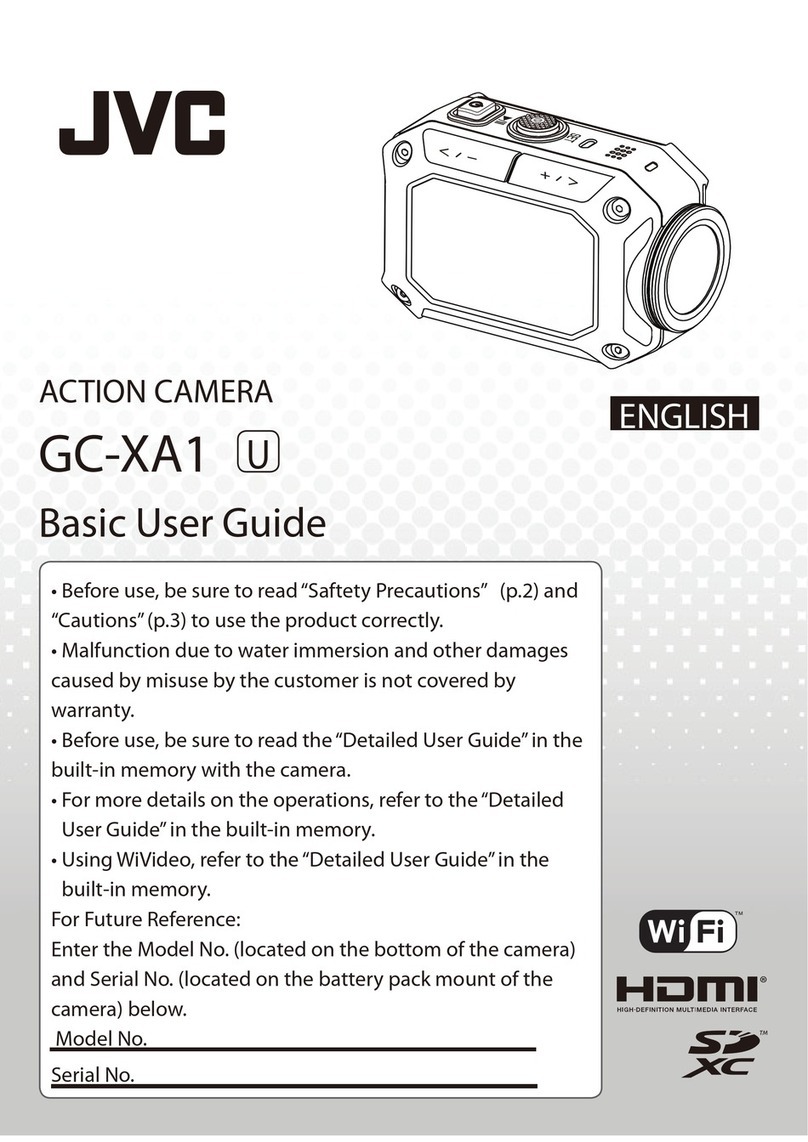
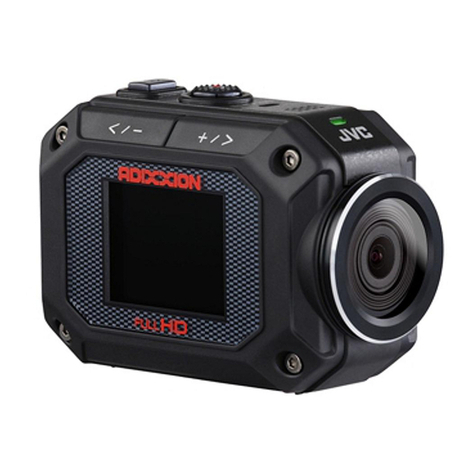
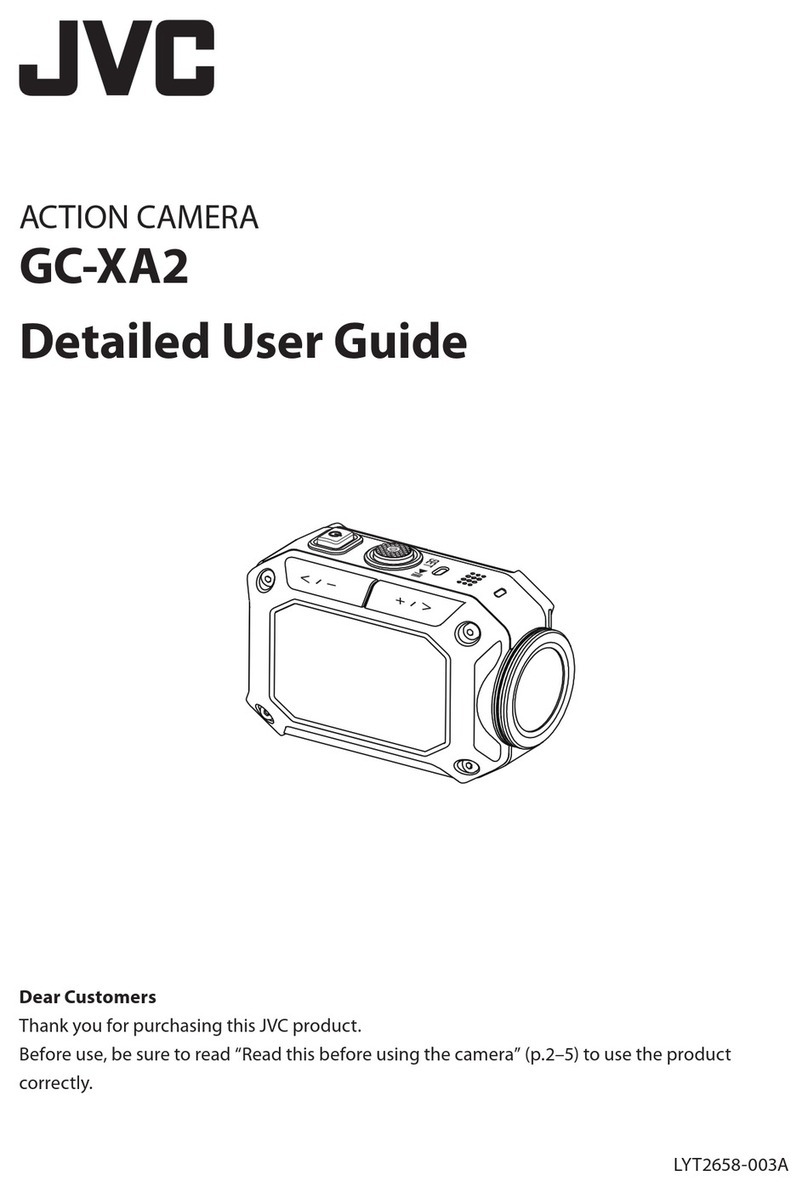
JVC GC-XA1U Operating and maintenance manual

GC-XA1
• Before use, be sure to read “Safety Precautions” (p.2)
and “Cautions” (p.3) to use the product correctly.
• Malfunction due to water immersion and other
damages caused by misuse by the customer is not
covered by warranty.
• Before use, be sure to read the “Detailed User Guide”
in the built-in memory with the camera.
• For more details on the operations, refer to the
“Detailed User Guide” in the built-in memory.
• Using WiVideo, refer to the “Detailed User Guide” in
the built-in memory.
For Future Reference:
Enter the Model No. (located on the bottom of the
camera) and Serial No. (located on the battery mount of
the camera) below.
Model No.
Serial No.
ENGLISH
ACTION CAMERA
Basic User Guide
U
TM

Safety Precautions
NOTES:
• Theserialnumberplateisonthebatterymountof
thecamera.
CAUTION:
Themainsplugshallremainreadilyoperable.
• Removethemainsplugimmediatelyifthe
camcorderfunctionsabnormally.
WARNING:
Thecamcordershouldnotbeexposedtoexcessiveheat
suchasdirectsunshine,reorthelike.
IMPORTANT SAFETY INSTRUCTIONS
1. Readtheseinstructions.
2. Keeptheseinstructions.
3. Heedallwarnings.
4. Followallinstructions.
5. Cleanonlywithdrycloth.
6. Donotblockanyventilationopenings.Installin
accordancewiththemanufacturer’sinstructions.
7. Donotinstallnearanyheatsourcessuchasradiators,
heatregisters,stoves,orotherapparatus(including
ampliers)thatproduceheat.
8. Protectthepowercordfrombeingwalkedon
or
pinchedparticularlyatplugs,conveniencereceptacles,
andthepointwheretheyexitfromtheapparatus.
9. Onlyuseattachments/accessoriesspeciedbythe
manufacturer.
10.Unplugthisapparatusduringlightningstormsor
whenunusedforlongperiodsoftime.
11.Referallservicingtoqualiedservicepersonnel.
Servicingisrequiredwhentheapparatushasbeen
damagedinanyway,suchaspower-supplycordor
plugisdamaged,liquidhasbeenspilledorobjects
havefallenintotheapparatus,theapparatushas
beenexposedtorainormoisture,doesnotoperate
normally,orhasbeendropped.
Ifamalfunctionoccurs,stopusingthecamcorder
immediatelyandcontactwww.jvc.comorbyphoneat
1-800-252-5722
ChangesormodicationsnotapprovedbyJVCcould
voidtheuser’sauthoritytooperatetheequipment.
Thisequipmenthasbeentestedandfoundto
complywiththelimitsforaClassBdigitaldevice,
pursuanttoPart15oftheFCCRules.Theselimitsare
designedtoprovidereasonableprotectionagainst
harmfulinterferenceinaresidentialinstallation.
Thisequipmentgenerates,uses,andcanradiate
radiofrequencyenergyand,ifnotinstalledand
usedinaccordancewiththeinstructions,maycause
harmfulinterferencetoradiocommunications.
However,thereisnoguaranteethatinterference
willnotoccurinaparticularinstallation.Ifthis
equipmentdoescauseharmfulinterferencetoradio
ortelevisionreception,whichcanbedetermined
byturningtheequipmentoandon,theuseris
encouragedtotrytocorrecttheinterferenceby
oneormoreofthefollowingmeasures:Reorient
orrelocatethereceivingantenna.Increasethe
separationbetweentheequipmentandreceiver.
Connecttheequipmentintoanoutletona
circuitdierentfromthattowhichthereceiveris
connected.Consultthedealeroranexperienced
radio/TVtechnicianforhelp.
Declaration of Conformity
ModelNumber:GC-XA1
TradeName:JVC
Responsibleparty:JVCAMERICASCORP.
Address:1700ValleyRoadWayne,N.J.07470
TelephoneNumber:973-317-5000
ThisdevicecomplieswithPart15ofFCCRules.
Operationissubjecttothefollowingtwoconditions:
(1)Thisdevicemaynotcauseharmfulinterference,
and(2)thisdevicemustacceptanyinterference
received,includinginterferencethatmaycause
undesiredoperation.
ThisClassBdigitalapparatuscomplieswithCanadian
CAUTION
RISK OF ELECTRIC SHOCK
DO NOT OPEN
CAUTION: TO REDUCE THE RISK OF ELECTRIC SHOCK,
DO NOT REMOVE COVER (OR BACK).
NO USER-SERVICEABLE PARTS INSIDE.
REFER SERVICING TO QUALIFIED SERVICE PERSONNEL.
The lightning flash with arrowhead symbol, within an
equilateral triangle, is intended to alert the user to the
presence of uninsulated "dangerous voltage" within the
product's enclosure that may be of sufficient magnitude
to constitute a risk of electric shock to persons.
The exclamation point within an equilateral triangle is
intended to alert the user to the presence of important
operating and maintenance (servicing) instructions in
the literature accompanying the appliance.
ICES-003.
CetappareilnumériquedelaclasseBestconformeàla
normeNMB-003duCanada.
PowerConsumption:<680mA(WorkingCurrent),
<200umA(LeakageCurrent)
Cautions
— Read Before Use —
Notes on this equipment
•
The camera shall not be exposed to excessive heat
such as direct sunshine, re or the like.
Thebatterymayexplodeifitgetsheatedup.
•
The battery is not charged when purchased. Charge
the battery before using it for the rst time.
•
Do not or subject it to excessive shock or vibration.
•
Before recording, be sure to conduct a trial
recording.
•
Store the recorded data periodically on computer.
JVCshallnotbeliableforanydamageorlossofdata.
•
Do not press against the surface of the screen with
force or subject it to strong impact.
Doingsomaydamageorbreakthescreens.
•
When using the unit in a low temperature
environment (-10°C (14°F) or below), the operating
time may be shortened, or it may not function
properly.
Precautions on Using Wi-Fi
CautionsonWi-FiFunction
• Operationisnotguaranteedonalldevices
• Thisfunctionisnotdesignedfordisasterorcrime
prevention.
• Communicationmaynotbecarriedoutproperlynear
radioequipmentorbroadcastingstations.Inthiscase,
changethelocationaccordingly.
• Radio wave interference by Bluetooth devices
Bluetoothdevicesmakeuseofthesamefrequency
bandwidth(2.4GHz)asthatofWi-Fidevices.Using
thisproductnearsuchdevicesmaycauseradiowave
interference,andresultinadropincommunication
speedorconnectionfailure.Inthiscase,turnothe
powerofdevicesthatarenotinuse.
Security of Wireless LAN
AnadvantageofwirelessLANisthatinsteadofusinga
LANcable,ittransmitsinformationusingradiowaves,
thusenablingLANconnectiontobeestablished
withintheareacoveredbytheradiowaves.However,
asradiowavespenetratethroughobjects(suchas
walls)withintherangethattheycover,security
issues,suchasinterceptionoftransmissionor
illegalaccess,mayariseifsecuritysettingsarenot
congured.Beforeyouconnecttothenetwork
inawirelessLANenvironment,readthroughthe
instructionmanualforthewirelessLANdeviceinuse,
andcongurethesecuritysettingsaccordingly.
Failuretodosomayincreasetheriskofpersonal
informationbeingintercepted,suchasusernames,
passwords,andthecontentofyourmails,orillegal
accesstothenetwork.
•
DuetothedesignofwirelessLAN,notethat
securitymaybebreachedbyunusualor
unforeseeablemeans.
•
FormoredetailsonwirelessLANandnetwork
security,pleaseconsultthemanufacturerofyour
wirelessLANdevice
•
JVCshallnotbeliableforanysecurityissues,
troubles,damagesorlossesarisingfromtheuse
ofthisfeature.
Radio Waves Used by this Product
This product makes use of radio waves in the
ISM band (2.4 GHz).
Although a radio station license is not required
for using this product, please take note of the
following.
•
Do not use this product near the following
places
•
Industrial,scientic,ormedicalequipment,
suchasmicrowaveovensandpacemakers
•
Speciedlow-powerradiostations(radio
stationlicensenotrequired)
•
Bluetoothdevices
Equipmentsuchastheabovementioneddevices
makesuseofthesamefrequencybandwidthas
thatofWi-Fi.
Usingthisproductneartheaboveequipment
maycauseradiowaveinterference,and
resultincommunicationfailureoradropin
communicationspeed.
•
Avoid using this product near a TV or radio
set.
TVorradiosetsmakeuseofaradiowave
frequencybandwidththatisdierentfrom
thatofWi-Fi,andthereforehasnoeecton
communicationbythisproductortheTV/
radioset.
However,whenaTV/radiosetisplacedcloseto
aWi-Fiproduct,electromagneticwavesemitted

bytheWi-Fiproductmaycausenoisetooccurinthe
soundorimagesoftheTV/radio.”
•
Radio signals are unable to penetrate through
reinforced steel, metal, or concrete.
Theradiowavesusedbythisproductareunable
topenetratethroughreinforcedsteel,metal,or
concretematerials.
Itmaydicultforcommunicationtobeestablished
iftworoomsoroorsareseparatedbythese
materials.
*Communicationmayalsogetweakerwhenthere
arehumansubjectsorpartsofthebodyinbetween
theWi-Fidevices.
•
Do not connect to wireless networks that you
do not have authorization for.
Onceconnected,itmaybeconsideredas
unauthorizedaccessandlegalactionscanbetaken
againstyou.
•
Do not use the Wi-Fi function outside the
country of purchase.
Dependingonthecountry,theremayberestrictions
ontheuseofradiowavesandanyviolationscouldbe
punishablebylaw.
•
Exporting/Bringing the Unit Overseas
PermissionfromtheU.S.governmentmaybe
requiredwhenbringingtheunittoanexport
controlledcountrysetbytheU.S.government
(suchasCuba,Iraq,NorthKorea,Iran,Rwanda,
andSyria.AsofJune2012).
Formoreinformation,consulttheU.S.Embassy
CommercialService.
Waterproof Function
Thiscameraisequippedwithawaterprooffunction.
Thiscameracanmakerecordingsinmarinewaterand
freshwater.Werecommendtoselect[Blue(marine)]/
[Green(marine)]inWhiteBalanceforunderwaterscene.
ThewaterproofistestedinaccordancewithJVCtest
standardanditdoesnotassuredamage-freeortrouble-free
operation.(WaterprooffunctionnotevaluatedbyUL.)
The waterproof cannot be guaranteed if the camera
is subject to impact. WaterproofFunction:IECStandard
publication529IPX8.
•
The cover for the ports must be rmly
closed.
•
Do not use this product in water deeper
than 5 m (16.4 ft).
•
Do not use in the following locations:
Place with higher water pressure than specied, in
Ifthissymbolisshown,itisonly
validintheEuropeanUnion.
hot springs or water of 40°C (104°F) or higher.
•
Supplied accessories are not waterproof.
gMalfunctionduetowaterimmersion(IPX85m(16.4ft)
30minutes)andotherdamagescausedbymisuseby
thecustomerisnotcoveredbywarranty.
Beforeuse,besuretoreadthe“DetailedUserGuide”in
thebuilt-inmemorywiththecamera.
— Maintenance After Use —
•
After use in water or or a dusty environment,
rinse the camera as soon as possible with still
fresh water in basin.
•
Always keep the lens clean and wipe the
water droplets o the camera with a soft
and dry cloth.
•Air-drythecameracompletelyinashaded
area.
gThe waterproof of the ports are not
guaranteed in all environments or
conditions(IPX85m(16.4ft)30minutes).
—CAUTION—
To maintain compliance with FCC’s RF exposure
guidelines, use only the supplied antenna.
Unauthorized antenna, modication, or
attachments could damage the transmitter and
may violate FCC regulations. This device complies
with Part 15 of the FCC Rules. Operation is subject
to the following two conditions:
(1) This device may not cause harmful
interference.
(2) This device must accept any interference
received, including interference that may Cause
undesired operation.
ATTENTION: The product you have purchased is
powered by a rechargeable battery
that is recyclable.
Please call 1-800-8-BATTERY for
information on how to recycle this
battery. (USA and Canada only)

5
Tour of Your Camera
[Record]/[SET]/[Play]/[Pause] Button
Microphone
Speaker
LCD Monitor
Lens
[Wide]/[Previous]
Button
Power/Charge
Light
[Tele]/[Next] Button
Power Button
Tripod Mounting
Socket
[MENU]/[Delete]
Button
Mini USB 2.0 Port (Inside)
HDMI Mini Connector (inside)
[Playback]/[Exit] Button
Port/Slot Cover Latch
Battery Slot (inside)
SD Slot (inside)
Tripod Mounting
Socket
Strap Hook
Protect from dropping with
a strap or similar measures

6
Accessories part
BN-VH105 Battery USB cable
LCD protect lm
Flexible mount
Notice:
1. Remove any dirt or moisture before attaching accessories.
2. The exible mount, once attached, cannot be removed.
3. For best results do not use lens protector in water.
Lens protector x2 Screw and screwdriver
Goggle mount
Flexible mount base

7
Accessories part
Replacing flexible mount
Removing lens cover
Attaching goggle mount
Replacing flexible mount
Removing lens protector
1. Lift the tabs on the rubber side and insert
the belt.
2. Secure with four screws.
Turn the knob in the direction indicated.
(Remove the mount when it is completely
loose.)
Press in on the protrusions to remove the lens
protector from the camera.

8
Getting Started
3
Insert the memory card
1. Slide the latch and open the cover.
2. Insert the SD card (Optional) into the slot until
it locks properly.
3. To remove the SD card, press inward to release
it and gently pull it out.
1
Load the battery
1. Slide the latch and open the cover.
2. Insert the battery according to the correct
polarity marks (+ or -).
3. Close the cover rmly for waterproof use.
1
2
1
2
3
How to set the clock
1. Press the MENU button
2. Select [Time Setting] and then press /
for Year, Month, Day, Hour, and Minute.
3. Press [ SET ] to go for next.
Using one with an output higher
than 5V riskd breakdown.
How to view the Detailed User Guide
1. Connect the camera to a computer.
2. Open DV Drive, then double click
[ Start for US.pdf ]
Note: Adobe Reader must be installed to read
PDF les.
Get from Adobe’s web site http://adobe.com/.
Supported SD card
SD/ SDHC/ SDXC (up to 64GB, class 4 or above)
-TOSHIBA -SanDisk
2
Charge the Li-ion battery
1. Connect USB cable.
2. Press / to select [Adapter], then
3. A blinking light will indicate active charging.
4. In adapter charging mode, the full charging
time for a depleted battery is about 3.5 hours
and the light will turn off automatically after the
charging is completed.
5. In PC USB charging mode, a longer charging
time is required.
press [ SET ]
Adapter charging mode
(Please use JVC authenticated adapter
and part no. is AC-V17LU)

9
To access menu
• Press to open the option menu.
• Use / to change
between the options. (e.g.
VIDEO/PHOTO MODE,
WIFI, RESOLUTION, WHITE
BALANCE).
To review videos/
photos
• Press to go to the Playback
Mode. You can view or delete
the recorded les.
1
3
2
4
5
To power on
• Hold it for 2 second.
• After idling for 5 minutes,
the camera will turn off
automatically.
To record
• In Video Mode, press to take
video. In Photo Mode, press to
take photo.
To zoom in or out
• +:Zoom In. -:Zoom out.
1
2
3
4
5
Record & Play

10
1
PC: Install WiVideo
• Use camera to install [ WiVideo ] on PC
by plugging USB cable. If there is no Auto-
Installation, please go to [ My Computer ]→[
WiVideo ] for installation.
WiVideo is the software to connect the camera with PC.
2
PC: Unplug the USB cable
3
Camera: Enable WiFi to PC
• Press [ MENU ] Button → Select [ WiFi ],
then press [ SET ] Button to enter its menu.
• Select [ WiFi to PC ] to turn on Wi-Fi.
The camera screen will show the Wi-Fi ID and
Password.
• (The default password is 0000. Wi-Fi ID and
password can be edited on WiVideo via USB
connection.)
4
PC: Connect to Camera
• Click [ Detect Wi-Fi Camera ] to search
camera.
• Enter the Wi-Fi ID and Password shown on
camera to the WiVideo window.
NOTE: WiVideo is for Windows®based systems only.
WiFi to PC
1
2
3
4

11
NOTE: WiVideo is for Windows®based systems only.
Active Mode Function
WiFi/USB
Manage video and photo les
• Transfer les from camera to PC.
• Delete les in your camera.
WiFi
Watch live video
• Watch live streaming from your camera on your PC.
• Use this camera as a remote home monitor.
WiFi
Wireless webcam for Skype/MSN
• Change the video/audio setting of your Skype/MSN.
• Select WiVideo Camera, which indicates your
camera.
USB
Account Setting
• Set up your social website account information
and save to your camera
.
USB
WiFi Setup
•
Congure and synchronize your WiFi prole on your
camera.
•
Name your camera and create your security password.
WiVideo Function

12
WiFi Modes to Mobile
NOTE: WiVideo is for Windows®based systems only.
NOTE: Before proceed any connection between Mobile and Camera, please connect
to PC via USB cable and set up Wi-Fi prole with WiVideo (Enter SSID and Password).
System Mode Page
Android
Connect via AP
13
Connect via Mobile Hotspot
14
iPhone/iPad
Connect via AP
15
Connect via Mobile Hotspot
16
Connect Directly to Camera
17

13
Mobile: Install WiVideo
• WiVideo is a software to connect wireless
between camera and mobile/tablet.
• Download WiVideo APP from Google Play
onto mobile/tablet.
Mobile: Connect to Access Point
• Go to [Settings] → [ Wireless & network ]
→ [ Wi-Fi settings ] → [ Wi-Fi ]
(Enable WiFi and connect to AP)
Camera: Connect to Same AP
• Press [ MENU ] → select [ WiFi ]→
choose [ WiFi to Mobile ] to scan
available AP →connect camera to the same
AP
• Note: Refer to the detailed User Guide
section 7 to set up hotspot password into
Camera.
4
Mobile: Launch WiVideo APP
• Press [ WiVideo ] APP icon → detecting
cameras → enter the password (The default
is 0000 and it can be edited via WiVideo APP
Setup) → start preview and remote control.
1
2
3
[MENU] Button
[SET] Button
WiFi to Mobile (Android: AP Mode)
1
2
3
4

14
Mobile: Install WiVideo
• WiVideo is a software to connect wireless
between camera and mobile/tablet.
• Download WiVideo APP from Google Play
onto mobile/tablet.
Mobile: Enable Mobile Hotspot/AP
• Go to [ Settings ] → [ Wireless & network ]
→ Enable mobile hotspot/AP
Note: Operation may vary, please refer to each
individual model.
Note: Be aware of using Hotspot service may not
be provided in some countries.
Camera: Connect to Hotspot/AP
• Press [ MENU ] → select [ WiFi ]→
choose [ WiFi to Mobile ] to scan
available AP →connect camera to mobile
hotspot/AP
Note: Refer to the detailed User Guide section 7
to set up hotspot password into Camera.
4
Mobile: Launch WiVideo APP
• Press [ WiVideo ] APP icon → detecting
cameras → enter the password (The default
is 0000 and it can be edited via WiVideo APP
Setup) → start preview and remote control.
1
2
3
[MENU] Button
[SET] Button
WiFi to Mobile (Android: Mobile Hotspot Mode)
1
2
3
4

15
Mobile: Install WiVideo
• WiVideo is a software to connect wireless
between camera and mobile/tablet.
• Download WiVideo APP from App Store onto
iPhone/ iPad.
Mobile: Connect to Access Point
• Go to [ Settings ] → [ WiFi ] → Enable WiFi
and connect to AP
Camera: Connect to Same AP
• Press [ MENU ] → select [ WiFi
] → choose [ WiFi to Mobile ] to scan
available AP →connect camera to the same
AP
Note: Refer to the detailed User Guide section
7 to set up AP password into Camera.
4
Mobile: Launch WiVideo APP
• Press [ WiVideo ] APP icon → detecting
cameras → enter the password (The default
is 0000 and it can be edited via WiVideo APP
Setup) → start preview and remote control.
1
2
3
[MENU] Button
[SET] Button
WiFi to Mobile (iPhone/iPad: AP Mode)
1
2
3
4

16
Mobile: Install WiVideo
• WiVideo is a software to connect wireless
between camera and mobile/tablet.
• Download WiVideo APP from App Store onto
iPhone/iPad.
Mobile: Enable Personal Hotspot
• Go to [ Settings ] → [ WiFi ] → Enable
[ Personal Hotspot ]
Note: Be aware of using Hotspot service may not
be provided in some countries.
Camera: Connect to Hotspot
• Press [ MENU ] → select [ WiFi ]→
choose [ WiFi to Mobile ] to scan
available AP →connect camera to mobile
hotspot/AP
Note: Refer to the detailed User Guide section 7
to set up hotspot password into Camera.
4
Mobile: Launch WiVideo APP
• Press [ WiVideo ] APP icon → detecting
cameras → enter the password (The default
is 0000 and it can be edited via WiVideo APP
Setup) → start preview and remote control.
1
2
3
[MENU] Button
[SET] Button
WiFi to Mobile (iPhone/iPad: Mobile Hotspot Mode)
1
2
3
4

17
Mobile: Install WiVideo
• WiVideo is a software to connect wireless
between camera and mobile/tablet.
• Download WiVideo APP from App Store onto
your iPhone/ iPad.
Camera: Enable Direct Mode
• Press [ MENU ] → select [ WiFi ] →
choose [ WiFi to Mobile ] →select [ Direct
Mode ]→camera ID shown on the screen
Mobile: Connect to Camera
• Go to [ Settings ] → [WiFi] → Select
camera ID to connect
Note: Once the icon [ ]shows, the Direct
Mode connection is activated. It will take a while
for [ ] to show up.(More than 1 minute)
4
Mobile: Remote Control Camera
• Press [ WiVideo ] APP icon → detecting
cameras → enter the password (The default
is 0000 and it can be edited via WiVideo APP
Setup) → start preview and remote control.
1
2
3
[MENU] Button
[SET] Button
WiFi to Mobile (iPhone/iPad: Direct Mode)
1
2
3
4

18
Problem/Situation Remediation/Solution
Cannot turn on the camera/ The
power turns off suddenly. Battery pack is weak or depleted. Recharge the battery pack.
Camera cannot be turned on
after plugging power adapter. Please make sure that you use the JVC original power adapter and
connect it to the power outlet correctly.
Wi-Fi icon does not appear after
activating Wi-Fi. Battery is low. Recharge the battery pack.
The camera is frozen. Please remove the battery/unplug the adapter. Then, insert the
battery/plug the adapter and turn on the camera again.
When the camera is connected
to the PC via USB cable, many
Autoplay windows may pop out.
They indicate the disks of the
camera.
“DV” indicates the internal memory of the camera.
“Removable Disk” indicates the external memory (memory card
installed in the camera).
“WiVideo” indicates the bundled program. Please double-click it to
start installation automatically.
The LCD shows “Connection
Failed”.
The password conguration does not match to the AP device you
want to connect.
The camera is not in the wireless network service area or weak
network signal. Please make sure the Access Point is able to access
the Internet.
The camera does not support the type of encryption used on the
AP device.
The social websites update their websites without notice. Please visit
the website to update your account setting or upgrade your camera
rmware.
Wi-Fi connections break off.
The camera disables any Wi-Fi connection three minutes after
shooting starts. Use the menu to re-enable it.
Reconnect in a clear radio environment. Remember that the
communication speed drops, interfering with connection, if the
receiver is too far away, there is something in between blocking
communications, or there is a microwave or wireless equipment in
use nearby.
Connecting a USB cable stops
photography. Photography is
not possible with a USB cable
connected.
Only time lapse and endless recording are available with a USB cable
connected. (Endless recording is limited to 720p 30 fps.)
There is no HDMI output. HDMI output is disabled during recording.
The thermometer icon appears. Turn off the camera and allow it time to cool down.
Trouble Shooting

GC-XA1
•
Avant toute utilisation, il est indispensable de lire « Précautions
de sécurité » (page 2) et « Précautions importantes » (page 3) an
d’utiliser le produit correctement.
• Un mauvais fonctionnement du à l’immersion dans l’eau et tout
autre dommage causé par une mauvaise utilisation aux mains du
client ne seront pas couverts par la garantie.
•
BAvant toute utilisation, veillez à lire le « Mode d’emploi détaillé » qui se
trouve dans la mémoire intégrée du caméscope.
• Pour plus de détails sur l’utilisation, voyez dans la mémoire intégrée
le « Mode d’emploi détaillé ».
• Pour utiliser WiVideo, consultez le « Mode d’emploi détaillé » qui se
trouve dans la mémoire intégrée.
Référence à conserver:
Saisissez ci-dessous le no du modèle (marqué au bas du
caméscope) et le no de série (marqué sur la monture de batterie du
caméscope).
No du modèle
No de série
Français
ACTION CAMERA
Mode d’emploi essentiel
TM
U

Précautions de sécurité
NOTES:
• Laplaqueportantlenodesériesetrouvesurla
monturedelabatterieducaméscope.
ATTENTION:
Laprisesecteurdoittoujoursêtrefaciled’accès.
• Encasdefonctionnementanormal,débranchez
immédiatementlaprisesecteur.
AVERTISSEMENT:
Nepasexposerlecaméscopeàunechaleurexcessive
(pleinsoleil,feu,etc.).
CONSIGNES DE SÉCURITÉ IMPORTANTES
1.Lisezcesinstructions
2.Lisezcesinstructions.
3.Tenezcomptedetouslesavertissements.
4.Suiveztouteslesinstructions.
5.Nettoyeruniquementavecunchionsec.
6.Nebloqueraucuneouverturedeventilation.Installer
selonlesinstructionsdufabricant.
7.Nepasinstalleràproximitédesourcesdechaleur
tellesqueradiateurs,bouchesd’airchaud,poêles
ouautresappareils(ycomprisdesamplicateurs)
dégageantdelachaleur.
8.
Protégezlecordond’alimentationdepersonnesmarchant
dessus,depincements,notammentauniveaudela
prise,branchéeounon,etdelasortiedel’appareil.
9.N’utilisezquedesaccessoiresspéciésparlefabricant.
10.
Nelaissezpasl’appareilbranchésurlesecteurpendant
unorage,ous’iln’estpasutilisépendantlongtemps.
11.Coneztouteinterventionàdupersonnelqualié.
Ilfautfaireappelàuntechniciensil’appareilasubiun
dommagequelconque,parexempleunedégradation
ducordond’alimentationoudelaprisesecteur,sidu
liquideacoulédessusousidesobjetssonttombés
dedans,s’ilaétéexposéàlapluieouàl’humidité,s’il
nefonctionnepasnormalement,ous’ilesttombé.
Encasdemauvaisfonctionnement,cessezimmédiatement
d’utiliserl’appareiletcontactezlefabricantsurwww.jvc.
comouenappelantle+1-800-252-5722
ToutemodicationnonapprouvéeparJVCpourrait
priverl’utilisateurdudroitd’utiliserl’appareil.
Cematérielaététestéetconsidéréconformeaux
contraintesimposéesauxdispositifsnumériquesde
classeB,autitredelasection15durèglementde
laFCC.Cescontraintessontconçuespourassurer
uneprotectionraisonnablecontrelesinterférences
nuisiblesdansuneinstallationrésidentielle.Cet
appareilproduit,utiliseetpeutirradierdel’énergie
deradiofréquenceetpeut,s’iln’estpasinstalléet
utiliséconformémentauxinstructions,provoquerdes
interférencesnuisiblesauxcommunicationsradio.
Cependant,iln’estpasgarantiquedesinterférences
neseproduisentpasdansuneinstallationen
particulier.Sicetappareilcausedesinterférences
nuisiblesàlaréceptionradioouTV,cequipeutêtre
déterminéenéteignantetenrallumantl’appareil,
l’utilisateurestinvitéàs’eorcerdecorrigercelaen
adoptantuneouplusieursdesmesuressuivantes:
Réorienteroudéplacerl’antenneréceptrice.Éloigner
l’appareildurécepteur.Brancherl’appareilàuneprise
setrouvantsurunautrecircuitquecelleàlaquelleest
raccordélerécepteur.Vousfaireaiderparlerevendeur
ouparuntechnicienradio/TVexpérimenté.
Déclaration de conformité
Numérodumodèle:GC-XA1
Marquecommerciale:JVC
Partieresponsable:JVCAMERICASCORP.
Adresse:1700ValleyRoadWayne,N.J.07470
Téléphone:973-317-5000
Cetappareilestconformeauxdispositionsdela
section15durèglementFCC.Sonutilisationest
sujetteauxdeuxconditionssuivantes:(1)Cetappareil
nedoitpascauserd’interférencesnuisibleset(2)
Cetappareildoitacceptertouteinterférencereçue,
ycomprisdesinterférencespouvantprovoquerune
miseenmarchenonvoulue.
CetappareilnumériquedeclasseBestconformeaux
règlementscanadiensICES-003.
ATTENTION
Le symbole de l’éclair à pointe de èche dans un
triangle équilatéral est là pour alerter l'utilisateur de la
présence à l’intérieur du boîtier du produit de « voltage
dangereux » non isolé, pouvant être susamment
important pour constituer un risque de choc électrique
aux personnes.
Le point d’exclamation dans un triangle équilatéral est
là pour alerter l’utilisateur de la présence d’instructions
importantes d’utilisation ou de maintenance dans la
documentation qui accompagne l’appareil.
ATTENTION: POUR RÉDUIRE LE RISQUE DE CHOC ÉLECTRIQUE, NE
PAS ENLEVER LE COUVERCLE (NI LE FOND).IL N’Y A À L’INTÉRIEUR
AUCUN ÉLÉMENT RÉPARABLE PAR L’UTILISATEUR.CONFIEZ TOUTE
RÉPARATION À DES TECHNICIENS QUALIFIÉS.
RISQUE DE CHOC
ÉLECTRIQUENE PAS OUVRIR
Table of contents
Languages:
Other JVC Action Camera manuals

JVC
JVC GC-XA2 BE Operating and maintenance manual

JVC
JVC ADIXXION GC-XA2 User manual

JVC
JVC GC-XA1 Operating and maintenance manual

JVC
JVC ADIXXION GC-XA2 User manual

JVC
JVC ADIXXION GC-XA2 Operating and maintenance manual

JVC
JVC GC-XA1 BE Operating and maintenance manual

JVC
JVC GC-XA1 BE Operating and maintenance manual

JVC
JVC ADIXXION GC-XA2 User manual

JVC
JVC GC-XA1EU Operating and maintenance manual

JVC
JVC GC-XA1 Operating and maintenance manual