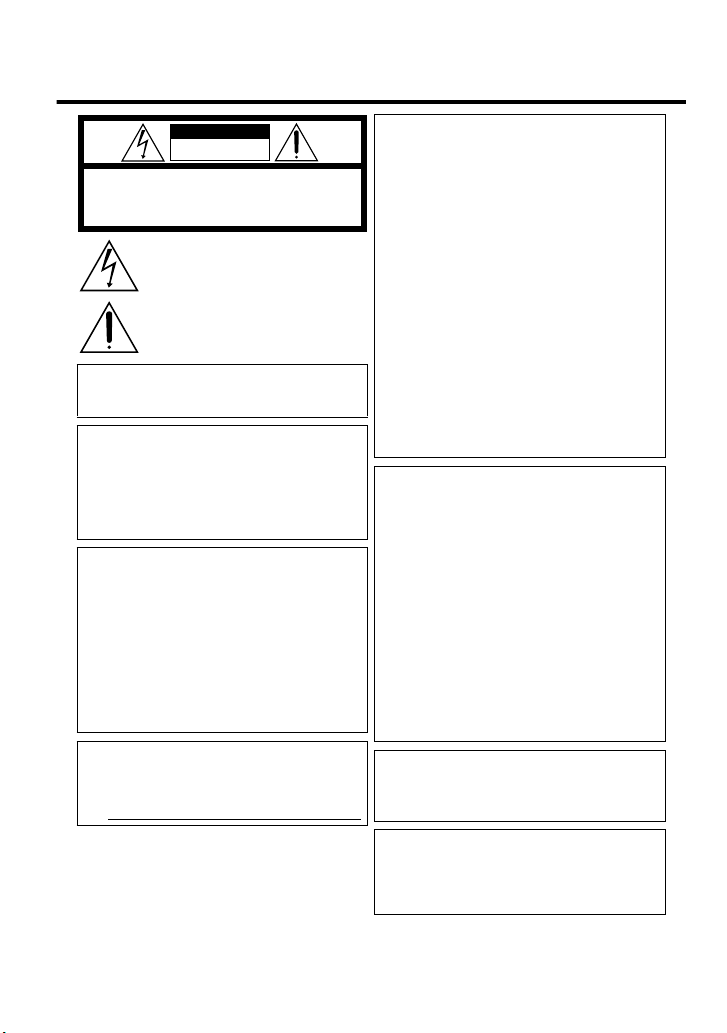
JVC Everio GZ-HD500U Operating and maintenance manual

HD HARD DISK CAMERA
GZ-HD620U/GZ-HD500U
Basic User Guide
Dear Customers
Thank you for purchasing this JVC product.
Before use, please read the Safety Precautions and Cautions on P.2 and P.29 to ensure safe
use of this product.
Some features explained in this manual only apply to the specific camera model identified.
This product comes with a “Basic User Guide” (this manual) and a “Detailed User Guide”.
Detailed User Guide
.
Explains the ways of shooting in various situations and the
useful features.
■Access the following website on your PC
http://manual.jvc.co.jp/index.html/
For Future Reference:
Enter the Model No. (located on the bottom of the camera) and Serial No.
(located on the battery pack mount of the camera) below.
Model No.
Serial No.
Getting StartedRecordingPlaybackCopyingOthers

Safety Precautions
.
CAUTION
RISK OF ELECTRIC SHOCK
DO NOT OPEN
CAUTION: TO REDUCE THE RISK OF ELECTRIC SHOCK,
DO NOT REMOVE COVER (OR BACK).
NO USER-SERVICEABLE PARTS INSIDE.
REFER SERVICING TO QUALIFIED SERVICE PERSONNEL.
The lightning flash with arrowhead symbol, within an
equilateral triangle, is intended to alert the user to the
presence of uninsulated "dangerous voltage" within the
product's enclosure that may be of sufficient magnitude
to constitute a risk of electric shock to persons.
The exclamation point within an equilateral triangle is
intended to alert the user to the presence of important
operating and maintenance (servicing) instructions in
the literature accompanying the appliance.
WARNING: TO PREVENT FIRE OR SHOCK
HAZARD, DO NOT EXPOSE THIS UNIT TO
RAIN OR MOISTURE.
NOTES:
•The rating plate and safety caution are on the
bottom and/or the back of the main unit.
•The serial number plate is on the battery pack
mount.
•The rating information and safety caution of the
AC adapter are on its upper and lower sides.
Caution on Replaceable lithium battery
The battery used in this device may present a fire
or chemical burn hazard if mistreated.
Do not recharge, disassemble, heat above 100°C
or incinerate.
Replace battery with Panasonic, Sanyo, Sony or
Maxell CR2025.
Danger of explosion or Risk of fire if the battery is
incorrectly replaced.
•Dispose of used battery promptly.
•Keep away from children.
•
Do not disassemble and do not dispose of in fire.
For USA-California Only
This product contains a CR Coin Cell Lithium
Battery which contains Perchlorate Material
– special handling may apply.
See www.dtsc.ca.gov/hazardouswaste/perchlorate
When the equipment is installed in a cabinet or on
a shelf, make sure that it has sufficient space on all
sides to allow for ventilation (10 cm (3-15/16") or
more on both sides, on top and at the rear).
Do not block the ventilation holes.
(If the ventilation holes are blocked by a
newspaper, or cloth etc. the heat may not be able
to get out.)
No naked flame sources, such as lighted candles,
should be placed on the apparatus.
When discarding batteries, environmental
problems must be considered and the local rules or
laws governing the disposal of these batteries must
be followed strictly.
The apparatus shall not be exposed to dripping or
splashing.
Do not use this equipment in a bathroom or places
with water.
Also do not place any containers filled with water
or liquids (such as cosmetics or medicines, flower
vases, potted plants, cups etc.) on top of this unit.
(If water or liquid is allowed to enter this
equipment, fire or electric shock may be caused.)
Do not point the lens directly into the sun. This
can cause eye injuries, as well as lead to the
malfunctioning of internal circuitry. There is also a
risk of fire or electric shock.
CAUTION!
The following notes concern possible physical
damage to this unit and to the user.
Carrying or holding this unit by the LCD monitor
can result in dropping the unit, or in a malfunction.
Do not use a tripod on unsteady or unlevel surfaces.
It could tip over, causing serious damage to the
unit.
CAUTION!
Connecting cables (Audio/Video, S-Video, etc.) to
this unit and leaving it on top of the TV is not
recommended, as tripping on the cables will cause
the unit to fall, resulting in damage.
CAUTION:
WARNING:
The battery pack, this unit with battery installed,
and the remote control with battery installed
should not be exposed to excessive heat such as
direct sunlight, fire or the like.
The mains plug shall remain readily operable.
•Remove the mains plug immediately if this unit
functions abnormally.
.
2For more information, refer to the Detailed User Guide
http://manual.jvc.co.jp/index.html/

.
IMPORTANT SAFETY INSTRUCTIONS
1. Read these instructions.
2. Keep these instructions.
3. Heed all warnings.
4. Follow all instructions.
5. Do not use this apparatus near water.
6. Clean only with dry cloth.
7. Do not block any ventilation openings. Install in
accordance with the manufacturer’s instructions.
8. Do not install near any heat sources such
as radiators, heat registers, stoves, or other
apparatus (including amplifiers) that produce heat.
9. Protect the power cord from being walked on or
pinched particularly at plugs, convenience
receptacles, and the point where they exit from
the apparatus.
Remember that this unit is intended for
private consumer use only.
Any commercial use without proper permission
is prohibited. (Even if you record an event such
as a show, performance or exhibition for personal
enjoyment, it is strongly recommended that you
obtain permission beforehand.)
Trademarks
10. Only use attachments/accessories specified by
the manufacturer.
11. Use only with the cart,
stand, tripod, bracket,
or table specified by
the manufacturer, or
sold with the apparatus.
When a cart is used,
use caution when
moving the cart/
apparatus combination
to avoid injury from tip-over.
12. Unplug this apparatus during lightning storms or
when unused for long periods of time.
13. Refer all servicing to qualified service personnel.
Servicing is required when the apparatus has
been damaged in any way, such as power-supply
cord or plug is damaged, liquid has been spilled
or objects have fallen into the apparatus, the
apparatus has been exposed to rain or moisture,
does not operate normally, or has been dropped.
If this symbol is shown, it is only valid
in the European Union.
• AVCHD and AVCHD logotype are trademarks
ofPanasonic Corporation and Sony Corporation.
• x.v.Color™ is a trademark of
Sony Corporation.
• HDMI is a trademark of HDMI
Licensing, LLC.
• Manufactured under license from Dolby
Laboratories. Dolby and the double-D symbol
are trademarks of Dolby Laboratories.
• Windows®is either registered trademark or
trademark of Microsoft Corporation in the
United States and/or other countries.
• Macintosh is a registered trademark of Apple Inc.
• iTunes, iMovie, iPhoto are trademarks of Apple
Inc., registered in the U.S. and other countries.
• YouTube™ and the YouTube logo are
trademarks and/or registered trademarks of
YouTube LLC.
•
Other product and company names included in
this instruction manual are trademarks and/or
registered trademarks of their respective holders.
•Fire or injury may result if batteries NOT
approved by JVC are used.
Only use the batteries specified on page 24.
•
Please do not pull or bend the AC adapter plug
and cable. This may damage the AC adapter.
CAUTION:
JVC will not be responsible for any lost data. It is
recommended to copy your important recorded
data to a disc or other recording media for storage.
Make a backup of important recorded data
For more information, refer to the Detailed User Guide
http://manual.jvc.co.jp/index.html/ 3

Contents
Safety Precautions .............................. 2
Contents .............................................. 4
Verifying the Accessories .................... 4
Names of Parts and Functions ............ 5
▶Getting Started .......................... 6
Charging the Battery Pack .................. 6
Grip Adjustment .................................. 7
Attaching the Lens Cap (GZ-HD500)
............................................................. 7
Clock Setting ....................................... 8
▶Recording ................................ 10
Video Recording ................................ 10
Still Image Recording ........................ 11
Recording on a microSD card ........... 12
▶Playback .................................. 14
Playing Back/Deleting Files on this Unit
........................................................... 14
Playing Back on TV ........................... 15
▶Copying ................................... 17
Copying Files .................................... 17
Dubbing Files by Connecting to a DVD
Recorder or VCR ............................... 18
Copying to Computer ........................ 19
▶Others ..................................... 23
Using the Menu ................................. 23
Recordable Time/Number of Images
........................................................... 24
Troubleshooting ................................ 25
Cautions ............................................ 29
Specifications .................................... 31
▶Learning About Advanced Operations
Use the “Detailed User Guide” on your PC to find out more about the advanced
operations.
■Access the following address on your PC
http://manual.jvc.co.jp/index.html/
Verifying the Accessories
AC Adapter
AP-V30U *¹
Battery Pack
BN-VG114US
USB Cable
(Type A - Mini Type B)
AV Cable
.
.
.
.
CD-ROM Basic User Guide
(this manual) ●Remote Control *²
RM-V760
●Lithium Battery *²
(Pre-installed in the remote control)
●Component Cable *²
●Lens Cap
(GZ-HD500)
.
.
●microSD cards are sold separately.
For details on the types of cards that can be used on this unit, refer to P.12.
*1 When using the AC adapter overseas, please prepare a commercially available
converter plug for the country or region of visit.
*2 Supplied for GZ-HD620 only.
4For more information, refer to the Detailed User Guide
http://manual.jvc.co.jp/index.html/

Names of Parts and Functions
.
AV
s
r
t
1
2
3
5
6
7 89 ji
a bc
f
4
e
d
h
g
m
o
n
l
k
q
p
0
ALens/Lens Cover *
BLight *
CRemote Sensor *
DStereo Microphone
ELCD Monitor
Turns the power on/off by opening and
closing.
FSlider
Selects an image or item.
GC Button
Confirms the selected image or item.
HOperation Buttons
Functions differently according to the
operation.
ID (menu) Button ( P.23)
JCamera Sensor
KSpeaker
LACCESS (Access) Lamp
Lights up/blinks during recording or
playback.
MPOWER/CHARGE (Power/Charge)
Lamp ( P.6)
NL (Play/Record Mode) Button
Switches between recording and
playback modes.
OA/B (Video/Still Image) Button
Switches between video and still
image modes.
PUPLOAD/EXPORT* (Upload/Export to
iTunes*) Button
Recording :Takes videos in
YouTubeä or iTunes*
format.
Playback :Changes the video to
YouTubeä or iTunes*
format.
QM (Power/Information) Button
Recording :Displays the remaining
time as well as the
battery power during
continuous recording.
Playback :Displays file information.
Press and hold to turn the power on/off
while the LCD monitor is opened.
RAV Terminal ( P.15, P.18)
SCOMPONENT (Component)
Connector ( P.15)
THDMI Mini Connector ( P.15)
UZoom/Volume Lever ( P.10, P.14)
VSNAPSHOT (Still Image Recording)
Button ( P.11)
WUSB Terminal ( P.22)
XDC Terminal ( P.6)
YSTART/STOP (Video Recording)
Button ( P.10)
ZGrip Belt Release Lever
aGrip Belt ( P.7)
bTripod Mounting Hole
cmicroSD Card Slot ( P.12)
dBattery Release Lever ( P.6)
* For GZ-HD620 only.
For more information, refer to the Detailed User Guide
http://manual.jvc.co.jp/index.html/ 5

Charging the Battery Pack
.
BATT.
2Connect the DC
terminal.
To detach the battery pack
Charging Lamp
1Attach the battery pack.
The battery pack is not
charged at the time of
purchase.
*
Align the top of the battery
with the mark on this unit,
and slide in until the battery
clicks into place.
•
(Base)
Cover
3Plug in the power.
Charging in progress:
Charging finished:
Blinks
Goes out
AC Adapter
To AC Outlet
(110V to 240V)
Charging Lamp
CAUTION
Be sure to use JVC battery packs.
●If you use any other battery packs besides JVC battery packs, safety and
performance cannot be guaranteed.
●Charging time: Approx. 2 h 30 m (using supplied battery pack)
* The charging time is when the unit is used at 25°C (77°F). If the battery pack is
charged outside the room temperature range of 10°C - 35°C (50°F - 95°F),
charging may take a longer time or it may not start. The recordable and
playable time may also be shortened under some usage conditions such as at
low temperature.
Getting Started
6For more information, refer to the Detailed User Guide
http://manual.jvc.co.jp/index.html/

Grip Adjustment
.
2Adjust the length
1Pull back the belt 3Attach the belt
Using as a Hand Strap
Remove the strap and loop it around your wrist.
While pressing A, pull B and remove the strap.
.
Press and hold
●When attaching the hand strap, insert C until it clicks into place.
Attaching the Lens Cap (GZ-HD500)
Damage may occur to the lens if this unit is stored without the lens cap attached.
.
CAUTION
●Please be careful not to lose the lens cap.
For more information, refer to the Detailed User Guide
http://manual.jvc.co.jp/index.html/ 7
Getting StartedRecordingPlaybackCopyingOthers

Clock Setting
1Open the LCD monitor.
.
AV
●The unit turns on. When the LCD
monitor is closed, the unit turns off.
2Select “YES” and touch C when
“SET DATE/TIME!” is displayed.
.
SET DATE/TIME!
YES
NO
SET
Select
②
Touch
1
Touch2
Slider
Operation Buttons
●Slide along the slider to select, then
touch the operation buttons to set.
3Set the date and time.
.
10 00 AM20101
JAN
CLOCK SETTING
DATE TIME
SET QUIT
Cursor
●Use the slider to adjust the year,
month, day, hour and minute.
●Touch the operation buttons “E” / “F”
to move the cursor.
4After setting the date and time,
touch C.
5Select the region where you live
and touch C.
●The city name and time difference is
displayed.
.
GMT JAN. 1. 2010 10:00 AM
CLOCK/AREA SETTING
SAVE QUIT
NOTE
●Touch the slider and buttons
around the screen with your
fingers.
●The slider and buttons do not
function if you touch them with
your fingernails or with gloves on.
●The displays on the screen do not
work even if you touch them.
●“SET DATE/TIME!” is displayed
when you turn on this unit after it
has not been used for a
prolonged period.
Charge this unit for more than 24
hours before setting the clock.
( P.6)
8For more information, refer to the Detailed User Guide
http://manual.jvc.co.jp/index.html/

■To reset the clock
Set the clock with “CLOCK ADJUST”
from the menu.
①Display the menu.
.
To u ch
②Select “CLOCK ADJUST” and
touch C.
.
?
VIDEO
DISPLAY SETTINGS
CLOCK ADJUST
BASIC SETTINGS
CONNECTION SETTINGS
MEDIA SETTINGS
SET QUIT
③Select “CLOCK SETTING” and
touch C.
.
?
CLOCK ADJUST
CLOCK SETTING
AREA SETTING
SET FOR DAYLIGHT SAVING TIME
SET QUIT
●The subsequent setting operations
are the same as steps 3 - 5 on the
previous page.
■To change the display
language
The language on the display can be
changed.
①Display the menu.
.
To u ch
②Select “DISPLAY SETTINGS”
and touch C.
.
?
VIDEO
DISPLAY SETTINGS
CLOCK ADJUST
BASIC SETTINGS
CONNECTION SETTINGS
SET QUIT
9+0&%76
③Select “LANGUAGE” and touch
C.
.
?
DISPLAY SETTINGS
LANGUAGE
DATE DISPLAY STYLE
MONITOR BRIGHTNESS
LCD BACKLIGHT
FOCUS ASSIST COLOR
SET QUIT
④Select the desired language and
touch C.
⑤Touch D to exit.
For more information, refer to the Detailed User Guide
http://manual.jvc.co.jp/index.html/ 9
Getting StartedRecordingPlaybackCopyingOthers

Video Recording
You can record without worrying about the setting details by using the auto mode.
Before recording an important scene, it is recommended to conduct a trial
recording.
.
AV
Press
Press
Touch
20x
2Select video
mode.
1Open the
LCD monitor.
3Check if the recording mode is
Auto.
If the mode is Manual, touch
the button to switch.
The mode changes between auto
and manual with every touch.
•
•
4Start recording.
Press again to stop.•
(Wide angle) (Telephoto)
Zooming
For
GZ-HD500,
remove the
lens cap.
•
■Indications during video recording
.
Remaining Recording Time
Video Quality
: Record-Standby
Scene Counter
Battery Indicator
: Recording in Progress
Recording Media
: SD Card
: Hard-Disk
NOTE
●The estimated recording time of the supplied battery pack is approximately 45
minutes. ( P.24)
Recording
10 For more information, refer to the Detailed User Guide
http://manual.jvc.co.jp/index.html/

Reducing Camera Shake (Video Recording)
When the image stabilizer is set, camera shake during recording can be effectively
reduced.
.
Touch
(White): Image stabilizer
(Green): Image stabilizer
(White): OFF
The setting switches with every touch.
A:Reduces camera shake under normal shooting conditions.
B:More effectively reduces camera shake during wide angle shooting. It is also
more effective for recording while walking.
NOTE
●It is recommended to set the image stabilizer to off when shooting a subject
of little movement with the unit on a tripod.
●Complete stabilization may not be possible if camera shake is excessive.
Still Image Recording
.
AV
Press halfway
Press fully
Press
Lights up during still
image recording
1Select still image
mode.
3Take a still image.
2Set the focus on the subject.
Lights up in green
when focused
■Indications during still image recording
.
1920
: SD Card
: Hard-Disk
Remaining Number of Shots
Image Quality
Recording in Progress
Shutter Speed
Focus
Battery Indicator
Image Size
Recording Media
For more information, refer to the Detailed User Guide
http://manual.jvc.co.jp/index.html/ 11
Getting StartedRecordingPlaybackCopyingOthers

Recording on a microSD card
When a commercially available microSD card is inserted, recordings can be made to the
card.
* To record to the microSD card it is necessary to adjust the media settings. ( P.13)
When no card is available, set media settings to “HDD” for recording.
.
AV
Press and hold
1
Press the Power button for more than
2 seconds to turn off this unit.
3Insert a microSD card.
2Open the cover.
(Base)
Turn off the power of this unit before
inserting or removing a card.
*
■To remove the microSD card
Push the card inward once, then pull it out straight.
.
AV
(Base)
NOTE
Operations are confirmed on the following microSD cards.
Manufacturer Panasonic, TOSHIBA, SanDisk, ATP
Video Class 4 or higher compatible microSDHC card (4 GB to
8 GB)
Still Image microSD card (256 MB to 2 GB),
microSDHC card (4 GB to 8 GB)
●Using microSD or microSDHC cards other than those specified above may
result in recording failure or data loss.
12 For more information, refer to the Detailed User Guide
http://manual.jvc.co.jp/index.html/

■To use a microSD card
Recording and playback can be
performed on a card when “REC
MEDIA FOR VIDEO” or “REC MEDIA
FOR IMAGE” of media settings is set
to “SD”.
①Display the menu.
.
To u ch
②Select “MEDIA SETTINGS” and
touch C.
.
?
VIDEO
DISPLAY SETTINGS
CLOCK ADJUST
BASIC SETTINGS
CONNECTION SETTINGS
MEDIA SETTINGS
SET QUIT
③Select “REC MEDIA FOR
VIDEO” or “REC MEDIA FOR
IMAGE”, and touch C.
.
?
MEDIA SETTINGS
REC MEDIA FOR VIDEO
REC MEDIA FOR IMAGE
FORMAT HDD
FORMAT SD CARD
DELETE DATA ON HDD
SET QUIT
④Select “SD” and touch C.
.
MEDIA SETTINGS
SD
SET QUIT
HDD
?
■To use microSD cards that
have been used on other
devices
Format (initialize) the card using
“FORMAT SD CARD” from media
settings.
All data on the card will be deleted
when it is formatted. Copy all files
on the card to a PC before
formatting.
①Touch D to display the menu.
②Select “MEDIA SETTINGS” with
the slider and touch C.
③Select “FORMAT SD CARD”
and touch C.
.
?
MEDIA SETTINGS
REC MEDIA FOR VIDEO
REC MEDIA FOR IMAGE
FORMAT HDD
FORMAT SD CARD
DELETE DATA ON HDD
SET QUIT
④Select “FILE” and touch C.
.
?
FORMAT SD CARD
FILE
FILE + MANAGEMENT NO
SET QUIT
⑤Select “YES” and touch C.
⑥After formatting, touch C.
For more information, refer to the Detailed User Guide
http://manual.jvc.co.jp/index.html/ 13
Getting StartedRecordingPlaybackCopyingOthers

Playing Back/Deleting Files on this Unit
Select and play back the recorded videos or still images from an index screen (thumbnail
display). The contents of the media selected in media settings ( P.13) are displayed on
the index screen.
.
AV
NOV.01.2009 04:55PM NOV.01.2009 04:55PMJAN.01.2010 04:55PM JAN.01.2010 04:55PM
VIDEO PLAYBACK VIDEO PLAYBACK
1
2
1
2
Select
Touch
Select
Touch
Press
Press
3Play back a file.
1Select the playback mode. Volume adjustment
during video playback
Turn up
the volume
Turn down
the volume
2Select video or still image mode.
To delete unwanted files
■Touch to stop.•Select “YES” when the confirmation
message appears and touch .
•
Media being
played back
■To capture a still image during playback
Pause the playback and press the SNAPSHOT button.
■Usable operation buttons during playback
Display During video playback During still image playback
d / ePlayback/pause Start/pause slideshow
fStop (returns to thumbnail display) Stop (returns to thumbnail display)
gAdvances to the next video Advances to the next still image
h
Returns to the beginning of the scene
Returns to the previous still image
iForward search -
jReverse search -
kForward slow-motion -
lReverse slow-motion -
Playback
14 For more information, refer to the Detailed User Guide
http://manual.jvc.co.jp/index.html/

Playing Back on TV
1Connect to a TV.
Refer also to the instruction manual of the TV.
** The component cable recommended is QAM1266-001.
●Press the Power button (M) for more than 2 seconds to turn off this unit.
To connect using the HDMI mini connector
If you are using an HDTV, you can play back in HD quality by connecting to the
HDMI terminal.
.
AV
TV
HDMI Terminal Input
To (HDMI mini)
Terminal
HDMI Cable (Optional)
To connect using the COMPONENT/AV connector
If you are using an HDTV, you can play back in HD quality by connecting to the
COMPONENT terminal.
.
AV
AV
Y
CB/PB
CR/PR
Green
Blue
Red
Component Video Input
Video Input
To COMPONENT
Terminal
TV
Video Input
Audio Input (L)
Audio Input (R)
White
*
Yellow
Red
To AV Terminal
AV Cable
(Provided)
Component Cable **
(Provided for
GZ-HD620 only)
*Do not connect the
yellow plug when
using component cable.
COMPONENT
For more information, refer to the Detailed User Guide
http://manual.jvc.co.jp/index.html/ 15
Getting StartedRecordingPlaybackCopyingOthers

2Connect the AC adapter. ( P.6)
●This unit powers on automatically when the AC adapter is connected.
3Select the TV input switch.
4Play back a file. ( P.14)
■To play back with date/time display
Set “DISPLAY ON TV” in the connection settings menu to “ON”.
Set “ON-SCREEN DISPLAY” in the playback menu to “DISPLAY DATE ONLY”.
■When images look unnatural on the TV
Images do not appear on the TV
properly.
●Disconnect the cable and connect again.
●Restart this unit by turning off and on.
The color of images looks
strange.
●When the video was recorded with “x.v.Color” set
to “ON”, set the x.v.Color setting of the TV to on.
●Adjust the TV's screen accordingly.
NOTE
●Please contact the TV manufacturer on questions or problems with setting the
TV to the correct mode.
●We recommend using the Category 2 HDMI cable (High Speed cable) for
viewing in higher picture quality.
16 For more information, refer to the Detailed User Guide
http://manual.jvc.co.jp/index.html/

Copying Files
You can create discs or copy the files on this unit by connecting it to various devices.
Devices
Standard Quality HD Quality
Page
.....
DVD Writer (*1)
.
-P P ---
External Blu-ray Drive
(*1)
.
-P P P - -
Blu-ray Recorder (*1)
.
- *2 *2 *2 *2 -
DVD Recorder
.
*2 P- - *2 18
VCR
.
P- - - - 18
External Hard Disk
.
- - - - P-
PC
.
- *3 *3 *3 P19
*1 Applicable to GZ-HD620 only.
*2 The way of copying files or creating discs varies according to the device in use.
For details, refer to the instruction manual of the device.
*3 For details on how to create a disc using a computer, refer to the Detailed User
Guide.
Copying
For more information, refer to the Detailed User Guide
http://manual.jvc.co.jp/index.html/ 17
Getting StartedRecordingPlaybackCopyingOthers

Dubbing Files by Connecting to a DVD
Recorder or VCR
You can dub videos in standard quality by connecting to a DVD recorder or VCR.
Refer also to the instruction manual of the TV, DVD recorder, VCR, etc.
1Connect to a VCR/DVD recorder.
●Press the Power button (M) for more than 2 seconds to turn off this unit.
.
AV
AV
To DC Terminal
VCR/DVD Recorder
Video Input
Audio Input (L)
Audio Input (R)
Video Input
To AV Terminal
AV Cable
(Provided)
Yellow
White
Red
AC Adapter
To AC Outlet
(110V to 240 V)
●This unit powers on automatically when the AC adapter is connected.
2Select the playback mode.
●Turn on this unit.
.
AV
Press
3Prepare to record.
Preparation on TV and VCR/DVD recorder
●Switch to a compatible external input.
●Insert compatible blank DVD or VHS to dub.
Preparation on this unit
●Set “VIDEO OUTPUT” in the connection settings
menu to the aspect ratio (“4:3” or “16:9”) of the connecting TV.
●To include the date during dubbing, set “DISPLAY ON TV” in the “CONNECTION
SETTINGS” menu to “ON”. Set “ON-SCREEN DISPLAY” in the playback menu to
“DISPLAY DATE ONLY”.
18 For more information, refer to the Detailed User Guide
http://manual.jvc.co.jp/index.html/

4Start recording.
●Start playback on this unit ( P.14) and press the record button on the recorder.
●After playback is complete, stop the recording.
Copying to Computer
Verifying System Requirements (Guideline)
Windows PC
You can copy files to a PC using the provided software.
Right-click on “Computer” (or “My Computer”) in the “Start” menu and select
“Properties” to check the following items.
■Windows Vista/Windows 7
.
Windows Vista
Home Basic or Home Premium
(Pre-installed versions only)
Windows 7
Home Premium
(Pre-installed versions only)
Service Pack 2 (Windows Vista only)
Processor:
Intel Core Duo CPU 1.66 GHz or higher
Intel Core 2 Duo CPU 2.13 GHz or
higher recommended
System type: 32-bit / 64-bit
Memory: At least 2 GB
■Windows XP
.
Windows XP
Home Edition or Professional
(Pre-installed versions only)
Service Pack 3
Processor:
Intel Core Duo CPU 1.66 GHz or higher
Intel Core 2 Duo CPU 2.13 GHz or
higher recommended
Memory: At least 1 GB
For more information, refer to the Detailed User Guide
http://manual.jvc.co.jp/index.html/ 19
Getting StartedRecordingPlaybackCopyingOthers

NOTE
●If your PC does not meet the above system requirements, the provided
software cannot be used. It is recommended to use a BD/DVD writer*
(optional).
* Applicable to GZ-HD620 only.
●Still images cannot be recorded to discs using the provided software.
●For more information, contact your PC's manufacturer.
●Mac users may use the software provided with the Mac computer.
Mac
Copy the video and still image files to a computer using the following method.
①Close the LCD monitor and connect to a PC. ( P.22)
②Open the LCD monitor and display the USB menu.
③Select “PLAYBACK ON PC” and touch C.
④Double-click on the "EVERIO_HDD" or "EVERIO_SD" icon on the desktop.
⑤Click on the column display icon.
⑥Copy the files to any folder in the PC (desktop, etc).
.
column display icon Copy the files
●When the folders or files are deleted/moved/renamed in the computer, they
cannot be played back on this unit anymore.
●When removing this unit from the computer, drag & drop the "EVERIO_HDD" or
"EVERIO_SD" icon on the desktop to the trash bin.
20 For more information, refer to the Detailed User Guide
http://manual.jvc.co.jp/index.html/
This manual suits for next models
4
Table of contents
Languages:
Other JVC Camcorder manuals

JVC
JVC LYT1642-006A User manual

JVC
JVC GY-DV300U - 1/3" 3-ccd Dv Camcorder User manual

JVC
JVC GR-DVL166 User manual

JVC
JVC Everio GZ-V500 User manual

JVC
JVC GR-SXM755UC User manual

JVC
JVC GR-AXM900 User manual

JVC
JVC Videomovie GR-AX15UM User manual

JVC
JVC GZ-MS100E Series User manual

JVC
JVC GR-SXM49 User manual

JVC
JVC GR-AXM237UM User manual