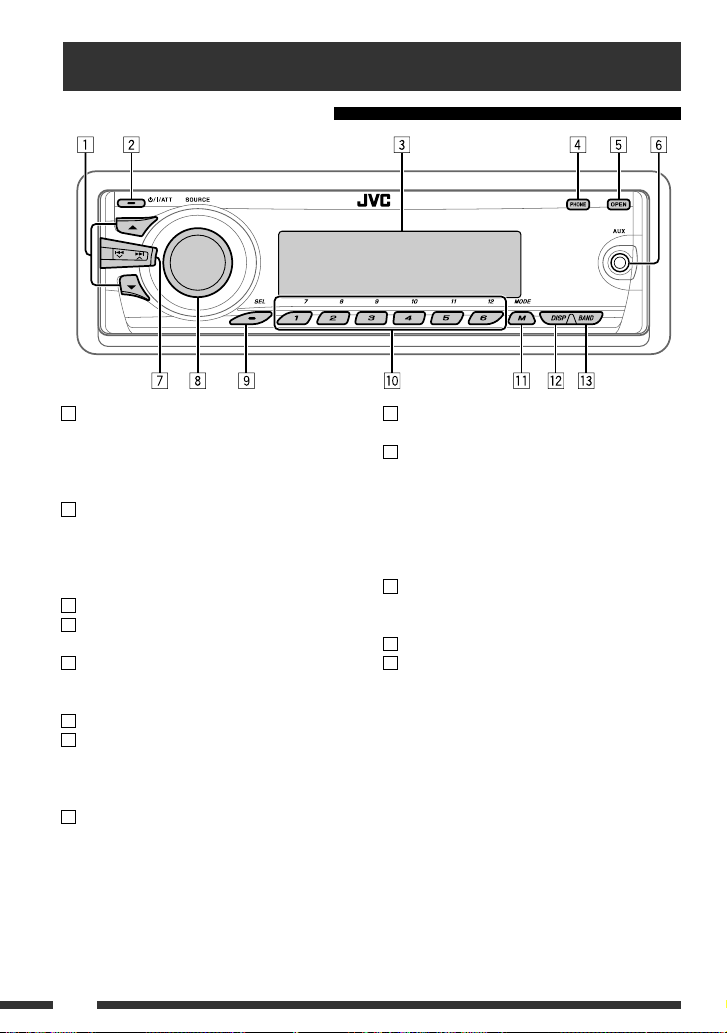
ENGLISH
4
Detaching the control panel
Attaching the control panel
Caution:
If the temperature inside the car is below 0°C, the
movement of animation and text scroll will be halted
on the display to prevent the display from being
blurred. appears on the display.
When the temperature increases, and the operating
temperature is resumed, these functions will start
working again.
Caution on volume setting:
Digital devices (CD/USB) produce very little noise
compared with other sources. Lower the volume before
playing these digital sources to avoid damaging the
speakers by sudden increase of the output level.
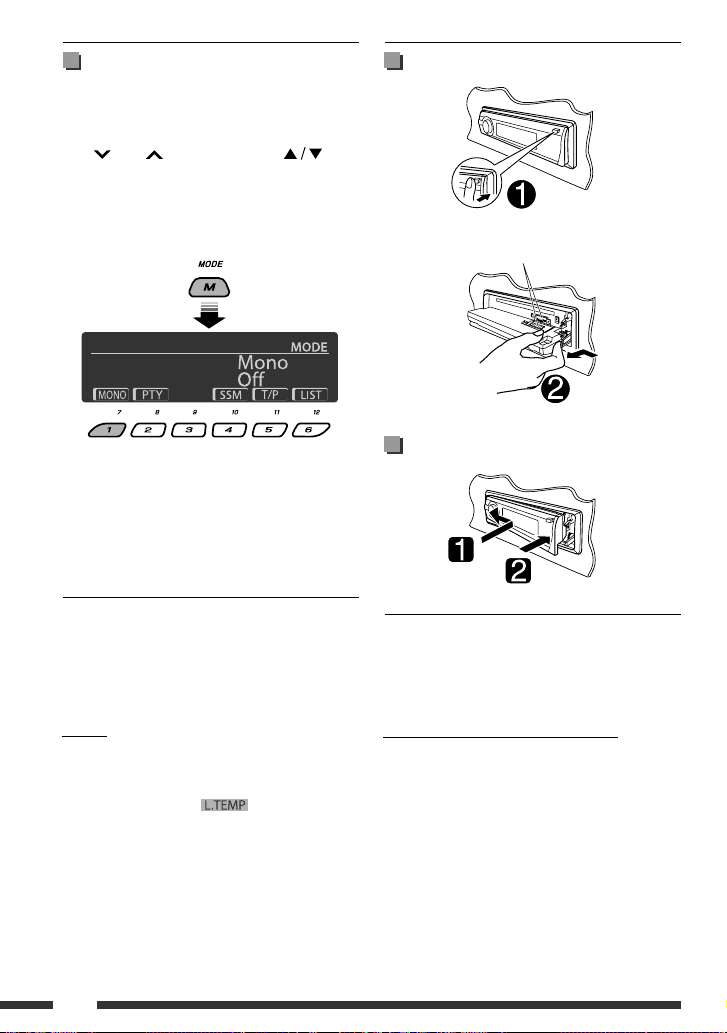
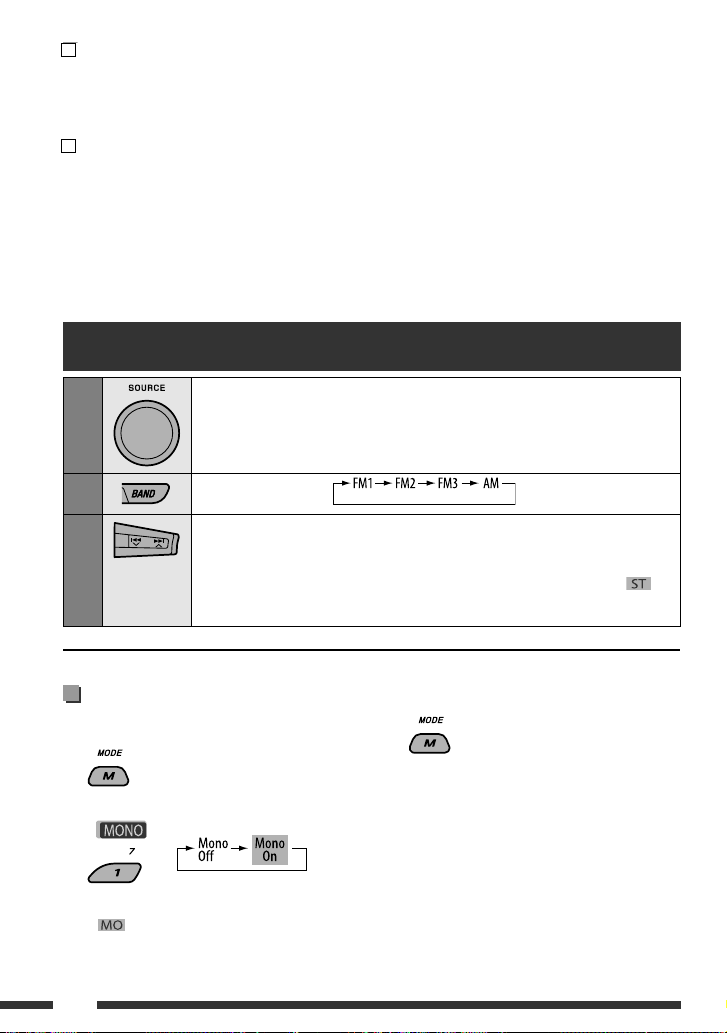
How to use the M MODE and SEL
buttons
If you use M MODE or SEL (select), the display and some
controls (such as the number buttons,
4/¢buttons, 5/∞buttons, and the
control dial) enter the corresponding control mode.
Ex.: When you press number button 1 after pressing
M MODE, to operate the FM tuner.
To use these controls for original functions, press
M MODE again.
• However, pressing SEL makes the unit enters a
different mode.
• Waiting for about 15 seconds without pressing any of
these buttons will automatically cancels the control.
Avoid touching the connectors.
Utilizarea tastelor M MODE şi SEL
Dacă utilizaţi tasta M MODE sau SEL (selectare), aşajul
şi unele comenzi (precum tastele numerice, tastele
ENGLISH
4
Detaching the control panel
Attaching the control panel
Caution:
If the temperature inside the car is below 0°C, the
movement of animation and text scroll will be halted
on the display to prevent the display from being
blurred. appears on the display.
When the temperature increases, and the operating
temperature is resumed, these functions will start
working again.
Caution on volume setting:
Digital devices (CD/USB) produce very little noise
compared with other sources. Lower the volume before
playing these digital sources to avoid damaging the
speakers by sudden increase of the output level.
How to use the M MODE and SEL
buttons
If you use M MODE or SEL (select), the display and some
controls (such as the number buttons,
4/¢buttons, 5/∞buttons, and the
control dial) enter the corresponding control mode.
Ex.: When you press number button 1 after pressing
M MODE, to operate the FM tuner.
To use these controls for original functions, press
M MODE again.
• However, pressing SEL makes the unit enters a
different mode.
• Waiting for about 15 seconds without pressing any of
these buttons will automatically cancels the control.
Avoid touching the connectors.
şi butonul de comandă ) intră
în modul de comandă corespunzător.
De exemplu: Când apăsaţi tasta numerică 1 după apăsarea
tastei M MODE, pentru acţionarea tunerului FM.
Pentru a utiliza aceste comenzi cu funcţiile lor iniţiale,
apăsaţi din nou tasta M MODE.
• Totuşi, dacă apăsaţi tasta SEL va activat alt mod.
• Dacă timp de 15 secunde nu apăsaţi niciuna dintre taste,
aceasta va anulată automat.
Atenţie:
Dacă temperatura din interiorul autovehiculului se
situează sub 0° C, derularea imaginilor şi a textului pe
aşaj se va opri pentru a se preveni redarea neclară a
acestora. Pe aşaj va apărea
ENGLISH
4
Detaching the control panel
Attaching the control panel
Caution:
If the temperature inside the car is below 0°C, the
movement of animation and text scroll will be halted
on the display to prevent the display from being
blurred. appears on the display.
When the temperature increases, and the operating
temperature is resumed, these functions will start
working again.
Caution on volume setting:
Digital devices (CD/USB) produce very little noise
compared with other sources. Lower the volume before
playing these digital sources to avoid damaging the
speakers by sudden increase of the output level.
How to use the M MODE and SEL
buttons
If you use M MODE or SEL (select), the display and some
controls (such as the number buttons,
4/¢buttons, 5/∞buttons, and the
control dial) enter the corresponding control mode.
Ex.: When you press number button 1 after pressing
M MODE, to operate the FM tuner.
To use these controls for original functions, press
M MODE again.
• However, pressing SEL makes the unit enters a
different mode.
• Waiting for about 15 seconds without pressing any of
these buttons will automatically cancels the control.
Avoid touching the connectors.
.
Când temperatura creşte revenind la nivelul normal pentru
funcţionare, aceste funcţii vor din nou active.
Demontarea panoului de comandă
Evitaţi atingerea conectorilor.
Montarea panoului de comandă
Măsuri de precauţie la reglarea volumului:
Dispozitivele digitale (CD/USB) produc foarte puţin zgomot
în comparaţie cu alte surse. Înainte de a folosi astfel de surse
digitale, micşoraţi volumul, pentru a nu deteriora difuzoarele
ca urmare a creşterii bruşte a nivelului sunetului la ieşire.