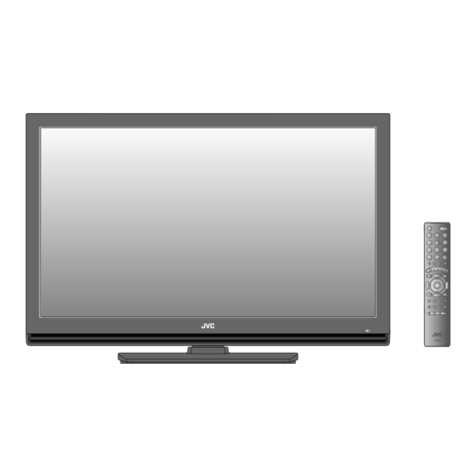
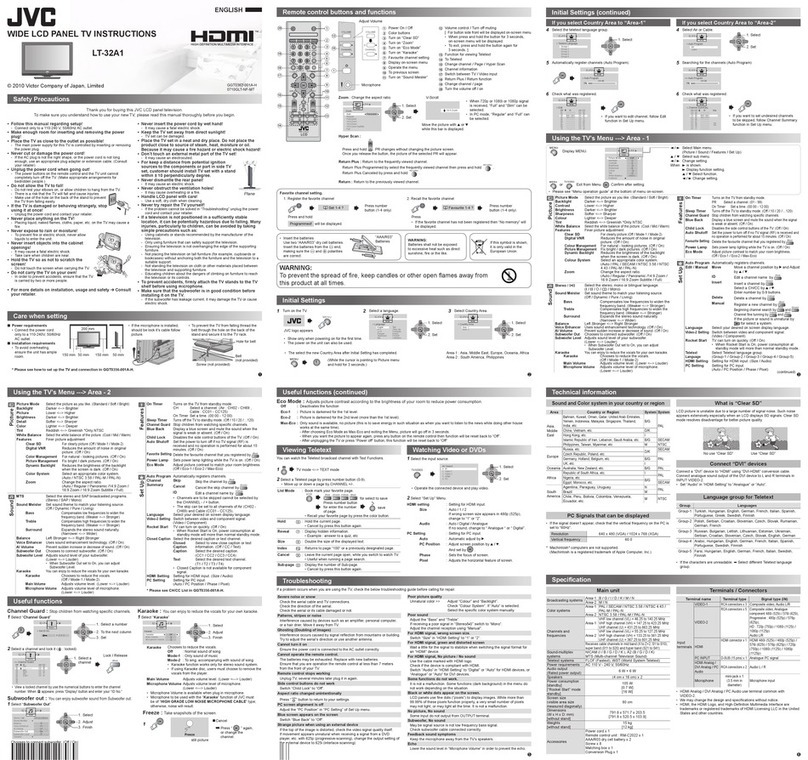
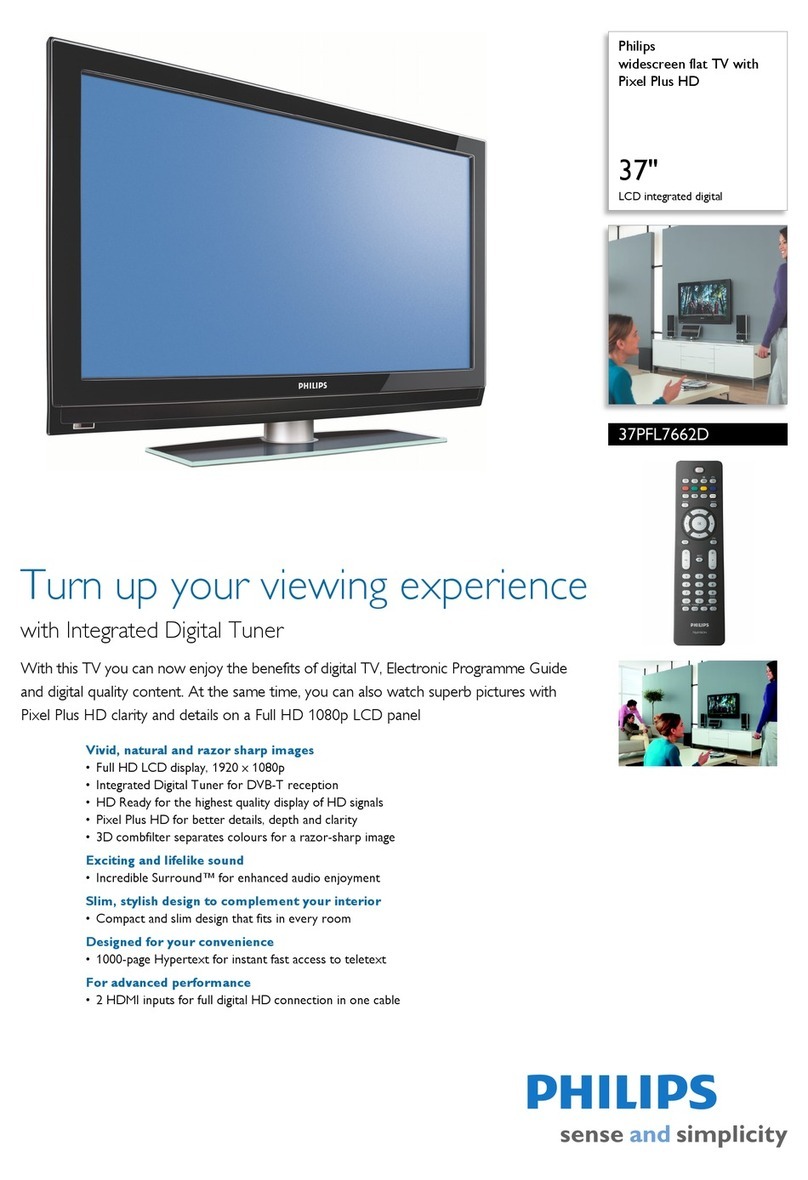
JVC LT-26DC1BH User manual

LT-26DC1BH
LT-32DC1BH
DEUTSCH ENGLISHFRANÇAIS
WIDE LCD PANEL TV
TELEVISEUR LCD A ECRAN LARGE
BREEDBEELD LCD-TV
BREITBILD-LCD-TV
INSTRUCTIONS
INSTRUCTIONS
INSTRUCTIES
ANWEISUNGEN
NEDERLANDS

GB-1
LYT1857-001A
0907FOH-AL-OT
Information for Users on Disposal of Old Equipment and Batteries ENGLISH
[European Union]
Products
Battery
Notice:
The sign Pb below the
symbol for batteries
indicates that this battery
contains lead.
These symbols indicate that the electrical and electronic equipment and the battery with this
symbol should not be disposed of as general household waste at its end-of-life. Instead, the
products should be handed over to the applicable collection points for the recycling of electrical
and electronic equipment as well as batteries for proper treatment, recovery and recycling in
accordance with your national legislation and the Directive 2002/96/EC and 2006/66/EC.
By disposing of these products correctly, you will help to conserve natural resources and will
help to prevent potential negative effects on the environment and human health which could
otherwise be caused by inappropriate waste handling of these products.
For more information about collection points and recycling of these products, please contact
your local municipal office, your household waste disposal service or the shop where you
purchased the product.
Penalties may be applicable for incorrect disposal of this waste, in accordance with national
legislation.
[Business users]
If you wish to dispose of this product, please visit our web page http://www.jvc.eu to obtain
information about the take-back of the product.
[Other Countries outside the European Union]
These symbols are only valid in the European Union.
If you wish to dispose of these items, please do so in accordance with applicable national
legislation or other rules in your country for the treatment of old electrical and electronic
equipment and batteries.
Benutzerinformationen zur Entsorgung alter Geräte und Batterien DEUTSCH
[Europäische Union]
Produkte
Batterie
Hinweis:
Das Zeichen Pb unterhalb
des Batteriesymbols gibt
an, dass diese Batterie
Blei enthält.
Diese Symbole zeigen an, dass elektrische bzw. elektronische Altgeräte und Batterien mit
diesem Symbol nicht als normaler Haushaltsabfall entsorgt werden dürfen. Stattdessen müssen
die Produkte zur fachgerechten Entsorgung, Weiterverwendung und Wiederverwertung in
Übereinstimmung mit der Landesgesetzgebung sowie den Richtlinien 2002/96/EG und 2006/66/
EG einer entsprechenden Sammelstelle für das Recycling elektrischer und elektronischer
Geräte und Batterien zugeführt werden.
Die korrekte Entsorgung dieser Produkte dient dem Umweltschutz und verhindert mögliche
Schäden für die Umwelt und die Gesundheit, welche durch unsachgemäße Behandlung der
Produkte auftreten können.
Weitere Informationen zu Sammelstellen und dem Recycling dieser Produkte erhalten Sie bei
Ihrer Gemeindeverwaltung, Ihrem örtlichen Entsorgungsunternehmen oder in dem Geschäft, in
dem Sie das Produkt gekauft haben.
Für die nicht fachgerechte Entsorgung dieses Abfalls können gemäß der Landesgesetzgebung
Strafen ausgesprochen werden.
[Geschäftskunden]
Wenn Sie dieses Produkt entsorgen möchten, besuchen Sie bitte unsere Webseite http://www.
jvc.eu , auf der Sie Informationen zur Rücknahme des Produkts finden.
[Andere Länder außerhalb der Europäischen Union]
Diese Symbole sind nur in der Europäischen Union gültig.
Wenn Sie diese Produkte entsorgen möchten, halten Sie sich dabei bitte an die entsprechenden
Landesgesetze und andere Regelungen in Ihrem Land zur Behandlung von alten elektrischen
bzw. elektronischen Geräten und Batterien.
Informations relatives à l’élimination des appareils et des piles usagés, à FRANÇAIS
l’intention des utilisateurs
[Union européenne]
Produits
Pile
Notification:
La marque Pb en dessous du
symbole des piles indique que
cette pile contient du plomb.
Si ces symboles figurent sur un appareil électrique/électronique ou une pile, cela signifie qu’ils
ne doivent pas être jetés comme déchets ménagers à la fin de leur cycle de vie. Ces produits
devraient être amenés aux centres de pré-collecte appropriés pour le recyclage des appareils
électriques/électroniques et des piles pour traitement, récupération et recyclage, conformément
à la législation nationale et la Directive 2002/96/EC et 2006/66/EC.
En traitant ces produits d’une manière correcte, vous contribuez à la conservation des ressources
naturelles et à la prévention d’effets négatifs éventuels sur l’environnement et la santé humaine,
pouvant être causés par une manipulation inappropriée des déchets de ces produits.
Pour plus d’informations sur les centres de pré-collecte et de recyclage de ces produits,
contactez votre service municipal local, le service d’évacuation des ordures ménagères ou le
magasin dans lequel vous les avez achetés.
Des amendes peuvent être infligées en cas d’élimination incorrecte de ces produits,
conformément à la législation nationale.
[Utilisateurs professionnels]
Si vous voulez jeter ce produit, visitez notre page Web, http://www.jvc.eu , afin d’obtenir des
informations sur son recyclage.
[Pays ne faisant pas partie de l’Union européenne]
Ces symboles ne sont reconnus que dans l’Union européenne.
Si vous voulez jeter ces produits, veuillez respecter la législation nationale ou les autres règles en vigueur
dans votre pays pour le traitement des appareils électriques/électroniques et des piles usagés.
Información para los usuarios sobre la eliminación de equipos y baterías/ CASTELLANO
pilas usados
[Unión Europea]
Productos
Baterías/pilas
Atención:
La indicación Pb debajo del
símbolo de batería/pila indica
que ésta contiene plomo.
Estos símbolos indican que los equipos eléctricos y electrónicos y las baterías/pilas que lleven
este símbolo no deben desecharse junto con la basura doméstica al final de su vida útil. Por el
contrario, los productos deberán llevarse al punto de recogida correspondiente para el reciclaje
de equipos eléctricos y electrónicos, al igual que las baterías/pilas para su tratamiento,
recuperación y reciclaje adecuados, de conformidad con la legislación nacional y con la
Directiva 2002/96/CE y 2006/66/CE.
Si desecha estos productos correctamente, estará contribuyendo a conservar los recursos
naturales y a prevenir los posibles efectos negativos en el medio ambiente y en la salud de las
personas que podría causar el tratamiento inadecuado de estos productos.
Para obtener más información sobre los puntos de recogida y el reciclaje de estos productos,
póngase en contacto con su oficina municipal, su servicio de recogida de basura doméstica o la
tienda en la que haya adquirido el producto.
De acuerdo con la legislación nacional, podrían aplicarse multas por la eliminación incorrecta
de estos desechos.
[Empresas]
Si desea desechar este producto, visite nuestra página Web http://www.jvc.eu para obtener
información acerca de la retirada del producto.
[Otros países no pertenecientes a la Unión Europea]
Estos símbolos sólo son válidos en la Unión Europea.
Si desea desechar estos productos, hágalo de conformidad con la legislación nacional vigente
u otras normativas de su país para el tratamiento de equipos eléctricos y electrónicos y
baterías/pilas usados.
LYT1857-001A.fm Page 1 Tuesday, September 18, 2007 3:14 PM
EN – English
Dear Customer,
This apparatus is in conformance with the valid European directives and standards
regarding electromagnetic compatibility and electrical safety.
European representative of Victor Company of Japan, Limited is:
JVC Technical Services Europe GmbH
Postfach 10 05 04
61145 Friedberg
Germany
DE - Deutsch
Sehr geehrter Kunde, sehr geehrte Kundin,
dieses Gerät stimmt mit den gültigen europäischen Richtlinien und Normen
bezüglich elektromagnetischer Verträglichkeit und elektrischer Sicherheit überein.
Die europäische Vertretung für die Victor Company of Japan, Limited ist:
JVC Technical Services Europe GmbH
Postfach 10 05 04
61145 Friedberg
Deutschland
FR – Français
Cher(e) client(e),
Cet appareil est conforme aux directives et normes européennes en
vigueur concernant la compatibilité électromagnétique et à la sécurité électrique.
Représentant européen de la société Victor Company of Japan, Limited :
JVC Technical Services Europe GmbH
Postfach 10 05 04
61145 Friedberg
Allemagne
IT – Italiano
Gentile Cliente.
Questa apparecchiatura è conforme alle direttive e alle norme europee
relative alla compatibilità elettromagnetica e alla sicurezza elettrica.
Il rappresentante europeo di Victor Company of Japan, Limited è:
JVC Technical Services Europe GmbH
Postfach 10 05 04
61145 Friedberg
Germania
ES – Español
Apreciado cliente,
Este aparato cumple con las normativas y normas europeas respecto a la
seguridad eléctrica y a la compatibilidad electromagnética.
El representante europeo de Victor Company of Japan, Limited es:
JVC Technical Services Europe GmbH
Postfach 10 05 04
61145 Friedberg
Alemania
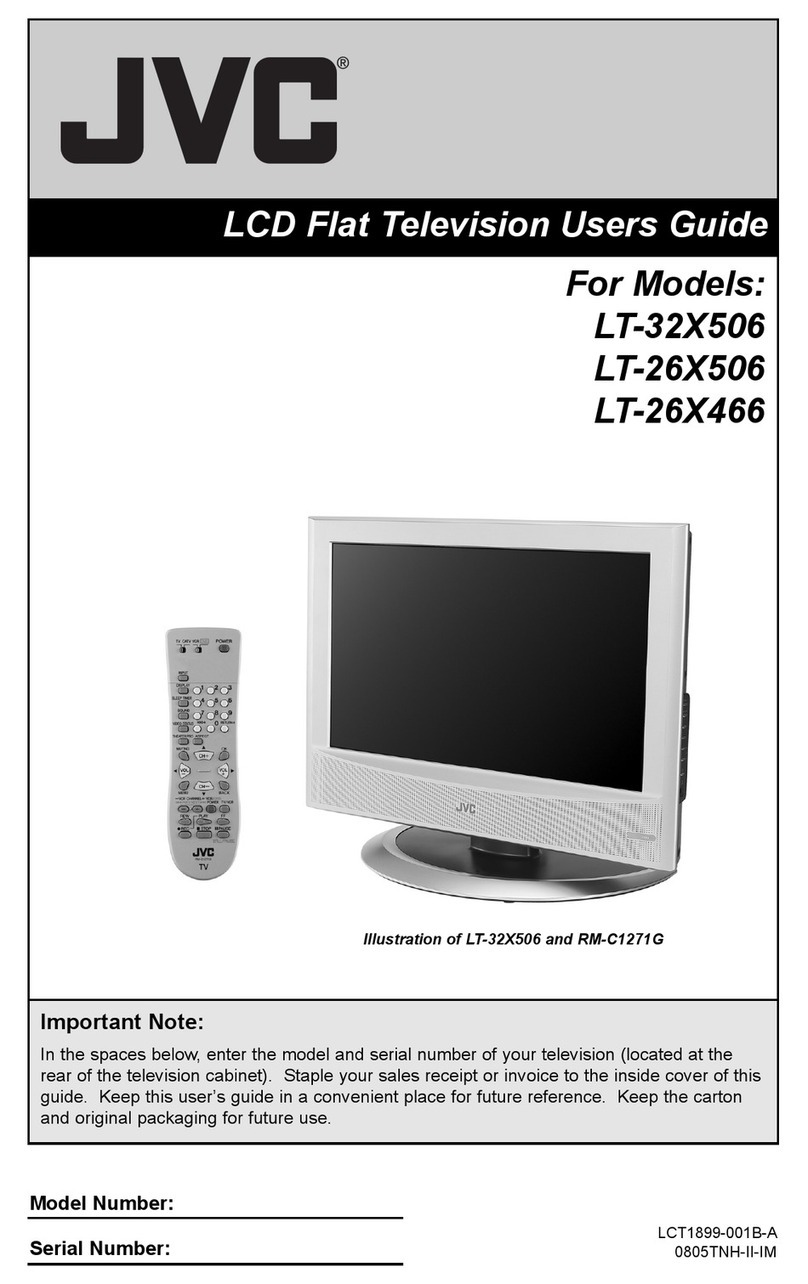
Make sure you connect this TV to cable TV to watch digital
channels, otherwise you cannot watch on-air digital channels.
ENGLISH

GB-2
NOTICE
Read this manual carefully and make sure you understand the instructions provided. For your safety, check
what the result of each action will be.
To reduce the risk of electric shock, do not remove cover (or back). No user
serviceable parts inside. Refer servicing to qualified service personnel. Indicates a
situation which, if not avoided, could damage the equipment or other apparatus.
This symbol indicates dangerous voltage inside the TV that presents a risk of electric
shock or personal injury. Indicates a hazardous situation which, if not avoided, could
result in serious injury.
This symbol indicates important instructions accompanying the TV.
Copyright ( © 2009 Victor Company of Japan, Limited)
Not to be copied, used or translated in part or whole without JVC’s prior consent in writing except approval of
ownership of copyright and copyright law.
Warranty
The information in this document is subject to change without notice. JVC does not have any responsibility for direct,
indirect, accidental and other damage caused by the use of the information contained in this manual.
Trademarks
VIACCESS™ is a trademark of France Telecom.
CryptoWorks™ is a trademark of Irdeto Access B.V.
Irdeto is a trademark of Irdeto Access B.V.
Nagravision is a registered trademark of KUDELSKI S.A.
Conax is a trademark of Telenor Conax AS.
HDMI, the HDMI logo and High-Definition Multimedia Interface are trademarks or registered trademarks of HDMI
Licensing LLC.
DVB is a registered trademark of the DVB Project.
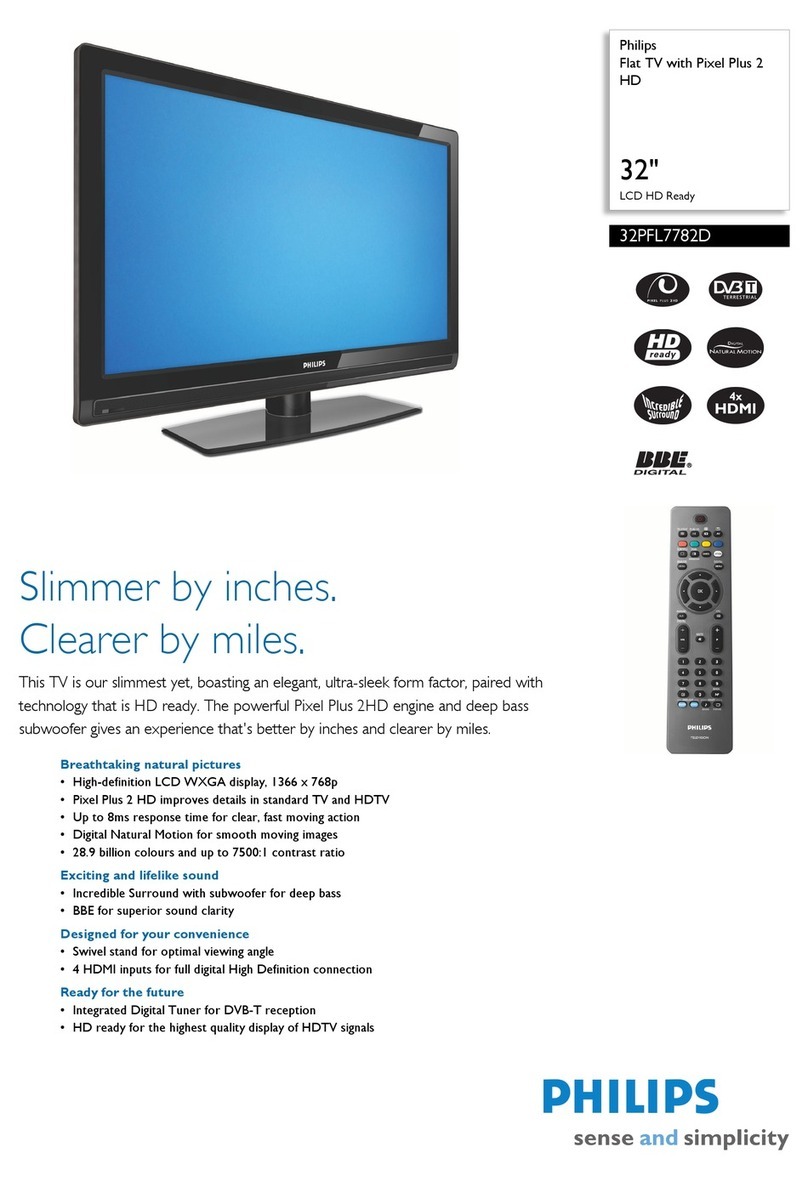
Thank you for purchasing a JVC TV. Please read this user manual carefully in order to safely install, use and
maintain the TV at maximum performance. Keep this user manual next to your TV to ensure the best performance
possible.

GB-3
GENERAL SAFETY PRECAUTIONS
Power
● Plugthepowercordintothecorrectpoweroutlet.Anunstableconnectionmaycausefire.
● Donotusedamagedpowercordsorplugs,orusealoosewalloutlet.Thismaycauseelectricalshockorfire.
● Donevertouchthepowercordwithwethands.Thismaycauseelectricalshock.
● Donotusemultipledeviceswithoneoutlet.Overheatingtheoutletmaycausefire.
● Donotbendorpulloutthepowercordusingforce,norplaceheavyobjectsoverit.Thismaycauseelectrical
shock or fire.
● Makesureyoupulloutthepowercordholdingtheplugitself.Aninternaldisconnectionmaycausefire.
● Whenremovingtheproduct,turnoffthepowerandpullouttheplugfromthepoweroutlet.Alsomakesureother
devices including the antenna or the connectors are removed from the outlets before relocating the product.
Otherwiseyoumaysufferelectricalshockorfireduetoadamagedpowercord.
● Themainsplugshallremainreadilyoperable.
● Plugasdisconnectiondeviceshallremaintobereadilyapproachedbyuser.
● Makeenoughroomforinsertingandremovingthepowerplug.PlacetheTVasclosetotheoutletaspossible.
● EveniftheTV’spowerlampisunlit,themainpowersupplyisnotcutoffunlessthepowercordisunplugged.
The main power supply is not cut off unless the power cord is unplugged. The main power supply for this TV is
controlled by inserting or removing the power plug.
● IfyoudonotusethisTVforalongperiodoftime,besuretodisconnectthepowerplugfromtheACoutlet.
● Thisisaclass1productsoitshallbeconnectedtoaMainSocketoutletwithaprotectiveearthingconnections.
Installation
● Keeptheproductawayfromanyheatingdevices.Placingitclosetoaheatingdevicemaycausefire.
● Keepthepowercordawayfromanyheatingdevices.Ameltedcoatingmaycausefireorelectricalshock.
● Placetheantennaasfarawayaspossiblefromanyhigh-voltagecables.
Touching the high voltage wiring may cause fire or electrical shock.
● Donotinstalltheproductinoily,smokyorhumid(orexposedtorain/water)placesorautomobiles.Thismay
cause fire.
● Theconnectionbetweentheexternalantennaandtheinternalwiringshouldbeturnedinsidetoavoidanyinflow
of rain. Exposing the LCD to water (rain) will cause electrical shock or fire.
● Donotusetheproductinhumidplaces.Humiditywillshortenthelifeoftheproductandmaycauseanelectrical
shortage or fire.
● Donotusetheproductinplaceswithlowtemperatures(below5°C).
● Avoidinstallingtheproductinpoorlyventilatedplaces.Internaloverheatingmaycauseanelectricalshortageand
fire.
● Besurenottocovertheventilator(withatable-clothorcurtain,etc.).Internaloverheatingmaycauseanelectrical
shortage and fire.
● Donotinstalltheproductinanunstableplaceoronasmallstand.Theproductmaycauseseriousinjury,ifitfalls
on somebody (especially children). Install it on an even, stable place as it is front-heavy.
● Donotinstalltheproductonthefloor.Someone(especiallychildren)maytripoverit.
ENGLISH

GB-4
GENERAL SAFETY PRECAUTIONS
Usage
● Unplugtheproductfromthewalloutletanddonottouchtheantennaduringathunderstorm.Thiswillprevent
damage to the unit due to lightning and power-surges.
● Keepdustorwaterawayfromthepinsortouchingpointsofthepowerplug.
This will prevent electrical shock or fire.
● Keepchildrenfromclimbingovertheproduct.Thedevicemaycauseseriousinjuryordeathifitfallsonthem.
● Donotplaceanythingovertheproductthatchildrenmaytrytoreach.Thedevicemaycauseseriousinjuryor
death if it falls on them.
● Whenremovingthebatteryfromtheproduct,keepitoutofchildren’sreach.
If a child swallows a battery, consult a doctor immediately.
● Useonlyspecifiedbatteriesanddonotuseanoldbatteryalongwithanewone.Alignthebatteriesaccordingto
the correct polarity (+ or -). Aligning them incorrectly may cause an internal explosion or a leakage of the internal
liquid, leading to electrical shock, physical damage or pollution of the surroundings.
● Donotinsertanymetaloraflammableobjectoranaliensubstanceintotheventilator,theAVinputterminalsor
the slot for the modules or Smartcards. This may cause damage to the product and reduce its life span.
● Donotdisassemble,repairorreconstructtheproductatyourdiscretion.Thismaycauseelectricalshockorfire.
Contact your local customer support.
● Keeptheproductawayfrominflammablesprayersorignitableobjects.
Exposure to these may cause explosion or fire.
● Donotplacewater-pots,flowervases,beveragecans,smallmetalsorheavyobjectsovertheproduct.Contact
of these contents with the product may cause electrical shock or fire, while any falling of the product may cause
injury.
● Donotplacenakedflamesource,suchaslightedcandlesovertheproduct.Itmaycauseafire.
● Iftheproductbreaksdown,turnoffthepowerandunplugitfromtheoutletbeforecontactingCustomerSupport.
This will protect you from electrical shock or fire.
● Whenyounoticesomethingstrangelikeanoddnoise,smellsomethingburningorseesmoke,unplugthepower
cord and contact your local Customer Support. Do this to avoid electrical shock or fire.
● DonotusesharptoolssuchasapinorapencilneartheTV,astheymayscratchtheLCDsurface.
● Donotuseasolvent,suchasbenzene,tocleantheTV,asitwilldamagetheLCDsurface.
Cleaning
● Unplugthepowercordbeforecleaningtheproduct.Thismaycauseelectricalshockorfire.
● Donotsprinklewaterontheproduct.Thismaycauseelectricalshockorfire.
● Useonlyasoftdryclothasthesurfaceisweakonscratch.Donotusechemicalslikewax,benzene,alcohol,
thinners, aroma, lubricator or cleanser.
Handling the glossy finish of the TV
● BecarefulwhenhandlingtheglossyfinishoftheTV.TheglossyfinishoftheTVscratcheseasily.
● ProtectionfilmshavebeenpastedontotheglossyfinishoftheTVtopreventscratches.Peeloffthefilmsafterthe
TV has been placed properly.
● Iftheglossyfinishgetsdirty,clearthedustofftheglossyfinishfirst.Thenwipesoftlywithasoftcloth.Ifyoudo
not clear the dust first, or you wipe the glossy finish too hard the glossy finish may be scratched.

GB-5
TABLE OF CONTENTS
ENGLISH
PREPERATION -------------------------------------------------------------------------------------------------------------- 6
Front and Side Panel ---------------------------------------------------------------------------------------------------------------------- 6
Rear and Side Panel ----------------------------------------------------------------------------------------------------------------------- 8
Remote Control Buttons------------------------------------------------------------------------------------------------------------------- 9
Connecting the Antenna------------------------------------------------------------------------------------------------------------------10
Conditional Access (for the digital channels only) --------------------------------------------------------------------------------- 11
CONNECTING EXTERNAL DEVICES -------------------------------------------------------------------------------12
Connecting the DVD or Set-Top Box-------------------------------------------------------------------------------------------------- 12
Connecting the VCR ----------------------------------------------------------------------------------------------------------------------13
Connecting the Camcorder or Game Console -------------------------------------------------------------------------------------13
Connecting the Digital Audio System -------------------------------------------------------------------------------------------------14
Connecting Headphones-----------------------------------------------------------------------------------------------------------------14
INSTALLATION WIZARD ------------------------------------------------------------------------------------------------15
WizardforDigitalChannels(InDigitalTVModeOnly)---------------------------------------------------------------------------15
WizardforAnalogChannels(APS)(InAnalogTVModeOnly) ----------------------------------------------------------------16
BASIC OPERATION-------------------------------------------------------------------------------------------------------17
Turning on the TV--------------------------------------------------------------------------------------------------------------------------17
Changing Channel-------------------------------------------------------------------------------------------------------------------------17
Volume Control -----------------------------------------------------------------------------------------------------------------------------17
Displaying Information -------------------------------------------------------------------------------------------------------------------18
Displaying Channel List -----------------------------------------------------------------------------------------------------------------19
DigitalProgrammeFeatures(InDigitalTVModeOnly)--------------------------------------------------------------------------20
Selecting the Main Input Source ------------------------------------------------------------------------------------------------------21
Setting the Aspect Ratio -----------------------------------------------------------------------------------------------------------------21
Displaying Teletext information ---------------------------------------------------------------------------------------------------------22
PROGRAMME GUIDE (In Digital TV mode only) ----------------------------------------------------------------23
Changing the Channel List Group -----------------------------------------------------------------------------------------------------23
Moving the Time Bar ----------------------------------------------------------------------------------------------------------------------24
ReservingaWatching(Schedule) -----------------------------------------------------------------------------------------------------24
Finding a Programme---------------------------------------------------------------------------------------------------------------------25
MENU SETTINGS ---------------------------------------------------------------------------------------------------------26
Picture Settings ----------------------------------------------------------------------------------------------------------------------------26
Sound Settings -----------------------------------------------------------------------------------------------------------------------------26
InstallationSettings(InAnalogTVModeOnly) -----------------------------------------------------------------------------------27
Feature Settings ---------------------------------------------------------------------------------------------------------------------------27
DTVSetup(InDigitalTVModeOnly)------------------------------------------------------------------------------------------------ 29
ANALOG CHANNEL SETTINGS (In Analog TV mode only) ------------------------------------------------30
Automatic Search --------------------------------------------------------------------------------------------------------------------------30
Manual Search------------------------------------------------------------------------------------------------------------------------------31
Edit Channels -------------------------------------------------------------------------------------------------------------------------------31
DIGITAL CHANNEL SETTINGS (In Digital TV mode only) ---------------------------------------------------32
Channel Search ----------------------------------------------------------------------------------------------------------------------------32
Edit Channels -------------------------------------------------------------------------------------------------------------------------------33
DTV CONFIGURATION (In Digital TV mode only) --------------------------------------------------------------34
Parental Control ----------------------------------------------------------------------------------------------------------------------------34
Language Setting --------------------------------------------------------------------------------------------------------------------------34
Schedule -------------------------------------------------------------------------------------------------------------------------------------35
Miscellaneous Settings -------------------------------------------------------------------------------------------------------------------35
DTV SOFTWARE UPDATE (In Digital TV mode only) ---------------------------------------------------------36
APPENDIX -------------------------------------------------------------------------------------------------------------------38
Menu Map------------------------------------------------------------------------------------------------------------------------------------38
Troubleshooting ----------------------------------------------------------------------------------------------------------------------------39
Error Message ------------------------------------------------------------------------------------------------------------------------------40
Specifications -------------------------------------------------------------------------------------------------------------------------------41

GB-6
Front and Side Panel
Here the shown illustration is LT-32DC1BH model and may be somewhat different from your TV.
Accessories
Please check that the following accessories are included with your TV.
Note: Package contents may vary according to area.
Remote control
(RM-C2503)
Inserting Batteries
Insert two AAA size batteries ensuring that the plus(+) and
minus(-) signs of the batteries are correctly aligned.
NOTE:
Do not mix different battery types such as alkaline with
manganese.
Batteries shall not be exposed to excessive heat such as
direct sunshine, fire or the like.
▪
▪
AAA batteries (X2)
User’s manual
Power cord
Note: Stand and screws are also included. For details, refer to page 7.
PREPERATION
Changes input source.
Displaysmenu/confirmsselection.
Changeschannel/movesselection.
Adjustsvolume/movesselection.
PowerOn/Off
Power lamp
ON:Lit(Blue)/STANDBY:Unlit
Remote control sensor

GB-7
PREPERATION
When attaching the TV to the wall, use the optional JVC wall
mounting unit (only for LT-32DC1BH)
• Consult a qualified technician.
• See the included manual on mounting procedures.
• JVC assumes no responsibility for damage due to improper mounting.
• Mountingholesforwallmountingunit:M5x4,200mmx200mm
Depthofscrewholes:13.7mmfromthesurfaceoftheTV
Installation requirements
To avoid overheating, ensure the unit has ample room.
200 mm
50 mm150 mm 150 mm 50 mm
Stand Installation
1. Firstly, fasten the stand bracket to the stand base using the 4 screws.
2. Assemble the TV as shown.
3. Fix the 4 screws securely using the holes in the back of the TV.
LT-32DC1BH
LT-26DC1BH
Note: To prevent scratches on the panel, lay a piece of soft cloth on an even platform and place the TV onto it.
ENGLISH

GB-8
PREPERATION
Rear and Side Panel
External AV Terminals by Model
SCART
Input/Output
COMPONENT
Input
COMPOSITE
Input
S-VIDEO
Input
HDMI
Input
LT-26DC1BH EXT-1, EXT-2 EXT-3 EXT-4 EXT-4S EXT-5,EXT-6
LT-32DC1BH EXT-1, EXT-2 EXT-3 EXT-4 EXT-4S EXT-5,EXT-6,EXT-7
CI (Common Interface) SLOT
A slot for a CI Module
(Conditional Access Module).
HDMI INPUT (HDMI™ Connector)
Connect to the HDMI outputs of DVD or STB.
H/P
Connects to headphones.
AC INPUT
Connects the power cord.
SCART INPUT/OUTPUT
ConnecttotheSCARTinput/output
of VCR, DVD or STB.
COMPONENT INPUT
Connect to the component
outputs of DVD or STB.
RF INPUT
Connects to an antenna or a
cable system.
DIGITAL AUDIO OUT (OPTICAL)
Connects to a digital audio component
(Digital TV audio output only).
COMPOSITE INPUT
Connect to the Composite video and audio outputs of VCR.
S-VIDEO INPUT
Connect to the S-video output of VCR or DVD.
Not available
(Service only)
Here the shown illustration is
LT-32DC1BH model and may be
somewhat different from your TV.
SMARTCARD SLOT
A slot for a Smartcard.

GB-9
PREPERATION
Remote Control Buttons
ENGLISH
TV/DTV
Switches between digital TV
and analog TV modes.
(Refer to p 17)
OK
Confirms (save or enter) your
choiceintheOSDmenu.
MENU
DisplaystheOSDmenu.
(Refer to p 26, 38)
ZOOM
Select the aspect ratio.
(Power On/Off)
GUIDE
Displays the EPG in Digital
TV input. (Refer to p 23)
Arrow Buttons
Controls the selection in the
OSDmenu.
BACK
Returns to the previous
display.
(Hyper Sound)
Gives the ambient sound
effect. (Refer to p 26)
P/
Switches channels.
AV
Changes the input sources.
(Refer to p 17)
(Mute)
Number Buttons
(Information)
Displays information on the
current channel or input.
(Refer to p 18)
Coloured Buttons
Used for interactive
applications in the EPG, Edit
Channels and Teletext mode.
VOL+/-
Adjusts the volume.
TV/RADIO (Refer to p 17)
Switches between digital TV
and Radio modes.
(DUAL SOUND)
Selects the sound mode
(Stereo, Mono, etc.) in
Analog TV input or the audio
language in Digital TV input.
(Refer to p 20)
(SUBTITLE)
Selects the subtitle language
in Digital TV input.
(Refer to p 20)
TELETEXT Buttons
(Refer to p 22)

GB-10
PREPERATION
Connecting the Antenna
1 Connect the RF coaxial cable from an aerial or a cable TV to the RF jack on the rear of the TV.
NOTE
For proper reception of signals, an external antenna is required. For best reception, an outdoor antenna is recommended.
To improve the picture quality in a poor signal area, please purchase a signal amplifier and install properly.
▪
▪
Aerial
Here the shown illustration is
LT-32DC1BH model and may be
somewhat different from your TV.
CATV
or

GB-11
PREPERATION
Conditional Access (for the digital channels only)
Although some TV and radio channels are free to air, most TV and radio channels are available on a subscription
basis and can only be enjoyed via a Conditional Access component.
Inserting a Smartcard
The Smartcard looks similar to a credit card and is inserted into the Smartcard slot on the side of the TV. A valid
Smartcard entitles you to view and listen to all the channels you choose to subscribe to.
1 Hold the Smartcard vertically with the electronic chip (small square-shaped, gold in colour) facing backwards to
your TV.
2 Insert the Smartcard completely into the left slot on the side of the TV.
NOTE: YoucanchecktheinformationoftheembeddedCAS(ConditionalAccessSystem)inDTV Setup > System >
Conditional Access menu.
Inserting a CI Module (Conditional Access Module)
CI Module looks like a PC Card (called PCMCIA) for laptops. There are different kinds of CI Modules, suitable for
different coding systems.
1 Follow the instructions of the module and insert the Smartcard into the CI Module.
2 Keep the CI Module (with the Smartcard) vertically.
3 Insert the CI Module completely into the right slot on the side of the TV.
NOTE: YoucanviewthecurrentstatusoftheinsertedCIModule(ConditionalAccessModule)inDTV Setup > System >
Common Interface menu.
CAUTION: Ensure the Smartcard or CI Module is inserted in the right direction. Inserting in the wrong direction may cause
damage to the Smartcard or CI Module.
ENGLISH
Here the shown illustration is
LT-32DC1BH model and may be
somewhat different from your TV.
CI Module
(Conditional Access Module)
Smartcard
Smartcard
Left Slot
Right Slot

GB-12
Connecting the DVD or Set-Top Box
With a SCART cable
Connect the SCART cable between the SCART connector (EXT-1 or EXT-2) on TV and the SCART connector of
DVD or STB.
With a component cable
Connect the component video and audio cable between the component video and audio input connectors (EXT-3) on
TV and the component video and audio output connectors of DVD or STB.
NOTE: Dependingonthemanufacturer,theY/Pb/PrjacksmaybeidentifiedasY/PB/PR,Y/B-Y/R-YorY/CB/CR.
With an HDMI cable
Connect the HDMI cable between the (EXT-5, EXT-6 or EXT-7) on TV and the HDMI output connector of DVD or
STB.
NOTE: AllHDMIinputssupportDVIvideobutonlyfirstHDMIinput(EXT-5)supportsDVIaudiothroughcomponentudio
input (EXT-3).
HDMI™ with Deep Color (HDMI™ CEC Support)
Please use a High Speed HDMI™ Cable. High Speed HDMI™ Cable are tested to carry an HD signal up to 1080p
and higher.
SCARTInput/Output COMPONENTInput HDMI Input
LT-26DC1BH EXT-1, EXT-2 EXT-3 EXT-5,EXT-6
LT-32DC1BH EXT-1, EXT-2 EXT-3 EXT-5,EXT-6,EXT-7
CONNECTING EXTERNAL DEVICES
HDMI
SCART
COMPONENT
DVD
STB
Here the shown illustration is
LT-32DC1BH model and may be
somewhat different from your TV.

GB-13
CONNECTING EXTERNAL DEVICES
Connecting the VCR
With a SCART cable
Connect the SCART cable between the SCART connector (EXT-1 or EXT-2) on TV and the SCART connector of
VCR.
With a composite cable
Connect the composite video and audio cable between the composite video and audio input connectors (EXT-4) on
TV and the composite video and audio output connectors of VCR.
With a S-video cable
Connect the S-video and audio cable between the S-video and audio input connectors on TV (EXT-4) and the
S-Video and audio output connectors of VCR.
NOTE: ThecompositevideoandS-VideoshareAudio-L/RinEXT-4onside.
Connecting the Camcorder or Game Console
With a composite cable
Connect the composite video and audio cable between the composite video and audio input connectors (EXT-4) on
TV and the composite video and audio output connectors of camcorder or game console.
SCARTInput/Output COMPOSITEInput S-VIDEOInput
LT-26DC1BH EXT-1, EXT-2 EXT-4 EXT-4S
LT-32DC1BH EXT-1, EXT-2 EXT-4 EXT-4S
ENGLISH
Here the shown illustration is
LT-32DC1BH model and may be
somewhat different from your TV.
VCR
SCART
S-VIDEO
Camcorder / Game consoles / VCR
Cable of COMPOSITE
Cable of S-Video
COMPOSITE

GB-14
CONNECTING EXTERNAL DEVICES
Connecting the Digital Audio System
DIGITAL AUDIO OUT (OPTICAL)
Connect the optical cable between the DIGITAL AUDIO OUT (OPTICAL) on TV and the composite optical audio
input connector of digital audio system.
Connecting Headphones
Connect a set of headphones to HP on TV if you want to watch a television programme without disturbing other
people close to you.
NOTE: Prolonged use of headphones at a high volume may cause health damage on your ears.
Headphone
Digital Audio System
Not available
(Service only)
Here the shown illustration is
LT-32DC1BH model and may be
somewhat different from your TV.

GB-15
INSTALLATION WIZARD
Wizard for Digital Channels (In Digital TV Mode Only)
The installation wizard for digital channels will appear automatically when you perform the followings;
● TurningonyourTVforthefirsttimeafterpurchase.(Refertop.17)
● PerformingthedefaultsettinginDTV Setup > Installation menu when Digital TV mode. (Refer to p.29)
NOTE:
This wizard is available in Digital TV mode only.
If you exit the installation wizard without fully completing the channel searching procedure, you may not have all of the
channels available. In this case, you can use the DTV Setup > Installation menu to search for more channels.
1 Language:Selectthemainlanguage.
2 Channel Search
Select Frequency, Symbol Rate or Network IDusingthe▲/▼buttonandpresstheOKor►button.
Enter the frequency value or network ID value using the NUMBER buttons and select a symbol rate value you
wantusingthe▲/▼buttonandpresstheOKor►button.Iftherequiredsymbolratevalueisnotlisted,then
select User Define and enter the value using the NUMBER buttons.
Select Next and press the OK button to start channel search.
Please wait for finishing the channel search. If you want to stop during search, press the OK button.
If the channel search is stopped or finished, select Save and press the OK button to save the result.
3 Result:Afterallsettingsarecompleted,youcanviewtheresultscreen.SelectFinish and press the OK button
to complete the installation wizard.
▪
▪
ENGLISH
1
3
Back
Result
Language : English
Search Result
TV : 7 Channels
Radio : 7 Channels
Finish
2-1
Channel Search
Back
Next
Frequency
Symbol Rate
Network ID
Strength
Quality
Channel Search
TV
Save
Total
2-2
Radio

GB-16
INSTALLATION WIZARD
Wizard for Analog Channels (APS) (In Analog TV Mode Only)
Firstly, switch to Analog TV input mode using the AV or TV/DTV button.
WhenyouperformthedefaultsettinginFeature menu, the installation wizard for analog channels will appear
automatically. (Refer to p.27)
NOTE: The default PIN code is 0000. If you have forgotten the PIN code, please contact your local TV distributor.
1 Selectthemainlanguageusingthe◄/►button.
2 Select Channel Search and press the OK button.
Please wait for finishing the channel search. If you want to stop
during search, press the BACK button.
If the channel search is stopped or finished, you can edit the found
channels.
• Skip:SetsthechanneltobeskippedusingtheRED button.
• Move:ShiftsthechannelusingtheGREEN button.
• Delete:DeletesthechannelusingtheYELLOW button.
NOTE:
If you do not want to setup the channels at this time, you can setup it later using the Installation menu.
▪
APS
Language
C ou n tr y
Channel Search
English
Netherland
Analog Channel Found 25
Scan Progress 8 0%
Stop

GB-17
Turning on the TV
1 Firstly, connect the power cord correctly. At this stage, the TV
switches to standby mode.
2 In standby mode to turn TV on, press the POWER, TV/AV or P /
button on the TV or press the POWER, AV, TV/DTV,P / or
NUMBER button on the remote control and the TV will switch on.
Changing Channel
1 Press the P / button or enter the channel number using the NUMBER
buttons to move to the channel directly.
2 Press the TV/RADIO button to switch between digital TV channels and radio
channels.
3 Press the TV/DTV button to switch between analog TV channels and digital
TV channels.
4 Press the BACK button to return to the previous channel.
NOTE: Youcanswitchchannelsusingthechannellistorprogrammeguide.
Volume Control
1 Press the VOL+/- button to adjust the audio volume.
2 Press the MUTE button to stop the audio temporarily.
NOTE: The mute function remains set while you switch channels.
BASIC OPERATION
ENGLISH

GB-18
BASIC OPERATION
Displaying Information
Programme Information (i- plate) (In Digital TV Mode Only)
Programme information is displayed for a certain period of time whenever you switch channels.
Youcanviewtheprogrammeinformationbypressingthe button while watching a programme.
The information is displayed as follows on the screen.
1 Channel number and channel name
2 Programme name
3 Icons
REC
MHP
13
Reserved programme
REC
MHP
13
Subtitle information
REC
MHP
13
Locked channel
REC
MHP
13
Teletext information
REC
MHP
13
Scrambled channel
REC
MHP
13
Parental control level (minimum age for viewing)
REC
MHP
13
Compressed bitstream audio signal
4 Current time
5 Detailedprogrammeinformation:Pressthe button again to view detailed information.
6 Current channel list
7 Programme broadcasting time and progress bar
8 Nextprogrammeinformation:Pressthe►buttontodisplaythenextprogrammeinformation.

GB-19
BASIC OPERATION
Simple Information (except for Digital TV Mode)
Youcanviewtheinformationsuchasthechannelnumber(orinputsource),andsoundmode(orsourceresolution)
by pressing the button while watching an analog TV channel or external input source.
P 11 -----
Mono
EXT-1 EXT-3
720 x 480p
P 11 -----
Mono
EXT-1 EXT-3
720 x 480p
P 11 -----
Mono
EXT-1 EXT-3
720 x 480p
▲AnalogTVInput ▲ExternalInput
(SCART, Composite, S-Video)
▲ExternalInput
(Component, HDMI)
Press the button again to view the current time at the top right hand corner of the screen.
NOTE: Wheneveryouswitchchannels,thisinformationisdisplayedforacertainperiodoftime.
Displaying Channel List
Press the OK button while watching a programme to display the channel list.
Tochangethechannel,selectachannelusingthe▲/▼buttonandpresstheOK button.
Channels
▲Digital Channel List
(InDigitalTVModeOnly)
▲Analog Channel List
(InAnalogTVModeOnly)
For Digital Channel List
● DigitalChannelListisprovidedinthreetypesasfollowsforeasyandquickchannelbrowsing;TV, Radio or
Favourite channel list.
● Pressthe►buttontochangeachannellistgroup.
● Youcanmovetothechannelyouwantbyenteringthechannelnumberdirectly.
● PresstheP / buttontomovetotheprevious/nextpage.
● PresstheTV/RADIO button to switch between TV and radio channel list.
● Todisplayscrambleicon(
REC
MHP
13
) in the channel list, select On in DTV Setup > Configuration > Miscellaneous
Settings > Option in CH List menu.
ENGLISH
This manual suits for next models
1
Table of contents
Other JVC Flat Panel TV manuals

JVC
JVC PD-42DX6BJ User manual

JVC
JVC HD-58DS8DDU Quick start guide

JVC
JVC 5030057088 User manual

JVC
JVC LT-42S90B User manual

JVC
JVC LT-20DA6SK User manual

JVC
JVC InteriArt LT-26A61BU User manual

JVC
JVC InteriArt LT-20A56SJ User manual

JVC
JVC InteriArt LT-26A60BU User manual

JVC
JVC GGT0303-001A-H User manual

JVC
JVC GGT0211-002A-H User manual

JVC
JVC LT-32DE9BU User manual

JVC
JVC LT-17B60SU User manual

JVC
JVC InteriArt LT-26B60BU User manual

JVC
JVC LCT1691-001A-A User manual

JVC
JVC LT-42GZ78 User manual

JVC
JVC LT-26B60SU User manual

JVC
JVC AV-21V115 User manual

JVC
JVC 0505TNH-II-IM User manual

JVC
JVC InteriArt LT-17D50BK User manual

JVC
JVC DynaPix LT-26DX7BJ User manual