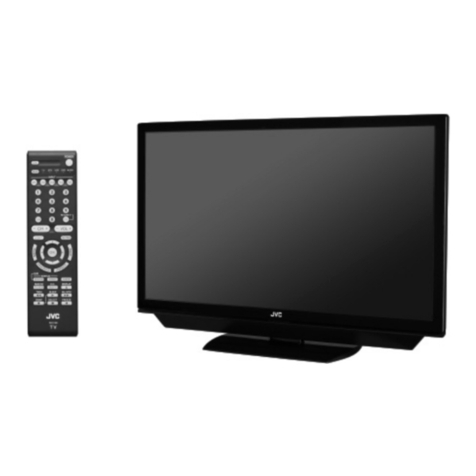
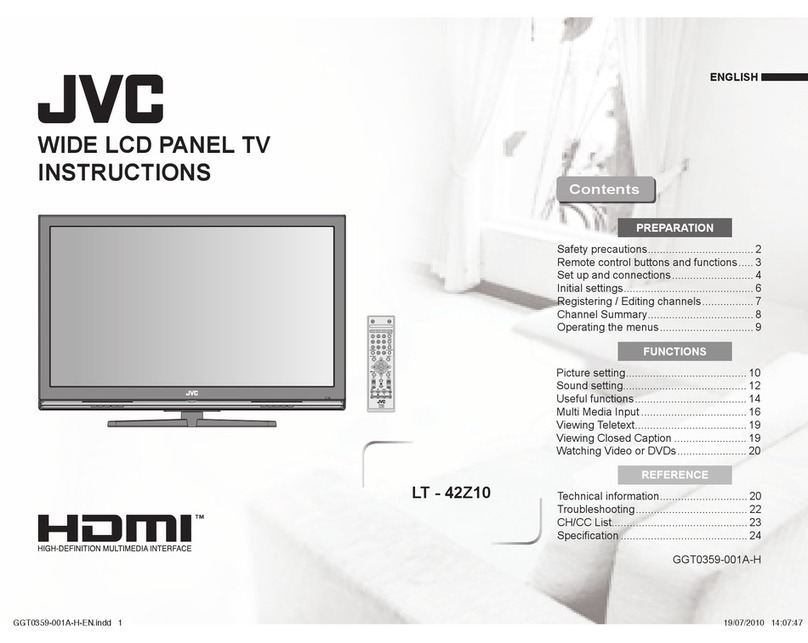
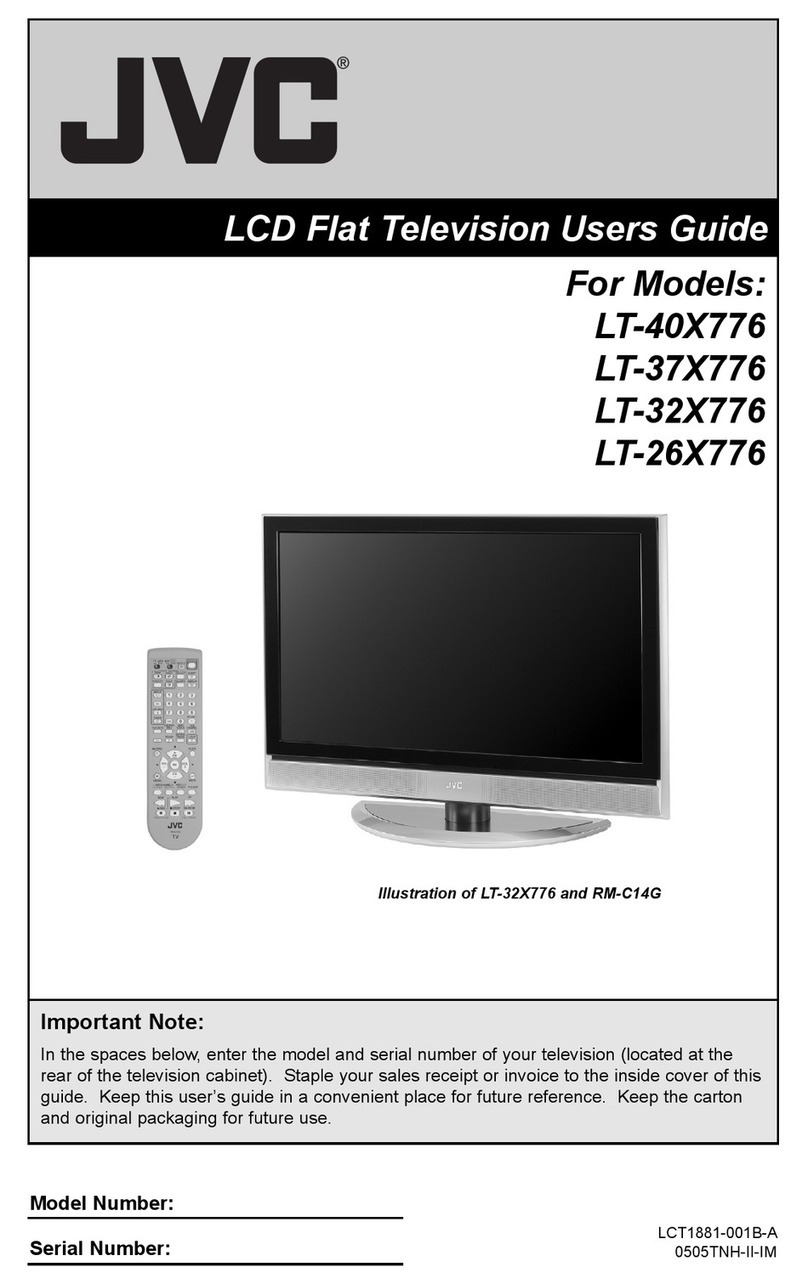
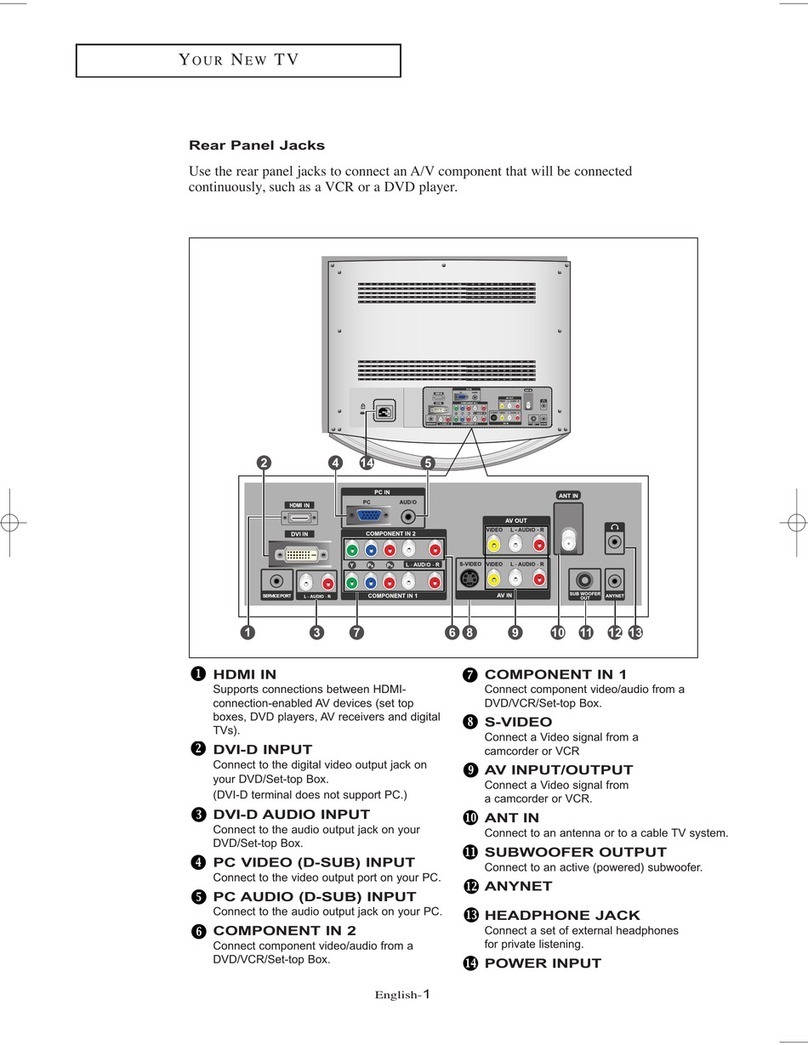
JVC LT-37DF7BK User manual

906TKH-VT-VT
©200 VICTOR COMPANY OF JAPAN, LIMITED6
50093732
INSTRUCTIONS
ENGLISH
LT-37DF7BK
INTEGRATED DIGITAL WIDE LCD PANEL TV
Digital ideo
roadcasting
V
B
DV
B
Trade Mark of the DVB Digital Video Broadcasting
Project (1991 to 1996) Number: 4222

- 1 -
Contents
Safety Precautions ................................... 2
Important Instruction ............................... 3
Where to install ........................................ 5
Important Information .............................. 6
Remote Control Buttons ........................... 7
Peripheral E uipment Connections ........ 8
LCD TV ....................................................... 8
Features .................................................... 9
Getting Started ........................................ 10
Initial Settings ......................................... 12
T-V LINK ................................................ 13
Basic Operations .................................... 14
Operating while watching IDTV ............. 15
Everyday Operation .............................. 15
Digital Teletext ...................................... 17
DTV Menus .............................................. 17
Timer (DTV Timer Recording) ........... 17
Configuration ....................................... 19
Edit PR Li t .......................................... 21
In tallation ............................................ 23
Common Interface ............................... 24
Analogue TV Menu System .................... 25
Picture menu ........................................ 25
Sound menu ........................................ 26
Feature menu ....................................... 27
In tall menu ......................................... 27
Program menu ..................................... 28
Source menu ....................................... 29
PC Mode .................................................. 30
In tallation ............................................ 30
Menu Sy tem in PC mode ................... 30
PC Picture Po ition Menu .................... 30
PC Picture Menu .................................. 30
Sound Menu ......................................... 31
Source Menu ........................................ 31
Sound in PC mode .............................. 31
Other Features........................................ 31
TV Statu .............................................. 31
Mute Indicator ....................................... 31
PIP mode .......................................... 31
Freeze Picture ...................................... 32
Zoom Mode ........................................ 32
Analogue Teletext ................................... 33
To operate Teletext ............................... 33
To elect a page of Teletext .................. 33
To Select Index Page ........................... 33
Searching for a teletext page while
watching TV .......................................... 33
To Select Double Height Text ............... 33
To Reveal concealed Information ...... 33
To Stop Automatic Page Change ......... 33
To Select a Subcode Page .................. 33
To exit Teletext ...................................... 34
Fa text and Toptext .............................. 34
Connect Peripheral E uipment ............. 34
Via The Scart ........................................ 34
Via Aerial Input ...................................... 34
Decoder................................................ 34
TV And Video Recorder ........................ 35
Playback NTSC .................................... 35
Copy Facility ......................................... 35
Search For And Store The Te t
Signal Of The Video Recorder ............. 35
Camera And Camcorder ...................... 35
Connect The Decoder To The
Video Recorder .................................... 35
Connecting Headphone .................... 35
Connecting External Equipment .......... 35
Tips .......................................................... 36
Care Of The Screen ............................. 36
Poor Picture .......................................... 36
No Picture ............................................. 36
Sound ................................................... 36
Remote Control .................................... 36
No olution ........................................... 36
Antenna Connections ............................. 37
Peripheral E uipment Connections ...... 37
PC Input Typical Display Modes ......... 38
Specifications ......................................... 39
ENG-37775W-17MB15-1895UK-(LT-37DF7BK)-(TVAVOK)-10044417-50093732.p65 07.11.2006, 13:091
- 2 -
Safety Precautions
Plea e read the following recommended
afety precaution carefully for your afety
1. Power Source
The et hould be operated only from a 220-
240V AC, 50 Hz. outlet. En ure you elect the
correct voltage etting for your convenience.
2. Power Cord
Do not place the et,a piece of furniture,etc.
on the power cord(main lead) or pinch the
cord.Handle the power cord by the plug.Do
not pull out the plug by tugging the cord and
never touch the power cord when your hand
are wet a thi could cau e a hort circuit or
electric hock.Never make a knot in the cord
or tie it with other cord. The power cord hould
be placed in uch a way that they are not likely
to be tepped on.
A damaged power cord can cau e fire or give
you an electric hock. When it i damaged
and need to be changed, it hould be done by
qualified per onel.
3. Moisture and Water
Do not u e thi equipment in a humid and
damp place (avoid the bathroom, the ink in
the kitchen, and near the wa hing machine).
Do not expo e thi equipment to rain or water,
a thi may be dangerou and do not place
object filled with liquid , uch a flower va e
on top of the et. Avoid from dripping or pla h-
ing.
If any olid object or liquid fall into the cabi-
net, unplug the et and have it checked by
qualified per onnel before operating it any fur-
ther
4. Cleaning
Before cleaning, unplug the et from the wall
outlet. Do not u e liquid or aero ol cleaner .
U e oft and dry cloth.
5. Ventilation
The lot and opening on the back cover are
intended for ventilation and to en ure reliable
operation. To prevent overheating, the e open-
ing mu t not be blocked or covered in any-
way.
6.Heat and Flames
The et hould not be placed near to naked
flame and ource of inten e heat, uch a
an electric heater. En ure that no naked flame
ource , uch a lighted candle , are placed
on top of the et
. Lightning
In ca e of torm and lightning or when going
on holiday, di connect the power cord from
the wall outlet.
8. Replacement Part
When replacement part are required, be ure
the ervice technician ha u ed replacement
part which are pecified by the manufacturer or
have the ame pecification a the original one.
Unauthori ed ub titution may re ult in fire,
electrical hock, or other hazard .
9 . Servicing
Plea e refer all ervicing to qualified per on-
nel. Do not remove the cover your elf a thi
may re ult in an electric hock.
WARNING: When the device is not in use for
a long time, disconnect from power.
Instructions for waste disposal:
Packaging and packaging aids are recy-
clable and should principally be recycled.
Packaging materials, such as foil bag, must
be kept away from children.
Battery, including those which is heavy metal-
free, should not be disposed of with house-
hold waste. Please dispose of used battery
in an environmentally sound manner. Find
out about the legal regulations which apply
in your area.
old cathode fluoresant lamp in L D PANEL
contains a small amount of mercury, please
follow local ordinates or regulations for dis-
posal.
The mains plug is used to disconnect the TV
from the mains and therefore it shall remain
readily operable.
Warning: To prevent injury, this device must
be securely attached to the floor/wall in ac-
cordance with the installation instrutions.
ENG-37775W-17MB15-1895UK-(LT-37DF7BK)-(TVAVOK)-10044417-50093732.p65 07.11.2006, 13:092

- 3 -
6XUHO\FRQQHFW
WKHJURXQGZLUH
Be sure to ground the connection properly.
Connect the ground terminal of TV with the ground terminal provided
at the power outlet u ing the enclo ed power cord. If theprovided plug
doe not fit your outlet, con ult an electrician for replacement
of the ob olete outlet.
"The LCD panel is very high technology prod-
uct with about a million thin film transistors,
giving you fine picture details. Occasionally,
a few non-active pixels may appear on the
screen as a fixed point of blue, green or red.
Please note that this does not affect the per-
formance of your product."
DO NOT LEAVE YOUR TV AT STAND-BY OR
OPERATING WHEN YOU LEAVE YOUR
HOUSE
Important Instruction
For your own afety read following in truction carefully before attempting to connect thi unit to
the main upply.
MAINS (AC) OPERATION
The wire in thi main lead are coloured in
accordance with the following code :
BLUE-NEUTRAL
BROWN-LIVE
A the colour of the wire in the main lead
of thi appliance may not corre pond with the
coloured marking identifying the terminal
in your plug, proceed a follow :
The wire which i coloured blue mu t be
connected to the terminal which i marked
with the letter N or coloured black.
The wire which i coloured brown mu t be
connected to the terminal which i marked
with the letter L or coloured red.
No connection i to be made to the earth
terminal of the plug.
If a 13 Amp (BS 1363) Plug i u ed a 5 Amp
Fu e mu t be fitted, or if any other type of Plug
i u ed a 5 Amp Fu e mu t be fitted, either in
the Plug of Adaptor, or on the Di tribution
Board.
CAUTION
TO PREVENT ELECTRIC SHOCK DISCONNECT
FROM THE MAINS BEFORE REMOVING COVER.
NO USER SERVICEABLE PARTS INSIDE. REFER
SERVICING TO QUALIFIED SERVICE PERSONNEL.
SAFETY PRECAUTION
THIS EQUIPMENT MUST BE DISCONNECTED FROM
THE MAINS WHEN NOT IN USE. DO NOT ALLOW
THIS UNIT TO BE EXPOSED TO RAIN OR MOISTURE.
*5((1
<(//2:
(DUWK
)86(
%/8(
1HXWUDO
%52:1
/LYH
ENG-37775W-17MB15-1895UK-(LT-37DF7BK)-(TVAVOK)-10044417-50093732.p65 07.11.2006, 13:093

- 4 -
WARNING
Do not allow children to hang from the TV, place their
elbow on the TV or lean again t the TV. Doing o may
cau e the TV to fall over and lead to injurie .
CAUTION:
To avoid electric hock or damage to the unit, fir t firmly
in ert the mall end of the power cord into the rear ide
of the TV ecurely, and then plug the larger end of power
cord into an AC outlet.
Make enough room for in erting and removing the power plug. Place the TV a clo e to the
outlet a po ible. The Main power upply for thi TV i controlled by in erting or removing the
power plug or pu hing the main power button on the rear ide of of the TV.
ENG-37775W-17MB15-1895UK-(LT-37DF7BK)-(TVAVOK)-10044417-50093732.p65 07.11.2006, 13:094

- 5 -
Where to install
WARNING
When you install the TV on the wall, only use a JVC wall mounting unit which is designed for
this TV.
Make sure the TV is installed on the wall by a skilled installer.
Locate the TV away from direct unlight and trong light , oft, indirect lighting i recommended
for comfortable viewing. Place on a turdy platform, the mounting urface hould be flat and
teady, it hould then be ecured to the wall with a turdy tie u ing the hook on the back of the
TV, thi will prevent it from falling over. U e curtain or blind to prevent direct unlight falling on
the creen.
A floor and table top tand are available for thi televi ion, or and angled bracket which enable
the TV to be wall-mounted.
The LCD di play panel are manufactured u ing an extremely high level of preci ion technol-
ogy, however ometime ome part of the creen may be mi ing picture element or have
luminou pot . Thi i not a ign of a malfunction.
Make ure the TV i located in a po ition where it cannot be pu hed or hit by object , a
pre ure will break or damage the creen.
Distance Recommendation
In tall the TV on olid horizontal urface uch a a table or de k.
For ventilation, leave a pace of at lea t 10 cm free all around the et. To prevent any fault and
un afe ituation , plea e do not place any object on top of the et.
ENG-37775W-17MB15-1895UK-(LT-37DF7BK)-(TVAVOK)-10044417-50093732.p65 07.11.2006, 13:095

- 6 -
Important Information
Please take note
EXCLUSION CLAUSE
JVC hall under no circum tance be liable for lo and/or damage to the product cau ed
by:
fire;
earthquake;
accidental damage;
intentional mi u e of the product;
u e of the product in improper condition ;
lo and/or damage cau ed to the product whil t in the po e ion of a third party;
any damage or lo cau ed a a re ult of the owner failure and/or neglect to follow the
in truction et out in the owner manual;
any lo or damage cau ed directly a a re ult of mi u e or malfunction of the product
when u ed imultaneou ly with a ociated equipment;
Furthermore, under no circum tance hall JVC be liable for any con equential lo and/
or damage including but not limited to the following, lo of profit, interruption of bu ine ,
the lo of recorded data whether cau ed during normal operation or mi u e of the
product.
WARNING! NEVER LEAVE A
STATIONARY IMAGE ON THE
SCREEN
If tationary image generated by TELETEXT,
CHANNEL IDENTIFICATION LOGOS, COM-
PUTER DISPLAYS, VIDEO GAMES, ON
SCREEN MENUS, etc. are left on the TV
creen for any length of time, they could be-
come permanently ingrained.
If you u e your televi ion to di play completely
till image , or moving picture which have a
permanent till image uperimpo ed e.g.
broadca t network logo , it i alway advi -
able to reduce BOTH the brightne and con-
tra t etting .
Care and disposal
Cleaning the screen and cabinet...
Turn off the power, clean the creen and cabi-
net with a oft, dry cloth. We recommend that
you do not u e any proprietary poli he or
olvent on the creen or cabinet a thi may
cau e damage.
Disposal...
When the et reache the end of it u eful
life plea e di po e of it in accordance with
Local Government Regulation or at a recy-
cling centre.
ENG-37775W-17MB15-1895UK-(LT-37DF7BK)-(TVAVOK)-10044417-50093732.p65 07.11.2006, 13:096

- 7 -
Remote Control Buttons
3
0(18
%$&.
7230(18
3&
79
9
&
5
'
9
'
7
9
$9
2.
79'79
=220
*8,'(
68%7,7/(
/ I = (Stand By) button
TV / VCR / DVD Switch
Number button
AV button
(EXT-1, EXT-2, EXT-2S, EXT-3,
EXT-4, EXT-4S, EXT-5, PC, TV/DIGITAL)
Colour button
MENU = Menu button
= Cur or Up button
OK button
= Cur or Right button
BACK = Back button
= Volume - /+ button
GUIDE button (Text Expand)
SUBTITLE button (Text Reveal)
PC Control button
= Hyper Sound On/Off button
ZOOM = Zoom button
button
IDTV/VCR/DVD/Teletext Control button
P button
= Cur or Down button
= Teletext button
= Cur or Left button
TV / DTV button
= Information Button / T-V Link in
Program Menu
= Mute button
ENG-37775W-17MB15-1895UK-(LT-37DF7BK)-(TVAVOK)-10044417-50093732.p65 07.11.2006, 13:097

- 8 -
3
$
%
&
'
(
*+
)
-
,0
./1
2
352*5$0
FRONT VIEW
REAR VIEW
LCD TV
S-Video Input ----- EXT-4S
Video Input
Audio Input (Left, Right)
Headphone
Audio Out
Digital Audio Out
PC Input
Component Video (YPbPr) Input
Component Audio Input EXT-3
HDMI Input (EXT-5)
Scart Socket 1 (EXT-1)
Scart Socket 2 (EXT-2)
Antenna
PC Audio Input
CI (Common Interface) Slot
Peripheral Equipment Connections
EXT-4
ENG-37775W-17MB15-1895UK-(LT-37DF7BK)-(TVAVOK)-10044417-50093732.p65 07.11.2006, 13:098

- 9 -
Features
Remote controlled colour televi ion.
Fully integrated Digital TV (DVB-T)
100 programme from VHF, UHF band or cable channel can be pre et.
It can tune cable channel .
Controlling the TV i very ea y by it menu driven y tem.
It ha 2 Scart ocket for external device ( uch a video, video game , audio et, etc.)
Stereo ound y tem (German+Nicam).
Full function Teletext .
Fa text (1000 Page ), TOP text.
Headphone connection.
Direct channel acce .
A.P.S. (Automatic Programming Sy tem).
All programme can be named.
Forward or backward automatic tuning.
Sleep timer.
Child Lock.
Automatic ound mute when no tran mi ion.
NTSC Playback.
AV in and S-Video in are available.
It ha VGA connector for external device uch a computer.
It ha PIP function . (only in PC mode)
When no valid ignal i detected, after 5 minute the TV witche it elf automatically to tand-
by mode.
PLL (Frequency Search)
PC Input (Support up to WXGA 1366 x 768)
Stereo PC Audio Input
Plug&Play for Window 98, ME, 2000, XP
3D Comb Filter
Audio Out
Connecting HDMI Device i available
ENG-37775W-17MB15-1895UK-(LT-37DF7BK)-(TVAVOK)-10044417-50093732.p65 07.11.2006, 13:099

- 10 -
etting Started
Follow Step 1 to 7 to set up your TV:
Step 1: Chec ing the accessories supplied
Remote control unit x 1
AA/R6 battery x 2
Power cord x 1
Step 2: Inserting batteries
Remove the battery cover located on the back of the remote control by gently pulling upward
from the indicated part.
In ert two AA/R6 dry cell or equivalent type of batterie in ide.
Replace the battery cover.
NOTE: Remove the batteries from remote control when it is not to be used for a long
period.Otherwise it can be damaged due to any leakage of battery.
Old batteries must be disposed in a designated area. If performance of the remote control
reduces, replace the batteries with the correct type. Do not combine a used, old battery or a new
one or mixed battery types. Remove dead batteries immediately to prevent acid from leaking
into the battery compartment.
Step 3: Removing the terminal cover
There are connection terminal and a card ocket behind the cover of the rear of the TV.
Remove the cover before connecting an antenna, VCR, DVD and other device .
Remove the cover by removing the hook . When replacing the cover , place the ide or bottom
of the cover again t the TV and in ert the hook .
Leave the cover off if they do not fit properly. DO NOT force to replace the cover . Doing o may
cau e damage of the connection cable and the cover .
Leave the e cover off when mounting the TV on a wall.
ENG-37775W-17MB15-1895UK-(LT-37DF7BK)-(TVAVOK)-10044417-50093732.p65 07.11.2006, 13:0910

- 11 -
The tand can be removed by loo ing the crew with a crewdriver when mounting the TV on
a wall.
Spread a oft cloth on a flat table and then place the TV on the cloth with the creen facing
downward when you remove the tand.
Step 4: Connecting an aerial VCR and mains
Plea e read the u er manual of each device before connecting, to en ure a correct etup.
It i nece ary to connect aerial to watch TV.
Plea e ee Peripheral E uipment Connections ection for connection to other device .
$(5,$/
&RQQHFWWKHDHULDO
0DLQSRZHU
EXWWRQ
ENG-37775W-17MB15-1895UK-(LT-37DF7BK)-(TVAVOK)-10044417-50093732.p65 07.11.2006, 13:0911

- 12 -
Initial Settings
When the TV i fir t turned on, it goe into the
initial etting mode. Follow the in truction
on the creen di play to make the initial et-
ting .
Note: If the TV does not go into the initial settings mode this
is because your TV has already been turned on for the first
time. (Perform the initial settings with INSTALLATION
(see page 23) in the DTV menu and AUTOSTORE (Ana
logue) (see page 28) in the PROGRAM menu.)
Becau e thi i the fir t time that IDTV ha
been u ed, there are no channel tored in
the memory and below information will be di -
played on the creen.
1. Press the [OK] button to start the auto-
matic search.
35/LVW(PSW\6WDUWDXWRPDWLFVHDUFK
2.
The IDTV will automatically tune to the UHF
tran mi ion channel 21 to 68 looking for
digital terre trial TV broadca t and di play-
ing the name of channel found. Thi pro-
ce will take about five minute . To cancel
earching, you can pre MENU button at any
time during the proce .
HINT: Depending on the reception condition
in your particular area, you may find that the
li t of channel found include one or more
repeated name . Thi i becau e the receiver
may detect and tore ome channel , includ-
ing tho e it cannot receive clearly, from adja-
cent area along ide the trong channel from
a tran mitter nearby. Thi i not a problem
and the weaker channel can be deleted from
the receiver later, a de cribed in - Edit PR
Li t section. When an indoor antenna i u ed,
and if it require 5 volt to be powered, et
antenna power to 5 volt .
0(1 8
When the automatic search has finished,
the EDIT PR LIST menu appears.
If you want to, you can now edit the
programme number (PR) u ing the EDIT
PR LIST function. For detail , ee Edit PR
Li t section.
If you do not want to edit programme num-
ber (PR), go to the next tep.
2. Press the MENU button.
The EDIT PR LIST menu di appear and the
following me age appear .
'R\RXZDQWWRVHDUFKIRU
DQDORJXHFKDQQHOV"
<HV 1R
If you elect Ye , Analogue terre trial broad-
ca ting AUTO PROGRAM window i di played.
Country Option are available a following:
D (Germany), A (Au tria), CH (Switzerland), I
(Italy), F (France), B (Belgium), DK (Denmark),
S (Sweden), N (Norway), SF (Finland), UK
(United Kingdom), NL (Netherland ), P (Por-
tugal), E (Spain), TR (Turkey), EIR (Ireland),
LUX (Luxemburg), CZE (Czech), PL (Poland),
HUN (Hungary), BL (Bulgaria), GR (Greece),
CRO (Croatia), ? (Other).
ENG-37775W-17MB15-1895UK-(LT-37DF7BK)-(TVAVOK)-10044417-50093732.p65 07.11.2006, 13:0912

- 13 -
$872352*5$0
3OHDVH&KHFN$QWHQQD&DEOH
$XWR3URJUDPPLQJ6\VWHP
&RXQWU\
8.
2.
&DQFHO
/DQJXDJH (QJOLVK
Pre the BLUE button to cancel APS if you
do not want to delete your exi ting programme
li t.
To continue APS, fir t elect the country by
pre ing
_
/
`
button and then pre the RED
or OK button.
$36,V5XQQLQJ3OHDVH:DLW
8., 0K]
&DQFHO
&
After initial aps i finalized, a programme li t
will appear on the creen. In the programme
li t you will ee the programme number and
name a igned to the programme .
3,&785(
,79
=')
&+
&
&
&
&
&
&
&
&
&
&
6
1DPH ,QVHUW
'HOHWH $36
352*5$0
,79/LQN
If you do not accept the location and / or the
programme name of programme , you can
change them in Programming menu. For de-
tail ee Program menu ection.
If you do not have a T-V LINK compatible VCR,
pre MENU button to exit the menu.
If you have a T-V LINK compatible VCR con-
nected to the EXT-2 terminal, pre but-
ton to di play T-V LINK menu. Then follow the
operating procedure Downloading data to
VCR in the following T-V LINK ection.
T-V LINK
When a T-V LINK compatible VCR connected
to the EXT-2 terminal on the TV, it i ea ier to
et up the VCR and to view video . T-V LINK
u e the following feature :
To use T-V LINK functions
A T-V LINK compatible VCR mean a JVC
video ca ette recorder with the T-V LINK logo,
or with one of the following logo . For detail
ee your VCR in truction manual.
Q-LINK (A trademark of Pana onic Corpora-
tion)
Data Logic (A trademark of Metz Corpora-
tion)
Easy Link (A trademark of Philip Corpora-
tion)
Megalogic (A trademark of Grundig Corpo-
ration)
SMARTLINK (A trademark of Sony Corpora-
tion)
Downloading data to VCR:
The VCR will automatically download the reg-
i tered data on the TV channel from the TV.
Thi mean you do not need to et up the
programme channel on your VCR manually.
The T-V LINK menu will be di played when
you pre the button while PROGRAM
menu i di played.
&RQWLQXH
'RZQORDG79!'(9,&(
&DQFHO
If you do not have a T-V LINK compatible VCR,
elect Cancel and pre or OK button to
exit the menu.
ENG-37775W-17MB15-1895UK-(LT-37DF7BK)-(TVAVOK)-10044417-50093732.p65 07.11.2006, 13:0913

- 14 -
Pre or OK button to tart downloading
data to VCR. TRANSFER i di played in the
menu.
7UDQVIHULQJ
'RZQORDG79!'(9,&(
If FEATURE NOT AVAILABLE i di played,
download wa not performed correctly. Before
trying to download again, check that:
The VCR power i turned on.
The VCR i T-V LINK compatible.
The VCR i connected to EXT-2.
The cart cable i fully wired.
Direct REC:
You can ea ily record to VCR the image that
you are watching on the TV. For detail , read
the manual for your VCR. U e your VCR con-
trol you can not carry out Direct REC u ing
your TV control.
When the VCR i not ready (For example when
there i no tape in erted), NO RECORDING
i di played.
When you pre the following button ( / I,
, TV / DTV, ZOOM, , , AV, MENU,
SUBTITLE, GUIDE, , BACK, / ,
number button ) during recording, a me age
appear a king if you want to top recording
or not. Pre OK button to top recording or
BLUE button to continue recording.
Do not turn the TV off in the following cases:
When recording image from an external
device connected to TV (For example
camcorder).
When recording a TV channel after it ha
been un crambled on a decoder.
When recording a TV channel by u ing the
TV output becau e the VCR own tuner
can not properly receive that channel.
When recording Digital terre trial broadca t-
ing (DVB-T).
TV autopower on/VCR image view:
When the VCR tart playing, the TV automati-
cally turn on and image from EXT-1 and
EXT-2 appear on the creen.
Thi function doe not happen if your TV main
power i turned off. Set your TV main power
to on (StandBy Mode).
Basic Operations
You can operate your TV using both the re-
mote control and TV buttons.
Operation with the buttons on the TV
Volume Setting
Pre - button to decrea e volume or
+ button to increa e volume, o a vol-
ume level cale ( lider) will be di played at
the middle of the bottom on the creen.
Programme Selection
Pre button to elect the next pro-
gramme or button to elect the previ-
ou programme.
Switching input mode
Pre ing TV/AV/OK button will change the
input mode.
Entering Main Menu
Pre MENU button to enter Main menu. In
the Main menu elect ubmenu u ing
or button and enter the ub-
menu u ing - / + or TV/AV/OK or
MENU button. To learn the u age of the
menu , refer to the Menu Sy tem ection .
Operation with Remote Control
The remote control of your TV i de igned to
control all the function of the model you e-
lected. The function will be de cribed in ac-
cordance with the menu y tem of your TV.
Function of the menu y tem are de cribed
in following ection .
ENG-37775W-17MB15-1895UK-(LT-37DF7BK)-(TVAVOK)-10044417-50093732.p65 07.11.2006, 13:0914

- 15 -
Volume Setting
Pre + button to increa e volume.
Pre - button to decrea e volume. A
volume level cale ( lider) will be di played in
the middle at the bottom of the creen.
9ROXPH
Programme Selection (Previous or next
programme)
Pre button to elect the previou
programme.
Pre button to elect the next
programme.
Programme Selection (direct access):
Pre digit button on the remote control to
elect programme between 0 and 9. TV will
witch to the elected programme. To elect
programme between 10 - 99, pre the digit
button con ecutively which programme you
want to elect (eg. for programme 27, fir t
pre 2 and then 7). When it i late to pre
econd digit button only the fir t digit
programme will be di played. The limit of the
delay time i 3 econd .
Example: PR6 pre 6, PR12 pre 1
and 2.
Pre directly the programme number to
re elect ingle digit programme .
Hint: The channel list numbers are assigned by the broad
casters. Because not all channels are broadcast free to air
and stored by the receiver, the channel list numbers do not
run continuously. The fifteenth channel in the list, for ex
ample, may not be channel number 15 but channel number
17.
Hint: If you enter a number which does not correspond to a
stored channel, the next valid channel number is selected
instead. If you enter a number greater than the highest
numbered channel in the channel list, the IDTV will select
the last channel in the list.
Operating while watching
IDTV
Pre ing the TV/DTV button at any time while
watching televi ion programme will witch
the TV et between di playing the digital ter-
re trial televi ion broadca ting and it nor-
mal analogue broadca ting.
It i al o u ed to witch to the la t watched
mode (TV or DIGITAL TV) from the EXT mode.
For example; if a DVD player i connected
with a SCART cable and powered on, then the
IDTV will automatically witch to EXT mode.
The IDTV will witch to the la t watched mode
(TV or DIGITAL TV) if DVD player i witched
off or TV/DTV button i pre ed.
EVERYDAY OPERATION
While u ing the IDTV to the full, there are great
many button to u e in different ituation .
Many of the menu creen di played by the
IDTV have reminder a to which button do
what, at the ba e of the creen. In addition,
many creen have further help available which
i di played when the button i pre ed,
a prompted at the bottom of the creen.
INFORMATION BANNER
Whenever you change channel, u ing the
/ button or the number button ,
an information banner i di played at the bot-
tom of the creen. Thi will remain on the
creen for approximately three econd . The
information banner can al o be di played at
any time while watching TV by pre ing the
button on the remote control. Pre ing the
button again remove the banner.
Hint: Not all channels broadcast the programme
data. If the name and times of the programme is not
available then No Information is displayed in the
information banner.
The information banner give a number of fact
on the channel elected and the programme
on it. The name of the channel i di played,
along with it channel li t number and an in-
dication of the trength of the ignal received
on thi tuning channel.
The name and the tart and fini h time of the
programme currently howing on the elected
channel are given, and the current time.
Icon are al o di played in the information
ENG-37775W-17MB15-1895UK-(LT-37DF7BK)-(TVAVOK)-10044417-50093732.p65 07.11.2006, 13:0915

- 16 -
banner and if thi channel i a favourite chan-
nel.
favorite channel icon
If the elected channel i locked, you mu t
enter the correct four digit code to view the
channel.
ELECTRONIC PROGRAMME GUIDE (EPG)
Another way of electing a channel i with the
electronic programme guide, or EPG. Like the
Channel Li t, the EPG creen di play a li t
of the tored channel along with information
on what programme are being broadca t.
Using the Electronic Programme Guide
EPG can di play 7 day programme guide,
but in ome area only current and next
programme guide i di played.
By u ing EPG, you can elect the channel and
et the reminder for the programme which you
do not want to mi .
To di play the EPG creen, pre the GUIDE
button while watching Digital terre trial broad-
ca ting.
You can exit the EPG creen by pre ing the
GUIDE button again or the MENU button.
MN OP
Q
M
Current date and time
N
Channel li ting
O
Selected date and time
P
Programme name and broadca t time
Q
Brief de cription of the programme
The programme name, broadca t time and
a brief de cription of the programme are di -
played for the programme cho en from the
channel li ting .
Choosing Channel
1. Press or buttons to choose the
channel.
2. Press OK button.
The elected channel i di played.
Programme Reminders
You can ea ily et the reminder o that you
will not mi the programme you want to watch.
1. Press or buttons to choose the
channel.
2. Press the Red and Green buttons to
change the time and Yellow and Blue but-
tons to change the date.
3. Press or buttons and then
or buttons to choose the
programme you want to watch.
4. Press the OK button.
The reminder icon will be di played on the
right ide of the cho en programme name
and the etting i completed.
When the TV i being watched, it automati-
cally change to the channel of the reminded
programme when the tart time of the ched-
uled programme i reached.
Thi function doe not work when the TV i
turned off.
To cancel the reminder setting
Di play the EPG creen, choo e a
programme which ha the reminder icon, and
pre the OK button.
Note:
Reminder event are ignored if any timer
event i active at that time.
You can not et the reminder for the
programme which ha already tarted.
No Information i di played for the
programme or channel which doe not have
any information. You can not et the reminder
for the e programme .
ENG-37775W-17MB15-1895UK-(LT-37DF7BK)-(TVAVOK)-10044417-50093732.p65 07.11.2006, 13:0916

- 17 -
DISPLAYING THE SUBTITLES
With Digital terre trial broadca ting (DVB-T),
ome programme are broadca t with ub-
title . Subtitle can be di played when watch-
ing the e programme .
Pre the SUBTITLE button when watching
Digital terre trial broadca ting (DVB-T).
Subtitle ON appear at the top-left of the
creen and, if programme ha ubtitle , the
ubtitle are di played.
When the SUBTITLE button i pre ed again,
Subtitle OFF appear and the ubtitle di -
appear.
6XEWLWOH21
6XEWLWOH2))
DIGITAL TELETEXT
With Digital terre trial broadca ting (DVB-T),
in addition to picture and ound, you can al o
watch digital teletext.
Digital teletext i ometime broadca t at the
ame time a normal broadca ting.
1. Press the button.
The digital teletext information appear .
2. Operate it with the colour buttons,
/ / / buttons and OK button.
The operation method may differ depending
on the content of the digital teletext.
Follow the in truction di played on digital
teletext creen.
When Pre SELECT or imilar me age
appear on the creen, pre the OK button.
When the (Text) button i pre ed, the TV
return to televi ion broadca ting.
With Digital terre trial broadca ting (DVB-T),
in addition to digital teletext broadca ting at
the ame time a normal broadca ting, there
are al o channel with ju t digital teletext
broadca ting.
The a pect ratio when watching a channel
with ju t digital teletext broadca ting i the
ame a the a pect ratio of the picture watched
previou ly.
When you pre the (Text) button while
ubtitle are on, the ubtitle are turned off.
When you pre the (Text) button again,
the digital teletext creen i di played.
DTV Menus
The DTV menu can only be hown when
watching Digital terre trial broadca ting. To
di play the DTV menu, do the following:
1. Press MENU button.
The menu appear .
',*,7$/
',*,7$/
2. Choose DIGITAL and press the OK button.
The DTV menu appear .
'79
7LPHUV
&RQILJXUDWLRQ
(GLW35/LVW
,QVWDOODWLRQ
&RPPRQ,QWHUIDFH
Timers (DTV Timer Recording)
By etting the timer, you can record a Digital
terre trial broadca ting (DVB-T) programme
with a VCR connected to EXT-2 while you are
out.
Before u ing DTV timer recording, the VCR
and TV mu t be connected correctly. For
detail , ee T-V LINK section.
ENG-37775W-17MB15-1895UK-(LT-37DF7BK)-(TVAVOK)-10044417-50093732.p65 07.11.2006, 13:0917

- 18 -
When you have a T-V LINK compatible VCR
connected to Ext-2, all you need to do i et
the TV timer etting and the programme
will be recorded.
By u ing Direct Rec of the T-V LINK func-
tion, the Direct Rec command are ent from
the TV to the VCR to automatically tart and
end the recording. It i not nece ary to et
the timer on the VCR.
When your VCR i not T-V LINK compatible,
you al o need to et the VCR timer etting
to match the TV timer etting .
The recording may not tart and top at ex-
actly the right time for ome programme .
It i recommended that you allow ome lee-
way when etting the recording time .
Provided that the day and time are not the
ame, you can et up to ten timer etting .
When ubtitle are ON, the ubtitle di -
played with the broadca t will be recorded.
When you do not want to record the ub-
title , you need to turn OFF the ubtitle et-
ting beforehand ( See Displaying the sub-
titles section).
During DTV timer recording, you are unable
to view the DTV menu.
1. Choose Timers and press the OK button.
The TIMER MENU appear .
7+5((
When the BACK button i pre ed, the previ-
ou creen i returned to.
2. Press / buttons to choose the
timer number, and then press the OK but-
ton.
The timer etting window appear .
7+5((
7+5((
3. Use the / buttons, number but-
tons and OK button to set the timer.
When etting the tart time and end time,
input 1200 for 12:00 PM, 1500 for 3:00 PM
and 0000 for 12:00 AM.
Name:
U e the / button to choo e the chan-
nel for which the timer i to be et.
Pre the button.
Start:
Set the timer tart time with the number but-
ton .
When the / button are pre ed, the
input po ition move .
Pre the button.
End:
Set the timer end time with the number but-
ton .
When the / button are pre ed, the
input po ition move .
Pre the button.
Date:
Set the date for the timer to work with the num-
ber .
When the / button are pre ed, the
input po ition move .
Pre the button.
ENG-37775W-17MB15-1895UK-(LT-37DF7BK)-(TVAVOK)-10044417-50093732.p65 07.11.2006, 13:0918

- 19 -
Mode:
U e the / button to choo e the timer
mode (Once/Daily/Weekly), and then pre the
OK button.
4. Prepare your VCR for recording
When recording on a T-V LINK
compatible VCR:
1. In ert the videotape for recording into the
VCR and et the recording mode.
2. Make ure the VCR i ready to receive Di-
rect Rec command from the TV.
3. Make ure VCR timer etting do not coin-
cide with the TV timer etting .
For detail , ee your VCR in truction manual.
When recording on a T-V LINK
incompatible VCR:
1. In ert the videotape for recording into the
VCR and et the recording mode.
2. Set the VCR recording timer etting .
3. Make ure that the tart and end time match
with the TV timer.
4. Set the VCR to record the ignal from the
external input that the TV i connected to.
For detail , ee your VCR in truction manual.
When you have fini hed the tep 4, you have
et the timer.
When you are not watching TV, make ure the
TV i in tand by.
WARNING :
Do not turn off the main power. The timer func-
tion will not work with the main power switched
off.
The TV power lamp begin fla hing before
the timer tart time. When you are watching
TV at that time, a me age appear on the
creen to inform you the timer i about to tart.
When performing timer recording with a T-V
LINK compatible device, te t the timer re-
cording before you record the programme.
There are ome T-V LINK compatible record-
ing device that will not correctly receive the
Direct Rec command from the TV.
If the recording device doe not operate when
the recording tart time i reached, it mean
VCR i not receiving the Direct Rec com-
mand from the TV. In thi ca e, follow the
in truction of When recording on a T-V LINK
incompatible VCR:.
While the timer is in operation:
You can turn the TV on or off (Stand by).
WARNING: Do not turn off the main power.
You can watch analogue terre trial broad-
ca ting channel or the picture via an Ext
terminal.
Plea e note that any programme informa-
tion that appear on the creen, uch a when
making change to the Digital terre trial
broadca ting (DVB-T) channel picture, will
be uperimpo ed over the picture in the VCR
recording.
When you pre the following button ( ,
AV, MENU, SUBTITLE, GUIDE, , BACK,
/ , number button ) during re-
cording, a me age appear a king if you
want to top recording or not. Pre OK
button to top recording or BLUE button to
continue recording.
Cancelling the timer setting
Di play the TIMER MENU and pre the
/ button to choo e which timer etting
to cancel. Pre the / button o
that Inactive appear in the Mode column.
Reactivating the cancelled timer
setting
Di play the TIMER MENU and pre the
/ button to choo e which timer etting
to reactivate. Pre the / button o
that Active appear in the Mode column.
Configuration
Set the ba ic etting when watching Digital
terre trial broadca ting (DVB-T).
Choo e configuration and pre the OK but-
ton.
CONFIGURATION appear .
ENG-37775W-17MB15-1895UK-(LT-37DF7BK)-(TVAVOK)-10044417-50093732.p65 07.11.2006, 13:0919
Table of contents
Other JVC Flat Panel TV manuals

JVC
JVC LT-20B60SU User manual

JVC
JVC LT-26AX5 User manual

JVC
JVC LT-52GZ79 User manual

JVC
JVC LT-26DC1BH User manual

JVC
JVC LT-20DA6SK User manual

JVC
JVC LT-26B60SU User manual

JVC
JVC InteriArt LT-23B60SU User manual

JVC
JVC LT-37M60BU User manual

JVC
JVC BlackSapphire JLE55SP4000 User manual

JVC
JVC LT-20A60SU User manual

JVC
JVC LT-32DC9BH User manual

JVC
JVC HD-58DS8DDU Quick start guide

JVC
JVC LT-32DG8BJ User manual

JVC
JVC LT-17S2 LT-23S2 User manual

JVC
JVC LT-32WX84 User manual

JVC
JVC LT-37X898 User manual

JVC
JVC AV-21MS30 User manual

JVC
JVC GGT0372-001A-H User manual

JVC
JVC 0209TKH-FU-FU User manual

JVC
JVC LT-32E488 User manual