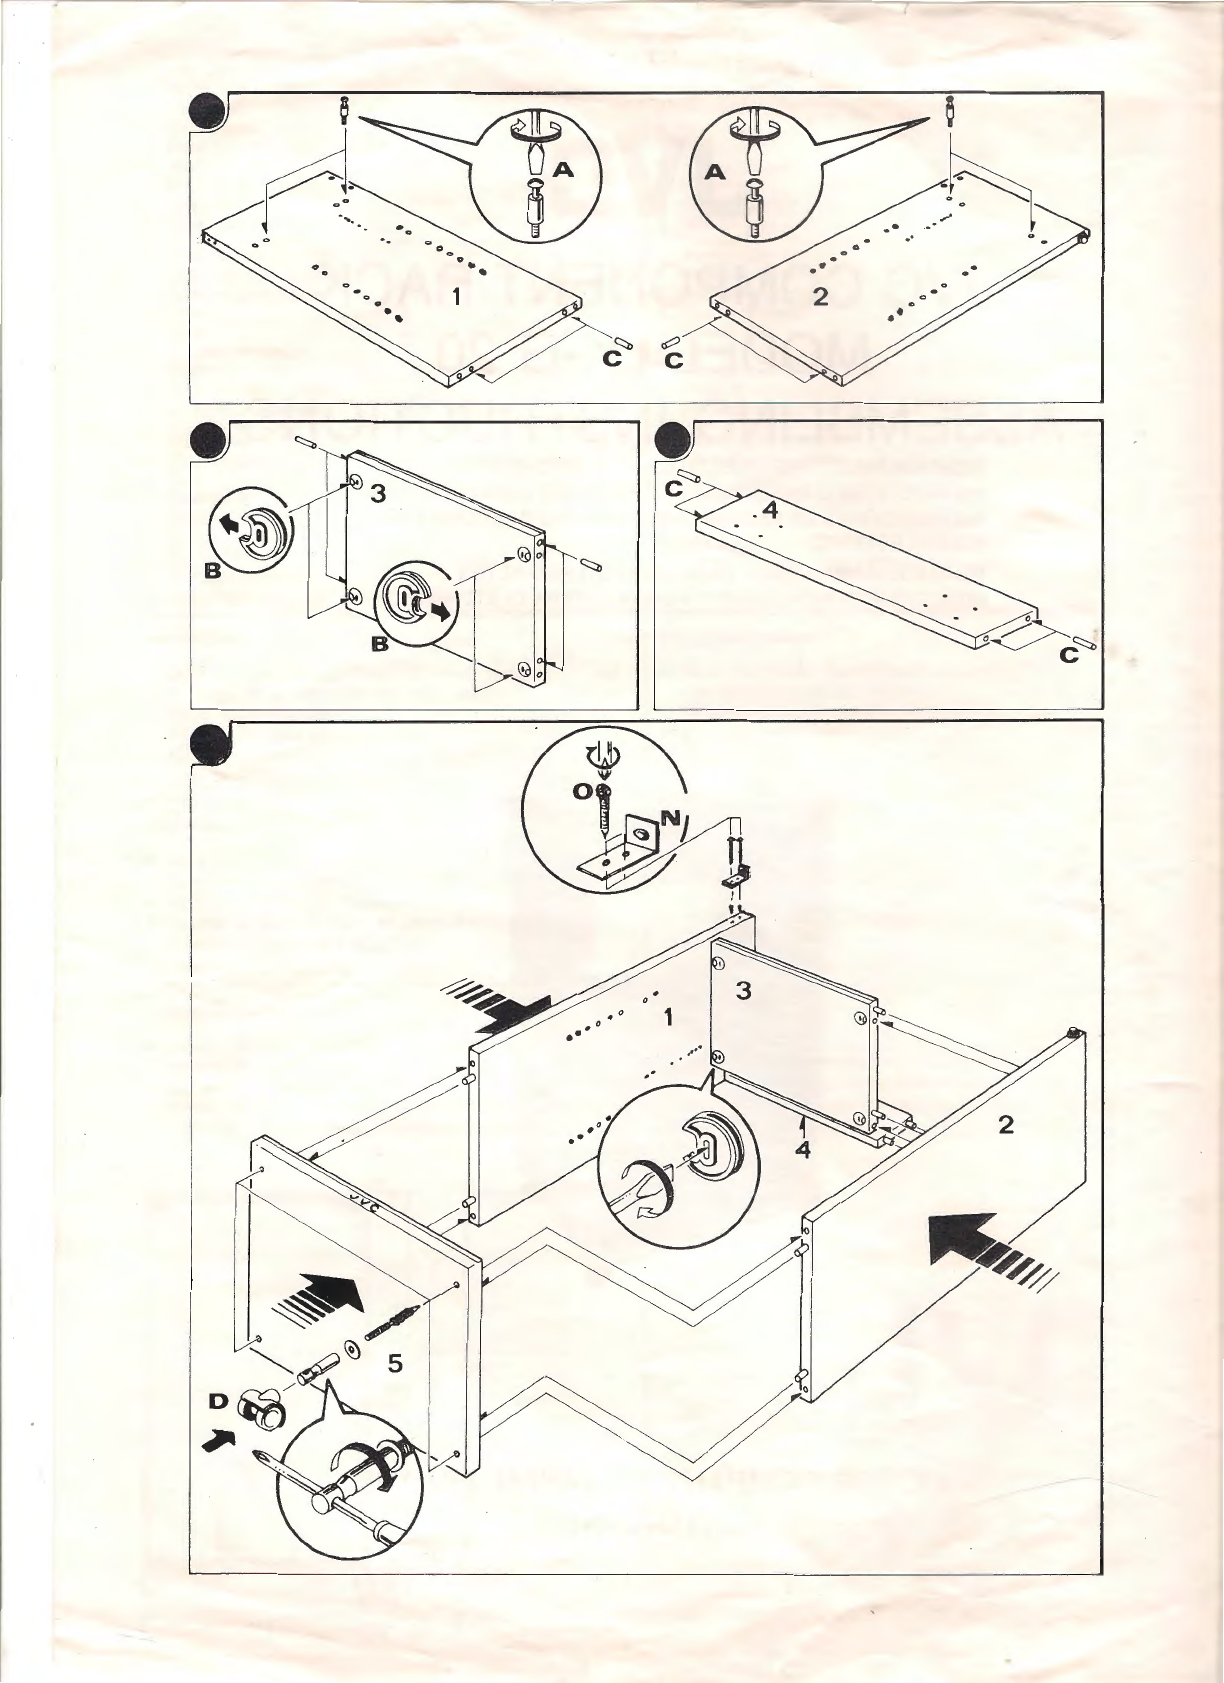
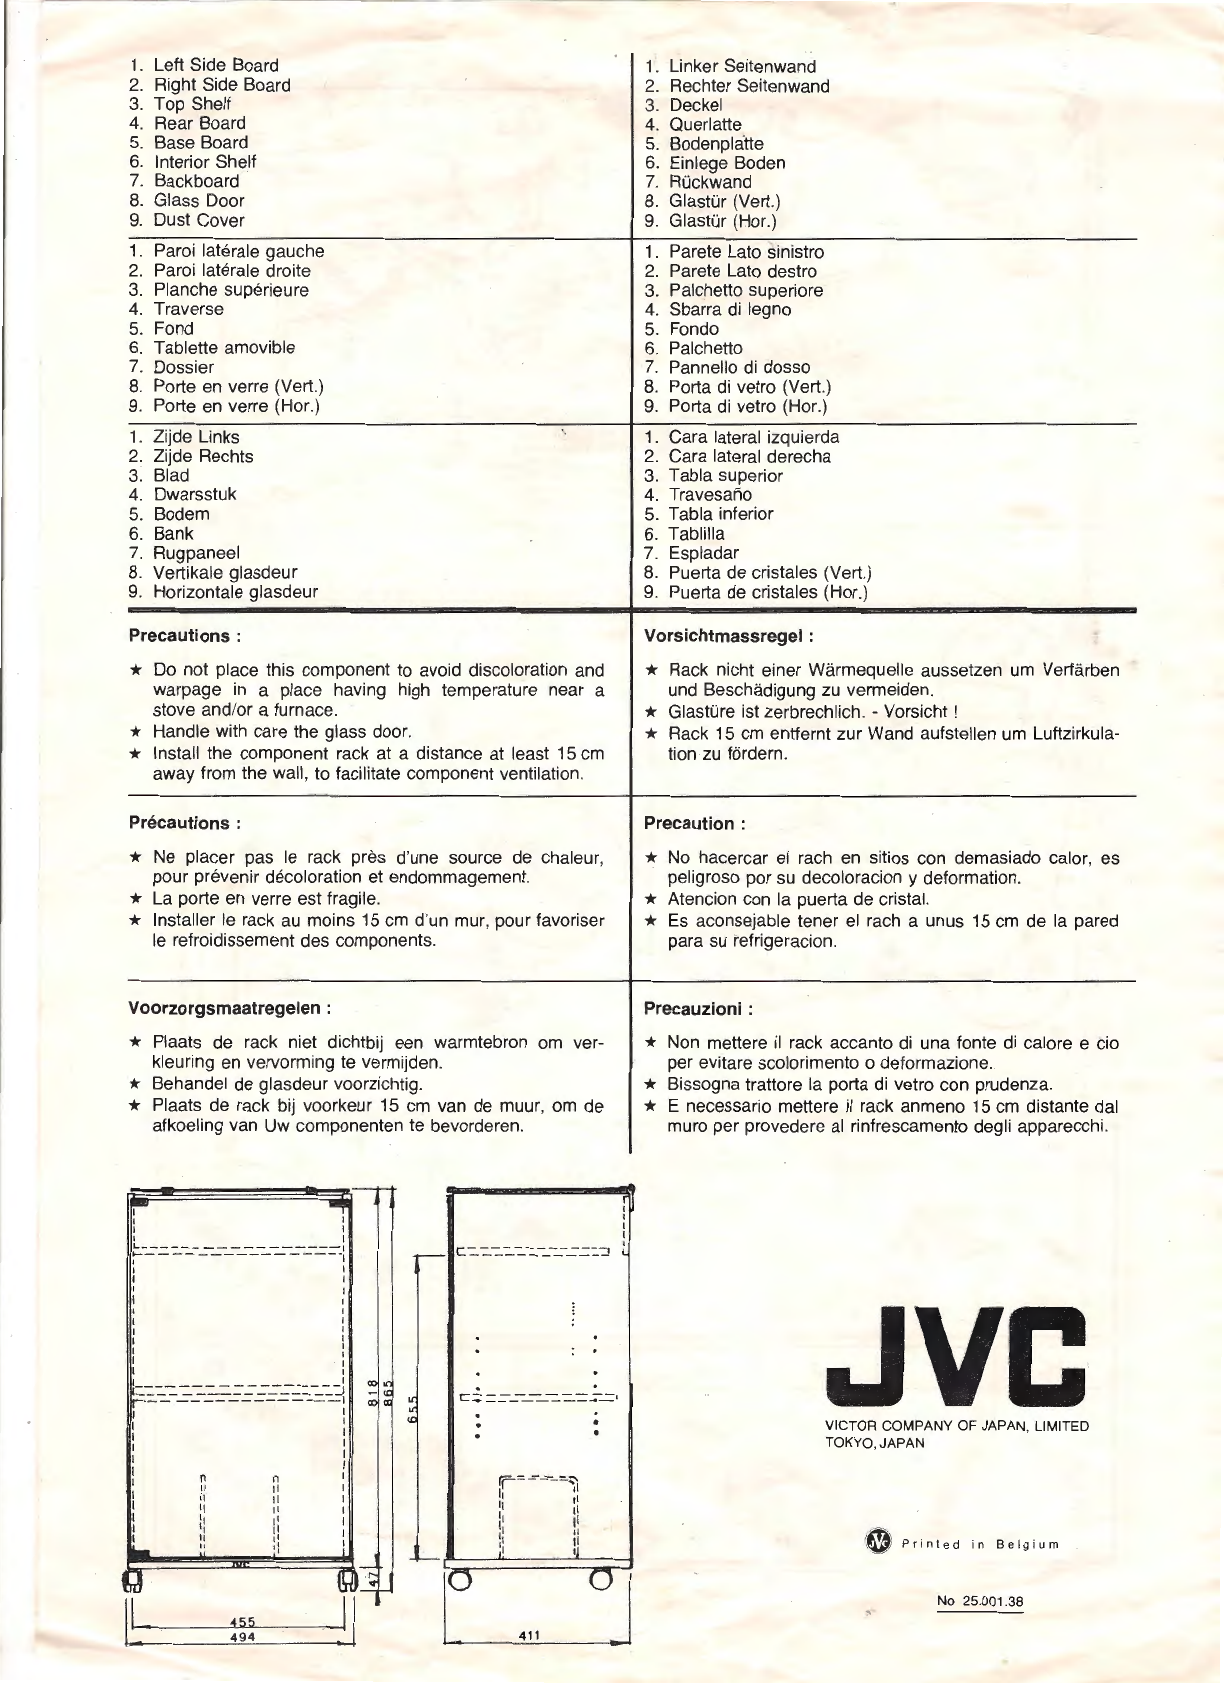
manuals.online logo
Brands
  1. Home
  2. •
  3. Brands
  4. •
  5. JVC
  6. •
  7. Indoor Furnishing
  8. •
  9. JVC LK-G 20 Installation guide

JVC LK-G 20 Installation guide

JVC
JVC COMPONENT RACK
MODEL
LK-G
20
ASSEMBLING INSTRUCTIONS
MONTAGEANLEITUNG : GESTELL
FUR
KOMPONENTEN
INSTRUCTIONS D'ASSEMBLAGE : RACK POUR CHAINE STEREO
INSTRUCCIONES
DE
ENSAMBLAJE : ARMARIO BASTIDOR PARA
EQUIPO ESTEREO
MONTAGE AANWIJZING : RACK VOOR STEREO-KETEN
ISTRUZIONE
Dl
MONTAGGIO :
PER
LA CATENA
Dl
STEREOFONIA
VICTOR COMPANY OF JAPAN, LIMITED
TOKYO, JAPAN
-·
_
;~
®
~
~
, G
'\
~~-~-----
--.
-\ .
I,
r-1
'.
I',/·~\
,'1',
.
:.
~
\ 1
••
-;-;
••
~.
~~~
1\
\ • • • •
\.
\
\ \
\ 7 \
. \
\/!4\
\.
~
"
A B c D E F G
4 8 6
H I J K . L M N 0
bf~~(ll~
4 1
1+1
2 2 4
1/
1 2
1. Left Side Board
2.
Right Side Board
3.
Top Shelf
4.
Rear Board
5. Base Board
6.
Interior Shelf
7.
Backboard
8.
Glass Door
9. Dust Cover
1. Paroi laterale gauche
2. Paroi laterale droite
3.
Planche superieure
4.
Traverse
5.
Fond
6.
Tablette amovible
7.
Dossier
8.
Porte
en
verre (Vert.)
9.
Porte
en
verre (Hor.)
1. Zijde Links
2.
Zijde Rechts
3.
Blad
4.
Dwarsstuk
5.
Bodem
6. Bank
7.
Rugpaneel
8.
Vertikale glasdeur
9.
Horizontale glasdeur
Precautions :
*
Do
not place this component
to
avoid discoloration and
warpage
in
a place having high temperature near a
stove and/or a furnace.
* Handle with care the glass door.
* Install the component rack
at
a distance at least
15
em
away from the wall,
to
facilitate component ventilation.
Precautions :
*
Ne
placer pas
le
rack pres d'une source de chaleur,
pour prevenir decoloration et endommagement.
*
La
porte
en
verre est fragile.
* Installer
le
rack
au
moins
15
em
d'un
mur,
pour favoriser
le
refroidissement des components.
Voorzorgsmaatregelen :
* Plaats de rack niet dichtbij een warmtebron
om
ver-
kleuring
en
vervorming
te
vermijden.
* Behandel de glasdeur voorzichtig.
* Plaats de rack bij voorkeur
15
em
van
de
muur,
om
de
afkoeling van Uw componenten te bevorderen.
,-
.,.
r
I
I
I
I
I I
~------
-
--
-----
-
--1
i----------------1
r--
c-::.-::.-:..-:..:.-:..--_--_-.:::~:.":J
~
I I
I I
I
I
I
I
I
I
I
I
I
I I
1:.-::.
-:..-:..
-=--=--=-==-
.::-
..:-..:-..:-_-:..-::...-::.:.l
lr---
------------1
I I
I I
I I
I I
1 I
I i
I I
l
II
I
I
II
I II
I
II
...
1f
~
-
g
~
~
~~
l
~-.---1
.
~455
-
II
494
=::::J
c:;
=-=-
_-_-_--::..
::..=.;:..=•
1.
Linker Seitenwand
2.
Rechter Seitenwand
3. Deckel
4. Querlatte
5. Bodenplatte
6. Einlege Boden
7.
ROckwand
8.
GlastOr
(Vert.)
9.
GlastOr
(Hor.)
1. Parete Lato sinistro
2.
Parete Lato destro
3.
Palchetto superiore
4. Sbarra
di
legno
5.
Fondo
6. Palchetto
7. Pannello
di
dosso
8.
Porta
di
vetro (Vert.)
9.
Porta
di
vetro (Hor.)
1. Cara lateral izquierda
2.
Cara lateral derecha
3.
Tabla superior
4.
Travesar'io
5. Tabla inferior
6.
Tablilla
7.
Espladar
8.
Puerta
de
cristales (Vert.)
9. Puerta de cristales (Hor.)
Vorsichtmassregel :
* Rack nicht einer Warmequelle aussetzen
um
Verfarben
und
Beschii.digung
zu
vermeiden.
*
GlastOre
ist zerbrechlich. -Vorsicht !
* Rack
15
em
entfernt zur Wand aufstellen
um
Luftzirkula-
tion
zu
fdrdern.
Precaution :
*
No
hacercar
el
rach
en
sitios con demasiado calor, es
peligroso por
su
decoloracion y deformation.
* Atencion con
Ia
puerta de crista!.
*
Es
aconsejable tener
el
rach a unus
15
em
de
Ia
pared
para
su
refrigeracion.
Precauzioni :
* Non mettere
il
rack accanto
di
una fonte
di
calore e cio
per evitare scolorimento o deformazione.
* Bissogna trattore
Ia
porta
di
vetro con prudenza.
* E necessaria mettere
il
rack anmeno
15
em
distante dal
muro per provedere
al
rinfrescamento degli apparecchi.
JVC
VICTOR COMPANY OF JAPAN, LIMITED
TOKYO, JAPAN
0
Printed
in
Belgium
No 25.001.38
Steel
plate
Metallscheibe
Plaque d'acier
Stalen
plaat
Placa
de
acero
.-uiTIONAL
ASSEMBLING INSTRUCTIONS (LK-G20, LK-G22)
ZUSATLICHE MONTAGE-ANLEITUNGEN (LK-G20, LK-G22)
SUI
TE
DES
CONSEILS D'INSTALLATION (LK-G20, LK-G22)
EXTRA MONTAGE AANWIJZINGEN (LK-G20, LK-G22)
INSTRUCCIONES SUPLEMENTARIAS
DE
MO~TAJE
(LK-G20, LK-G22)
Glass
Glasabdecku
ng
Vitre
Glas
Cushion
Auflagekissen
Coussinet
Kussen
Mue
lle
Top
glass
Glasabdeckung
Vitre
du
dessus
Glas
bovenkant
Vidrio
superior
I
S
tic
k
the
cushion
aligning
it
to
the
position
of
the
hinge
in
the
'
U'
shape.
Das Auflagekissen genau
auf
Hiihe
der
U-Form-Halter
anbr
ingen.
Fai
re
adherer le coussinet en
l'alignant
sur
!'emplacement
de Ia
charniere
en
"U".
Bevestig de kussen en
richt
deze
met
de
stand van
de
scharnier in de
U-vorm.
Pegue
el
muelle
alineandolo
a Ia
posicion
de
Ia
bisagra
en
forma
de
'U'
.
Secure
the
screw
so
that
there
is
no space
between
the
pad and
the
bracket
wh
en
viewed
from
the
side;
do
not
tighten
the
screw excessively.
When
in
use,
the
top
glass
may
shake. In
this
case, secure
again
to
reduce
instability
.
Die schraube
soweit
anziehen, daB zwischen
Auflage-
kissen
und
Halterung
kein
Spielraum
mehr
erkennbar
ist,
wenn
man
von
der
Seite
darauf
schaut.
Bei
Gebrauch
kann
das Glas
vibrieren
.
In
diesem
Fall
die
Schrauben
wieder
fest anziehen.
Tighten
the
screw
towards
the
steel
plate
.
Fixer
Ia
vis de
maniere
qu'il
n'y
ait
aucun
intervalle
entr
e le coussin
et
le
collier
de
fixation
quand
on
les
regarde
de
cote;
cependant,
ne pas serrer
Ia
vis
de.
maniere
excessive.
Die schraube bis
zur
Metallscheibe
eindrehen
.
Fixer
Ia
vis a
Ia
plaque
d'acier.
Monteer
de
schroef
tegen
de
stalen
platen
.
Fije el
tornillo
a
Ia
placa
de
acero.
© ®
En
cours
d'
utilisation
, il
se
peut
que
Ia
vitre
du
dessus
bouge
. Dans
un
tel
cas,
Ia
fixer
de
nouveau
pour
reduire
les
possi
bilites
d'instabilite.
De schroeven
zodanig
vastzetten
dater
geen
ruimte
tussen het kussentje
en
de beugel
is
,
vanaf
de
zijkant
gezien.
Niet
te
ver
doordraaien
.
Tijdens
gebruik
kan
de
bovenkant
losraken.
Wanner
dat
voorkomt,
weer
vastzetten
voor
grotere
stabiliteit.
Apriete
el
tornillo
de
forma
tal
que
no
haya espacio
entre
Ia
pi
eza
y
ld
mensula vistas
lateralmente;
no
apriete
el
tornillo
excesivament.
Durant
e el uso,
el
vidrio
superior
puede moverese. Si
es
el c
aso
, asegure
lo
nueva
mente
para
reducir
Ia
instabilidad.
Fix
the
screws
after
a
ligning
the
holes
with
the
guide-
holes (C). In
this
case, be sure
that
the
two
guides
(A)
are parallel
with
part
(B).
With screw
E,
you can adjust the tention of the spring
of
the hinges. Adjust the tention so, that the glassdoor remains
stopped at a position between 15 and
30
degrees to the top
surfaces of the side boards.
Wenn
die
Bohrungen
auf
die
Fuhrungs
.
iiffhungen
aus-
gerichtet
sind,
die
Schrauben anziehen. In diesem Fali
darauf
achten,
daB
die
zwei
Fuhrungen
(AI'
parallel zu
Teil
(B)
verlaufen
.
Mit der Schraube E kann man die Federspannkraft des
Scharnier regeln. Regel diese soweit, das
der
Glastlirstehen
bleibt
in
einer Position zwiscHen 15 und
30
Grad gegenuber
die Oberkante der Seitenpanele.
Vi
ss
er les vis apres
avoir
fait
co'i
ncider
les
trous
avec
les
gui
de
s (C). Dans ce
cas
,
s'
assurer
que
les
deux guides
(A
)
sont
paralleles a
Ia
piece
(B).
Avec Ia
vi
s E, on peut ajuster
Ia
tension du ressort des char-
nieres. Ajustez
le,s
jusqu'aIa vitre reste immobiledansunepo-
sition entre 15
et
30 degrees vis a vis des dessus des cotes
lateraux.
mont
eer de s
chroeven
nadat de ga
ten
op
de gelei
der
-
op
eningen (C)
gericht
zijn
. L
et
er op
da
t de zwee geleide
rs
(A)
parallel
zijn
met
onderd
eel (B) .
Met
de
schroef E kan men de spanning van de v
eer
van
de
scharnieren regelen. Regel
de
ze zo dat de glasdeur blijft
staan
in
een stand tussen 15 en
30
graden t.o.v. bovenkant
van
de
zijpanelen.
Fije los t
or
nill
os despues de
alin
earla l
os
o
rificios
con
los
orificios
guias (C). En este caso,
as
egu
rese
de
que
las
dos
gu
ias
(A)
queden
paralel
as
a
Ia
p
art
e (B).
How
to
fix
the
top
glass
1.
Fix
the
hinges (D)
for
the
top
glass
to
the
assembled
rack
body
according
to
the
illustrated
assembling
instructions
.
2.
Peel
off
the
yellow
papers
from
the
cushions
with
steel
plates
enclosed
in
this
bag.
Montage der Glasabdeckung
1. Die
Scharniere
(D) fur
die
Glasabdeckung
am
bereits
fertig
montierten
Rack-Gestell
anschrauben,
wie
in
der
Abbildung
gezeigt.
2.
Die gelbe
Schutzfolie
von
den
Aufl"agekissen
mit
Metall-
scheibe
entfernen.
Comment
installer
Ia
vitre
du
dessus
1.
Fixer
les
charnieres
(D)
destinees
a
Ia
vitre
du
dessus
sur
le
·
rack
deja
assemble
suivant
le
schema
des
consei
Is
d'installation.
2.
Enlever
les feuilles
de
papier
jaune
adherant
aux
cous-
sinets
entourant
les
plaques
d'
acier
et
qui
sont
emballees
dans
ce
sac.
Aanbrengen van
het
bovenste
glas
1.
Monteer
de
scharnieren
voor
het
bovenste
glas
aan
het
gemonteerde
rack
verwijzend
naar
de
afbeelding
.
2 .
Verwijder
de
gele
papieren
van
de
kussens
met
de
meergeleverde
stalen
platen
in
deze
zak.
Como
fijar el vidrio superior
1.
Fije las bisagras (D) del
vidrio
superior
al
bastidor
montado,
de
acuerdo
con
las
instrucciones
de
montaje
i
lustradas.
2 .
Quite
los
papeles
amarillos
de
los
muelles
con
placas
de
acero
adjuntos
en
esta
balsa
de
platico.
3.
Stick
the
cushions
with
steel
plates
to
the
top
glass
aligning
with
the
two
positions
of
two
hinges
for
the
top
glass as
illustrated.
3.
Die
Auflagekissen
mit
Metallscheibe
so
an
der
Glasab-
deckung
anbringen,
da~
sie
genau
auf
die
beiden
Halterungen
der
Glasabdeckung
ausgerichtet
sind,
wie
gezeigt.
3.
Faire
adherer
les
coussinets
entourant
les
plaques
d'acier
a
Ia
vitre
du
dessus
en les
alignant
sur
les
emplacements
destines
aux
deux
charnieres
de
Ia
vitre
du
dessus,
com
me I
'indique
I
'illustration.
3.
Bevestig
de
kussens
met
de
stalen
platen
tegen
de
bovenste
glas
op
lettend
dat
de
twee
scharnieren
gelijk
gericht
zij
zoals
afgebeeld.
3.
Pegue
los
muelles
con
placas
de
acero
al
vidrio
superior
alineando
con
las
dos
positiones
de
las
dos
bisagras
de
dicho
vidrio
tal
como
se ilu
st
ra.
JVC
VICTOR
COMPANY
OF
JAPAN,
LIMITED

Other JVC Indoor Furnishing manuals

JVC TS-C50P2G User manual

JVC

JVC TS-C50P2G User manual

JVC Lamp LCT2078 User manual

JVC

JVC Lamp LCT2078 User manual

Popular Indoor Furnishing manuals by other brands

Hallowell HOME TEAM LOCKER Assembly instructions

Hallowell

Hallowell HOME TEAM LOCKER Assembly instructions

Cool Kids Furniture 4220 Assembly instructions

Cool Kids Furniture

Cool Kids Furniture 4220 Assembly instructions

Mocka Inca Three Drawer Assembly instructions

Mocka

Mocka Inca Three Drawer Assembly instructions

Next AMELIA 939924 Assembly instructions

Next

Next AMELIA 939924 Assembly instructions

Exclusive Heritage BV-20060D installation guide

Exclusive Heritage

Exclusive Heritage BV-20060D installation guide

Haworth Planes instructions

Haworth

Haworth Planes instructions

Argos Samuel Shorty Bunk Bed Assembly instructions

Argos

Argos Samuel Shorty Bunk Bed Assembly instructions

National Eloquence Series Ganging Center andCorner... Assembly instructions

National

National Eloquence Series Ganging Center andCorner... Assembly instructions

Knightsbridge Large Sideboard 227/7013 Assembly instructions

Knightsbridge

Knightsbridge Large Sideboard 227/7013 Assembly instructions

Frontgate Kensington FG045-10-P quick start guide

Frontgate

Frontgate Kensington FG045-10-P quick start guide

Tavistock SLE510 INSTALLATION & CARE INSTRUCTIONS

Tavistock

Tavistock SLE510 INSTALLATION & CARE INSTRUCTIONS

CHITA DC71266 Assembly manual

CHITA

CHITA DC71266 Assembly manual

Forte PEDINA PDNK231 Assembling Instruction

Forte

Forte PEDINA PDNK231 Assembling Instruction

Trasman 1090 Bo1 Assembly manual

Trasman

Trasman 1090 Bo1 Assembly manual

Granberg 6302H installation instructions

Granberg

Granberg 6302H installation instructions

PAIDI FIONA instructions

PAIDI

PAIDI FIONA instructions

Rauch M2663 Assembly instructions

Rauch

Rauch M2663 Assembly instructions

Kvik SH906-060 Assembly instructions

Kvik

Kvik SH906-060 Assembly instructions

manuals.online logo
manuals.online logoBrands
  • About & Mission
  • Contact us
  • Privacy Policy
  • Terms and Conditions

Copyright 2025 Manuals.Online. All Rights Reserved.