JVC InteriArt LT-15B60SE User manual

ENGLISH
DEUTSCH
FRANÇAIS
ITALIANO
1004TKH-VT-VT
©2005 VICTOR COMPANY OF JAPAN, LIMITED
INSTRUCTIONS
LCD-TV-GERÄT BEDIENUNGSANLEITUNG
PANNEAU LCD TELEVISEUR MANUEL D'INSTRUCTIONS
TV A SCHERMO LCD ISTRUZIONI
LT-15B60SE
LCD PANEL TV

ENGLISH - 1 -
For your safety
This equipment has been designed and
manufactured to meet international safety stan-
dards but, like any electrical equipment, care
must be taken if you are to obtain the best
results and safety is to be assured. So, please
read the points below for your own safety. They
are of a general nature, intended to help you
with all your electronic consumer products and
some points may not apply to the goods you
have just purchased.
Some DOs and DONTs for you
Air Circulation
eave at least 10cm clearance around the tele-
vision to allow adequate ventilation. This will
prevent the TV from overheating and conse-
quential possible damage to the TV. Dusty
places should also be avoided.
Heat Damage
Damage may occur if you leave the TV in di-
rect sunlight or near a heater. Avoid places
subject to extremely high temperatures or hu-
midity, or locations where the temperature is
likely to fall below 5ºC (41ºF).
Mains Supply
The mains supply required for this equipment
is 100- 40 V AC, 50 Hz. Never connect to a
DC supply or any other power source. DO en-
sure that the TV is not standing on the mains
lead. DO NOT cut off the mains plug from this
equipment, this incorporates a special Radio
Interference Filter, the removal of which will
impair its performance.
Hot / Moderate Climate Conditions
This device is suitable for working in hot and
moderate climate conditions.
Contents
For your safety ......................................... 1
Important Information ............................. 4
Remote Control Buttons .......................... 5
Control Panel Buttons ............................. 6
Using the stand ........................................ 7
How to remove the stand ........................ 7
Installing TV on the wall .......................... 8
Preparation .............................................. 9
Before Switching on your TV .................. 9
Switching the TV ON/OFF ...................... 10
Initial Settings ......................................... 11
Operating the TV .....................................11
Menu System ......................................... 1
Other Features ....................................... 17
PC Mode ................................................. 18
Teletext ................................................... 0
Peripheral Equipment Connections ..... 1
Antenna Connections ............................ 4
Peripheral Equipment Connections ..... 4
PC Input Typical Display Modes ......... 5
Tips ......................................................... 6
Specifications ........................................ 7
01-ENG-1525-17MB18-1861UK_15B60SE.p65 30.06.2005, 15:091

ENGLISH - 2 -
IF IN DOUBT P EASE CONSU T A COMPE-
TENT E ECTRICIAN.
DO
DO read the operating instructions before you
attempt to use the equipment.
DO ensure that all electrical connections (in-
cluding the mains plug, extension leads and
inter-connections between pieces of equip-
ment) are properly made and in accordance
with the manufacturers instructions.
Switch off and withdraw the mains plug be-
fore making or changing connections.
DO consult your dealer if you are ever in doubt
about the installation, operation or safety of
your equipment.
DO be careful with glass panels or doors on
equipment.
DO NOT
DONT remove any fixed cover as this may
expose dangerous voltages.
DONT obstruct the ventilation openings of the
equipment with items such as newspapers,
table-cloths, curtains etc. Overheating will
cause damage and shorten the life of the
equipment.
DONT allow electrical equipment to be ex-
posed to dripping or splashing or objects filled
with liquids, such as vases, to be placed on
the equipment.
DONT place hot objects or naked flame
sources, such as lighted candles or night-
lights on, or close to the equipment. High tem-
peratures can melt plastic and lead to fires.
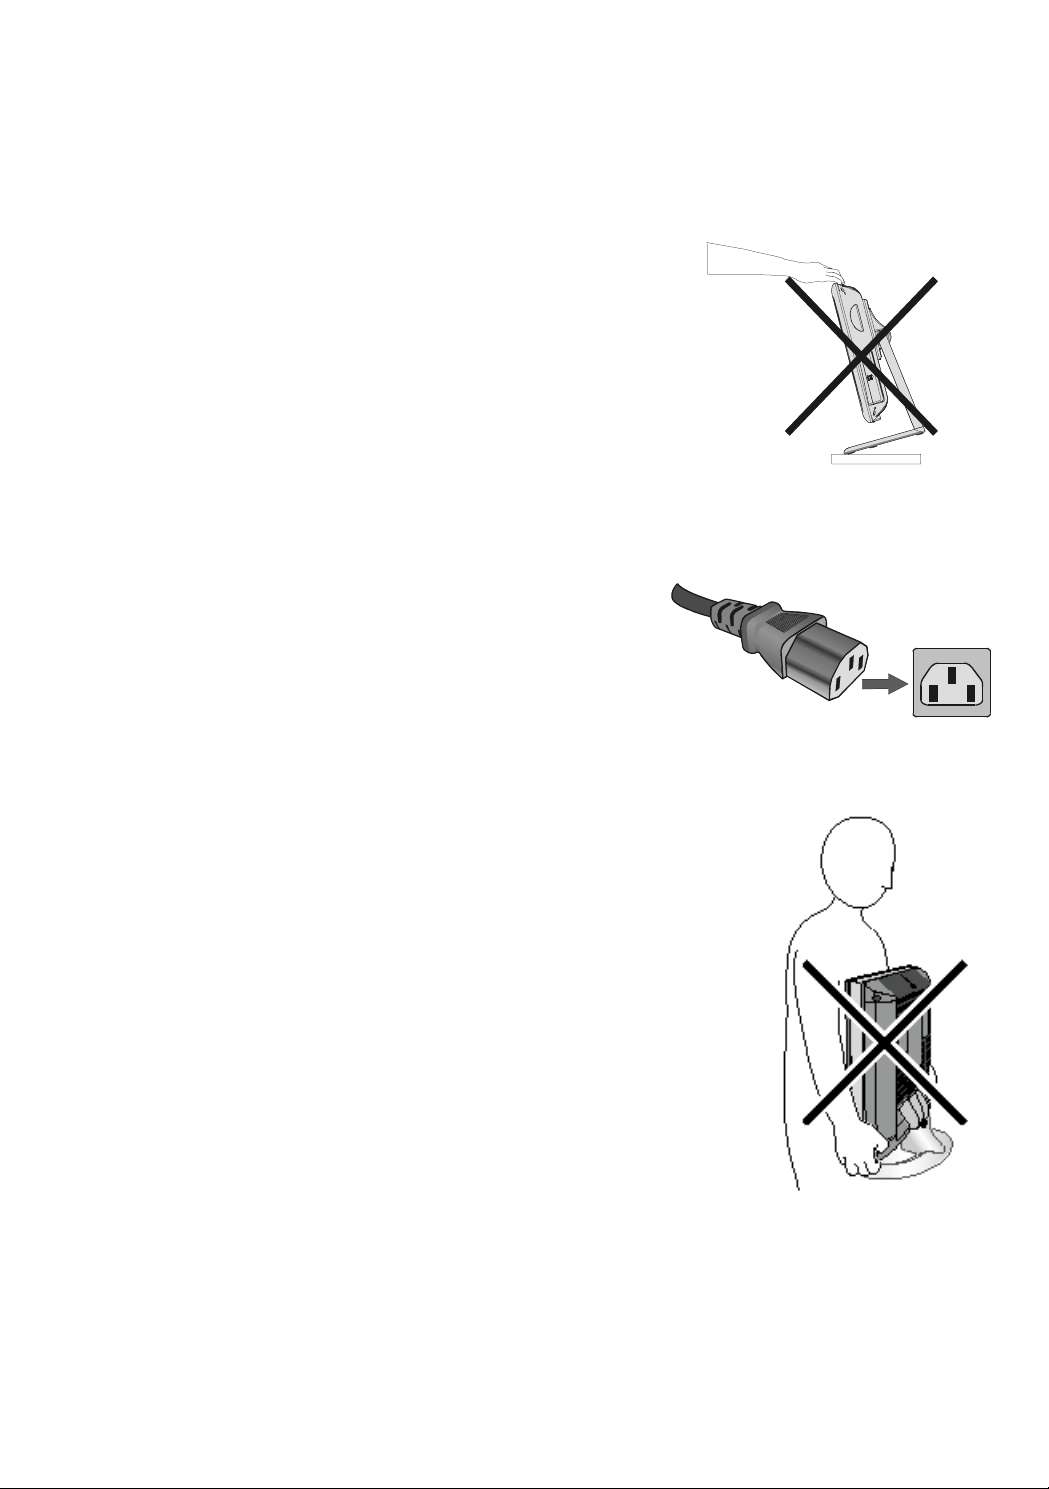
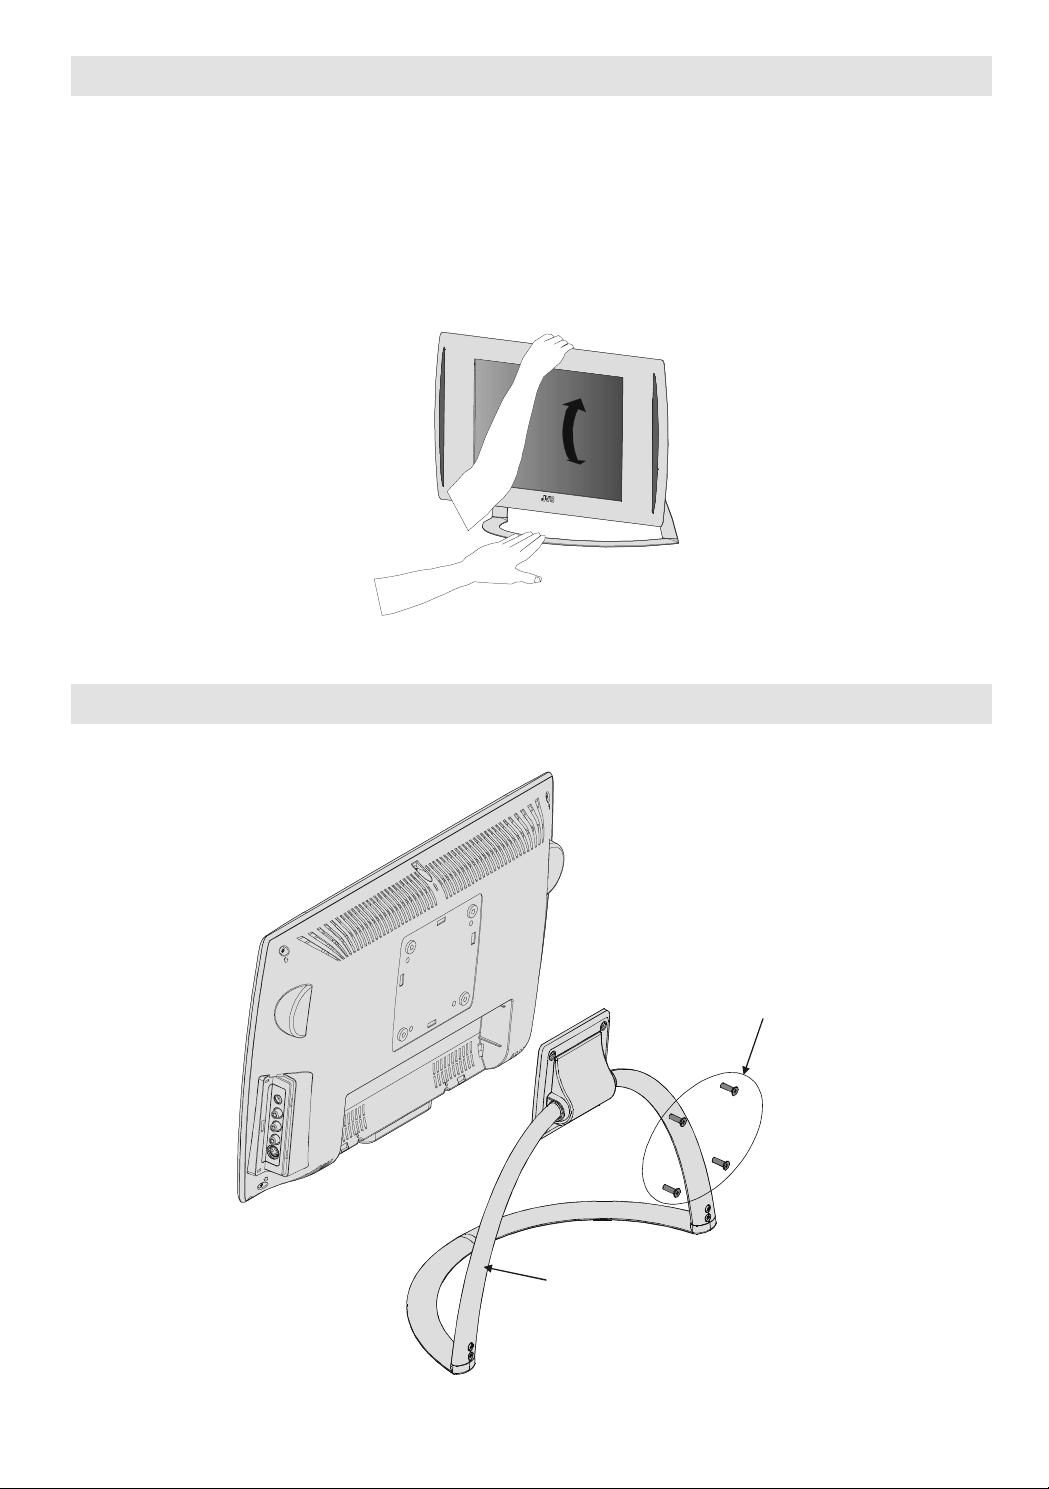
DONT use makeshift stands and NEVER fix
legs with wood screws. To ensure complete
safety, always fit the manufacturers approved
stand or legs with the fixings provided accord-
ing to the instructions.
DONT listen to headphones at high volume,
as such use can permanently damage your
hearing.
DONT leave equipment switched on when it
is unattended, unless it is specifically stated
that it is designed for unattended operation or
has a standby mode. Switch the equipment
off and make sure your family know how to do
this. Special arrangements may need to be
made for infirm or handicapped people.
DONT continue to operate the equipment if
you are in any doubt about it working normally,
or it is damaged in any way switch off, with-
draw the mains plug and consult your dealer.
DONT put the empty batteries into garbage
instead of recycle bin to reduce harmfull ef-
fects to the environment.
ABOVE ALL NEVER let anyone, especially
children, push anything into holes, slots or
any other openings in the case this could
result in a fatal electric shock.
NEVER guess or take chances with electrical
equipment of any kind it is better to be safe
than sorry.
To fully disconnect the TV, switch off the
mains socket and remove the Power plug.
Safety Precautions for Power adaptor
Be careful! May become hot.
For indoor and dry location use only.
Risk of electric shock.
Shock hazard, do not open.
Keep all power adaptors away from any other
heat source.
Always use power adaptor(s) well-ventilated
area.
** Cold cathode fluoresant lamp in LCD PANEL
contains a small amount of mercury, please
follow local ordinates or regulations for dis-
posal.
"The LCD panel is very high technology prod-
uct with about a million thin film transistors,
giving you fine picture details. Occasionally,
a few non-active pixels may appear on the
screen as a fixed point of blue, green or red.
Please note that this does not affect the per-
formance of your product." Please note that
certain light guns used with games consoles
may not work on this product.
Warning:
This is a Class A product. In a domestic envi-
ronment this product may cause radio inter-
ference in which case the user may be re-
quired to take adequate measures.
01-ENG-1525-17MB18-1861UK_15B60SE.p65 30.06.2005, 15:092

ENGLISH - 3 -
WARNING
Do not allow children to hang from the TV, place their
elbows on the TV or lean against the TV. Doing so may
cause the TV to fall over and lead to injuries.
CAUTION:
To avoid electric shock or damage to the unit, first firmly
insert the small end of the power cord into the AC Adaptor
unit it is no longer wobbly, and then plug the larger end of
power cord into an AC outlet.
CAUTION:
The TV screen may be damaged if the TV is carried as
shown in the diagram.
WARNING : TO PREVENT FIRE OR SHOCK HAZARD, DO NOT EXPOSE THIS APP IANCE TO
RAIN OR MOISTURE.
01-ENG-1525-17MB18-1861UK_15B60SE.p65 30.06.2005, 15:093

ENGLISH - 4 -
Important Information
Please take note
EXCLUSION CLAUSE
JVC shall under no circumstances be liable for loss and/or damage to the product caused
by:
fire;
earthquake;
accidental damage;
intentional misuse of the product;
use of the product in improper conditions;
loss and/or damage caused to the product whilst in the possession of a third party;
any damage or loss caused as a result of the owner s failure and/or neglect to follow the
instructions set out in the owners manual;
any loss or damage caused directly as a result of misuse or malfunction of the product
when used simultaneously with associated equipment;
Furthermore, under no circumstances shall JVC be liable for any consequential loss and/
or damage including but not limited to the following, loss of profit, interruption of business,
the loss of recorded data whether caused during normal operation or misuse of the
product.
WARNING! NE ER LEA E A
STATIONARY IMAGE ON THE
SCREEN
If stationary images generated by TE ETEXT,
CHANNE IDENTIFICATION OGOS, COM-
PUTER DISP AYS, VIDEO GAMES, ON
SCREEN MENUS, etc. are left on the TV
screen for any length of time, they could be-
come permanently ingrained.
If you use your television to display completely
still images, or moving pictures which have a
permanent still image superimposed e.g.
broadcast network logos, it is always advis-
able to reduce BOTH the brightness and con-
trast settings.
Care and disposal
Cleaning the screen and cabinet...
Turn off the power, clean the screen and cabi-
net with a soft, dry cloth. We recommend that
you do not use any proprietary polishes or
solvents on the screen or cabinet as this may
cause damage.
Disposal...
When the set reaches the end of its useful
life please dispose of it in accordance with
ocal Government Regulations or at a recy-
cling centre.
01-ENG-1525-17MB18-1861UK_15B60SE.p65 30.06.2005, 15:094

ENGLISH - 5 -
Remote Control Buttons
/ I = (Stand By) button
TV / VCR / DVD Switch
Number buttons
AV button (EXT-1, EXT-1S, EXT-1RGB,
EXT-2, EXT-2S or PC)
BLUE / PICTURE Mode button
YELLOW / Sleep Timer button
MENU button
= Cursor Up button
OK button
= Cursor Right button
BACK button
Volume Up/Down buttons
Teletext / VCR /DVD Control buttons
Programme Up/Down buttons
= Cursor Down button
= Teletext Button
= Cursor eft button
= Stereo / Bilingual button
GREEN / Hyper Sound On/Off button
RED / ZOOM Mode button
= Information Button
= Mute button
01-ENG-1525-17MB18-1861UK_15B60SE.p65 30.06.2005, 15:095

ENGLISH - 6 -
Control Panel Buttons
67$1'%<
92/80(
'2:1
92/80(
83
352*5$0
'2:1
352*5$0
83
0(18
79$9
2.
63($.(5 63($.(5
32:(5
/$03
,1)5$5('
5(&(,9(5
01-ENG-1525-17MB18-1861UK_15B60SE.p65 30.06.2005, 15:096

ENGLISH - 7 -
Using the stand
This TV comes with a Table Top Stand already attached.
This stand can be used to adjust the direction of the TV screen.
Tilt the TV up and down:
While holding the stand with one hand which should be on lower level of the stand for avoiding
trapping, use your other hand to hold the middle of the top of the TV and slowly tilt the TV up and
down.
How to remove the stand
5(029(7+(
6&5(:6
67$1'
01-ENG-1525-17MB18-1861UK_15B60SE.p65 30.06.2005, 15:097

ENGLISH - 8 -
Installing TV on the wall
WARNING
When you install the TV on the wall, only use a JVC wall mounting unit (optional) which is
designed for this TV.
Make sure that the TV is installed on the wall by a skilled installer.
ocate the TV away from direct sunlight and strong lights, soft, indirect lighting is recommended
for comfortable viewing. Place on a sturdy platform, the mounting surface should be flat and
steady, it should then be secured to the wall with a sturdy tie using the hook on the back of the
TV, this will prevent it from falling over. Use curtains or blinds to prevent direct sunlight falling on
the screen.
A floor and table top stand are available for this television, or and angled bracket which enables
the TV to be wall-mounted.
The CD display panels are manufactured using an extremely high level of precision technol-
ogy, however sometimes some parts of the screen may be missing picture elements or have
luminous spots. This is not a sign of a malfunction.
Make sure the TV is located in a position where it cannot be pushed or hit by objects, as
pressure will break or damage the screen.
100 mm mount based on VESA regulation is equipped.
01-ENG-1525-17MB18-1861UK_15B60SE.p65 30.06.2005, 15:098

ENGLISH - 9 -
Preparation
Install Display on solid horizontal surface such
as a table or desk.
For ventilation, leave a space of at least 10 cm
free all around the set. To prevent any fault
and unsafe situations, please do not place
any objects on top of the set.
Features
It is a remote controlled colour television and
PC monitor.
100 programmes from VHF, UHF bands or
cable channels can be preset.
It can tune cable channels.
Controlling the TV is very easy by its menu
driven system.
It has an Euroconnector socket for an exter-
nal device (such as VCR, DVD player, video
games etc.)
German+Nicam stereo sound system.
Multilanguage OSD.
Teletext (Fastext, 7 pages).
It is possible to connect headphone.
A.P.S. (Automatic programming system)
All programmes can be named.
Forward or backward automatic tuning.
Sleep timer.
Child lock
Auto, 4:3, 16:9
Automatic sound mute when no transmis-
sion.
When no valid signal is detected, after 5 min-
utes the TV switches itself automatically to
stand-by mode.
NTSC Playback.
P (Frequency Search)
PC input (Support Up to 1024 x 768)
Before Swit hing on your TV
Power connection
Only use the adaptor supplied with this prod-
uct.
7R32:(5
,1387'&9
WHUPLQDO
$&DGDSWRU
IMPORTANT: The TV set is designed to oper-
ate on 1 V DC. For this, an adaptor is used
which gives 1 V DC voltage. Connect this
adaptor to a system that supplies 100- 40V
AC, 50 Hz.
After unpacking, allow the TV set to reach the
ambient room temperature before you con-
nect the set to the mains.
Connections to the RF input
socket
Connect the aerial or cable TV plug to the RF
input socket located at the back of the TV
and connect the cable plug coming out from
the TV out socket located at the devices (VCR,
DVB etc.) to this socket as well.
795($53$1(/
&$%/(79
01-ENG-1525-17MB18-1861UK_15B60SE.p65 30.06.2005, 15:099

ENGLISH - 10 -
How to connect other devices
IMPORTANT: Switch off the TV before connect-
ing any external device.
Sockets for external connections are at the
back of the TV. For connection of other devices
via Euroconnector refer to the manuals of the
related devices.
Inserting batteries in the remote
control handset
Remove the battery cover located on the back
of the handset by gently pulling downwards
from the indicated part.
Insert two AA/R6 dry cell or equivalent type of
batteries inside.
Replace the battery cover.
NOTE: Remove the batteries from remote con-
trol handset when it is not to be used for a long
period. Otherwise it can be damaged due to
any leakage of battery.
Old batteries must be disposed in a desig-
nated area. If performance of the remote con-
trol reduces, replace the batteries with the cor-
rect type. Do not combine a used, old battery
or a new one or mixed battery types. Remove
dead batteries immediately to prevent acid
from leaking into the battery compartment.
Swit hing the TV ON/OFF
To switch the T on
Your TV will switch on in two steps:
1- Connect the power supply cord to the sys-
tem. Then the TV switches itself to stand-
by mode and the power lamp becomes red.
- To switch on the TV from stand-by mode
either:
Press the / I button on the remote control
or at the bottom of the TV,
or,
Press a digit button on the remote control so
that a programme number is selected,
or,
Press or buttons on the remote
control or at the bottom of the TV, so that last
switched off programme is selected.
Either way the TV will switch on and the power
lamp will become green.
To switch the T off
Press the / I button on the remote control
or at the bottom of the TV, so the TV will switch
to stand-by mode and the power lamp will
become red.
NOTE: To switch the TV off completely remove
the mains plug from the socket.
01-ENG-1525-17MB18-1861UK_15B60SE.p65 30.06.2005, 15:0910

ENGLISH - 11 -
Initial Settings
First A.P.S. (Automatic
Programming System)
The following menu will be displayed on the
screen when you turn the TV on for the first
time. A.P.S. searches and sorts all channels
and stores them automatically on your TV, ac-
cording to the transmission of programme
systems in your area.
GRZQIRU$36
$36
$36
&RXQWU\ 8.
/DQJXDJH (QJOLVK
First of all choose language and country by
using / and / buttons. This
will affect the sort process in A.P.S. To start
A.P.S., select A.P.S. by using / but-
tons and press the or OK button. The
following warning is displayed.
,1,7,$/$36:$51,1*
3OHDVH&KHFN
WKH$QWHQQD&DEOH
0HQX!WR&DQFHO 2.!WR6WDUW
Press the OK button to start A.P.S.
$36 VUXQQ QJ
3OHDVH:D W
0HQX!WRH[ W
After A.P.S. is finalized, Program Table will be
displayed on the screen. In the Program Table
you will see the programme numbers and
names assigned to the programmes.
Operating the TV
You can operate your TV using oth the re-
mote control handset and onset uttons.
Volume setting and programme selection can
be made by using the buttons on the bottom
of the TV.
Operating with the buttons on the
T
Volume Setting
Press - button to decrease volume or
+ button to increase volume, so a vol-
ume level scale (slider) will be displayed at
the middle of the bottom on the screen.
Programme Selection
Press P button to select the next pro-
gramme or P button to select the previ-
ous programme.
Switching input mode
Pressing TV/AV/OK button will change the
input mode.
Entering Main Menu
Press MENU button to enter Main menu. In
the Main menu select submenu using
P or P button and enter the sub-menu
using - / + or TV/AV/OK button. To
learn the usage of the menus, refer to the
Menu System sections.
Operating with Remote Control
The remote control handset of your TV is de-
signed to control all the functions of the model
you selected. The functions will be described
in accordance with the menu system of your
TV.
Functions of the menu system are described
in following sections.
Volume Setting
Press + button to increase volume.
Press - button to decrease volume. A
volume level scale (slider) will be displayed in
the middle at the bottom of the screen.
01-ENG-1525-17MB18-1861UK_15B60SE.p65 30.06.2005, 15:0911

ENGLISH - 12 -
Programme Selection (Previous or next
programme)
Press button to select the previous
programme.
Press button to select the next
programme.
Programme Selection (direct access)
Press digit buttons on the remote control to
select programmes between 0 and 9. TV will
switch to the selected programme. To select
programmes between 10 - 99, press the digit
buttons consecutively which programme you
want to select (eg. for programme 27, first
press 2 and then 7). When it is late to press
second digit button only the first digit
programme will be displayed. The limit of the
delay time is 3 seconds.
Example: PR6 press 6
PR12 press 1 and 2
Press directly the programme number to
reselect single digit programmes.
Hint: The channel list numbers are assigned by the broad-
casters. Because not all channels are broadcast free-to-air
and stored by the receiver, the channel list numbers do not
run continuously. The fifteenth channel in the list, for ex-
ample, may not be channel number 15 but channel number
17.
Menu System
Your TV has been designed with a menu sys-
tem to provide an easy manipulation of a multi-
function system. The TV is controlled by choos-
ing the commands, which are displayed on
the screen.
Press the MENU button. The menu will be
displayed in the middle of the screen.
Press or button to select a menu title
and then or button to select a menu
item. Press / or OK buttons to enter
the menu item.
In AV modes, menus appear the same as in
TV mode except the Installation menu.
Press the MENU button again to remove
menu.
Press the BACK button to return to the pre-
vious menu.
Picture Menu
By pressing or button, select the first
icon. Picture menu appears on the screen.
Setting Mode
As you enter the picture menu, Mode will be
the first item.
By pressing or button you may
choose one of these options:
Manual, Bright, Standard and Soft.
GRZQIRUSLFWXUHVHWWLQJV
%ULJKW
&RQWUDVW
6KDUSQHVV
&RORXU
3LFWXUH
0RGH 0DQXDO
&RORXU7H SHUDWXUH 1RU DO
%ULJKW 0LQ
5HVHW
Bright, Standard and Soft modes are all pre-
set. When these modes are selected Con-
trast, Bright-1, Sharpness and Colour can
not be changed. They can only be changed
when Manual is selected as a picture mode.
01-ENG-1525-17MB18-1861UK_15B60SE.p65 30.06.2005, 15:0912

ENGLISH - 13 -
Setting Contrast
Using or button select Contrast.
Press button to increase contrast level.
Press button to decrease contrast level.
ULJKWOHIWWRDGMXVWFRQWUDVW
%ULJKW
&RQWUDVW
6KDUSQHVV
&RORXU
3LFWXUH
0RGH 0DQXDO
&RORXU HPSHUDWXUH 1RUPDO
%ULJKW 0LQ
5HVHW
Setting Bright-1
Using or button select Bright-1.
Press button to increase brightness.
Press button to decrease brightness.
Setting Sharpness
Using or button select Sharpness.
Press button to increase sharpness level.
Press button to decrease sharpness
level.
Setting Colour
Using or button select Colour.
Press button to increase colour level.
Press button to decrease colour level.
Setting Colour Temperature
Using or button select Colour Tem-
perature.
Press or button to select Warm,
Cool or Normal.
Setting Bright-
This item changes the back light of the pic-
ture.
Using or button select Bright- .
Press or button to select Min., Med.
or Max..
Setting Hue
This item is displayed in Picture menu when
the TV receives an NTSC signal.
Using or button select Hue.
Press button to increase hue level.
Press button to decrease hue level.
ULJKWOHIWWRDGMXVW+XH
%ULJKW
&RQWUDVW
6KDUSQHVV
&RORXU
3LFWXUH
RGH DQXDO
&RORXU7HPSHUDWXUH 1RUPDO
%ULJKW LQ
5HVHW
+XH
Reset
Press B UE button to reset the Manual mode
settings to factory default settings.
To Store the Settings
In the Picture Menu, all settings are stored
automatically.
Sound Menu
By pressing or button, select the sec-
ond icon. Sound menu appears on the screen.
GRZQIRUVRXQGVHWWLQJV
7UHEOH
%DVV
%DODQFH
+\SHU6RXQG
6RXQG
9ROXPH
2II
2Q
01-ENG-1525-17MB18-1861UK_15B60SE.p65 30.06.2005, 15:0913

ENGLISH - 14 -
Setting Volume
Press button to increase volume.
Press button to decrease volume.
Or you can directly change the volume set-
tings using + (to increase) or - (to
decrease) button.
Setting Bass Level
Using or button select Bass evel.
Press button to increase bass level.
Press button to decrease bass level.
Setting Treble Level
Using or button select Treble.
Press button to increase treble level.
Press button to decrease treble level.
Setting Balance
It allows adjusting the distribution between the
left and right speakers.
Using or button select Balance.
Press button to change balance right-
ward.
Press button to change balance leftward.
Hyper Sound
Using or button select Hyper Sound.
Pressing or button will turn this fea-
ture on or off.
Pseudo/spatial effect can be turned on or off
via the Hyper Sound item in the Sound menu
or by remote control. In Mono transmission
the left and right channels will be added at left
channel and dummy stereo effect will be in-
troduced to end-user. In stereo transmission
it yields a phase difference between left and
right channels.
To Store The Settings
In the Sound Menu, all settings are stored
automatically.
Feature Menu
By pressing or button, select the third
icon. Feature menu appears on the screen.
GRZQIRUIHDWXUHVHWWLQJV
/DQJXDJH
&KLOG/RFN
)HDWXUH
6OHHS7LPHU
2II
2II2Q
(QJOLVK
%OXH%DFN 2II2Q
Sleep Timer
The Sleep Timer is used to turn the TV off after
a defined period of time after selecting this
item. The timer can be programmed between
Off and 120 minutes in steps of 10 minutes.
(Off, 10, 20, 30, ... , 110, 120)
If sleep timer is activated, at the end of the
selected time, the TV goes automatically to
stand-by mode.
Child Lock
You can use this feature to prevent children
changing programmes or adjustments etc.
without remote control.
Using or button select Child Lock.
Press / button to select Child ock
On or Off .
When Off is selected, there will be no differ-
ence in the operation of your TV. When On is
selected, the TV can only be controlled by the
remote control handset. In this case the con-
trol panel buttons, except button, at the
bottom of the TV will not work.
Selecting Menu Language
Using or button select Language.
Press or button to select menu lan-
guage.
Blue Back
You can set the TV to automatically change to
a blue screen if the signal is weak or absent,
or when there is no input from an external
device.
01-ENG-1525-17MB18-1861UK_15B60SE.p65 30.06.2005, 15:0914

ENGLISH - 15 -
The Blue Background feature can be turned
on or off by pressing or button.
To Store Settings
In Feature menu all settings are stored auto-
matically.
Installation Menu
By pressing or button, select the fourth
icon. Installation menu appears on the screen.
GRZQIRULQVWDOODWLRQVHWWLQJV
$36
3URJUDP7DEOH
,QVWDOODWLRQ
3URJUDPPLQJ
Programming Menu
By pressing or button, select Pro-
gramming and press button. Program-
ming menu appears on the screen.
Selecting Program Number
Using or button select Program
Number.
To select a program number, you can use
/ button or Digit Buttons.
GRZQWRSURJUDPPLQJRSWLRQV
%DQG
3URJUDP1DPH
3URJUDPPLQJ
3URJUDP1XPEHU
&KDQQHO
&RORXU6\VWHP
6RXQG6\VWHP
)LQH7XQLQJ
0DQXDO6HDUFK
9&5
6WRUH
')
6
$872
$872
0K]
2II2Q
Setting Program Name
Using or button select Program
Name.
Press button to select a character and
or button to change it.
After the program name is entered, press
button to exit.
Selecting Band
Band, can be chosen either,
C or S by pressing or button.
Selecting Channel
Channel can be changed by or button
or by Digit Buttons.
Selecting Colour System
Using or button on Colour System,
you can change the colour system to PAL,
SECAM or AUTO.
Note: In EXT mode, you can choose NTSC
3.58 and NTSC 4.43 as well.
Selecting Sound System
Using or button on Sound System,
you can change the standard to BG, I, DK, L/ L.
Selecting Fine Tuning
You can use the Fine Tuning process for fine
adjustment (after coarse adjustment), if you
are not happy about the image on the screen.
Use or button on Fine Tuning item,
until getting the best image on the screen.
Selecting Manual Search
To start the manual search process, press
button for forward search or button for
backward search. If a signal is found or
reaches to end of the band after searching,
press or buttons to continue search
process. To stop the search process when
you want, press the MENU button at any time.
Setting VCR (Video Cassette Recorder )
Mode
This item can be seen in TV, EXT-1 and EXT-
modes.
01-ENG-1525-17MB18-1861UK_15B60SE.p65 30.06.2005, 15:0915

ENGLISH - 16 -
If you want to watch a VCR source, then it will
be better to set VCR mode on. For this,
while the cursor is on this item press the
or button to set it On.
If you want to watch a DVD , then you must set
this item off; because DVD is not a source
like a VCR and to see the picture better, you
must set the VCR mode Off.
To Store Settings
Press button on Store option to store
Programming menu settings.
You can also store a setting by pressing OK
button on the selected setting.
STORING is displayed on screen during
the store process.
Program Ta le
By pressing or button, select the sec-
ond icon. Program table appears on the
screen.
GRZQWRDGMXVWFKDQQHORUGHU
3URJUDP7DEOH
=')
,79
&
%%&
&
&
&
6
Program table shows the programme num-
bers and the names assigned to the
programmes.
Here you can adjust the channel order by
moving or deleting the channels.
First of all press the button.
Using the GREEN button you can move a
programme into another programmes loca-
tion. Press the direction buttons to select a
programme and press the GREEN button.
Then select another programme and press
the GREEN button again. The first selected
programme moves into the location of the sec-
ond selected programme.
Using the YE OW button you can delete any
programme you want.
A.P.S. (Auto Programming System)
By pressing button, select the third icon.
A.P.S. menu appears on the screen.
GRZQIRU$36
$36
$36
&RXQWU\
8.
country
By pressing or button, select coun-
try. Press or button to select the coun-
try where you are.
A.P.S.
By pressing or button, select A.P.S.
When or OK button is pressed, the fol-
lowing warning is displayed.
$36:$51,1*
$OO3UHVWRUHG3URJUDPPHV
: OO%H'HOHWHG
0HQX!WR&DQFHO 2.!WR6WDUW
If you want to cancel A.P.S. function, press the
MENU button.
If OK button is pressed, A.P.S. starts and the
following warning is displayed.
$36 VUXQQ QJ
3OHDVH:D W
0HQX!WRH[ W
If you press the MENU button, A.P.S. function
stops and Program table appears on the
screen.
If you wait till A.P.S. is finalized, Program table
is displayed with the programmes found and
located.
01-ENG-1525-17MB18-1861UK_15B60SE.p65 30.06.2005, 15:0916

ENGLISH - 17 -
Source Menu
By pressing or button, select the fifth
icon. Source menu appears on the screen.
GRZQIRUVRXUFHVHOHFWLRQ
(;76
(;7
6RXUFH
79
(;76
(;7
(;75*%
3&
Use or button to select a mode and
then press or OK button to switch to that
mode. You can also switch your TV to EXT
modes by pressing directly to AV button.
Other Features
T Status
Programme Number, Programme Name
and Sound Indicator are displayed on screen
after programme change for 3 seconds.
This information is also displayed by press-
ing the button. Pressing this button again
shows the current time. Pressing this button
once more removes the on-screen display.
To Display the Time
While watching a TV programme with teletext
transmission, press button twice. The
current time information captured from tele-
text will be displayed on the screen.
If the programme being watched does not have
teletext transmission, no time information will
be displayed.
The time information will disappear after
pressing the button again.
Sound Indicator
button is used to select Mono or Ste-
reo, or Dual I or Dual II.
0RQR
In Mono broadcast or in forced-mono (for ste-
reo broadcast).
6WHUHR
In Stereo broadcast.
'XDO,
If dual broadcast is detected. Dual I is selected
in default and also can be selected after Dual
II by Remote Control.
'XDO,,
If Dual II is selected by Remote Control.
Hyper Sound
By selecting Hyper Sound in sound menu or
by pressing the button on your remote
control, Pseudo/Spatial effect can be turned
on or off.
In Mono transmission the left and right chan-
nels will be added at left channel and dummy
stereo effect will be introduced to end-user.
In stereo transmission it yields a phase differ-
ence between left and right channels.
Picture Mode
Picture mode OSD is displayed when B UE
button is pressed. Picture mode can be
changed to Manual, Bright, Standard and Soft.
01-ENG-1525-17MB18-1861UK_15B60SE.p65 30.06.2005, 15:0917

ENGLISH - 18 -
Sleep Timer
Sleep Timer mode OSD is displayed when
YE OW button is pressed. See page 14 for
detailed information.
Mute Indicator
It is placed in the upper right side of the screen
when enabled, and it stays there until it is dis-
abled.
To cancel mute, there are two alternatives; the
first one is by pressing the button, this vol-
ume is set to the preceding value, and the
second one is increasing or decreasing the
volume level.
olume Bar
It is displayed in the lower middle of the screen.
When a volume command is received (press-
ing + or - by Remote Control or
Control panel at the bottom of the TV) and no
menu is active, it stays on the screen for 3
seconds, after the last volume command or
until another command is received in between.
EXT Modes
By pressing the AV button you can switch
your TV to EXT modes (except being in Tele-
text). Pressing this button consecutively will
switch the TV in one of the optional EXT
modes: EXT-1, EXT-1S, EXT-1RGB, EXT- ,
EXT- S and PC.
In order to quit the EXT mode press any digit
buttons or or .
Zoom Modes
Zoom mode can be changed by pressing Red
button. You can change the screen size ac-
cording to the picture aspect ratio. Select the
optimum one from the following ZOOM modes:
Auto, 4:3 and 16:9.
AUTO
When a WSS (Wide Screen Signalling) sig-
nal, which shows the aspect ratio of the pic-
ture, is included in the broadcast signal or the
signal from an external device, the TV auto-
matically changes the ZOOM mode to 4:3 or
16:9 according to the WSS signal.
When the AUTO mode does not function cor-
rectly due to poor WSS signal quality or when
you want to change the ZOOM mode, change
to another ZOOM mode manually.
PC Mode
Installation
Power off both Computer and Display before
making any connections.
Set your PCs resolution correctly before con-
necting to the TV. See the table in page 5
for supported modes.
Use a D-SUB cable to connect the TVs PC
input to the computers RGB output termi-
nal.
3LQ0LQL'6XE&RQQHFWRU
Tighten the screws of the Display cable until
the connectors are fastened securely (fin-
ger-tighten only).
Menu System in PC mode
Press the MENU button. The menu will be
displayed in the middle of the screen.
PC Picture Menu
By pressing or button, select the first
icon. PC Picture menu appears on the screen.
01-ENG-1525-17MB18-1861UK_15B60SE.p65 30.06.2005, 15:0918

ENGLISH - 19 -
GRZQIRU3&SLFWXUH
%ULJKW
&RQWUDVW
3&3LFWXUH
5HVHW
&RORXU7HPSHUDWXUH 1RUPDO
The items in this menu are described at Pic-
ture menu starting page 1 .
Press B UE button to reset the Manual mode
to factory default settings.
PC Picture Position Menu
By pressing or button, select the sec-
ond icon. PC Picture Position menu appears
on the screen.
GRZQIRU3&SLFWXUHSRVLWLRQ
+3RVLWLRQ
$XWR$GMXVWPHQW
3&3LFWXUH3RVLWLRQ
93RVLWLRQ
'RW&ORFN
3KDVH
Auto Adjustment
If you shift the picture horizontally or vertically
to an unwanted position, use this item to put
the picture into correct place automatically.
Select Auto Adjustment item by using
or buttons.
Press button.
Press MENU button or BACK button to store
the value.
Warning: Auto position adjustment recom-
mended to be done with the full screen image
for the proper adjustment.
Horizontal Position
This item shifts the image horizontally to right
hand side or left hand side of the screen.
Select H. Position item by using or
button.
Use or button to adjust the value.
Press MENU button or BACK button to store
the value.
Vertical Position
This item shifts the image vertically towards
the top or bottom of the screen.
Select V. Position item by using or
button.
Use or button to adjust the value.
Press MENU button or BACK button to store
the value.
Dot Clock
Dot Clock adjustments correct interference
that appear as vertical banding in dot inten-
sive presentations like spreadsheets or para-
graphs or text in smaller fonts.
Use or button to adjust the value.
Phase
Depending on the resolution and scan fre-
quency that you input to the TV Set, you may
see a muddy or noisy picture on the screen. In
such a case you can use this item to get a
clear picture by trial and error method.
Use or button to adjust the value.
Sound Menu
By pressing or button, select the third
icon. Sound menu appears on the screen.
The items in this menu are described at
Sound menu starting page 13.
Source Menu
By pressing or button, select the fourth
icon. Source menu appears on the screen.
01-ENG-1525-17MB18-1861UK_15B60SE.p65 30.06.2005, 15:0919
Other JVC LCD TV manuals

JVC
JVC 1016MTH-VT-VT User manual

JVC
JVC LT-32DG8BU User manual

JVC
JVC LT - 32BX18 User manual

JVC
JVC LT-42P80BU User manual

JVC
JVC LT-26AM21 User manual

JVC
JVC LCT2403-002A-A User manual

JVC
JVC DynaPix LT-47DV8BG User manual

JVC
JVC LT-19DA1BU User manual

JVC
JVC LT-20E50SJ User manual

JVC
JVC LT-42DR9BU User manual

JVC
JVC LT32A200 - 32" LCD TV User manual

JVC
JVC LT-37R70BU User manual

JVC
JVC InteriArt LT-26A61BJ User manual

JVC
JVC LT-32X987 User manual

JVC
JVC LT-50MAW804 User manual

JVC
JVC LT-32C50BU User manual

JVC
JVC Wide LCD Panel TV LT-42DV8BG/N/T User manual

JVC
JVC LT-26DF7BC User manual

JVC
JVC LT-32HR1BN User manual

JVC
JVC LT-40V550 User manual