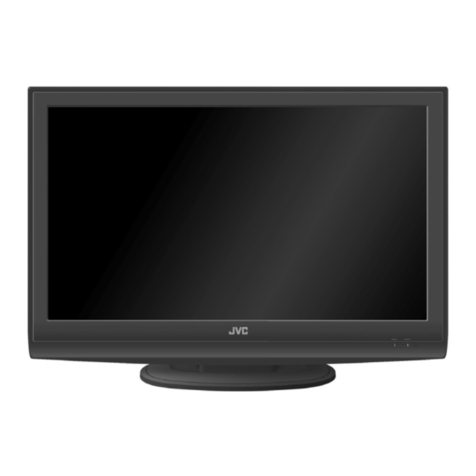
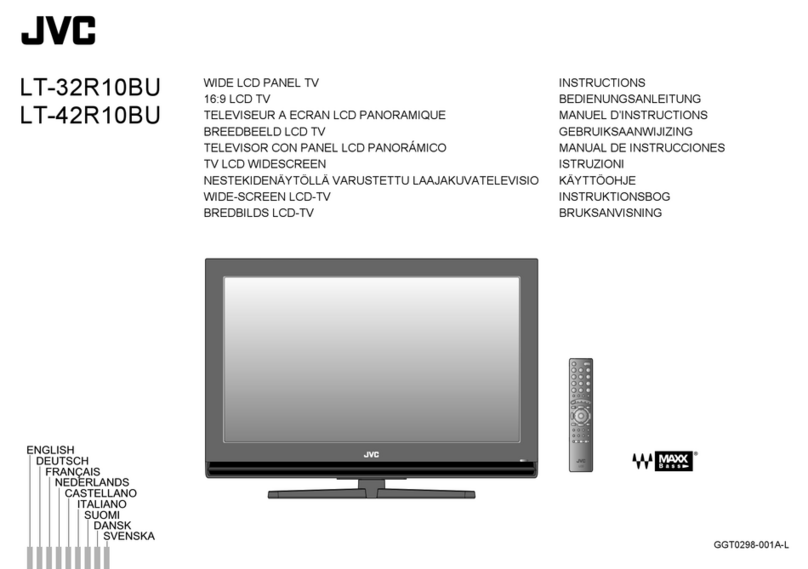
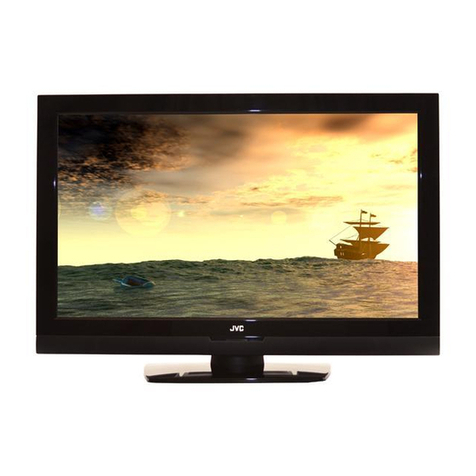
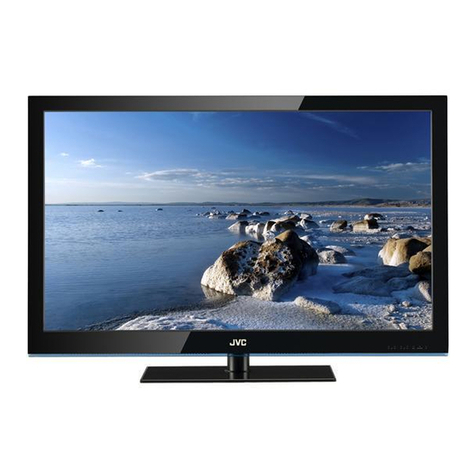
JVC LT-32DH8ZG User manual


Information for Users on Disposal of Old Equipment ENGLISH
[European Union]
Attention:
(Business users)
[Other Countries outside the European Union]
Benutzerinformationen zur Entsorgung alter Geräte DEUTSCH
[Europäische Union]
Hinweis:
(Geschäftskunden)
[Andere Länder außerhalb der Europäischen Union]
Informations relatives à l’élimination des appareils usagés, à
l’intention des utilisateurs FRANÇAIS
[Union européenne]
Attention :
(Utilisateurs professionnels)
[Pays ne faisant pas partie de l’Union européenne]
Informatie voor gebruikers over het weggooien van oude
apparatuur NEDERLANDS
[Europese Unie]
Let op:
(Zakelijke gebruikers)
[Landen buiten de Europese Unie]
Información para los usuarios sobre la eliminación de equipos
usados CASTELLANO
[Unión Europea]
Atención:
(Empresas)
[Otros países no pertenecientes a la Unión Europea]
Informazioni per gli utenti sullo smaltimento delle apparecchiature
obsolete
ITALIANO
[Unione Europea]
Attenzione:
(Per gli utenti aziendali)
[Per altre nazioni al di fuori dell'Unione Europea]
Informações para os Utilizadores sobre a Eliminação de
Equipamento Antigo PORTUGUÊS
[União Europeia]
Atenção:
(utilizadores profissionais)
[Outros países fora da União Europeia]
Informasjon til brukerne om kassering av gammelt utstyr NORSK
[Europeiske Union]
OBS!
(Bedriftsbrukere)
[Andre land utenfor EU]
© 2007 Victor Company of Japan, Limited
ENGLISH
Dear Customer,
This apparatus is in conformance with the valid European directives and standards
regarding electromagnetic compatibility and electrical safety.
European representative of Victor Company of Japan, Limited is:
JVC Technology Centre Europe GmbH
Postfach 10 05 52
61145 Friedberg
Germany
CASTELLANO
Apreciado cliente,
Este aparato cumple con las normativas y normas europeas respecto a la seguridad
eléctrica y a la compatibilidad electromagnética.
El representante europeo de Victor Company of Japan, Limited es:
JVC Technology Centre Europe GmbH
Postfach 10 05 52
61145 Friedberg
Alemania
0207KTH-SW-MU
LCT2149-005A-U
DEUTSCH
Sehr geehrter Kunde, sehr geehrte Kundin,
dieses Gerät stimmt mit den gültigen europäischen Richtlinien und Normen bezüglich
elektromagnetischer Verträglichkeit und elektrischer Sicherheit überein.
Die europäische Vertretung für die Victor Company of Japan, Limited ist:
JVC Technology Centre Europe GmbH
Postfach 10 05 52
61145 Friedberg
Deutschland
ITALIANO
Gentile Cliente,
Questa apparecchiatura è conforme alle direttive e alle norme europee relative alla
compatibilità elettromagnetica e alla sicurezza elettrica.
Il rappresentante europeo della Victor Company of Japan, Limited è:
JVC Technology Centre Europe GmbH
Postfach 10 05 52
61145 Friedberg
Germania
FRANÇAIS
Cher(e) client(e),
Cet appareil est conforme aux directives et normes européennes en vigueur concernant la
compatibilité électromagnétique et à la sécurité électrique.
Représentant européen de la société Victor Company of Japan, Limited :
JVC Technology Centre Europe GmbH
Postfach 10 05 52
61145 Friedberg
Allemagne
PORTUGUÊS
Caro Cliente,
Este aparelho encontra-se em conformidade com as directivas Europeias válidas e padrões
referentes à compatibilidade magnética e segurança eléctrica.
O representante europeu da Victor Company of Japan, Limited é:
JVC Technology Centre Europe GmbH
Postfach 10 05 52
61145 Friedberg
Alemanha
NEDERLANDS
Geachte klant,
Dit apparaat voldoet aan de geldende Europese normen en richtlijnen inzake
elektromagnetische compatibiliteit en elektrische veiligheid.
De Europese vertegenwoordiger van Victor Company of Japan, Limited is:
JVC Technology Centre Europe GmbH
Postfach 10 05 52
61145 Friedberg
Duitsland
NORSK
Kjære kunde,
Dette apparatet er i samsvar med gjeldende europeiske direktiver og standarder for
elektromagnetisk kompatibilitet og elektrisk sikkerhet.
Den europeiske representanten for Victor Company of Japan, Limited, er:
JVC Technology Centre Europe GmbH
Postfach 10 05 52
61145 Friedberg
Tyskland
46?3(%%4?*4%?!INDD !-

Information for Users on Disposal of Old Equipment ENGLISH
[European Union]
Attention:
(Business users)
[Other Countries outside the European Union]
Benutzerinformationen zur Entsorgung alter Geräte DEUTSCH
[Europäische Union]
Hinweis:
(Geschäftskunden)
[Andere Länder außerhalb der Europäischen Union]
Informations relatives à l’élimination des appareils usagés, à
l’intention des utilisateurs FRANÇAIS
[Union européenne]
Attention :
(Utilisateurs professionnels)
[Pays ne faisant pas partie de l’Union européenne]
Informatie voor gebruikers over het weggooien van oude
apparatuur NEDERLANDS
[Europese Unie]
Let op:
(Zakelijke gebruikers)
[Landen buiten de Europese Unie]
Información para los usuarios sobre la eliminación de equipos
usados CASTELLANO
[Unión Europea]
Atención:
(Empresas)
[Otros países no pertenecientes a la Unión Europea]
Informazioni per gli utenti sullo smaltimento delle apparecchiature
obsolete
ITALIANO
[Unione Europea]
Attenzione:
(Per gli utenti aziendali)
[Per altre nazioni al di fuori dell'Unione Europea]
Informações para os Utilizadores sobre a Eliminação de
Equipamento Antigo PORTUGUÊS
[União Europeia]
Atenção:
(utilizadores profissionais)
[Outros países fora da União Europeia]
Informasjon til brukerne om kassering av gammelt utstyr NORSK
[Europeiske Union]
OBS!
(Bedriftsbrukere)
[Andre land utenfor EU]

English-1
English
Notice
Copyright ( ©2007 Victor Company of Japan, Limited)
Not to be copied, used or translated in part or whole without JVC’s prior consent in
writing except approval of ownership of copyright and copyright law.
Warranty
The information in this document is subject to change without notice. JVC does not
have any responsibility for direct, indirect, accidental and other damage caused by the
use of the information contained in this manual.
Trademarks
VIACCESS™ is a trademark of France Telecom.
CryptoWorks™ is a trademark of Philips Electronics N.V.
Irdeto is a trademark of Mindport BV.
Nagravision is a registered trademark of KUDELSKI S.A.
Conax is a trademark of Telenor Conax AS.
Thank you for purchasing a JVC TV. Please read this user manual carefully in
order to safely install, use and maintain the TV at maximum performance. Keep
this user manual next to your TV to ensure the best performance possible.
Read this manual carefully and make sure you understand the instructions provided. For your
safety, check what the result of each action will be.
To reduce the risk of electric shock, do not remove cover (or back).
No user serviceable parts inside. Refer servicing to qualied service
personnel. Indicates a situation which, if not avoided, could damage
the equipment or other apparatus.
This symbol indicates dangerous voltage inside the TV that presents
a risk of electric shock or personal injury. Indicates a hazardous
situation which, if not avoided, could result in serious injury.
This symbol indicates important instructions accompanying the TV.
Notice

English-2
Power
Plug the power cord into the correct power outlet. An unstable connection may cause re.
Do not use damaged power cords or plugs, or use a loose wall outlet. This may cause electrical shock
or re.
Do never touch the power cord with wet hands. This may cause electrical shock.
Do not use multiple devices with one outlet. Overheating the outlet may cause re.
Do not bend or pull out the power cord using force, nor place heavy objects over it. This may cause
electrical shock or re.
Make sure you pull out the power cord holding the plug itself. An internal disconnection may cause re.
When removing the product, turn off the power and pull out the plug from the power outlet. Also make
sure other devices including the antenna or the connectors are removed from the outlets before
relocating the product. Otherwise you may suffer electrical shock or re due to a damaged power cord.
The mains plug shall remain readily operable.
Plug as disconnection device shall remain to be readily approached by user.
Make enough room for inserting and removing the power plug. Place the TV as close to the outlet as
possible. The Main power supply for this TV is controlled by inserting or removing the power plug.
The main power switch on the back of the TV does not fully isolate the TV from the main power
supply.
If you do not use this TV for a long period of time, be sure to disconnect the power plug from the AC
outlet.
Installation
Keep the product away from any heating devices. Placing it close to a heating device may cause re.
Keep the power cord away from any heating devices. A melted coating may cause re or electrical
shock.
Place the antenna as far away as possible from any high-voltage cables.
Touching the high voltage wiring may cause re or electrical shock.
Do not install the product in oily, smoky or humid (or exposed to rain/water) places or automobiles.
This may cause re.
The connection between the external antenna and the internal wiring should be turned inside to avoid
any inow of rain. Exposing the LCD to water (rain) will cause electrical shock or re.
Do not use the product in humid places. Humidity will shorten the life of the product and may cause an
electrical shortage or re.
Do not use the product in places with low temperatures (below 5°C).
Avoid installing the product in poorly ventilated places. Internal overheating may cause an electrical
shortage and re.
Be sure not to cover the ventilator (with a table-cloth or curtain, etc.). Internal overheating may cause
an electrical shortage and re.
Do not install the product in an unstable place or on a small stand. The product may cause serious
injury, if it falls on somebody (especially children). Install it on an even, stable place as it is front-heavy.
Do not install the product on the oor. Someone (especially children) may trip over it.
General Safety Precautions

English-3
English
Usage
Unplug the product from the wall outlet and do not touch the antenna during a thunderstorm. This will
prevent damage to the unit due to lightning and power-surges.
Keep dust or water away from the pins or touching points of the power plug.
This will prevent electrical shock or re.
Keep children from climbing over the product. The device may cause serious injury or death if it falls
on them.
Do not place anything over the product that children may try to reach. The device may cause serious
injury or death if it falls on them.
When removing the battery from the product, keep it out of children’s reach.
If a child swallows a battery, consult a doctor immediately.
Use only specied batteries and do not use an old battery along with a new one. Align the batteries
according to the correct polarity (+ or -). Aligning them incorrectly may cause an internal explosion
or a leakage of the internal liquid, leading to electrical shock, physical damage or pollution of the
surroundings.
Do not insert any metal or a ammable object or an alien substance into the ventilator, the AV input
terminal or the slots for the modules or Smartcards. This may cause damage to the product and
reduce its life span.
Do not disassemble, repair or reconstruct the product at your discretion. This may cause electrical
shock or re. Contact your local customer support.
Keep the product away from inammable sprayers or ignitable objects.
Exposure to these may cause explosion or re.
Do not place water-pots, ower vases, beverage cans, small metals or heavy objects over the product.
Contact of these contents with the product may cause electrical shock or re, while any falling of the
product may cause injury.
If the product breaks down, turn off the power and unplug it from the outlet before contacting Customer
Support. This will protect you from electrical shock or re.
When you notice something strange like an odd noise, smell something burning or see smoke, unplug
the power cord and contact your local Customer Support. Do this to avoid electrical shock or re.
Do not use sharp tools such as a pin or a pencil near the TV, as they may scratch the LCD surface.
Do not use a solvent, such as benzene, to clean the TV, as it will damage the LCD surface.
Do not move the product or turn the power off suddenly while the hard disk drive is running.
The company shall not be liable for any corruption of data on the hard disk drive caused by the
carelessness or misuse of users.
Do not separate the hard disk drive from the main body. Contact your local Customer Support when
you want to change the hard disk drive.
Cleaning
Unplug the power cord before cleaning the product. This may cause electrical shock or re.
Do not sprinkle water on the product. This may cause electrical shock or re.
Use only a soft dry cloth as the surface is weak on scratch. Do not use chemicals like wax, benzene,
alcohol, thinners, aroma, lubricator or cleanser.
General Safety Precautions

English-4
Table of Contents
Chapter 1 >> Getting Started ................................................................................................6
Package Contents ................................................................................................................................... 6
Front & Top Panel.................................................................................................................................... 7
Rear & Side Panel................................................................................................................................... 8
Remote Control Buttons ........................................................................................................................ 10
Chapter 2 >> Connecting Your TV.......................................................................................13
Connecting to an Aerial or a Cable TV .................................................................................................. 13
Connecting to the VCR.......................................................................................................................... 14
Connecting to the DVD Player .............................................................................................................. 16
Connecting to the Set-Top Box.............................................................................................................. 18
Connecting to the Digital Audio System ................................................................................................ 19
Connecting to the PC ............................................................................................................................ 20
Connecting Headphones ....................................................................................................................... 21
Conditonal Access System.................................................................................................................... 21
Chapter 3 >> Initial Setup Wizard........................................................................................22
Running Initial Setup Wizard ................................................................................................................. 22
Chapter 4 >> Basic Operation.............................................................................................23
Turning on Your TV................................................................................................................................ 23
Selecting the Menu Language............................................................................................................... 23
Selecting the Main Input Source ........................................................................................................... 24
Viewing Channel List............................................................................................................................. 24
Displaying Information ........................................................................................................................... 25
Digital Programme Features ................................................................................................................. 27
Chapter 5 >> Using the Electronic Programme Guide (EPG) .............................................28
Viewing the Electronic Programme Guide(EPG)................................................................................... 28
Viewing Reserved Programme.............................................................................................................. 30
Finding a Programme............................................................................................................................ 31
Chapter 6 >> Setting Channels ...........................................................................................32
Scanning Analog Channels Automatically ............................................................................................. 32
Scanning Analog Channels Manually.................................................................................................... 33
Editing Analog Channels ....................................................................................................................... 34
Scanning Digital Channels Automatically .............................................................................................. 35
Scanning Digital Channels Manually..................................................................................................... 36
Editing Digital Channels ........................................................................................................................ 37
Editing Favourite Digital Channels ........................................................................................................ 39
Chapter 7 >> Setting the Picture .........................................................................................41
Selecting a Picture Mode ...................................................................................................................... 41
Customizing the Picture Settings .......................................................................................................... 41
Fleshtone............................................................................................................................................... 42
Colour Temperature............................................................................................................................... 42
Noise Reduction .................................................................................................................................... 43
Adjusting Backlight Brightness .............................................................................................................. 43

English-5
English
Table of Contents
Chapter 8 >> Setting the Sound..........................................................................................44
Setting the Bass and Treble .................................................................................................................. 44
Adjusting the Sound Balance ................................................................................................................ 44
Adjusting the Volume Automatically ...................................................................................................... 44
Setting the Hyper Sound ....................................................................................................................... 45
Setting up Audio Priority ........................................................................................................................ 45
Chapter 9 >> Setting the Feature........................................................................................46
Setting the Time Information ................................................................................................................. 46
Parental Control .................................................................................................................................... 47
Adjusting OSD Transparency ................................................................................................................ 48
Adjusting Blue Back .............................................................................................................................. 48
Picture-in-Picture (PIP) Settings............................................................................................................ 49
Common Interface ................................................................................................................................. 50
Default Settings ..................................................................................................................................... 50
Chapter 10 >> DTV Setup...................................................................................................51
Language Setting .................................................................................................................................. 51
Miscellaneous Settings.......................................................................................................................... 52
Software Update.................................................................................................................................... 53
Status .................................................................................................................................................... 56
Signal Detection .................................................................................................................................... 56
Chapter 11 >> Recording ....................................................................................................57
Time-Shift Recording (TSR) .................................................................................................................. 57
Instant Recording .................................................................................................................................. 59
Scheduled Recording ............................................................................................................................ 59
Programme Playback ............................................................................................................................ 61
Checking Hard Disk Drive ..................................................................................................................... 64
Chapter 12 >> Setting the Aspect Ratio ..............................................................................65
Chapter 13 >> Using the Teletext ........................................................................................66
Chapter 14 >> Setting the PC .............................................................................................67
Auto Congure ...................................................................................................................................... 67
Position.................................................................................................................................................. 67
Clock ..................................................................................................................................................... 68
Phase .................................................................................................................................................... 68
Menu Map............................................................................................................................69
Troubleshooting...................................................................................................................70
Troubleshooting..................................................................................................................................... 70
Error Message ....................................................................................................................................... 71
Specication ........................................................................................................................72

English-6
Package Contents
User’s manual Remote control AA batteries (X2)
Power cord
Chapter 1 >> Getting Started
LCD TV

12
3 4 5 6 7
Note: When pressing the
buttons on the top panel,
press like pulling the back
part of them forward.
Press
English-7
English
1 Remote control sensor
Receives commands directly from your remote control and passes them
on.
2 Standby indicator
Turns on red during the standby mode and turns on green during the
operation mode.
3 TV/AV/OK button
Displays input source or conrms the selection.
4 MENU button
Displays the on-screen menu.
5 VOL- /VOL+ buttons
Adjusts the volume.
6 P / P buttons
Selects channels.
7 Standby button
Switches between operation and standby modes.
Note: If the standby indicator lamp is unlit, press the main power switch on
the rear of the TV.
Front & Top Panel
Chapter 1 >> Getting Started

1
2
3
English-8
Side Panel
1 CI (Common Interface) SLOT
A slot for a CI Module.
2 EXT-4 INPUT (Video, S-Video, Audio-L/R)
Connects to the audio and video (or S-Video) output jacks of a camcorder,
video game console and similar devices.
3 Headphones
Connects to headphones.
Rear & Side Panel
Chapter 1 >> Getting Started

172 364 8 9
5
English-9
English
Rear Panel
1 MAIN POWER switch
Turns the power on/off.
2 AC INPUT
Connects the power cord.
3 EXT-5/EXT-6 INPUT (HDMI)
Receives uncompressed digital audio and video signals from the device that
supports High Denition Multi-media Interface (HDMI).
4 DIGITAL AUDIO OUTPUT
Connects to a digital audio component (Digital TV audio output only).
5 SERVICE ONLY (RS232C)
Connects to the PC to update the software of the TV.
6 EXT-7 INPUT (D-SUB, Audio)
Connect to the video and audio output jacks on your PC.
7 EXT-3 INPUT (Y/Pb/Pr, Audio-L/R)
Connects to video (Y/Pb/Pr) and audio (L/R) components.
8 EXT-1/EXT-2 INPUT/OUTPUT (SCART)
Inputs or Outputs for external devices, such as VCR, DVD, video game
console or video disc players.
9 RF INPUT
Connects to an antenna or a cable system.
Chapter 1 >> Getting Started

English-10
Remote Control Buttons
Coloured Buttons
Used for interactive applications in
the EPG, Edit Channels and Teletext
mode.
MENU
Displays the On Screen Display
(OSD) menu.
BACK
Returns to the previous display.
OK/LIST
Conrms (save or enter) your choice
in the On Screen Display (OSD)
menu or displays the channel list.
Arrow (▲/▼/◄/►) buttons
Controls the selection in the On
Screen Display (OSD) menu.
(INFO)
Displays information on the current
channel or input.
GUIDE
Displays the Electronic Programme
Guide (EPG) in Digital TV input.
PLAYLIST
Displays the recorded programme
list.
SCHEDULE
Displays the reserved prgramme list.
P /
Switches channels.
VOL+/-
Adjusts the volume.
(STANDBY/ON)
Switches between operation and
standby modes.
AV
Displays all available input sources.
Press the ▲/▼ button to select a
required input source.
(MUTE)
Mutes the sound. To cancel, press the
MUTE, VOL+, or VOL- button.
TV/DTV
Switches between digital TV and
analog TV modes.
PIC MODE
Selects the picture mode (Standard,
Bright, Soft or Manual).
(DUAL SOUND)
Selects the sound mode (Stereo,
Mono, etc.) in Analog TV input or the
soundtrack list in Digital TV input..
(SUBTITLE)
Displays the subtitle language list in
Digital TV input.
(MULTI)
Turns on and off the PIP mode.
(MUSICAL)
Selects the sound output between
main and sub screen.
SLEEP
Selects a preset time interval for
switching the TV to standby mode
automatically.
ZOOM
Select the aspect ratio (Auto, Regular,
Panoramic, 14:9 Zoom, 16:9 Zoom,
16:9 Zoom Subtitle or Full).
Number (0~9) buttons
Enters the channel number for direct
display. Used to enter digit numbers.
Chapter 1 >> Getting Started
Note: If the standby indicator lamp is
unlit, press the main power switch on
the rear of the TV.

English-11
English
TELETEXT Function Buttons
TELETEXT ON/OFF
Activates or deactivates the teletext
service.
MIX
Overlaps the teletext with the
broadcasting screen.
Adjusts the opacity to the
background in Teletext mode.
(INDEX)
Displays the teletext index page.
(CANCEL)
Displays the TV programme when
searching for the new teletext page.
(REVEAL)
Shows the hidden information.
F.T/L (MODE)
Selects the teletext mode (LIST/
FLOF)
(SIZE)
Displays the double-size letters.
(HOLD)
Holds the current teletext page not
updating it.
(SUBPAGE)
Displays the availale sub-page.
Trick Play Buttons
(only in Digital TV input)
REPLAY
Jumps back 7 seconds (default
value) and starts playing again in
trick play mode.
SKIP
Skips watching the programme for 30
seconds forward.
SLOW
Plays the programme in slow motion
mode.
(STOP)
Stops recording or playback and go
to the live programme.
(RECORD)
Records programmes or sets time to
end recording.
/
(PLAY/PAUSE)
Plays at normal speed or pauses the
live programme.
(FAST FORWARD)
Fast forward at high speed. Each
time you press this button the fast
forwarding speed increases.
(FAST REWIND)
Rewinds at high speed. Each
time you press this button the fast
rewinding speed increases.
Chapter 1 >> Getting Started
BOOKMARK ADD
Not available for this product.
BOOKMARK JUMP
Not available for this product.
AB (A-B Repeat)
Not available for this product.
No function Button.

English-12
Inserting Batteries into the Remote Control
You must insert or replace the batteries in the remote control when:
+ You just purchased TV
+ Remote control does not work
1 Remove the cover on the rear of the remote control.
2 Insert two AA size 1.5V batteries ensuring that the plus(+) and minus(-) signs
of the batteries are correctly aligned.
3 Close the cover.
Note: Do not mix different battery types such as alkaline with manganese.
Chapter 1 >> Getting Started
Push Pull
Insert
Lock

English
or
Cable TV
English-13
To view the television channels correctly, a signal must be received by the
broadcasting provider.
1 Connect the RF coaxial cable from an aerial or a cable TV to the RF jack on
the rear of the TV.
2 Turn on the TV, and then press the AV button to select Digital TV or Analog
TV.
Notes:
1. To receive an optimal signal, it is recommended that you use a 75 ohm IEC-
type coaxial cable.
2. For proper reception of signals, an external antenna is required. For best
reception, an outdoor antenna is recommended.
3. To improve the picture quality in a poor signal area, please purchase a signal
amplier and install properly.
When attaching the TV to the wall, use the
optional JVC wall mounting unit
- Consult a qualied technician.
- See the included manual on mounting procedures.
- JVC assumes no responsibility for damage due to improper mounting.
- 200 mm x 200 mm mount which conforms to VESA standards.
Connecting to an Aerial or a Cable TV
Chapter 2 >> Connecting Your TV

SCART cable
VCR
English-14
Chapter 2 >> Connecting Your TV
Connecting to the VCR
Using the SCART Cable
1 Connect the SCART cable between the EXT-1 (or EXT-2) jack on TV and
the SCART jack on your VCR.
2 Turn on the TV, and then press the AV button to select EXT-1 (or EXT-2).
3 Turn on your VCR, then insert a video cassette into the VCR and press the
PLAY button on your VCR. (Refer to the VCR owner’s manual)
If you want to make a copy from a secondary VCR (or DVD player)
1 Connect your secondary VCR (or DVD player) to the EXT-1 jack and the
target VCR (or DVD player) to the EXT-2 jack so that the signal transfers
from EXT-1 to EXT-2.
2 To record a programme, connect the receiver to the EXT-1 jack and the VCR
(or DVD player) to the EXT-2 jack so that the signal transfers from EXT-1 to
EXT-2.
Note: For more details about how to record, refer to your required Equipment’s
instructions.
Main Input EXT-1 (SCART1) Output EXT-2 (SCART2) Output
Digital TV Digital TV Digital TV
Analog TV Analog TV Analog TV
EXT-1
(SCART1)
CVBS
Previous RF
(Digital TV/Analog TV)
EXT-1 (CVBS)
RGB EXT-1 (CVBS)
EXT-2
(SCART2)
CVBS EXT-2 (CVBS)
RGB EXT-2 (CVBS)
EXT-3 (Component) A/V MUTE
EXT-4 (CVBS Side) EXT-4 (CVBS Side)
EXT-4S (S-VIDEO Side) EXT-4S
(S-VIDEO Side/Y+C)
EXT-5 (HDMI1) A/V MUTE
EXT-6 (HDMI2) A/V MUTE
EXT-7 (PC) A/V MUTE
Note: During recording, EXT-1 output is xed to Digital TV only. When changing
the main input from Analog TV to EXT-5 or EXT-6, EXT-1 outputs nothing (A/V
are muted).

English
Audio cable
VCR
S-Video cable
English-15
Using the Audio/S-Video Cable
S-Video carries the video data as two separate signals (brightness and colour),
unlike composite video which carries the entire set of signals in one package.
S-Video does not carry audio. Hence, a separate audio connection is required.
1 Connect the S-Video cable between the S-Video (EXT-4) input jack on TV
and the S-Video output jack on your VCR.
2 Connect the audio cable between the Audio-L/R (EXT-4) input jacks on TV
and the audio output jacks on your VCR.
3 Turn on the TV, and then press the AV button to select EXT-4S.
4 Turn on your VCR, then insert a video cassette into the VCR and press the
PLAY button on your VCR. (Refer to the VCR owner’s manual)
Chapter 2 >> Connecting Your TV
Using the Audio/Video (Composite) Cable
1 Connect the video cable between the Video (EXT-4) input jack on TV and
the video output jack on your VCR.
2 Connect the audio cable between the Audio-L/R (EXT-4) input jacks on TV
and the audio output jacks on your VCR.
3 Turn on the TV, and then press the AV button to select EXT-4.
4 Turn on your VCR, then insert a video cassette into the VCR and press the
PLAY button on the VCR. (Refer to the VCR owner’s manual)
Audio cable
VCR
Video cable

SCART cable
DVD
English-16
Using the Audio/Component Video Cable
1 Connect the component video cables between the Y/Pb/Pr (EXT-3) input
jacks on TV and the component video output jacks on your DVD player.
2 Connect the audio cable between the Audio-L/R (EXT-3) input jacks on TV
and the audio output jacks on your DVD player.
3 Turn on the TV, and then press the AV button to select EXT-3.
4 Turn on your DVD player, then insert a DVD into the DVD player and press
the PLAY button on your DVD player. (Refer to the DVD player owner’s
manual)
Note: Depending on the manufacturer, the Y/Pb/Pr jacks may be identied as
Y/PB/PR, Y/B-Y/R-Y or Y/CB/CR.
Connecting to the DVD Player
Component video cable
DVD
Audio cable
Chapter 2 >> Connecting Your TV
Using the SCART Cable
1 Connect the SCART cable between the EXT-1 (or EXT-2) jack on TV and
the SCART jack on your DVD player.
2 Turn on the TV, and then press the AV button to select EXT-1 (or EXT-2).
3 Turn on your DVD player, and then insert a DVD into the DVD player and
press the PLAY button on your DVD player. (Refer to the DVD player
owner’s manual)

English
DVD
HDMI cable
English-17
Chapter 2 >> Connecting Your TV
Using the HDMI Cable
High-Denition Multimedia Interface (HDMI) is the leading new standard for
Digital video and audio interconnection.
1 Connect the HDMI cable between the EXT-5 (or EXT-6) input jack on TV and
the HDMI output jack on your DVD player.
2 Turn on the TV, and then press the AV button to select EXT-5 (or EXT-6).
3 Turn on your DVD player, then insert a DVD into the DVD player and press
the PLAY button on your DVD player. (Refer to the DVD player owner’s
manual)
Other manuals for LT-32DH8ZG
1
Table of contents
Other JVC LCD TV manuals

JVC
JVC LT-42DR9BU Mounting instructions

JVC
JVC LT-32A70BU User manual

JVC
JVC LT-32HA48U User manual

JVC
JVC LT-40C790 User manual

JVC
JVC InteriArt LT-26A61BJ User manual

JVC
JVC LT-32FG5BU User manual

JVC
JVC LT-19E620 User manual

JVC
JVC LT-32DF7BK User manual

JVC
JVC InteriArt LT-32C31BJE User manual

JVC
JVC LT-42BD30 User manual

JVC
JVC LT-42J300 - 42" LCD TV User manual

JVC
JVC Wide LCD Panel TV LT-42DA9BN User manual

JVC
JVC LT-32WX84 User manual

JVC
JVC LT-Z26S2 User manual

JVC
JVC LT-22HG22J User manual

JVC
JVC InteriArt LT-26A61BJ User manual

JVC
JVC LT-17E31 BUG User manual

JVC
JVC LT-48C780 User manual

JVC
JVC LT-19DA9 Series User manual

JVC
JVC LT-40A320 User manual