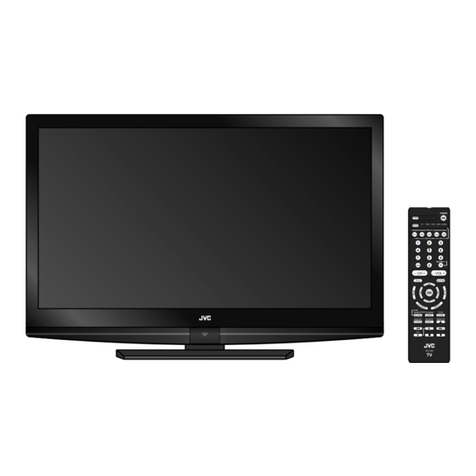
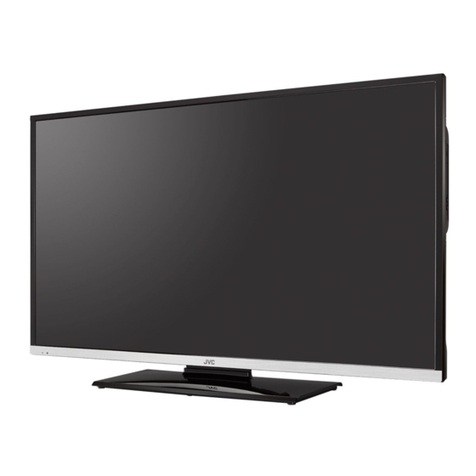
JVC LT-32DP9BU User manual

Trade Mark of the DVB Digital
Video Broadcasting Project
(1991 to 1996) Number :
5228, 5486, 5487
LCT2412-001A-L-EN
LT-32DP9BU
LT-32ED91U
LT-32ELD9U
WIDE LCD PANEL TV INSTRUCTIONS
16:9 LCD TV BEDIENUNGSANLEITUNG
TELEVISEUR A ECRAN LCD PANORAMIQUE MANUEL D’INSTRUCTIONS
BREEDBEELD LCD TV GEBRUIKSAANWIJZING
TELEVISOR CON PANEL LCD PANORÁMICO
MANUAL DE INSTRUCCIONES
TV LCD WIDESCREEN ISTRUZIONI
ŠIROKOÚHLÝ LCD MONITOR PŘÍRUČKA K OBSLUZE
ENGLISH
DEUTSCH
FRANÇAIS
NEDERLANDS
CASTELLANO
ITALIANO
ČESKY

1
ENGLISH
Dear Customer,
This apparatus is in conformance with the valid European directives and standards
regarding electromagnetic compatibility and electrical safety.
European representative of Victor Company of Japan, Limited is:
JVC Technical Services Europe GmbH
Postfach 10 05 04
61145 Friedberg
Germany
Information for Users on Disposal of Old
Equipment ENGLISH
[European Union]
This symbol indicates that the electrical and electronic equipment
should not be disposed as general household waste at its
end-of-life. Instead, the product should be handed over to the
applicable collection point for the recycling of electrical and
electronic equipment for proper treatment, recovery and recycling
in accordance with your national legislation.
By disposing of this product correctly, you will help to conserve
natural resources and will help prevent potential negative effects
on the environment and human health which could otherwise be
caused by inappropriate waste handling of this product. For more
information about collection point and recycling of this product,
please contact your local municipal ofce, your household waste
disposal service or the shop where you purchased the product.
Penalties may be applicable for incorrect disposal of this waste, in
accordance with national legislation.
(Business users)
If you wish to dispose of this product, please visit our web page
www.jvc-europe.com to obtain information about the take-back of
the product.
[Other Countries outside the European Union]
If you wish to dispose of this product, please do so in accordance
with applicable national legislation or other rules in your country for
the treatment of old electrical and electronic equipment.
Attention:
This symbol
is only valid in
the European
Union.
This TV can receive digital terrestrial broadcasting (DVB-T) in the following
countries. Digital terrestrial broadcasting (DVB-T) reception in other
countries is not guaranteed. Austria, Denmark, Finland, France, United
Kingdom, Germany, Italy, Netherlands, Spain, Sweden, Switzerland, Czech
Republic
When selecting a country which does not support Digital Terrestrial
broadcasting, select “Other” in “Select a country” (P. 13). When “Other” is
selected, you can select the system language in “Select a system language”
(P. 13) from languages listed below:
Bulgarian, Hungarian, Norwegian, Polish, Romanian, Turkish, Ukrainian.
2
First things rst!
Warning Please follow all the guidelines below
For more details on installation, usage and safety ÆConsult your retailer
Hold the TV so as not to
scratch the screen!
Do not touch the screen when
carrying the TV.
Do not carry the TV
on your own!
In order to prevent
accidents, ensure that
the TV is carried by
two or more people.
Never listen to headphones at
high volume!
It may damage your hearing.
Never place anything on the TV!
Placing liquids, naked
ames, cloths, paper,
etc. on the TV may
cause a re.
Never expose to rain or
moisture!
To prevent re or
electric shock, never
allow liquids to enter
the unit.
Never insert objects into the
cabinet openings!
It may cause a fatal
electric shock. Take
care when children
are near.
Never obstruct the ventilation
holes!
It may cause overheating or a re.
Unplug the power cord when
going out!
The power buttons
on the remote control
and the TV unit cannot
completely turn off the TV. (Make
appropriate arrangements for
bedridden people.)
Make enough room for inserting
and removing the power plug!
Place the TV as close to the
outlet as possible!
Even if the TV’s power lamp is unlit,
the main power supply is not cut
off unless the power cord is
unplugged. The main power supply
for this TV is controlled by inserting
or removing the power plug.
Never cut or damage the power
cord!
If the power plug is
not the right shape, or
the power cord is not
long enough, use an
appropriate plug adapter
or extension cable.
(Consult your retailer.)
Follow this manual regarding
setup!
Connect only to a 220-240 V,
50 Hz AC outlet.
On disposal of the TV!
Follow the instruction
in “Information for
Users on Disposal of
Old Equipment” (P. 1).
When attaching the TV to the
wall, use the optional JVC
wall mounting unit!
Consult a qualied technician.
See the included manual on
mounting procedures.
JVC assumes no responsibility
for damage due to improper
mounting.
Do not allow the TV to fall!
Do not rest your elbows on, or
allow children to hang from the TV.
There is a risk that the TV will
fall and cause injuries.
Make use of the hole on the
back of the stand to prevent the
TV from falling easily. (P. 8)
Take care when handling
the glossy nish!
For more details, see P. 7.
Handle LCD panel with care!
Use a soft, dry cloth when
cleaning.
Never dismantle the rear
panel!
It may cause an electric shock.
If the TV is damaged
or behaving strangely,
stop using it at once!
Unplug the power cord
and contact your retailer.
Æ
Never try to
repair the TV yourself!
If the problem cannot be solved
in “Troubleshooting” (P. 37),
unplug the power cord and
contact your retailer.
Æ

3
ENGLISH
English
Deutsch
Step 1: Please select Language 1/3
Français
Italiano
Castellano
Català
Nederlands
Dansk
Svenska
Norsk
Menu Language
Etc.AdvancedBasicsGetting started
Enjoy rich multi-media with JVC
Quick setup
Connecting external devices and aerial Watch pay-TV digital
channels
Editing / tuning channels
PAGE
08
PAGE
13
Contents
Getting started
Package Contents
(Buttons and functions)
··· 4
Setting up your TV········· 7
Let’s try it out
Watching TV (Digital
channels / Analogue
channels / Radio)
········· 15
Using EPG··················· 20
Viewing teletext ··········· 22
Watching videos /
DVDs··························· 23
Conguring your
remote control ············· 24
Just the way you like it
Using the menu
functions······················ 26
Viewing / listening
from USB device
(Picture / Music) ·········· 35
When you have trouble
Troubleshooting··········· 37
Technical information
··· 40
Frequency table··········· 42
Specications ·············· 45
Digital terrestrial broadcasting (DVB-T) ÆDigital channels Analogue terrestrial broadcasting (VHF / UHF) and analogue cable TV ÆAnalogue channels
First things rst!
Warning························· 2
-
PAGE
12
PAGE
09
PAGE
33
Initial
setting Edit PR
Auto Scan /
Manual Scan /
Update Scan
,
PAGE
32
PAGE
31

4
Getting started
The functions of the remote control buttons are explained as follows.
This remote control can be congured to operate up to four different devices simply by changing the remote code.
“Conguring your remote control” (P. 24)
Mute.
Turn on / off (standby) the TV.
Enter channel / page number.
Channel information. “Watching TV”
(P. 16)
Watch video etc. “Watching videos /
DVDs” (P. 23)
Colour buttons:
Select a page when viewing teletext.
Operate functions in menus.
Switch between “TV / STB / DVD /
AUDIO”. (P. 24)
Display the Electronic Programme
Guide (P. 20)
Display on-screen menu. “Using the
menu functions” (P. 26)
Select and conrm settings in menus.
Change channel / page.
Volume control.
The volume settings for headphone and
speaker will be memorised separately.
View teletext. “Viewing teletext” (P. 22)
To the previous channel.
Package Contents
Remote control
Buttons and functions

5
ENGLISH Etc.AdvancedBasicsGetting started
Select digital / analogue / radio
channels.
Display favourite list. (P. 15)
Display hidden information when
viewing teletext. (P. 22)
Hold the current sub page when
viewing teletext. (P. 22)
Change the subtitle language when
viewing digital channels (P. 17)
Change the aspect ratio. (P. 18)
Turn on “MaxxBass”. (P. 19)
Adjust the mix level when “Audio
Selection” is set to “Special audio track
for the visually impaired”. (P. 17)
Change the audio language when
viewing digital channels. (P. 17)
Change the sound mode or language
when viewing analogue channels.
(P. 18)
Set the sleep timer. (P. 19)
Note
For buttons that can be used to operate other devices, refer to “Conguring your remote control” (P. 24).

6
Package Contents
TV/AV
OK
MENU
P
Wide LCD panel TV
Power lamp Remote control sensor
ON: Lit
OFF: Unlit
When “Power Lamp” is set to “Off”, the Power lamp will not light up.
For details, refer to “Power Lamp” (P. 30)
The power lamp will lit for a while after inserting the plug into an AC
outlet. This is not a malfunction.
To headphones
Power On / Off
Volume
Change channel / page
Display on-screen menu / set
Switch between TV / AV devices
Accessories
WARNING:
Batteries shall not be exposed to excessive heat such as direct sunshine,
re or the like.
“AAA/R03” Batteries Cleaning cloth
(For conrming the
TV works)
(For details on using
the cleaning cloth,
see P. 7.)
Peel off the protection lms pasted on the glossy nish of the TV after the
TV has been placed properly. (P. 7)
Note

7
ENGLISH Etc.AdvancedBasicsGetting started
Setting up your TV
Attach the stand to the TV
To prevent scratches on the panel, lay a piece of soft cloth on an even
platform and place the TV onto it.
Handling the glossy nish of the TV
Be careful when handling the glossy nish of the TV
The glossy nish of the TV scratches easily.
Protection lms have been pasted onto the glossy nish of the TV
to prevent scratches. Peel off the lms after the TV has been placed
properly.
If the glossy nish gets dirty, clear the dust off the glossy nish rst.
Then wipe softly with the cleaning cloth provided. If you do not clear the
dust rst, or you wipe the glossy nish too hard, or a cleaning cloth other
than the one provided is used, the glossy nish may be scratched.
Glossy nish
Change the direction of TV

8
Setting up your TV
Install your TV
Power requirements
Connect the power cord only to a 220 - 240 V, 50 Hz AC outlet.
When attaching the TV to the wall, use the optional JVC wall mounting unit
Consult a qualied technician.
See the included manual on mounting procedures.
JVC assumes no responsibility for damage due to improper mounting.
Mounting holes for wall mounting unit:
M5 x 4, 200 mm x 200 mm
Depth of screw hole is 7 mm from the surface of the TV.
Installation requirements
Place the TV on the at and stable location.
To avoid overheating, ensure the unit has ample room.
200 mm
50 mm150 mm 150 mm 50 mm
Insert the batteries
Use two “AAA/R03” dry cell batteries. Insert the batteries from the -end,
making sure the +and -polarities are correct.
Subscribe to a broadcasting company beforehand. A Smart Card (B) will
be sent by the broadcasting company after subscribing to it. It may be
necessary for you to purchase a Conditional Access Module (A) in addition
to the Smart Card.
Consult your broadcasting company or retailer.
1Unplug the power cord
2Insert “B” into “A”.
3Insert “A”.
4Plug the power cord, and turn the power on.
5Perform necessary settings using “Common Interface”. (P. 30)
Pay-TV analogue channels cannot be watched.
Watch pay-TV digital channels
A
B
To prevent the TV from falling, thread the belt through the hole on the
back of the stand and secure it to the TV rack, etc.
Hole
Belt and screw (not provided)

9
ENGLISH Etc.AdvancedBasicsGetting started
Make sure all the devices and the TV are turned off.
The names of the devices shown in the following illustration are examples.
Note
Please read the user manuals of each device before setting up.
Connecting cables are not supplied with this TV.
When using EXT-2 terminal, some USB device may not able to connect
properly depending on the outside dimensions.
DVD player
Video camera
Game consoles
Audio system
Digital Satellite broadcast tuner DVD player
HD Video camera
CI (Common Interface) slot
Refer to P. 8.
EXT-1
EXT-3 EXT-2
DIGITAL
AUDIO
OUT
EXT-4
(HDMI 1)
EXT-5
(HDMI 2)
EXT-6
(HDMI 3)
Find the best connections that are possible with
your devices. Æ(P. 10, 11)
A B
C
F
A
A
D
D
Connecting external devices
Not available (for service adjustments)
USB terminal
Refer to P. 35.
: type of connections
A B C D E F
E
EXT-1 Satellite broadcast tuner
EXT-2 VCR / DVD recorder

10
Setting up your TV
You can connect your TV to other devices in different ways. Check your devices and
choose the best connection. In addition, please read “Notes” before using.
Picture
quality Other devices Connecting cables Connect to your TV Available signals Notes
Best
AHDMI HDMI cable
EXT-4
EXT-5
EXT-6
Input
HDMI (digital)
SD: 576i (625i), 480i (525i)
ED: 576p (625p), 480p (525p)
HD: 1080i (1125i), 1080p (1125p) / 24Hz,
1080p (1125p) / 50Hz,
1080p (1125p) / 60Hz,
720p (750p)
Audio L / R
BDVI
Audio DVI-HDMI cable,
Audio cable
EXT-4
EXT-3: L and R jacks
Input
DVI (digital)
SD: 576i (625i), 480i (525i)
ED: 576p (625p), 480p (525p)
HD: 1080i (1125i), 1080p (1125p) / 24Hz,
1080p (1125p) / 50Hz,
1080p (1125p) / 60Hz,
720p (750p)
Audio L / R (analogue)
Better
C
Component
video and Audio
Component video cable,
Audio cable
EXT-3
Input
Component (analogue)
SD: 576i (625i), 480i (525i)
ED: 576p (625p), 480p (525p)
HD: 1080i (1125i), 720p (750p)
Audio L / R (analogue)
Change the EXT-3
setting from “composite”
to “component”. (P. 23)
Note
Please do not change any of the menu settings before
completing the “Initial settings” (P. 13). Otherwise, the “Initial
settings” will not start automatically.
Choose your best connection

11
ENGLISH Etc.AdvancedBasicsGetting started
Good
DSCART
(Euroconnector)
SCART cable
EXT-1
Input
Composite video (analogue)
RGB input (analogue)
Audio L / R (analogue)
Output
Monitor out (composite video and audio
L/R) (analogue)
Please refer to the
“Monitor out (EXT-1,
EXT-2)” (P. 40)
When connecting
a decoder that are
not equipped with
a tuner, use EXT-1
terminal.
EXT-2
Input
Composite video (analogue)
S-Video (analogue) *NTSC/PAL compatible
Audio L / R (analogue)
Output
Monitor out (composite video and audio
L/R) (analogue)
E
Video and audio
Video and audio cable EXT-3: V, L, R jacks
Input
Composite video (analogue)
Audio L / R (analogue)
Change the EXT-3
setting from “component”
to “composite”. (P. 23)
Audio system Connecting cables Connect to your TV Available signals Notes
F
Optical input
Optical audio cable
DIGITAL AUDIO OUT
Output
When watching digital channel
Linear PCM / Dolby Digital / MPEG
(digital)
Other
Linear PCM (digital)
Please refer to the ““Dolby Digital”
output from the DIGITAL AUDIO OUT
terminal” (P. 40)

12
Setting up your TV
Connecting the aerial
After all the connections
have been made, insert the
plug into an AC outlet.
AERIAL
After all the connections
have been made, insert
the plug into an AC outlet.
AERIAL
VCR / DVD recorder
EXT-2
EXT-1
Connect a VCR / DVD recorder
Power supply for the indoor aerial
When using an indoor aerial which requires external power, set “Antenna Power” to “On” in step 6 of “Initial settings” (P. 13).
The TV will supply DC 5 V, 50 mA (max) from the aerial socket through the cable to the aerial.
Supplying power to outdoor and indoor aerials which does not require external power, may cause damage to the aerial.
If you are uncertain whether the aerial needs external power, select “Off”.
Connect the aerial directly to the TV. When a recording device is connected between the aerial and the TV, power cannot be supplied to the aerial.
Power is supplied to the aerial only when the TV is on.
You can change the “Antenna Power” setting later. For details, refer to “Antenna Power” (P. 31).

13
ENGLISH
English
Deutsch
Step 1: Please select Language 1/3
Français
Italiano
Castellano
Català
Nederlands
Dansk
Svenska
Norsk
Menu Language
Austria
Switzerland
Step 2: Please select Country 1/2
Czech Republic
Germany
Denmark
Spain
Finland
France
United Kingdom
Italy
Country
German
Step 3: Please select Language
System Language
Home
Shop with Auto Demo.
Step 4: Please select Place of Installation
Place of Installation
On
Off
Step 5: Please select Antenna Power
Antenna Power
Etc.AdvancedBasicsGetting started
The initial settings will begin automatically when the TV is turned on for the
very rst time. Follow the on-screen instructions to perform the settings.
1Turn on
If the remote control doesn’t work, conrm that the mode is set to
“TV”.
If the “Menu Language” does not appear, refer to “Factory Setting”
(P. 34) or “Retuning” (P. 34) for channel settings.
2Select a Menu language
Select a language for on-screen displays.
Select the country of installation. Receivable digital channels will differ
depending on the “Country” setting.
2set
1select
2set
1select
Initial settings
3Select a country *
4Select a system language
Select a language for audio, subtitle, and EPG.
The system language will differ depending on selected country.
2set
1select
5Select place of installation
Select “Home”, for use at home.
2set
1select
6Set antenna power
Conrm that the aerial power supply is set to “Off”. Select “On” only
when using an aerial which requires external power. (P. 12)
2set
1select
The power lamp on the TV lights
Note
* To select a country that not listed, refer to (P. 1).

14
Setting up your TV
Start
Cancel
Step 6: Auto Scan will start when "Start" is selected
Auto Scan
Digital
13 Service Found
Analogue
51%
1 Service Found
Auto Scan
Digital
Scan Completed
13
Analogue
100%
14
Service Found
Service Found
Auto Scan
To the previous screen Æ
If the “Menu Language” does not appear or if you wish to make changes
later, refer to “Factory Setting” (P. 34) or “Retuning” (P. 34) for channel
settings.
8Finish
When you cannot watch TV channels
1Check the following points
Is the TV connected correctly to the aerial?
Change the direction of the indoor aerial.
Note
You can check the broadcast signal level of the channel you
are watching. For details, refer to “Signal Check” (P. 34).
2Set digital channels using “Factory Settings”. For details, refer to
“Factory Settings” (P. 34)
If you still cannot watch digital channels after following the steps
above, there may be a problem with your aerial or its cable. Or, the
signal may be too weak. ÆConsult your retailer
Initial settings (continued)
7Start auto scan
Register channels
If you can not register channels, refer to “When you cannot watch TV
channels” (P. 14).
You can edit the channels after the initial settings. For details, refer to
“Edit PR” (P. 33). To edit PR Æ(green)
Some digital channels cannot be watched on this TV. For details,
refer to page 40.

15
ENGLISH
Let’s try it out
PR List Favourites 1/2
2
1
3
4
5
6
7
8
9
0
RTL Television
RTL2
Super RTL
VOX
Doku/KiKa
Info/3sat
ZDF
TERRA NOVA
CNN Int.
VIVA
1
2
3
4
5
6
7
8
9
10
D
D
D
D
D
D
D
D
D
D
MENUTOP
GUIDE
2. RTL2
1. RTL Television
3. Super RTL
4. VOX
5. Doku/KiKa
6. Info/3sat
7. ZDF
8. TERRA NOVA
9. CNN Int.
Electronic Programme Guide
05/
05
06/
05
07/
05
08/
05
09/
05
10/
05
11/
05
12/
05
14:00 05/05/2008
15:00
14:00
17:00
17:15
18:00
18:20
18:50
20:20
20:30
Golf
Nachrichten
Nachrichten
Musik
Wetter
Nachrichten
Fußball
Nachrichten
Wetter
RTL Television
D
14:00 - 15:00 Nachrichten
RADIO
ATV
DTV
Etc.AdvancedBasicsGetting started
Turn on
If the remote control doesn’t
work, conrm that the mode
is set to “TV”.
Select a channel
Watching TV
The power lamp on the TV lights
Press again to turn the screen off and put the
TV into standby mode.
To completely turn off the TV, unplug the
power plug.
Enter a channel number
E.g.
1 :
15 :
Move up or down a channel
up
down
Select with PR List
PR List
You can also display “Favourites” by pressing
To edit favourite channels, refer to “Favourite Setting” (P. 32)
Select with EPG (Electronic Programme Guide) (P. 20)
EPG
2view
1select
Display only programmes which match your selected genre
“Genre” (P. 21)
Æ
Note
Add a new station. Æ“Update Scan” (P. 32)
Edit the “PR List” according to your liking. Æ“Edit PR” (P. 33)
Some digital channels cannot be watched on this TV. Æ(P. 40)
The channels and programme names shown in the illustrations are
for Germany.
Select Digital, Analogue or Radio
Digital channels / Analogue channels / Radio
Mute
Volume
2view
1select
Close PR List
Favourites
Radio
DTV
ATV
1
2
3
Select DTV / ATV / Radio / Favourites

16
Watching TV
Nachrichten
ZDF 7
14:00
D
14:00 - 15:00
5
Häusliche Nachrichten
Weltnachrichten
Wirtschaftliche Informationen
Sportarten-Nachrichtenblitz
Kanal33
ARD 1
14:00
A
Display the programme information
Symbols Name of station Symbols Channel
ClockProgramme
Whenever changing the channel, “Programme Information”
is displayed.
More information
Symbols description
:Reception level Red Yellow Green
:Poor :Acceptable :Excellent
D
A
:TV programme :Radio programme
:Teletext is available. (P. 22)
t·u:t: Audio in another language is not available.
u: Other audio languages are available. (P. 17)
:Pay-TV channel
:Minimum viewing age limit of the programme.
Set viewing age limit. Æ(P. 30)
:Subtitles are available. (P. 17)
:More information about the programme is available. Æ
Dolby Digital : Dolby Digital signal is received. (P. 40)
:Special audio track for the visually impaired. (P. 29)
:Special audio track for the hearing impaired. (P. 29)
Digital channel / radio
Analogue channel
Symbols Channel
ClockSymbols
Name of station
(No indication)
(No indication)
Time is displayed only when teletext broadcasting can be received.

17
ENGLISH
Subtitle Selection
Off
English
Audio Selection
English
Audio Selection
English
Etc.AdvancedBasicsGetting started
View subtitles (Digital channel only)
2set
1select
Off : Don’t display
By default, the language set in “System Language” (P. 29) is
automatically selected.
When not broadcast in that language, another broadcast language is
automatically selected.
When no subtitles are broadcasted, “No Subtitles” is displayed.
: Special subtitles for the hearing impaired
Undened : When the subtitle’s language cannot be identied
The language that can be selected depends on the broadcast.
Select audio language (Digital channel only)
By default, the language set in “System Language” (P. 29) is automatically
selected.
When not broadcast in that language, another broadcast language is
automatically selected.
Switch to another language
: Special audio track for the visually impaired
: Special audio track for the hearing impaired
Undened: When the audio’s language cannot be identied
Dolby: Dolby Digital
The language that can be selected depends on the broadcast.
Please read ““Dolby Digital” output from the DIGITAL AUDIO OUT
terminal” (P. 40) before selecting “Dolby”.
You can adjust the mix level of Bilingual tand Bilingual usound for
visually impaired. To display mix level, select “Special audio track for the
visually impaired” and then press during volume control.
* Manufactured under license from Dolby Laboratories. “Dolby” and the
double-D symbol are trademarks of Dolby Laboratories.
2set
1select

18
Watching TV
Zoom
Full
Slim
Panoramic Zoom
16: 9 Zoom
Digital Audio Output
Bass
Treble
Balance
Surround
MaxxBass
Auto Volume Control
PCM
Off
Off
High
0
0
0
0
Sound
Stereo
Zoom
Auto
Regular
Panoramic
14:9 Zoom
16:9 Zoom
16:9 Zoom Subtitle
Full
2Select the aspect ratio
2set
1select
Move the picture with 1or 4while this bar is displayed
When “Slim” is selected, a 4:3 image stretched out to 16:9 will revert back
to its original aspect ratio with black bands.
When “Panoramic Zoom” is selected, a 4:3 image with black bands will be
stretched out to 16:9.
Using “Auto” Æ“Auto in “Zoom”” (P. 40)
Note
If an image is displayed in an aspect ratio that differs from its original
aspect ratio, the image will be distorted or portions of the image will be cut
off.
Change the aspect ratio
1
3
2Select the sound mode or language
Change the sound mode or language
(Analogue channel only)
1
2set
1select
When viewing a bilingual broadcast programme, you can select either
Bilingual I (Sub I) or Bilingual II (Sub II) sound.
If the stereo broadcast reception is poor, you can change to mono sound
for clearer sound.
This button can also be used when watching digital channels. For details,
refer to “Select audio language” (P. 17)
For high denition
signal
When viewing high denition signal, the content of the menu will be
changed.

19
ENGLISH
50
0 120
Sleep Timer
MaxxBassMaxxBass High
Etc.AdvancedBasicsGetting started
2Set the time
1
Set a time for the TV to turn off automatically
Cancel ÆSet the time to “0”.
Remaining time ÆDisplay this menu again.
Other useful functions
Surround (P. 28)
Enjoy ambient sound.
Auto Volume Control (P. 29)
Maintains a uniform sound volume even if the sound becomes loud
suddenly during commercial breaks etc.
Picture Mode (P. 27)
Select preset picture setting according to the brightness of your room.
You can also adjust the “MaxxBass” settings in the “MaxxBass” menu.
(P. 29)
“MaxxBass” does not work with headphones.
Enjoy Bass enhanced sound
: For “MaxxBass”
(when the sound distorts in
“High” mode)
: Turns off “MaxxBass”Off
Low
: For “MaxxBass”High
Radio Mode (P. 30)
Automatically turns off the backlight when listening to the radio channel.
This function reduces the power consumption of this TV.
Each press of will increase the time by 10 minutes.
This manual suits for next models
2
Table of contents
Other JVC LCD TV manuals

JVC
JVC LT-37DS6BJ User manual

JVC
JVC LT-26DC1BH/AX User manual

JVC
JVC InteriArt LT-26C31BJE User manual

JVC
JVC LT-52X899 User manual

JVC
JVC 0610TMH-MW-ST User manual

JVC
JVC InteriArt LT-23B60SU User manual

JVC
JVC LT-22J10 User manual

JVC
JVC LT-19HA72U User manual

JVC
JVC LT-19DA1BU User manual

JVC
JVC LT-40C755 User manual

JVC
JVC LT-32A70BJ User manual

JVC
JVC LT-46AM73 User manual

JVC
JVC InteriArt LT-23B60SU User manual

JVC
JVC LT-26KM18/NSK User manual

JVC
JVC LT-26X70BU User manual

JVC
JVC LT-26F80BU User manual

JVC
JVC InteriArt 1004MKH-VT-VT User manual

JVC
JVC InteriArt LT-26A60BU User manual

JVC
JVC LT-32G4 User manual

JVC
JVC LT-42FX77 User manual