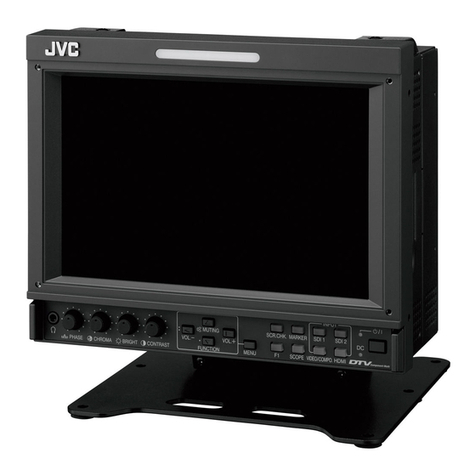
JVC LM-10W User manual

BEDIENUNGSANLEITUNG : LCD-VIDEO-MONITOR
MANUEL D’INSTRUCTIONS : MONITEUR VIDEO LCD
MANUALE DI ISTRUZIONI : MONITOR VIDEO LCD
INSTRUCCIONES : MONITOR DE VIDEO LCD
!"#$%&'(&)
INSTRUCTIONS
LM-10W
LCD VIDEO MONITOR
ESPAÑOL ITALIANO FRANÇAIS DEUTSCH ENGLISH
====
PHASE CHROMA BRIGHT CONTRAST MENU INPUT SELECT
VOLUME/SELECT
–+
BA
POWER
Y/C
000 1.2.7, 9:15 PM1

000 1.2.7, 9:15 PM2

ENGLISH
INSTRUCTIONS
LCD VIDEO MONITOR
LM-10W
Thank you for purchasing this JVC LCD video monitor. Before using it, read
and follow all instructions carefully to take full advantage of the monitor’s
capabilities.
(* “LCD” stands for Liquid Crystal Display.)
For Customer Use:
Enter below the Serial No. which is located on the rear of the cabinet. Retain this information
for future reference.
Serial No. :Model No. : LM-10W
LCT0883-001A 01.2.8, 14:033

WARNING:
TO PREVENT FIRE OR SHOCK HAZARDS, DO NOT
EXPOSE THIS APPLIANCE TO RAIN OR MOISTURE.
WARNING:
THIS APPARATUS MUST BE EARTHED.
CAUTION:
To reduce the risk of electric shock, do not remove
cover.
Refer servicing to qualified service personnel.
When installing this unit, be sure that it is located near
an easily accessible electrical outlet.
This unit automatically enters the stand-by mode or
turns on when the power cord is plugged into an AC
outlet. Switching the power button off does not cut the
power completely. For safety, unplug the power cord
from the AC outlet when the unit is not in use.
This monitor is equipped with a 3-blade grounding-type
plug to satisfy FCC rule. If you are unable to insert the
plug into the outlet, contact your electrician.
PRECAUTIONS
●Use only the power source specified on the unit.
●When not using this unit for a long period of time, or when
cleaning it, be sure to disconnect the power plug
from the AC outlet.
●Do not allow anything to rest on the power cord. And do not
place this unit where people will tread on the cord.
●Do not overload wall outlets or power cords as this can
result in a fire or electric shock.
●Avoid using this unit under the following conditions:
– in extremely hot, cold or humid places,
– in dusty places,
– near appliances generating strong magnetic fields,
– in places subject to direct sunlight,
– in badly ventilated places,
– in automobiles with doors closed.
●Do not cover the ventilation slots while in operation as this
could obstruct the required ventilation flow.
●When dust accumulates on the screen surface, clean it with
a soft cloth.
●Unplug this unit from the AC outlet and refer servicing to
qualified service personnel under the following conditions:
– when the power cord is frayed or the plug is damaged,
– if liquid has been spilled into the unit,
– if the unit has been dropped or the cabinet has been
damaged,
– when the unit exhibits a distinct change in performance.
2
SAFETY PRECAUTIONS
FCC NOTICE (U.S.A. only)
CAUTION: Changes or modifications not approved by
JVC could void the user’s authority to operate the
equipment.
NOTE: This equipment has been tested and found to
comply with the limits for a Class A digital device,
pursuant to Part 15 of the FCC Rules. These limits are
designed to provide reasonable protection against harmful
interference when the equipment is operated in a
commercial environment. This equipment generates,
uses, and can radiate radio frequency energy and, if not
installed and used in accordance with the instruction
manual, may cause harmful interference to radio
communications. Operation of this equipment in a
residential area is likely to cause harmful interference in
which case the user will be required to correct the
interference at his own expense.
●Do not attempt to service this unit yourself as opening or
removing covers may expose you to dangerous voltage or
other hazards. Always refer servicing to qualified service
personnel.
●When replacement parts are required, have the service
personnel verify in writing that the replacement parts he/
she uses have the same safety characteristics as the
original parts. Use of manufacture’s specified replacement
parts can prevent fire, shock, or other hazards.
●Upon completion of any servicing or repair work to this unit,
please ask the service personnel to perform the safety
check described in the manufacturer’s service literature.
●When this unit reaches the end of its useful life, improper
disposal could result in an LCD panel implosion. Ask
qualified service personnel to dispose of this unit.
LCT0883-001A 01.2.8, 14:034

ENGLISH
CONTENTS
SAFETY PRECAUTIONS................................................................................. 2
CONTROLS AND FEATURES ......................................................................... 4
HOW TO HANDLE BASIC OPERATIONS ....................................................... 6
HOW TO USE THE MENU FUNCTIONS.......................................................... 7
HOW TO INITIALISE THE SETTING.............................................................. 10
BASIC CONNECTION EXAMPLE...................................................................11
TROUBLESHOOTING.................................................................................... 13
SPECIFICATIONS .......................................................................................... 14
Fuse
3
POWER CONNECTION
The power supply voltage rating of this product is AC 120 V (For U.S.A. and Canada only) and AC 230 V (For European countries
or United Kingdom), the power cord attached conforms to the following power supply voltage and countries. Use only the power
cord designated to ensure Safety and EMC regulations of each countries.
Power cord
Power supply voltage : AC 120 V AC 230 V AC 230 V
Countries : U.S.A. and Canada European countries United Kingdom
Warning:
●Do not use the same Power Cord for AC 120 V as for AC 230 V. Doing so may cause malfunction, electric shock
or fire.
Note for the United Kingdom power cord only
The plug on the United Kingdom power cord has a built-in fuse. When replacing the fuse, be sure to use only a correctly rated
approved type, re-fit the fuse cover.
(Consult your dealer or qualified service personnel.)
How to replace the fuse
Open the fuse compartment with the blade screw driver, and
replace the fuse.
(* An example is shown in the illustration.)
After image phenomenon
●When a still image has been displayed for a long period, a faint residual image may remain on the screen after the
power has been turned off or when another image is displayed.This is a normal characteristic of the LCD (Liquid
Crystal Display) and is not a malfunction.
LCT0883-001A 01.2.8, 14:035

OUT
IN
AUDIO
OUT
IN
OUT
IN
OUT
IN
A
B
Y/C
VIDEO
CONTROLS AND FEATURES
FRONT VIEW
<Front Panel>
PHASE CHROMA BRIGHT CONTRAST MENU INPUT SELECT
VOLUME/SELECT
– +
BA
POWER
Y/C
PHASE CHROMA BRIGHT CONTRAST MENU INPUT SELECT
VOLUME/SELECT
– +
BA
POWER
Y/C
REAR VIEW
<Rear Panel>
4
120 V AC,
50 Hz/60 Hz
230 V AC,
50 Hz/60 Hz
To AC outlet
For U.S.A. and Canada
For European countries
For United Kingdom
LCT0883-001A 01.2.8, 14:036

ENGLISH
5
1
2
3
4
5
6
7
Phase button [PHASE ]
Press this button to set the picture hue adjustment mode.
Adjust the value with the VOLUME/SELECT buttons.
Also used as a control button in the menu function mode.
Chroma button [CHROMA ]
Press this button to set the picture colour density
adjustment mode. Adjust the value with the VOLUME/
SELECT buttons. Also used as a control button in the
menu function mode.
Brightness button [BRIGHT ]
Press this button to adjust picture brightness. Adjust the
value with the VOLUME/SELECT buttons. Also used as a
control button in the menu function mode.
Contrast button [CONTRAST ]
Press this button to adjust picture contrast. Adjust the
value with the VOLUME/SELECT buttons. Also used as a
control button in the menu function mode.
Menu button [MENU]
Displays and disappears the <MENU> screen.
Pressing the PHASE button with the Menu button
depressed will display the <SET-UP MENU> screen.
Volume/Select buttons
[VOLUME/SELECT – +]
Adjusts the speaker volume. Also used as a control
button in the menu function mode.
Input select buttons [INPUT SELECT]
Select the VIDEO A, VIDEO B orY/C (S-video) terminals
on the rear of this unit by pressing INPUT A, INPUT B or
INPUT Y/C buttons.The selected button lights in green.
Buttons Terminals
INPUT A The VIDEO A terminal (0) selected.
INPUT B The VIDEO B terminal (!) selected.
INPUT Y/C TheY/C (S-video) terminal (@) selected.
Power button [POWER ( )]
Turns the power on or activates stand-by mode.
Push : Turns the power on. The button lights
green.
Push again : Turns the power off and activates the
stand-by mode.
* The power is not turned off completely when the Power
button is pressed. When the unit is not in use, unplug
the power cord from the AC outlet to cut off the power
supply completely.
Built-in speaker
A built-in speaker is provided. (monaural)
Video A terminals [VIDEO A IN/OUT]
Video signal input (IN) and output (OUT) terminals.
The output terminal is bridge-connected.
IN : Video signal input terminal
OUT : Bridge-connected video signal output terminal
Notes:
* For corresponding audio signals, use the AUDIO
terminals #.
* Also refer to BASIC CONNECTION EXAMPLE
on pages 11 and 12.
8
9
10
11 Video B terminals [VIDEO B IN/OUT]
Video signal input (IN) and output (OUT) terminals.
The output terminal is bridge-connected.
IN : Video signal input terminal
OUT : Bridge-connected video signal output terminal
Notes:
* For corresponding audio signals, use the AUDIO
terminals #.
* Also refer to BASIC CONNECTION EXAMPLE on
pages 11 and 12.
VideoY/C terminals
[VIDEO Y/C IN/OUT]
Y/C (S-Video) signal input (IN) and output (OUT)
terminals.
The output terminal is bridge-connected.
IN : Y/C-separated (S-video) signal input terminal
OUT : Bridge-connected Y/C-separated (S-video) signal
output terminal
Notes:
* For corresponding audio signals, use the AUDIO
terminals #.
* Also refer to BASIC CONNECTION EXAMPLE on
pages 11 and 12.
Audio terminals [AUDIO IN/OUT]
Audio signal input (IN) and output (OUT) terminals.
The output terminal is bridge-connected.
IN : Audio signal input terminal
OUT : Bridge-connected audio signal output terminal
Notes:
* All audio signals are input or output from these audio
terminals. When the input video signal is changed, the
corresponding audio signal may not be output if the
correct audio cable is not connected.
* Also refer to BASIC CONNECTION EXAMPLE
on pages 11 and 12.
AC inlet [AC IN]
Power input connector. Connect the provided AC power
cord %to an AC outlet (120 V AC or 230 V AC, 50 Hz/
60 Hz).
Power cord
Connects the provided power cord (120 V AC or 230 V
AC, 50 Hz/60 Hz) to the AC IN connector. (Refer to
page 3)
Caution:
This monitor includes three power cords:
For U.S.A. and Canada x 1
For European countries x 1
For United Kingdom x 1
Be sure to use the proper power cord for the AC outlet in
your country. If neither can be used, please contact your
dealer or qualified service personnel for the correct
power cord.
12
13
14
15
LCT0883-001A 01.2.8, 14:037

6
INPUT
SELECT
button
Items VOLUME/SELECT buttons
–+
PHASE reddish greenish
(Phase)
CHROMA lighter deeper
(Chroma)
BRIGHT darker brighter
(Brightness)
CONTRAST lower higher
(Contrast)
STATUS indication
(PAL or NTSC)
HOW TO HANDLE BASIC
OPERATIONS
BASIC OPERATION
PICTURE ADJUSTMENT
1. Press the POWER ( ) button to turn on the
power.
Push : Turns the power on. (The Power button lights
green.)
Push again: Turns the power off and activates the stand-by
mode. (The Power button goes out.)
2. Press the INPUT SELECT buttons to choose input.
Select video signals input to terminals on the rear panel.The
selected INPUT SELECT button lights in green.
3. Press the VOLUME/SELECT buttons to adjust the
speaker volume.
Press this button to display the speaker volume level on the
screen.
+ : The Built-in speaker volume is increased.(0 =50)
– : The Built-in speaker volume is decreased. (50 =0)
* Screen indication will disappear about 10 seconds after
operating.
1. Press select buttons corresponding to the item
you want to adjust.
The item you select is displayed on the screen.
1PHASE ( ) : Phase control
2CHROMA ( ) : Chroma control
3BRIGHT ( ) : Brightness control
4CONTRAST ( ) : Contrast control
* Screen indication will disappear about 10 seconds after operating.
About the STATUS indication
●With the COLOR SYSTEM setting set
to AUTO mode, when you turn on the
power or select inputs, the colour
system indication appears for about
3 seconds on the screen while PAL or
NTSC signals are being detected.
It does not appear when receiving a
B/W signal or when no signal is input.
Refer to page 7 for more information
about COLOR SYSTEM setting and
page 8 for more information about
STATUS indication setting.
Notes:
●Phase control is effective only in the
NTSC colour system mode.
●Chroma control is not effective when
receiving B/W or when no signal is
input.
●When CHROMA is adjusted to “–40,”
the picture becomes less colourful.
●“NO EFFECT” is displayed (for about
3 seconds) when your selected
function has no effect.
2. Adjust with the VOLUME/SELECT buttons.
Terminals on the rear panel
Video signal input Audio signal input
1Input A VIDEOA terminal
2Input B VIDEO B terminal AUDIO terminal
3Input Y/C VIDEO Y/C terminal
POWER
INPUT SELECT
BA
Y/C
VOLUME/SELECT
– +
VOLUME/SELECT
– +
PHASE CHROMA BRIGHT CONTRAST
PAL
VOLUME : 20
0 50
+
–
PHASE : 20
– 40 +40
+
–
LCT0883-001A 01.2.8, 14:038

ENGLISH
Menu items Purpose Setting range
SHARPNESS Picture sharpness
COLOR Colour system
SYSTEM
ASPECT Aspect ratio
Front panel Function Contents
button displayed
+ Increase (to max. value)
3Forward the setting value
– Decrease (to min. value)
2Reverse the setting value
VOLUME/
SELECT (–)
VOLUME/
SELECT (+)
Front panel Function Contents
button displayed
PHASE ( ) ∞Forward selection mark (3)
CHROMA ( ) 5Reverse selection mark (3)
Front panel Function Contents
button displayed
MENU EXIT Quit (or Release) the <MENU>
screen
HOW TO USE THE MENU FUNCTIONS
•SHARPNESS (to adjust picture sharpness) •ASPECT (to adjust aspect ratio)
•COLOR SYSTEM (to adjust colour system)
You can set the following menu items.
Set them depending on your needs.
1. Press the MENU button.
The <MENU> screen is displayed.
* The screen automatically disappears when no operation is
performed after about 5 minutes.
2. Press the PHASE ( ) or CHROMA ( ) button
to select MENU items.
A selection mark (3) is put next to the selected item.
SHARPNESS
COLOR SYSTEM
ASPECT
3. Press the VOLUME/SELECT buttons to set.
4. If you want to set the other menu items, repeat
procedures 2 and 3.
5. Press the MENU button to quit.
1Selection mark (3): Indicates the
menu item you select.
2Menu item: Menu items you can
select.
3Setting display: Indicates the
current settings (value).
4Function display: The functions of
the front panel buttons (7 buttons on
the left) correspond to the function
displayed.
Notes:
●When the screen aspect ratio is set to
16 - 9 (16:9) in ASPECT, the picture
will be vertically reduced.
●When the screen aspect ratio is set to
4–3 UNDER in ASPECT, the picture
is underscanned with an aspect ratio
of 4:3. When the screen aspect ratio
is set to 4–3 NORM in ASPECT, the
picture is scanned normally with an
aspect ratio of 4:3.
<MENU> screen
<Front panel buttons>
Function
Contents
displayed
∞Forward the menu item.
5Reverse the menu item.
– Lower the adjustment
value. (to the minimum)
+ Raise the adjustment
value. (to the maximum)
3Forward the setting value.
2Reverse the setting value.
EXIT Exits the <MENU> screen.
DISPLAY AND SELECTION IN THE <MENU>
SCREEN MODE (SETTING)
7
MENU
PHASE CHROMA
VOLUME/SELECT
– +
–10 ~ 0 ~ 10
AUTO NTSC PAL
4 – 3 NORM 4 – 3 UNDER 16 – 9
EXIT
< MENU >
‰SHARPNESS : 0
COLOR SYSTEM : AUTO
ASPECT : 4 – 3NORM
PHASE CHROMA BRIGHT CONTRAST MENU VOLUME/SELECT
– +
MENU
LCT0883-001A 01.2.8, 14:039

HOW TO USE THE MENU
FUNCTIONS (cont’d)
8
DISPLAY AND SELECTIONS IN THE <SET-UP
MENU> MODE (SETTING)
• H. POSITION (to adjust horizontal screen position) • CONTROL LOCK (to lock operation buttons)
• V. POSITION (to adjust vertical screen position) • STATUS DISPLAY (to adjust status display)
• WHITE BALANCE (to adjust white balance)
You can set the following set-up menu items.
1. While pressing the MENU button, press the
PHASE ( ) button.
The <SET-UP MENU> screen is displayed.
* The screen automatically disappears when no operation is
performed after about 5 minutes.
2. Press the PHASE ( ) or CHROMA ( ) button
to select the desired menu item.
A selection mark (3) is put next to the selected item.
3. Press the VOLUME/SELECT buttons to set.
●For the WHITE BALANCE setting, select the CUT OFF or
DRIVE setting screen, then select the buttons (PHASE/
CHROMA/BRIGHT) corresponding to the function indicated
(R/G/B).
●Press the EXIT (MENU) button to return to the <SET-UP
MENU> screen.
Notes:
<SET-UP MENU> screen
<Front panel buttons>
1Selection mark (3): Indicates the
menu item you select.
2Menu item: Menu items you can
select.
3Setting display: Indicates the
current settings (value).
4Function display: The functions of
the front panel buttons (7 buttons
on the left) correspond to the
function displayed.
Function
Contents
displayed
∞Forward the menu item.
5Reverse the menu item.
– Lower the adjustment
value. (to the minimum)
+ Raise the adjustment
value. (to the maximum)
3Forward the setting value.
2Reverse the setting value.
EXIT Exit the <SET-UP MENU>
screen. (release)
DRV Selects DRV adjustment.
CUTO Selects CUT OFF
adjustment.
R Adjusts red signal level.
G Adjusts green signal level.
B Adjusts blue signal level.
DISP
Turns the ON-SCREEN
display on or off. (This
function is effective only
in the DRIVE or CUT OFF
adjustment mode.)
Front panel Function Contents
button displayed
PHASE ( ) ∞Forward selection mark (3)
CHROMA ( ) 5Reverse selection mark (3)
Front panel Function Contents
button displayed
+ Increase (to max. value)
3Forward the setting value
CUTO Selects CUT OFF setting screen
– Decrease (to min. value)
2Reverse the setting value
DRV Selects DRIVE setting screen
VOLUME/
SELECT (–)
VOLUME/
SELECT (+)
H. POSITION
V. POSITION
WHITE BALANCE
CONTROL LOCK
STATUS DISPLAY
PHASE MENU
PHASE CHROMA
VOLUME/SELECT
– +
EXIT
< SET–UP MENU >
‰H . POS I T I ON : 0
V . POS I T I ON : 0
WH I T E BA L A N C E
CONTROL LOCK : OFF
STATUS DISPLAY : ON
PHASE CHROMA BRIGHT CONTRAST MENU VOLUME/SELECT
– +
LCT0883-001A 01.2.8, 14:0310

ENGLISH
Set-up menu items Purpose Settings
H. POSITION Adjusts the horizontal position of
the screen (+ : Horizontal position
shifts to the right/–: Horizontal
position shifts to the left)
V. POSITION Adjusts the vertical position of the
screen (+: Vertical position moves
down/–:Vertical position moves up)
WHITE BALANCE Adjusts the white balance Selects DRIVE (DRV) or CUT OFF (CUTO) adjustment.
Screen setting is changed to the selected setting mode.
Select R/G/B buttons corresponding to the function display
to adjust.
DRIVE R.DRIVE Adjusts red level
B.DRIVE Adjusts blue level
CUT OFF R. CUT OFF Adjusts red cut off
G. CUT OFF Adjusts green cut off
B. CUT OFF Adjusts blue cut off
CONTROL LOCK Sets the operation buttons on the
front panel to control lock mode
STATUS DISPLAY Sets the status display of the colour
system
4.To set the other set-up menu items, repeat the
procedures 2 and 3.
5. Press the MENU button to quit.
Notes:
●When the CONTROL LOCK function is
set to ON, pressing operation buttons
on the front panel will display the
message “CONTROL LOCK ON!” on
the screen for about 3 seconds.
●The CONTROL LOCK function is
maintained even when the power is
turned off.
●To turn off the CONTROL LOCK
function, while holding the MENU button
press the PHASE button.Then set the
CONTROL LOCK function to OFF.
●Even when the CONTROL LOCK
function is set to ON, the following
operations are available:
– Volume control with the VOLUME/
SELECT buttons
– Display or disappear of the <SET-UP
MENU> screen.
●The STATUS DISPLAY function can be
set to display (ON) or not display (OFF)
the present colour system when the
power is turned on or the input signal is
changed. Refer to page 6 for more
information.
Front panel Function Contents
button displayed
MENU EXIT Quit (or Release) the <MENU>
screen
OFF ON
ON OFF
9
–10 ~ 0 ~ 10
–10 ~ 0 ~ 10
–20 ~ 0 ~ 20
–20 ~ 0 ~ 20
–20 ~ 0 ~ 20
–20 ~ 0 ~ 20
–20 ~ 0 ~ 20
MENU
LCT0883-001A 01.2.8, 14:0311

10
Functions (Items) Initialisation
(setting)
SHARPNESS 0
COLOR SYSTEM
AUTO
ASPECT 4–3 NORM
H. POSITION 0
V. POSITION 0
WHITE BALANCE
R. CUT OFF 0
G. CUT OFF 0
B. CUT OFF 0
R. DRIVE 0
B. DRIVE 0
CONTROL LOCK OFF
STATUS DISPLAY ON
PHASE 0
CHROMA 0
CONTRAST 0
BRIGHT 0
VOLUME 20
Sorts
<MENU> screen
<SET-UP MENU> screen
Picture adjustment
Volume
HOW TO INITIALISE THE
SETTING
SCREEN DISPLAY AND SELECTIONS IN THE
<SET-UP MENU> RESET MODE
You can set <MENU> and <SET-UP MENU> screen items, picture adjustment items and
the volume level to their factory-set (initial) values.
1. Press the Power ( ) button to turn the power off
(activate the stand-by mode).
The <SET-UP MENU> RESET screen is displayed.
Initial settings
<SET-UP MENU> RESET screen
2. While pressing both MENU button and PHASE ( )
button, press the Power ( ) button to turn the
power on.
3. Setting
䢇 Initialisation is required.
䢇 Initialisation is not required.
Press the CONTRAST ( ) button.
* Initialisation is completed, and the <SET-UP MENU>
RESET screen disappears.
Press the VOLUME/SELECT [+] or [–] button.
* Initialisation is aborted, and the <SET-UP MENU>
RESET screen disappears.
●The <SET-UP MENU> RESET screen will not be
displayed if the MENU or PHASE buttons are pressed
for a very short time. Keep pressing them until the
display screen appears.
Note:
POWER
PHASE MENU POWER
CONTRAST
VOLUME/SELECT
– +
< SET–UP MENU > RESET
A r e y o u s u r e ?
" Y e s " t he n < CONTRAST >
" N o " t he n < + > o r < – >
LCT0883-001A 01.2.8, 14:0312

ENGLISH
OUT
OUT
OUT
IN
AUDIO
OUT
IN
IN
IN
A
B
Y/C
VIDEO
PHASE CHROMA BRIGHT CONTRAST MENU INPUT SELECT
VOLUME/SELECT
– + BA
POWER
_ON
—OFF
Y/C VIDEO VIDEO
PHASE CHROMA BRIGHT CONTRAST MENU INPUT SELECT
VOLUME/SELECT
– + BA
POWER
_ON
—OFF
Y/C VIDEO VIDEO
BASIC CONNECTION EXAMPLE
Notes:
•Before connecting your system, make sure that all units are turned off.
•The illustration below shows some examples of different connections.Terminal connections may differ depending on the
component connected. Be sure to refer to the instructions provided with the unit(s) you are connecting.
•Each pair of input (IN) and output (OUT) terminals are bridge-connected.
•If you’re not connecting any equipment to a bridged output (OUT) terminal, be sure not to connect any other cables to the
bridged output (OUT) terminal as this will cause the terminating resistance switch to open (auto terminate function).
•When making a bridge connection, connect the input (IN) and output (OUT) terminals on the monitor to separate video
components.
(For example, if both terminals are connected to the same VCR, resonance may occur except during playback.This is caused by
the same video signal “looping” between the VCRs, and is not a malfunction.)
•Select the video input (INPUT A, INPUT B or INPUTY/C) with the INPUT SELECT buttons on the front panel.
䡵VIDEO A Connection Example
(Select Input A)
Video Camera
Video Monitor
VCR
Video
(Video signal cable)
Audio
(Audio signal cable)
11
Video
(Video signal cable)
Audio
(Audio signal cable)
: Signal Flow
Video Monitor
VCR
LCT0883-001A 01.2.8, 14:0313

OUT
OUT
OUT
IN
AUDIO
OUT
IN
IN
IN
A
B
Y/C
VIDEO
PHASE CHROMA BRIGHT CONTRAST MENU INPUT SELECT
VOLUME/SELECT
– + BA
POWER
_ON
—OFF
Y/C VIDEO VIDEO
PHASE CHROMA BRIGHT CONTRAST MENU INPUT SELECT
VOLUME/SELECT
– + BA
POWER
_ON
—OFF
Y/C VIDEO VIDEO
OUT
OUT
OUT
IN
AUDIO
OUT
IN
IN
IN
A
B
Y/C
VIDEO
PHASE CHROMA BRIGHT CONTRAST MENU INPUT SELECT
VOLUME/SELECT
– + BA
POWER
_ON
—OFF
Y/C VIDEO VIDEO
PHASE CHROMA BRIGHT CONTRAST MENU INPUT SELECT
VOLUME/SELECT
– + BA
POWER
_ON
—OFF
Y/C VIDEO VIDEO
12
䡵VIDEOY/C Connection Example
(Select Input Y/C)
Video Camera
Video Monitor
VCR
(Y/C (S-video) signal cable)
Audio
(Audio signal cable)
(Y/C (S-video) signal cable)
Audio
(Audio signal cable)
: Signal Flow
Video Monitor
VCR
Video
(Video signal cable)
Video
(Video signal cable)
Y/C (S-video)
䡵VIDEO B Connection Example
(Select Input B)
Y/C (S-video)
Audio
(Audio signal cable)
Audio
(Audio signal cable) Video Monitor
VCR
: Signal Flow
BASIC CONNECTION EXAMPLE
(cont’d)
Video Camera
Video Monitor
VCR
LCT0883-001A 01.2.8, 14:0314

ENGLISH
Problems
No power supply.
No picture with the
power on.
No sound.
No colours, wrong
colour, or dark
picture.
Dark stripes appear
at the top and bottom
of the screen, picture
vertically squeezed.
Function buttons on
the front panel do not
function.
Points to be checked
Is the power plug loosened or disconnected?
Is the video signal output from the connected
component?
Is the input signal selected properly?
Is the video cable disconnected?
Is the audio signal output from the connected
component?
Is the volume output set to minimum?
Is the audio cable disconnected?
Is the colour system selected properly?
Has the picture control setting (CONTRAST,
BRIGHT, CHROMA or PHASE) been changed?
Is the aspect ratio set to 16:9?
Has control of the buttons been locked? (Has
the CONTROL LOCK function been set to ON?)
Measures (Remedy)
Firmly insert the power plug.
Set the connected component correctly.
Select the required video signal input with the
Input select button. (See page 6.)
Connect the video signal cable firmly.
(See pages 11 and 12.)
Set the connected component correctly.
Adjust the speaker volume with the VOLUME/
SELECT button. (See page 6.)
Connect the audio signal cable firmly.
(See pages 11 and 12.)
Set COLOR SYSTEM in the <MENU> screen to
AUTO. (See page 7.)
Set each picture control to the standard setting.
(See page 6.)
Set ASPECT in the <MENU> screen to
[4 : 3 (4 – 3 NORM or 4 –3 UNDER)].
(See page 7.)
Set CONTROL LOCK in the <SET-UP MENU>
screen to OFF. (See pages 8 and 9.)
TROUBLESHOOTING
Solutions to common problems related to your monitor are described here. If none of the solutions presented here
solves the problem, unplug the monitor and consult a JVC-authorised dealer or service centre for assistance.
The following are not malfunctions:
●The monitor emits a strange sound when the room temperature changes suddenly.This is only a problem if an abnormality
appears on the screen as well.
●When a still image has been displayed for a long period, a faint residual image may remain on the screen for a short time after
the power has been turned off or when another image is displayed.The image will eventually disappear.This is a normal
characteristic of the LCD (Liquid Crystal Display) and is not a malfunction.
13
LCT0883-001A 01.2.8, 14:0315

䡵Dimensions
< Front View > < Side View >
Unit : mm (inch)
14
VICTOR COMPANY OF JAPAN, LIMITED
SPECIFICATIONS
䡲Type : LCD Video Monitor
䡲LCD panel : 10.4" (26.4cm measured
diagonally), Transmission type,
a-Si TFT active matrix
䡲Display area : Width : 21.1cm (8-5/16")
Hight : 15.8cm (6-1/4")
Diagonal: 26.4cm (10-7/16")
䡲Number of pixels : 640 (horizontal) x 480 (vertical)
䡲Display colours : 262,144 colours
䡲Pixel pitch : Horizontal : 0.33mm
Vertical : 0.33mm
䡲Color system : PAL, NTSC (3.58)
䡲Input / output terminals
VIDEO A : Composite video
1 line, BNC connector x 2,
1 V(p-p), 75 Ω, negative sync
(bridge connection possible,
auto termination)
VIDEO B : Composite video
1 line, BNC connector x 2,
1 V(p-p), 75 Ω, negative sync
(bridge connection possible,
auto termination)
VIDEO Y/C : Y/C-separated (S-video)
1 line, mini-DIN 4-pin
connector x 2,
Y : 1 V(p-p), 75 Ω
C: 0.286 V(p-p), 75 Ω (NTSC)
0.3 V(p-p), 75 Ω (PAL)
(bridge connection possible,
auto termination)
AUDIO : 1 line (monaural), RCA pin x 2,
0.5 V(rms), high-impedance
(bridge connection possible)
*
Design and specifications subject to change without notice.
*
Illustrations used in this manual are for explanatory.
The appearance of the actual product may differ slightly.
*
Dimensions and weight are approximate.
*
“LCD” stands for Liquid Crystal Display.
*
“a-Si” stands for amorphous silicon.
*
“TFT” stands for Thin Film Transistor.
*
The LCD panel is made with high-precision technology and has more than 99.99% effective pixels.
Fewer than 0.01% of pixels may be chipped or always lit.
䡲Audio power output : 0.5 W (monaural)
䡲Built-in speaker : 4 cm x 7 cm
(1-4/7" x 2-3/4") x 1,
impedance of 8 Ω
䡲Environmental conditions
: Operation temperature:
5°C – 35°C (41°F – 95°F)
Operation humidity:
20 % – 80 % (non-condensing)
䡲Power requirements : 120 V AC or 230 V AC,
50 Hz/60 Hz
䡲Power consumption : 0.44 A (120 V AC)
0.28 A ( 230 V AC)
䡲Dimensions : Width : 259 mm (10-1/4" )
Hight : 216 mm (5-5/8" )
Depth: 88 mm (3-1/2" )
*Protrusion excluded
䡲Weight : 2.5 kg(5.5 lbs. )
䡲Accessory : AC power cord:
for U.S.A. and Canada x 1
for European countries x 1
for United Kingdom x 1
PHASE CHROMA BRIGHT CONTRAST MENU INPUT SELECT
VOLUME/SELECT
– +
BA
POWER
Y/C
OUT
IN
AUDIO
OUT
IN
OUT
IN
OUT
IN
A
B
Y/C
VIDEO
259 (10-1/4 )
88 (3-1/2)
216 ( 8-5/8 )
89.5 (3-5/8)
Front
LCT0883-001A 01.2.8, 14:0316

DEUTSCH
BEDIENUNGSANLEITUNG
LCD-VIDEO-MONITOR
LM-10W
Vielen Dank für den Kauf dieses LCD-Monitors von JVC. Bitte lesen Sie diese
Bedienungsanleitung vor Ingebrauchnahme sorgfältig durch, um einen
einwandfreien Betrieb sicherzustellen.
(* “LCD” ist die Abkürzung für Liquid Crystal Display.)
Kundenhinweis:
Tragen Sie bitte hier rechts unten die Seriennummer ein, die an der Geräterückseite
vorzufinden ist, und bewahren Sie diese Information zur späteren Bezugnahme auf.
Serien-Nr. :Modell-Nr. : LM-10W
LCT0883-001A 01.2.8, 14:3917

2
ACHTUNG
DIESES GERÄT NIEMALS NÄSSE ODER
FEUCHTIGKEIT AUSSETZEN. ANDERNFALLS
BESTEHT STROMSCHLAG- UND FEUERGEFAHR!
ACHTUNG
DIESES GERÄT MUSS GEERDET WERDEN.
VORSICHT:
Das Gehäuse darf nicht entfernt werden. Andernfalls
besteht Stromschlaggefahr.
Falls Wartungsarbeiten erforderlich sind, wenden Sie
sich bitte an qualifiziertes Fachpersonal.
Das Gerät so aufstellen, dass es sich in der Nähe einer
leicht zugänglichen Netzsteckdose befindet. Dieses
Gerät schaltet automatisch auf Betriebsbereitschaft
oder Betriebsspannung, wenn das Netzkabel an einer
Netzsteckdose angeschlossen wird. Auch nach
Ausschalten der Betriebsspannung liegt am Gerät eine
geringe Spannung an. Aus Sicherheitsgründen sollte
das Netzkabel abgezogen werden, wenn dieses Gerät
nicht in Gebrauch ist.
Dieser Monitor ist mit einem 3-pol. Netzstecker, der mit
den FCC-Bestimmungen übereinstimmt, ausgestattet.
Falls diese Steckerausführung für die zu verwendende
Netzsteckdose ungeeignet ist, wenden Sie sich bitte an
einen qualifizierten Elektriker.
VORSICHTSMASSREGELN
●Stets nur mit der Spannung arbeiten, die am Typenschild
an der Geräterückseite angegeben ist.
●Bei längerem Nichtgebrauch bzw. vor Reinigung des
Geräts unbedingt den Netzstecker abziehen.
●Das Netzkabel keiner Gewichts- oder Zugbelastung
aussetzen. Das Netzkabel nicht so verlegen, daßPersonen
auf dieses treten können.
●Netzsteckdosen und Netzkabel nicht überlasten.
Andernfalls besteht die Gefahr von elektrischen Schlägen
oder Überhitzungen mit Brandgefahr.
●Das Gerät nicht unter den folgenden Bedingungen
betreiben:
–an extrem warmen, kalten oder feuchten Orten,
–an Orten, die hoher Staubeinwirkung ausgesetzt sind,
–in der Nähe von Vorrichtungen, die starke Magnetfelder
erzeugen,
–bei direkter Sonneneinstrahlung
–an Orten, an denen Hitzestaus auftreten können,
–in geschlossenen Fahrzeugen.
●Bei Betrieb stets die Ventilationsöffungen freihalten, da
andernfalls der Wärmeaustausch behindert wird.
●Staubanlagerung am Bildschirm mit einem weichen Tuch
entfernen.
SICHERHEITSHINWEISE
FCC-HINWEIS (nur für die USA)
VORSICHT: Durch Eingriffe und Änderungen, die nicht
durch die Firma JVC autorisiert wurden, kann die
Betriebserlaubnis für dieses Gerät erlöschen.
HINWEIS: Die Typenüberprüfung ergab, dass dieses
Gerät den Auflagen für Digitalgeräte der Klassifizierung A,
gemäß Sektion 15 der FCC Bestimmungen, entspricht.
Die Einhaltung dieser Bestimmungen gewährleistet
ausreichenden Schutz gegen Störeinstreuungen an
Arbeitsplätzen. Dieses Gerät erzeugt, arbeitet mit und
strahlt Funkfrequenzenergie ab und kann bei nicht
sachgemäßer Installation und Nutzung, dies bedeutet bei
Nichtbeachtung der vom Hersteller vorgeschriebenen
Anweisungen zur Installation und Nutzung,
Störeinstreuungen für Funkempfänger verursachen.
Durch das Betreiben dieses Geräts in Wohngebieten
können Störeinstreuungen verursacht werden. Der
Benutzer ist verpflichtet, Maßnahmen zur Beseitigung
dieser Störeinstreuungen auf eigene Kosten
durchzuführen.
●In den folgenden Fällen sofort den Netzstecker abziehen
und einen Fachmann zu Rate ziehen:
–Bei beschädigtem Spannungsversorgungskabel oder -
stecker.
–Wenn Flüssigkeit in das Geräteinnere eingedrungen ist.
–Wenn das Gerät einer starken Erschütterung ausgesetzt
war oder wenn das Gehäuse beschädigt ist.
–Bei stark nachlassender Betriebsleistung.
●Niemals selber Wartungs- oder Reparaturarbeiten
vornehmen! Nach Abnehmen der Gehäuseverkleidung
besteht die Gefahr von Stromschlägen und anderen
Unfällen. Überlassen Sie Wartung und Reparaturen einer
qualifizierten Kundendienststelle.
●Bei Teiletausch sollten Sie von der Kundendienststelle eine
schriftliche Bestätigung anfordern, in der der Nachweis für
die Einhaltung aller vorgeschriebenen technischen Daten
der Austauschteile geführt wird. Die Verwendung von
Original-Ersatzteilen verhindert Betriebsstörungen (mit
Feuer- und Stromschlaggefahr) und Leistungseinbußen.
●Nach der Durchführung von Wartungs- oder
Reparaturarbeiten an diesem Gerät sollten Sie von der
Kundendienststelle eine Sicherheitsüberprüfung
entprechend den Herstellervorschriften durchführen lassen.
●Wenn dieses Gerät das Ende seiner Nutzungsdauer
erreicht hat, kann es bei einer unsachgemäßen Entsorgung
zum Implodieren des LCD-Bildschirmes kommen. Wenden
Sie sich bezüglich der Entsorgung dieses Geräts bitte an
qualifiziertes Fachpersonal.
LCT0883-001A 01.2.8, 14:3918

DEUTSCH
INHALT
SICHERHEITSHINWEISE ................................................................................ 2
DIE BEDIENELEMENTE UND IHRE FUNKTIONEN ....................................... 4
GRUNDSÄTZLICHE BEDIENSCHRITTE ........................................................ 6
GEBRAUCH DER MENÜFUNKTIONEN.......................................................... 7
AUFRUF DER ANFANGSEINSTELLUNGEN ................................................ 10
EINFACHES ANSCHLUSSBEISPIEL .............................................................11
STÖRUNGSSUCHE ....................................................................................... 13
TECHNISCHE DATEN.................................................................................... 14
3
NETZANSCHLUSS
Dieses Gerät arbeitet mit einer Netzspannung von 120 V Wechselspannung (USA und Kanada) und 230 Volt Wechselspannung
(Europa/Großbritannien). Die beigefügten Netzkabel sind für die hier nachfolgend aufgeführten Netzspannungen und Länder
ausgelegt. Ausschließlich das geeignete Netzkabel verwenden, damit die jeweils gültigen Sicherheits- und EMC-Bestimmungen
eingehalten werden.
Netzkabel
Netzspannung : 120 V Wechselspannung 230 Volt Wechselspannung 230 Volt Wechselspannung
Länder : USA und Kanada Europa Großbritannien
Achtung:
●Niemals das für 120 V Wechselspannung vorgesehene Netzkabel anstelle des für 230 Volt Wechselspannung vorgesehenen
Netzkabels verwenden. Andernfalls können Betriebsstörungen auftreten und es besteht Stromschlag- und Feuergefahr.
Hinweis zur Verwendung des Netzkabels für Großbritannien
Der Netzstecker der England-Netzkabelausführung enthält eine eingebaute Sicherung. Bei einem Sicherungswechsel ausschließlich
eine geeignete Sicherung mit der erforderlichen Belastbarkeit einlegen und das Sicherungsfach schließen.
(Wenden Sie sich an Ihren Fachhändler oder qualifiziertes Service-Personal).
Sicherungswechsel
Öffnen Sie das Sicherungsfach mit einem Flachklingen-
schraubendreher und wechseln Sie die Sicherung aus.
(*Wie in der Abbildung als Beispiel gezeigt.)
Bildechoeffekte
●Wenn ein Standbild über längere Zeit auf dem LCD-Bildschirm dargestellt wird, kann nach einem Bildwechsel oder dem
Ausschalten der Betriebsspannung ein schwaches Bildecho auf dem Bildschirm wahrnehmbar bleiben. Dies ist eine
konstruktionsbedingte Eigenschaft und stellt keine Fehlfunktion des LCD-Bildschirmes dar.
Sicherung
LCT0883-001A 01.2.8, 14:3919

4
OUT
IN
AUDIO
OUT
IN
OUT
IN
OUT
IN
A
B
Y/C
VIDEO
DIE BEDIENELEMENTE UND IHRE
FUNKTIONEN
VORDERANSICHT
<Vorderseite>
PHASE CHROMA BRIGHT CONTRAST MENU INPUT SELECT
VOLUME/SELECT
–+
BA
POWER
Y/C
PHASE CHROMA BRIGHT CONTRAST MENU INPUT SELECT
VOLUME/SELECT
–+
BA
POWER
Y/C
RÜCKANSICHT
<Rückseite>
120 V
Wechselspannung,
50 Hz/60 Hz
230 Volt
Wechselspannung,
50 Hz/60 Hz
An
Netzsteckdose
Ausführung für die USA und Kanada
Ausführung für Europa
Ausführung für Großbritannien
LCT0883-001A 01.2.8, 14:3920
Table of contents
Languages:
Other JVC Monitor manuals

JVC
JVC TM-A210GU - Color Monitor User manual

JVC
JVC TM-A140PN-A User manual

JVC
JVC GM X50U User manual

JVC
JVC I'Art Palette LCT1648-001B-A User manual

JVC
JVC TM-H1950CG User manual

JVC
JVC DT-V100CG/E Service manual

JVC
JVC DT-U31 User manual

JVC
JVC BM-H2000PN User manual

JVC
JVC DT-V17G1 User manual

JVC
JVC TM-H1950CG User manual