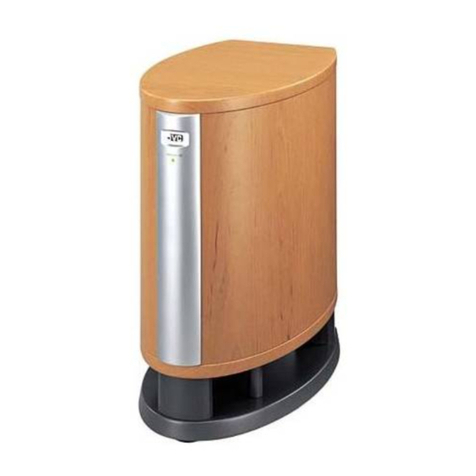
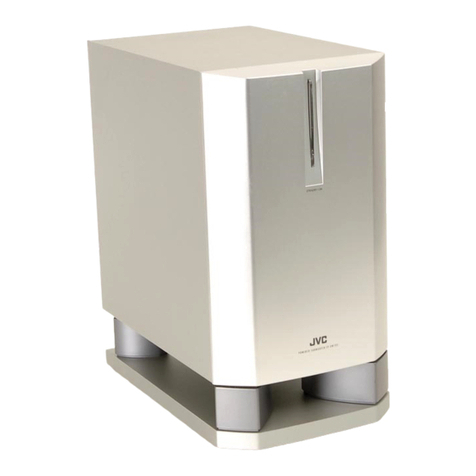
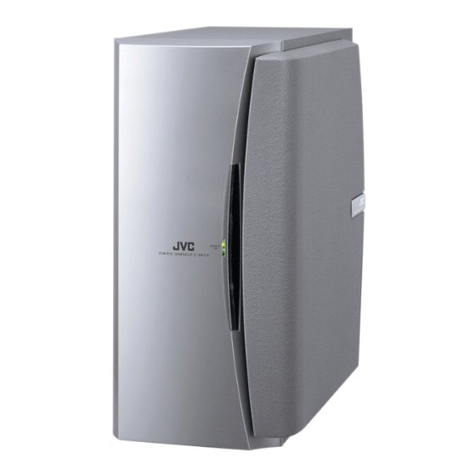
JVC SP-DW103 User manual

SERVICE MANUAL
COPYRIGHT © 2003 VICTOR COMPANY OF JAPAN, LIMITED No.22056
2003/6
POWERED SUBWOOFER
2205620036SP-DW103
TABLE OF CONTENTS
1 PRECAUTION. . . . . . . . . . . . . . . . . . . . . . . . . . . . . . . . . . . . . . . . . . . . . . . . . . . . . . . . . . . . . . . . . . . . . . . . . 1-3
2 SPECIFIC SERVICE INSTRUCTIONS. . . . . . . . . . . . . . . . . . . . . . . . . . . . . . . . . . . . . . . . . . . . . . . . . . . . . . 1-4
3 DISASSEMBLY . . . . . . . . . . . . . . . . . . . . . . . . . . . . . . . . . . . . . . . . . . . . . . . . . . . . . . . . . . . . . . . . . . . . . . . 1-5
4 ADJUSTMENT . . . . . . . . . . . . . . . . . . . . . . . . . . . . . . . . . . . . . . . . . . . . . . . . . . . . . . . . . . . . . . . . . . . . . . . . 1-8
5 TROUBLE SHOOTING. . . . . . . . . . . . . . . . . . . . . . . . . . . . . . . . . . . . . . . . . . . . . . . . . . . . . . . . . . . . . . . . . . 1-9
Area suffix
B ------------------------------- U.K.
E ----------- Continental Europe

1-2 (No.22056)
SPECIFICATION
Type Powered Subwoofer Bass-reflex type, (magnetically shielded type)
Speaker unit 16.0 cm cone (×1)
Frequency range 30 Hz to 200 Hz
Input impedance 50 kΩ(LOW-LEVEL) 470 Ω(HIGH-LEVEL)
Input terminals INPUT 1 (LOW-LEVEL) INPUT 2 (HIGH-LEVEL)
Power requirements AC 230 V , 50 Hz
Output power of built-in amp 100 W (45 Hz, 4 Ω, 10 % THD)
Power consumption 27 W
Dimensions 210 mm (width) ×392 mm (height) ×348 mm (depth)
Mass 10 kg
Accessories Monaural audio cord (×1)

(No.22056)1-3
SECTION 1
PRECAUTION
1.1 Safety Precautions
(1) This design of this product contains special hardware and
many circuits and components specially for safety purpos-
es. For continued protection, no changes should be made
to the original design unless authorized in writing by the
manufacturer. Replacement parts must be identical to
those used in the original circuits. Services should be per-
formed by qualified personnel only.
(2) Alterations of the design or circuitry of the product should
not be made. Any design alterations of the product should
not be made. Any design alterations or additions will void
the manufacturers warranty and will further relieve the
manufacture of responsibility for personal injury or property
damage resulting therefrom.
(3) Many electrical and mechanical parts in the products have
special safety-related characteristics. These characteris-
tics are often not evident from visual inspection nor can the
protection afforded by them necessarily be obtained by us-
ing replacement components rated for higher voltage, watt-
age, etc. Replacement parts which have these special
safety characteristics are identified in the Parts List of Ser-
vice Manual. Electrical components having such features
are identified by shading on the schematics and by ( ) on
the Parts List in the Service Manual. The use of a substitute
replacement which does not have the same safety charac-
teristics as the recommended replacement parts shown in
the Parts List of Service Manual may create shock, fire, or
other hazards.
(4) The leads in the products are routed and dressed with ties,
clamps, tubings, barriers and the like to be separated from
live parts, high temperature parts, moving parts and/or
sharp edges for the prevention of electric shock and fire
hazard. When service is required, the original lead routing
and dress should be observed, and it should be confirmed
that they have been returned to normal, after reassem-
bling.
(5) Leakage shock hazard testing
After reassembling the product, always perform an isola-
tion check on the exposed metal parts of the product (an-
tenna terminals, knobs, metal cabinet, screw heads,
headphone jack, control shafts, etc.) to be sure the product
is safe to operate without danger of electrical shock.Do not
use a line isolation transformer during this check.
• Plug the AC line cord directly into the AC outlet. Using a
"Leakage Current Tester", measure the leakage current
from each exposed metal parts of the cabinet, particular-
ly any exposed metal part having a return path to the
chassis, to a known good earth ground. Any leakage cur-
rent must not exceed 0.5mA AC (r.m.s.).
• Alternate check method
Plug the AC line cord directly into the AC outlet. Use an
AC voltmeter having, 1,000Ωper volt or more sensitivity
in the following manner. Connect a 1,500Ω10W resistor
paralleled by a 0.15µF AC-type capacitor between an ex-
posed metal part and a known good earth ground.
Measure the AC voltage across the resistor with the AC
voltmeter.
Move the resistor connection to each exposed metal
part, particularly any exposed metal part having a return
path to the chassis, and measure the AC voltage across
the resistor. Now, reverse the plug in the AC outlet and
repeat each measurement. Voltage measured any must
not exceed 0.75 V AC (r.m.s.). This corresponds to 0.5µ
mA AC (r.m.s.).
1.2 Warning
(1) This equipment has been designed and manufactured to
meet international safety standards.
(2) It is the legal responsibility of the repairer to ensure that
these safety standards are maintained.
(3) Repairs must be made in accordance with the relevant
safety standards.
(4) It is essential that safety critical components are replaced
by approved parts.
(5) If mains voltage selector is provided, check setting for local
voltage.
1.3 Caution
Burrs formed during molding may be left over on some parts
of the chassis.
Therefore, pay attention to such burrs in the case of pre-
forming repair of this system.
1.4 Critical parts for safety
In regard with component parts appearing on the silk-screen
printed side (parts side) of the PWB diagrams, the parts that are
printed over with black such as the resistor ( ), diode ( )
and ICP ( ) or identified by the " " mark nearby are critical
for safety. When replacing them, be sure to use the parts of the
same type and rating as specified by the manufacturer.
(This regulation dose not Except the J and C version)
Good earth ground
Place this
probe on
each expose
d
metal part.
AC VOLTMETER
(Having 1000
ohms/volts,
or more sensitivity)
1500 10W
0.15 F AC TYPE

1-4 (No.22056)
SECTION 2
SPECIFIC SERVICE INSTRUCTIONS
This service manual does not describe SPECIFIC SERVICE INSTRUCTIONS.

(No.22056)1-5
SECTION 3
DISASSEMBLY
3.1 Disassembly method
3.1.1 Removing the Amplifier assembly.
(See Fig1 and 2.)
(1) Remove the eleven screws Aattaching the amplifier as-
sembly. (See Fig 1.)
(2) Remove the amplifier assembly from the main body.
(3) Disconnect the wire connector from the back side of the
amplifier assembly. (See Fig 2.)
(4) Disconnect the speaker wire from the speaker terminal.
(See Fig 2.)
Fig.1
Fig.2
3.1.2 Removing the back panel.
(See Fig 3.)
(1) From the back side of the main body pull out the volume
and frequency knobs.
(2) Remove the seven screws Battaching the back panel.
Fig.3
A
A
A
A
A
Amplifier assembly
Amplifier assembly Wire connector
Speaker termin
al
B
B
B
Frequency knobVolume knob

1-6 (No.22056)
3.1.3 Removing the power cord.
(See Fig 4 and 5)
• Prior to performing the following procedures. remove the back
panel.
(1) Remove the two screw Cattaching the bracket. (See Fig 4)
(2) Pull out the bracket toward you.
(3) Disconnect the power cord from the connection CN901 on
the power supply assembly.
3.1.4 Removing the amplifier board assembly.
(See Fig 5 and 6)
• Prior to performing the following procedures remove the back
panel and the power cord.
(1) Remove the screw Dattaching the bracket b. (See Fig 5.)
(2) Remove the three screws Eattaching the bracket c. (See
Fig 5.)
(3) Disconnect the wire from the connection CN102 and
CN103 on the amplifier board assembly. (See Fig 6.)
(4) Remove the amplifier board assembly from the connector
CN951 and Cn952 on the power supply board assembly.
(See Fig 6.)
(5) Pull out the amplifier board assembly toward you.
3.1.5 Removing the power supply board assembly.
(See Fig 6.)
• Prior to performing the following procedures remove the back
panel remove the power cord and amplifier board assembly.
(1) Remove the two screws Fand four screws Gattaching the
power supply board assembly.
(2) Pull out the power supply board assembly toward you.
Fig.4
Fig.5
Fig.6
B
racket a
Power co
rd
C
C
Amplifier assembly
board
Bracket c
B
racket b
Power supply
assembly board CN901
CN503
CN102
D
E
E
Power supply
assembly boa
rd
C
N951 CN95
2
GG
F

(No.22056)1-7
3.1.6 Removing the bottomplate.
(See Fig 7.)
(1) Remove the eight screws Hattaching the bottom plate.
Referense:
When attaching the screw H. attach the plane and spring
washers with them.
(2) Pull out the bottom plate toward you.
Fig.7
3.1.7 Removing the woofer.
(See Fig 8.)
• Prior to performing the following procedures. remove the bot-
tom plate.
(1) Remove the six screws Jattaching the woofer.
(2) Pull out the woofer toward you.
Fig.8
Spring washer
Plane washer
HH
H
JJ

1-8 (No.22056)
SECTION 4
ADJUSTMENT
This service manual does not describe ADJUSTMENT.

(No.22056)1-9
SECTION 5
TROUBLE SHOOTING
This service manual does not describe TROUBLE SHOOTING.

1-10 (No.22056)
SECTION 6
Description of major ICs
6.1 AN79L05-T (IC592) : Regulator
• Pin Layout
• Block Diagram
1
2
3
Starter
2
1
R1
R2
Q1
RSC 3
Commo
n
(1)
Output
(3)
Input
(2)
Voltage
Reference
Error Amp.
Terminal
Protection Current
Limiter
Pass Tr.
+
-

(No.22056)1-11
6.2 BA15218F-XE (IC101,IC102,IC103,IC104,IC501) : Dual operation amplifier
•Pinlayout
• Block diagram
1
2
8 Vcc
7 OUT2
6 -IN2
5 +IN2
OUT1 1
-IN1 2
+IN1 3
VEE 4
Q19
Q17Q16
OTHER
CH
R9
R6
R8
R7
R5
R4
R3R2
R1
D1
C1
Q18Q13
Q11
Q8
Q5
Vcc
VEE
OUTPUT
-IN
+IN
Q1
Q3 Q4
Q2
C2
Q9
Q6
Q7
Q10
Q12
Q14 Q15Q114

1-12 (No.22056)
6.3 BU4584BF-X (IC505) : Hex schmitt inverter
• Pin layout & Block diagram
6.4 IR2113S-X (IC506) : Gate driver
• Pin Layout
• Block Diagram
14 13 12 11 10 9 8
7
6
543
2
1
I
1
O
1
I
2
O
2
I
3
O
3
Vss
VDD I6O6I5O5I4O4
9
14 13 12 11 10
7
6
543
2
1
LO COM VCC VS VB
VSS LIN SD HIN VDD
8
16 15
HO
V
DD
H
IN
SD
LIN
V
ss
R Q
S
R Q
R
S
V
B
S
R Q
HO
V
S
V
CC
LO
CO
M
UV
DETECT
DELAY
UV
DETECT
PULSE
FILTER
PULSE
GEN
HV
LEVEL
SHIFT
LEVEL
SHIFT
V
DD/
V
CC
LEVEL
SHIFT
V
DD/
V
CC

(No.22056)1-13
6.5 NJM311M-XE (IC502) : Comparator
• Pin Layout
6.6 NJM78L05A-T (IC591) : Regulator
• Pin Layout
• Block Diagram
GND
+
INPUT
-
INPUT
V-
1
2
3
4
(TOP VIEW)
8
7
6
5
V+
BAL/STROB
E
BAL
OUTPUT
1.OUTPU
T
2.GND
3.INPUT
123
INPUT
GND
OUTPU
T

1-14 (No.22056)
6.7 STR-F6676 (IC951) : Switching regulator
• Pin Layout • Block Diagram
6.8 TC74HC00AF-W (IC503) : Quad 2-input NAND gate
• Pin layout & Block diagram
6.9 TC74HC14AF-X (IC504, IC571) : Hex Schmitt inverter
• Pin layout & Block diagram
12 34
5
VIN
4
START
REG.
T.S.D
O.V.P LATCH
O.S.C
DRIVEVth(1)
Comp.1
Vth(2)
Comp.2
GND
5
O.C.P./F.
B
1
S
2
D
3
R4
R3
R1C1
Iconst
R2 Rconst-Rconst+
14 13 12 11 10 9 8
7
6
543
2
1
1A 1B 1Y 2A 2B 2Y GND
Vcc 4B 4A 4Y 3B 3A 3Y
14 13 12 11 10 9 8
7
6
543
2
1
1A 1Y 2A 2Y 3A 3Y GND
Vcc 6A 6Y 5A 5Y 4A 4Y

(No.22056)1-15

(No.22056)
AV & MULTIMEDIA COMPANY AUDIO/VIDEO SYSTEMS CATEGORY 10-1,1chome,Ohwatari-machi,Maebashi-city,371-8543,Japan
VICTOR COMPANY OF JAPAN, LIMITED
WPC
Printed in Japan

SCHEMATIC DIAGRAMS
No.22056SCH
2003/06
COPYRIGHT 2003 VICTOR COMPANY OF JAPAN, LTD.
SP-DW103
SP-DW103
Contents
Block diagrams
Standard schematic diagrams
Printed circuit boards
2-1
2-3
2-3 to 5
CD-ROM No.SML200306
Area suffix
B ------------------------------- U.K.
E ----------- Continental Europe
POWERED SUBWOOFER

SP-DW103
2-2
In regard with component parts appearing on the silk-screen printed side (parts side) of the PWB diagrams, the
parts that are printed over with black such as the resistor ( ), diode ( ) and ICP ( ) or identified by the " "
mark nearby are critical for safety.
(This regulation does not correspond to J and C version.)

SP-DW103
2-1
AB CD E F G
1
2
3
4
5
Block diagram
INPUT
(LOW-LEVELL)
INPUT
(HIGH-LEVEL)
OUTPUT
(SPEAKER-OUT)
L/MONO
IC101
2/2
IC104
CN101
IC101
1/2
IC104
MUTE
AUTO POWER ON
IN PUT L / H AMP
& H.P FIL TER
L.P FILTER /
PHASE /
A.H.B
IN PUT L / H AMP
LED CONT.
IC103
2/2
IC102
AMP
VARIABLE-- FIX
CUT OFF
FILTER SW
FREQUENCY
VOLUME
IC103
1/2
VOLUME
PHASE SW
NORMAL-- REVERSE
CN151
W1001
ON -- CANCEL
AUTO POWER ON / STANDBY SW
MAINS
PLUG
POWER
CIRCUIT
+B
W9001 to 4
CN901
IC951
CN951
TRANS
T9501
IC501
IC502
IC503
IC504
CN501
Off set
VR502
Carrier Freq.
POWER-SUPPLY
W9001 to 4
VR501
CN504
POWER AMP
SPEAKER
OUT
IN
MUTE
Q5902 Q5903
Q5904
REGULATOR
RY502
CN503
CN505
IC571
Q5706
IC505 IC506
Q5006
Q5007
Q5905
CN102
CN861
RED GREEN
INDICATOR
+B
LED
CN502

SP-DW103
2-2
SP-DW103
HAB C DE FG
1
2
3
4
5
Parts are safety assurance parts.
When replacing those parts make
sure to use the specified one.
PRE MAIN signal
Standard schematic diagram
R1004 C1011
R1005
R1003
C1003
C1004
C1005
R1038
IC101
IC101
C1018
C1010
R1021R1020
R1013
C1007
R1008
R1009
R1011
R1010
R1006
R1007
R1015
R1017
Q1002
Q1001
R1047
Q5902
IC104
IC103
Q5903
K1001
R1030
R1031
VR101
R1036
R1035
C1016
C1502
S1501
R5023
S1001
IC102
C1028
R1051
C1029
C1030 R1053
IC104
R1061
CN952
R1065
Q5706
R1062
Q1006
CN103
Q1007
S9001
C9005
RY502
IC103
R1040
C1020
Q5713
W9001
R9001
IC501 IC502
Q5001
Q5002
R5005
IC503
IC504
R5013
R5014
R5011
R5012
R5021
R5022
R5007
R5003
VR501
R1070
R5008
CN151
W1001
Q5003
R5027
R5028
C5015
R5036
D5003
R5034
D5905
C5915
C5913
C5916
C5914
D5906
R1071 C1039
Q5005
IC505
D5006
D5005 R5046
R5045
R5044
R9529
IC506
Q5721
R5048
R5050
R5049
R5916
D5009
D5010
Q5006
Q5007
R5055
R5056
Q5708
L5001
CN503
R5742
Q5901
R5901
Q5722
R5702
D5703
R5701
CN102
D5911
CN504
CN505
Q1003
Q5723
R5743
R5749
R5720
R1068
Q5712
R5721
R5723
D5706
D5707
R5729 R5728
C1038
D5710
D5712
Q5709
Q5711
R5718
D1003
D5704
Q5707
D1002
Q5904
Q5905
L5904
L5903 L5901
L5902
C1035
C1014
C1037
R1032
R1019
Q1005
IC571
Q5715
Q5716 R5731
Q5717 Q5718 Q5719
R5733
R5739
D5912 R5732
Q5720
F9001
T9501
LF901
EP952
TH901
D9001
IC951
D9506
Q9504
D9503
D9504
R9508
W9001
D9502
D9501
LF901 LF902
R9510
D9509
C9515
W9002
D9510
C9507
C9508
K5001
PC951
D9511
R9517
R5746
C9513
Q9508
D9512
C9514
Q9509
Q9510
D5717
C5711
CN861
R9503
R5915
EP951
R8601
D8601 D8602
D5013
R5059
IC102
C1013
R1028
R1044
R1064
W9002
W9003
W9004
W9003
W9004
J1001
C1019
R1023
R1022
R1048
R1002 R1001
C1002 C1001
R1014
R1012
C1006
J1002
C1025
C1026
C1009
C1008
R1046
C1023
C1017
R1037
VR151
C1501 R1501
R1034
R1033
C1015
R5024
C5007
R1050
R1052
C1027
C1031
Q1004
D1001
R1049
R1054
R1057
R1056
C1032
R1059R1060
C5706
C5025
R1055
C1034
C1033
R1016
R9002
R1067
CN101
CN501
R1039
C1012
C1021
C5022
R5009
R5017R5018
C5005
R5015
R5016
C5006
R5010
C5004
C5001
R5002 R5001
C5002
R5006
R1041
C5008
C5009
R5026
Q5004
R5030
R5029
D5001D5002
R5032
C5003
R5020
C5010
C5011
C5012
C5013
C5014
D5004
R5039
R5035
R5031
R5038
VR502
R5037
R5033
R5025
R5019
IC591
IC592
R5043
R5041 R5040
R5042
C5017
C5016
C5018
D5007
C5020
C5019
D5008
R5053R5054
C5021
D5011D5012
CN951
D5708
CN502
R5057
C5903
C5904
C5901
C5902
C5918
C5905
D5901
R5902
C5906
D5902
C5702
R5910
C5026
R1066
C1036
D5907
D5908
R9528
R5744
D5716
R5905
D5903
C5909
C5911
R5906
D5904
C5910
C5912
C5704
C5907
C5908
D5709
C5705
R5722
R5727
R5909
R5724
R5725
R5726
Q5714
D5711
D5713
Q5710
R5716
R5717
C5703
R5719
D5705
R5715
R5713R5714
TH501
D5909
D5910
R5911
R5912
C5710
R5730
R5734
R5735
R5736
R5737
R5738
C5707
C5708
C5709
D5714
D5715
R5740
R5745
R1069
CN901
C9001
C9002
C9003C9004 C9504
D9505
R9506
R9505
C9505
R9527
R9504
R5051
C9503
R9502
R9501
K9501
C9502
C9501
D9507 C9506
C5917
K5002
C9509
TH591
C9510
C9511C9512
R9516
TH592
TH594
TH593
R5748R5747
D5718
R9518
R9519
R9520
R9521
R9522
R9523
R9526
R9524
R9525
R5913R5914
R5052
R5058
C5023
C5024
C1022
R1025
R5004
R5060
R5061
R5062
C5027C5028
R5063
56k 0.1
68k
56k
4.7/50
4.7/50
0.0022
12k
BA15218F
BA15218F
0.047
0.1
5.6K
1.5K
6.8k
0.022
150k
150k
150k
150k
470/1W
470/1W 47
47
2SC2412K
2SC2412K
220k
2SA1037AK
BA15218F
BA15218F
2SC2412K
NQR0129-003X
5.6k
5.6k
20KB
15k
10k
10/35
0.0033
100
BA15218F
4.7/50
1M
47p
4.7/50 4.7k
BA15218F
1M
QGB2016K1-05
1K
2SC2412K
47
2SA1037AK
QGB2016J1-05
2SC2412K
QSW1001-001
0.01/275
QSK0148-001
BA15218F
68K
0.0022
2SK303/3-4/-X
100k/2W
BA15218F NJM311M-XE
2SA1037AK
2SC2412K
10k
TC74HC00AF-W
TC74HC14AF-X
4.7k
4.7k
10k
10k
4.7
4.7
13K
10k
5K
1K/1/4W
10k
QGA2001C1-08
QJB001-080701
2SA1037AK
2.2
1k
47p
10k
1SS133
20K
2.2
MTZJ6.8B
10/25
10/16
10/25
10/16
MTZJ6.8B
1K/1/4W 0.68
2SA1514K
BU4584BF-X
1SS133
1SS133
8.2K
8.2K
560
75K/1/4W
IR2113S-X
KRC104S-X
10k
2.2/1/2W
22/1/4W
22/1/4W
MTZJ18B
MTZJ18B
IRFI540N
IRFI540N
6.8/1W
6.8/1W
KRC104S
( D) QQR1352-001
2.2
2SD2395/EF/
10/1/4W
DTC144TKA
10k
1SS133
1k
1SS355
QGB2016J1-11
QGB2016K1-11
2SC2412K
2SK303/3-4/-X
2.2k
100K
2.2k
1K
KRA104S
47k
220k
1SS355-X
1SS355-X
68K 33K
0.68
1SS355-X
MA3300/L/
2SC2412K
2SC2412K
47k
1SS133
1SS355-X
2SA1037AK
1SS133
2SC2412K
2SA1037AK
NQL114K-471X
NQL114K-471X
0.015
0.056
0.0033
680K
4.7K
2SD2114K
TC74HC14AF-X
KRA104S-X
KRC104S-X 10k
DTC115EKA-X DTC115EKA-X KRC104S-X
10K
10k
1SS355 100K
KRA104S
( D) 3.15A/125V
QQS0172-001
QQR1353-001
QAD0141-6R0
RBV-606
STR-F6676
AG01Z
2SC2412K
AG01Z
MTZJ20B
22/1W
AG01Z
AW04
QQR1360-001 QQR1360-001
75K/1/4W
FML-G22S
0.0033/250 FML-G22S
0.0047/1K
0.0047/1K
QQR1183-001Z
PC123Y22
MTZJ15A
10k
100K
0.01
2SA1514K
MTZJ15A
0.01
2SA1514K
2SC2412K
1SS355-X
0.22/25
680
22/1/4W
220
SPR325MVW
1SS355
11k
BA15218F
100/16
47
47
47
QNN0090-001
10/35
180K
33K
1k
470k 470k
0.001 0.001
56k
6.8k
0.022
QNB0159-002
150p
150p
100/16
100/16
82K
1/50
0.068
39k
10KB
10/35
3.9k
10K
10K
0.22
2.7k
470p
47k
2.2K
0.01
0.01
2SA1037AK
1SS133
2.2k
56
150K
10k
470/16
100k
220k
3.3/10
0.1
1.5k
10/16
10/16
15K
3.3M
56
QGB2016K1-08
QGB2016J1-08
22k
100/16
47/16
0.0039/100
10k
1K1K
100/16
2.2k2.2K/1/4W
100/16
10k
100/16
100/16
10K 15K
100/16
7.5K
47
0.022
0.1
4.7
2SC4452/3-4/-X
6.8k
6.8k
1SS133
1SS133
2.2k
100/16
4.7
0.1
0.1
0.1
0.1
680p
1SS133
10K
2.2
4.7k
2.2k 12K
2.2
4.7
4.7
NJM78L05A
AN79L05
3.3K
5.6k 1k
1k
56P
56P
0.22
MTZJ16B
10/35
0.68
M1FL20U
1M
1M
0.22/100
M1FL20UM1FL20U
QGB2510J1-10
MA3200/H/
QGB2510K1-10
22K
220/50
220/50
0.1/100
0.1/100
QGA3901C1-02
0.018
4.7/25
MTZJ16B
6.8k
47/25
MTZJ18B
220/35
QGA2501C1-02
1K
4.7/100
47k
0.12
MTZJ16BMTZJ16B
75K/1/4W
390
1SS133
47K
MTZJ15A
100/50
100/25
47K
MTZJ15A
100/50
100/25
0.01
220P220P
MA3200/H/
0.01
47k
100k
1K
39K
68K
100k
DTC115EKA-X
1SS355-X
MA3300/L/
2SA1037AK
220k
100k
47/16
47k
1SS355-X
4.7k
15K
47k
QAD0015-153Z
RB160L-40-XRB160L-40-X
12K12K
2.2/10
100k
470k
10k
470k
10k
100K
0.1
3.3/10
2.2/10
1SS355-X
1SS355-X
47k
22K
1K
QGA7901F2-02
0.22/275
0.1/275
0.001/2500.001/250 100/35
MTZT20B
10k
2.2k
470P
2.2k
3.3k
10/1/2W
470P
0.33/1W
0.33/1W QQR0779-001Z
( D) 680P/2K
470/400
SARS03 0.01/630
0.018
QQR1183-001Z
0.022/100
NAD0032-330X
0.022/100
2200/50
2200/50
13K
NAD0032-330X
NAD0032-330X
NAD0032-330X
100K100K
1SS355-X
10K
10k
13K10k
10k
1k
10k
4.7k
1k
330330
22/1/2W
180k
2.2/50
0.082
47/16
47/1/4W
10k
15
15
15
270P270P
15
!!
!
!
!! !
!
!
!
!
!
!
!
!
!
!
!
!
!
!
!
!!
!
!
!
!
!
!
!
!
Other manuals for SP-DW103
3
Table of contents
Other JVC Subwoofer manuals

JVC
JVC TH-M337B User manual

JVC
JVC CS-G1200 Operator's manual

JVC
JVC SP-PW100 User manual

JVC
JVC Powered Subwoofer SW-DW303 User manual

JVC
JVC SP-DWF10 User manual

JVC
JVC SP-PW3000 User manual

JVC
JVC CS-BB2J User manual

JVC
JVC SX-DW303 User manual

JVC
JVC CS-AW7020 - 10 DVC 2OHM 1000W MAX User manual

JVC
JVC CS-DX25 User manual

JVC
JVC SX-DW303 User manual

JVC
JVC CW-DRA8 User manual

JVC
JVC TH-WL709H User manual

JVC
JVC SX-DW303 User manual

JVC
JVC SP-PW100 User manual

JVC
JVC SP-DWF10 User manual

JVC
JVC SX-DW303AC User manual

JVC
JVC SP-DWF10 User manual

JVC
JVC CS-AW7020 - 10 DVC 2OHM 1000W MAX User manual

JVC
JVC CS-AW8520 - Arsenal 15" Subwoofer User manual