JVC LT-22HD7WU User manual

LT-22HD7WU ENGLISH
FRANÇAIS
ITALIANO
SLOVENCINA
50247612
0413MTH-VT-VT
INSTRUCTIONS
LCD TV/DVD Combo
MANUEL D'INSTRUCTIONS
TV LCD/DVD-Combo
LCD TV/DVD Combo NÁVOD
ISTRUZIONI
LCD TV/DVD Combo
Downloaded from www.vandenborre.be

ESPAÑOL
CZECH
POKYNY
NEDERLANDS
AANWIJZINGEN
50247650
0413MTH-VT-VT
LT-22HD7WU
TV LCD/Combo DVD MANUAL DE INSTRUCCIONES
LCD TV/DVD Kombo
LCD TV/DVD Combo
Downloaded from www.vandenborre.be

English - 1 -
Information for Users on Disposal of Old Equipment and Batteries
[European Union]
These symbols indicate that the electrical and electronic equipment and the battery with this
symbol should not be disposed of as general household waste at its end-of-life. Instead,
the products should be handed over to the applicable collection points for the recycling
of electrical and electronic equipment as well as batteries for proper treatment, recovery
and recycling in accordance with your national legislation and the Directive 2002/96/EC
and 2006/66/EC.
By disposing of these products correctly, you will help to conserve natural resources and
will help to prevent potential negative effects on the environment and human health which
could otherwise be caused by inappropriate waste handling of these products.
For more information about collection points and recycling of these products, please contact
your local municipal ofce, your household waste disposal service or the shop where you
purchased the product.
Penalties may be applicable for incorrect disposal of this waste, in accordance with national
legislation.
[Business users]
If you wish to dispose of this product, please contact your supplier and check the terms
and conditions of the purchase contract.
[Other Countries outside the European Union]
These symbols are only valid in the European Union.
The battery in this product is 2X AAA 1.5V Cell.
This batteries are located in the remote and are readily accessible.
Contact your local authority to learn about disposal and recycling.
The product and packaging should be taken to your local collection point for recycling.
Some collection points accept products free of charge.
Dear Customer,
This apparatus is in conformance with the valid European directives and standards regarding electromagnetic
compatibility and electrical safety.
European representative of the manufacturer is:
Vestel Germany GmbH
Parkring 6
85748 Garching b.München
Germany
Logo & License
The terms HDMI and HDMI High-Denition Multimedia Interface, and the HDMI Logo are trademarks or
registered trademarks of HDMI Licensing LLC in the United States and other countries.
DVB is a registered trademark of the DVB Project
LICENSE NOTICE
Manufactured under license from Dolby Laboratories.
TRADEMARK ACKNOWLEDGMENT
“Dolby” and the double-D symbol are trademarks of Dolby Laboratories.
Notice:
The sign Pb below
the symbol for
batteries indicates
that this battery
contains lead.
Battery
Products
Pb
Downloaded from www.vandenborre.be

English - 2 -
Safety Information
Mains Supply
This television is designed to operate from a 220-240 Volts 50Hz AC mains supply. Other power sources
may damage it. Check that the rating plate (on the back cover of the television) states 220-240V AC before
you plug it in for the rst time.The manufacturer accepts NO liability for damage or injury caused by using the
product with the wrong mains voltage.
Mains Plug
We have tted this television with a standard mains plug.
• If the mains lead is damaged it must be replaced with a mains lead of the same type and rating to avoid a
hazard.
• If for any reason you cut off the mains plug, please destroy the old plug as it would be dangerous if inserted
into a live power outlet. Carefully follow the wiring instructions supplied with the new plug.
• If a fuse is tted to the plug, remove the fuse before throwing the plug away.
• Never use a fused mains plug without the fuse cover.
• The mains plug shall be the main disconnect device and should be accessible at all times.
Safe use and care of your television
We have designed and made this television to meet European Safety Standards, but as with any electronic
equipment you must take care to stay safe and get the best results. Here is some good advice to help you do this.
Read these instructions carefully before you try to use the television.
Protect the mains lead. You must ensure the mains lead cannot be walked on, crushed, chafed, cut or trapped.
Switch off the mains power or pull out the mains plug when you leave the television unattended, unless the
function of the television requires a continuous power supply.
Do not continue to use your television if you have spilt liquids in it, if it is damaged in any way or if it does not
work normally. Immediately unplug the television and get expert advice.
Avoid harsh conditions such as wet or damp places, high humidity, strong vibration, extremely high or low
temperatures, strong sunlight and places that are very dusty.
Never t makeshift stands or legs to the television.
Never push objects into holes and ventilation slots.
To prevent electric shock do not remove any cover.
Dangerous voltage constituting a risk
of electric shock is present inside this
equipment.
This equipment is double insulated and an
earth connection is not required.
This mark is applied to show the equipment
conforms to European safety and electro-
magnetic compatibility standards.
Downloaded from www.vandenborre.be

English - 3 -
Safety Information (cont)
Do not touch the LCD display as it gets warm when in use, this is normal and is not a fault.
If anything goes wrong do not try to x it yourself, get a qualied service agent to look at it.
Pull out the mains plug and disconnect the aerial lead during thunder storms.
CAUTION: Connect headphones with the volume set low and increase if required. Prolonged listening through
headphones at high volume settings can result in hearing damage.
Ventilation
Place the television on a hard at surface away from direct sunlight or heat sources. If it is in a cabinet allow
at least a 10cm gap all around. Do not obstruct the ventilation slots, including those underneath with soft
furnishings.
Overheating will shorten the life of the television and increase the risk of re.
Cleaning
Disconnect the mains supply and use only a lightly dampened soft cloth. Do not use chemical solvents or
strong detergents as these may damage the cabinet or screen.
Never allow water droplets to remain on the screen as moisture can cause permanent discolouration.
Greasy marks must only be removed with a commercial cleaner specically recommended for LCD screens.
Eye Fatigue
When using this product as a computer monitor, health and safety experts recommend short frequent breaks
rather than occasional longer breaks. For example a 5-10 minute break after an hour of continuous screen
work is considered to be better than a 15 min break every 2 hours.
Do not use the monitor against a bright background or where sunlight or other bright light sources will shine
directly onto the screen.
Batteries
Remove batteries when the remote control is not to be used for a long time. Batteries left in equipment may
cause damage through deterioration and corrosive leakage, invalidating the guarantee.
To protect the environment use local recycling facilities for battery disposal.
Dispose of used batteries according to the instructions.
CAUTION: Risk of explosion if batteries are replaced by an incorrect type.
WARNINGS:
• This appliance is intended for domestic household use only and should not be used for any other purpose
or on any other application, such as for non-domestic use or use in a commercial environment.
• This appliance is not intended for use by persons (including children) with reduced physical, sensory or mental
capabilities, or lack of experience and knowledge, unless they have been given supervision or instructions
concerning use of the appliance by a person responsible for their safety.
• Children should be supervised to ensure that they do not play with the appliance.
• If the supply cord is damaged it must be replaced by the manufacturer, its service agent or similarly qualied
persons in order to avoid a hazard.
• This apparatus shall not be exposed to dripping or splashing and that no objects lled with liquids, such as
vases shall be placed on the apparatus.
• No naked ame sources, such as lighted candles should be placed on the apparatus.
• The ventilation should not be impeded by covering the ventilation openings, with items such as newspapers,
tablecloths, curtains etc.
• WARNING: To prevent injury, this apparatus must be securely attached to the oor/wall in accordance with
the installation instructions.
• This apparatus is not suitable for use in a tropical climate.
Downloaded from www.vandenborre.be

English - 4 -
Contents
Safety Precautions .................................................5
Environmental Information .....................................6
Wall mounting instructions......................................7
Getting Started .......................................................8
Notications & Features & Accessories..................8
Features .................................................................8
Connect Power ......................................................9
Specications (TV) .................................................9
Remote Control ...................................................10
Connections.......................................................... 11
Media Browser Menu............................................14
Quick Menu ..........................................................14
TV Menu Features and Functions ........................15
General TV Operation ..........................................17
Using the Channel List .........................................17
Conguring Parental Settings...............................17
Electronic Programme Guide (EPG) ....................17
Software Upgrade.................................................18
Troubleshooting & Tips.........................................18
PC Input Typical Display Modes ..........................20
Supported File Formats for USB Mode ................20
AV and HDMI Signal Compatibility ......................20
DVD Mode............................................................21
Notes on Discs .....................................................21
Licence Notication ..............................................21
How to Watch a DVD............................................21
DVD Control Panel Buttons..................................22
Overview of the Remote Control ..........................22
General Operation................................................23
Other Functions – Button Combinations (During
playback) ..............................................................23
General Playback .................................................24
DVD Troubleshooting ...........................................24
Disc Types Compatible with This Unit ..................25
Specications (DVD) ............................................25
Downloaded from www.vandenborre.be

English - 5 -
Safety Precautions
Please read these instructions fully
before installing or operating.
Preparation
Place the device on a solid even surface. To prevent
any fault and unsafe situations, do not place any objects
on top of the set. Use this device in moderate climates.
Operation temperature and operation humidity:
5ºC up to 45ºC, 85% rel. humidity max. (not blocking
ventilation openings).
Intended Use
This device is used to receive and display TV
programmes.The different connection options
make an additional expansion of the reception and
display sources possible (various external devices).
This device is only suitable for the operation in
dry interiors. This appliance is intended solely
for private domestic use and may not be used for
industrial and commercial purposes. We exclude
liability in principle, if the device is not used as
intended, or unauthorized modications have been
made. To operate your LCD TV in extreme ambient
conditions may cause the damage of the device.
This appliance is not intended for use
by persons (including children) with reduced
physical, sensory or mental capabilities, or
lack of experience and knowledge, unless they
have been given supervision or instructions
concerning use of the appliance by a person
responsible for their safety.
Children should be supervised to ensure that
they do not play with the appliance.
Power source
• The TV should be operated only from a 220-240 V
AC, 50 Hz outlet.
• Warning: Do not leave your TV in standby or
operating mode when you leave your house.
Positioning the TV
10 cm
10 cm
10 cm
• For ventilation, please leave a clear space of at least
10cm all around the TV.
•Do not block the ventilation openings.
•Do not place the TV on sloping or unstable surfaces,
the TV may tip over.
• To prevent damage to the TV, do not place any
objects on top of the TV.
Power cord and plug
• The power cord plug should be easily accessible.
In case of storms and lightning, when going on
holiday, or when the TV is not used for a long period
of time disconnect the power cord from the mains
power socket.
• The mains plug is used to disconnect TV set from the
mains and therefore it must remain readily operable.
•Do not place the TV, furniture, etc. on the power
cord or pinch the cord.
• Handle the power cord by the plug, do not unplug
the TV by pulling the power cord.
• Never touch the power cord/plug with wet hands
as this could cause a short circuit or electric shock.
• Never make a knot in the power cord or tie it with
other cords.
• Power cords should be placed in such a way that
they are not likely to be stepped on or driven over.
• A damaged power cord/plug can cause re or give
you an electric shock. When damaged it must be
replaced, this should only be done by
qualied personnel.
Moisture and Water
•Do not use this TV in a humid or damp
place (avoid bathrooms, the sink in the
kitchen, and near the washing machine).
•Do not expose this TV to rain or water,
as this may be dangerous.
• If any solid object or liquid falls into the cabinet,
unplug the TV and have it checked by qualied
personnel before operating it any further.
Ventilation
• The slots and openings on the TV
set are intended for ventilation and to
ensure reliable operation.
• To prevent overheating, these openings
must not be blocked or covered in anyway.
Lightning
In case of storm and lightning or when
going on holiday, disconnect the power
cord from the wall outlet.
Heat sources and Flames
•Do not expose the TV to direct sunlight or other
heat sources.
• The TV should not be placed near to open ames
and sources of intense heat such as an electric
heater.
Downloaded from www.vandenborre.be

English - 6 -
Replacement Parts
When replacement parts are required, make sure that
the service technician has used replacement parts,
which are specied by the manufacturer or have the
same specications as the original one. Unauthorized
substitutions may result in re, electric shock or other
hazards.
Servicing
Please refer all servicing to qualified
personnel. Do not remove the cover
yourself as this may result in an electric
shock.
Waste Disposal
Instructions for waste disposal:
• Packaging and packaging aids are recyclable and
should principally be recycled. Packaging materials,
such as a foil bag, must be kept away from children.
• Batteries, including those which are heavy metal-
free, should not be disposed of with household
waste. Please dispose of used batteries in an
environmentally friendly manner. Find out about the
legal regulations which apply in your area.
• Do not try to recharge batteries, there is a danger
of explosion. Replace batteries only with the same
or equivalent type.
Headphone Volume
CAUTION: Connect headphones with the
volume set low and increase if required.
Prolonged listening through headphones
at high volume settings can result in
hearing damage.
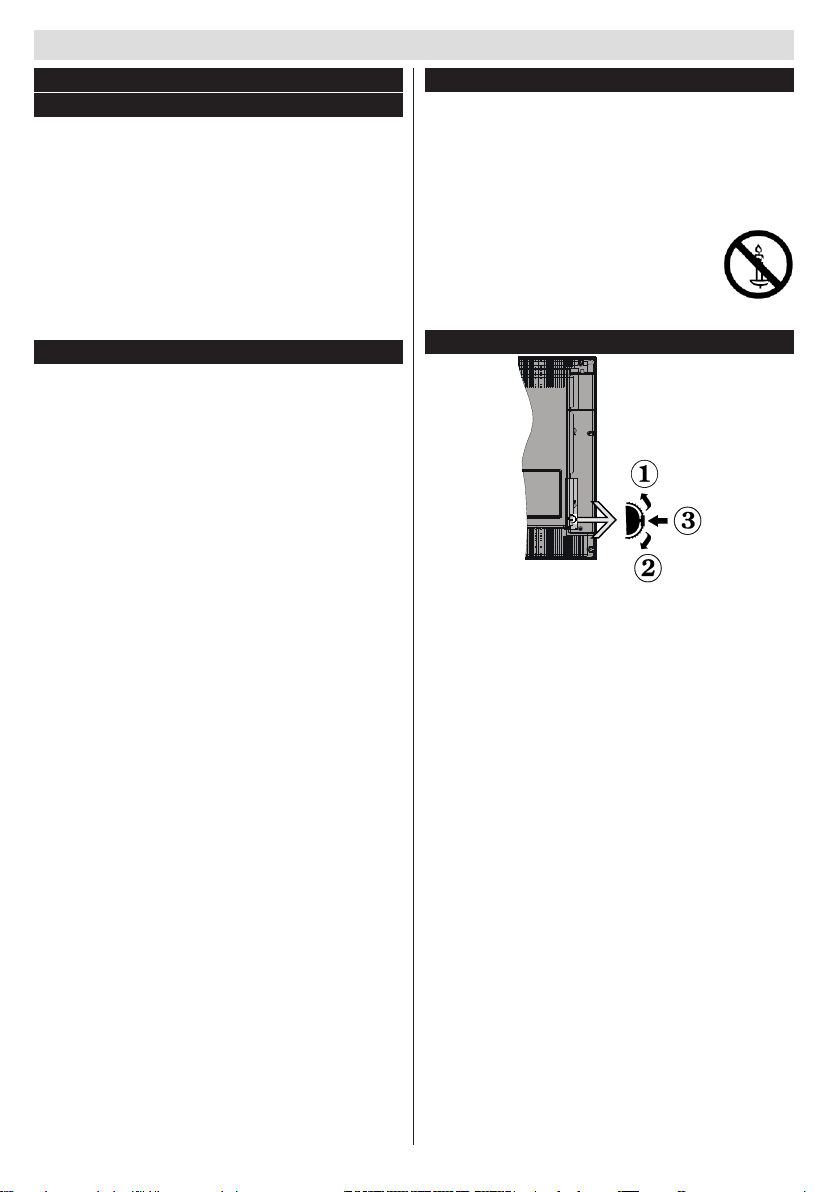
Wall Mounting (optional)
• To prevent injury, this TV must be securely attached
to the wall in accordance with the installation
instructions (if the option is available).
Screen
• Occasionally, a few non-active pixels may appear
on the screen as a xed blue, green or red point.
Please note that this does not affect the performance
of your product.
• Take care not to scratch the screen with ngernails
or other hard objects.
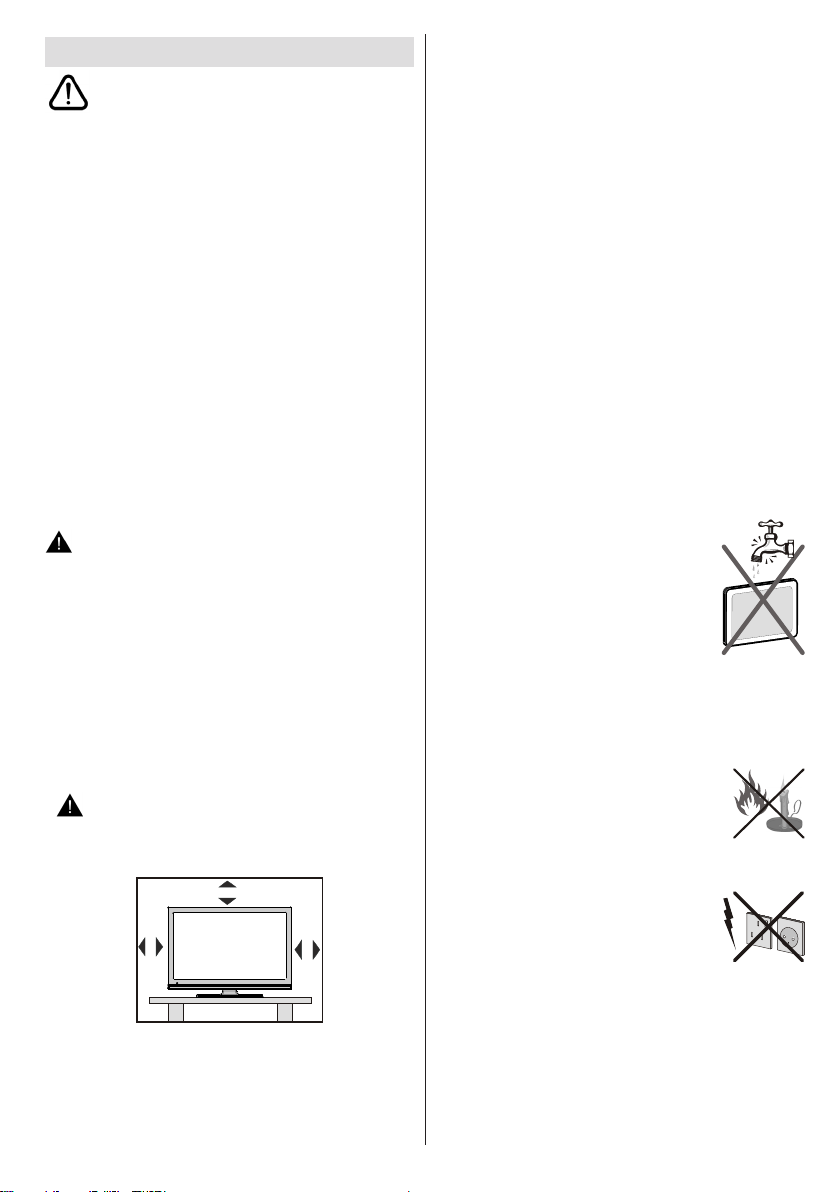
Cleaning
• Before cleaning, unplug the TV from
the wall socket.
•Do not use liquid or aerosol cleaners.
Only use a soft, dry cloth.
Connection to a Television Distribution
System (Cable TV etc.) from Tuner
Devices connected to the protective earthing of the
building installation through the mains connection or
through other apparatus with a connection to protective
earthing-and to a television distribution system using
a coaxial cable, may in some circumstances create
a re hazard.
Connection to a cable distribution system has
therefore to be provided through a device providing
electrical isolation below a certain frequency range
(galvanic isolator, see EN 60728-11).
Environmental Information
This television is designed to consume less energy to
save the environment. You not only help to save the
environment but also you can save money by reducing
electricity bills thanks to the energy efciency feature
of this TV. To reduce energy consumption, you should
take the following steps:
You can use Power Save Mode setting, located in the
Picture Settings menu. If you set Power Save Mode
as Eco, the TV will switch to energy-saving mode
and luminance level of TV set will be decreased to
optimum level. Note that some picture settings will be
unavailable to be changed when the TV is in Power
Save Mode.
If you press the right navigation button when ‘Eco’
is displayed, the message “Screen will be off in
15 seconds.” will appear on the screen. Select
PROCEED and press OK. The backlight will turn
off in a few seconds but sound will continue. This is
particularly useful for radio channels. Press any button
on the remote controller to activate the picture again.
If you set Picture Mode to Dynamic, the ‘Power save
mode’ will be disabled.
When the TV is not in use, please switch off or
disconnect the TV from the mains. This will also
reduce energy consumption.
Disconnect power when going away for longer time.
It is highly recommended to activate Power Save Mode
setting to reduce your annual power consumption. It
is also recommended to disconnect the TV from the
mains to save energy when not in use.
Please help us to save environment by following
these steps.
Repair Information
Please refer all servicing to qualied personnel.
Only qualied personnel must repair the TV. Please
contact your local dealer, where you purchased this
TV for further information.
Downloaded from www.vandenborre.be

English - 7 -
Wall mounting instructions
Wall Mounting the TV
The TV can be mounted on a wall using a 75mm x 75mm VESA mounting kit supplied separately.
Remove the base stand as shown.
Mount the TV according to the instructions supplied with the kit. Beware of electrical cables, gas and water
pipes in the wall. In case of any doubt please contact a qualied installer.
The screw thread length must not exceed 7 mm into the TV.
Contact the store where you purchased the product for information on where to purchase the VESA kit.
Removing the base stand
To remove the base stand, protect the screen and lay the TV at on its face on a stable table with the base
over the edge.
• Press the locking button and pull the stand away from the TV
Downloaded from www.vandenborre.be

Getting Started
English - 8 -
Notications&Features&Accessories
StandbyNotications
1. If the TV does not receive any input signal (e.g.
from an aerial or HDMI source) for 5 minutes, the
TV will go into standby. When you next switch-
on, the following message will be displayed:
“Standby Cause No Signal” Press OK to
continue.
2. If the TV has been left on and not been operated
for a while, the TV will go into standby. When
you next switch-on, the following message will
be displayed. “Standby Cause No Operation”
Press OK to continue.
Features
• Remote controlled colour TV.
• Fully integrated digital/cable TV (DVB-T/C)
• HDMI inputs are for connecting a device that has
a HDMI socket.
• USB input.
• OSD menu system.
• Scart socket for external devices (such as DVD
Players, PVR, video games, etc.)
• Stereo sound system.
• Teletext.
• Headphone connection.
• Automatic programming system.
• Manual tuning.
• Automatic power down after up to six hours.
• Sleep timer.
• Child lock.
• Automatic sound mute when no transmission.
• NTSC playback.
• AVL (Automatic Volume Limiting).
• PLL (Frequency Search).
• PC input.
• Plug&Play for Windows 98, ME, 2000, XP, Vista,
Windows 7.
• Game Mode (Optional).
Optional
The Word ‘Optional’ is used in these instructions to
specify when a feature, or function, is only available
on some models, or with some particular combination
of menu settings.
Accessories Included
• Remote Control
• Instruction Book
• Quick Start Guide
WARNING
To prevent re, never place
any type of candle or open
ame on the top or near the
TV set.
TV Control Switch & Operation
1. Up direction
2. Down direction
3. Programme/Volume / AV / Standby-On selection
switch
The Control button allows you to control the Volume/
Programme/ Source and Standby-On functions of
the TV.
To change volume: Increase the volume by pushing
the button up. Decrease the volume by pushing the
button down.
To change channel: Press the middle of the button,
the channel information banner will appear on screen.
Scroll through the stored channels by pushing the
button up or down.
To change source: Press the middle of the button
twice, the source list will appear on screen. Scroll
through the available sources by pushing the button
up or down.
To turn the TV off: Press the middle of the button down
and hold it down for a few seconds, the TV will turn
into standby mode.
Getting Started
Downloaded from www.vandenborre.be

English - 9 -
Inserting the Batteries into the Remote
Lift the back cover up to open the battery compartment
of the remote control. Observe the correct polarity (+/-)
when inserting batteries. Replace the cover.
+
+
--
Batteries should not be exposed to excessive heat
such as sunshine, re or the like.
Connect Power
IMPORTANT: The TV set is designed to operate on
220-240V AC, 50 Hz socket. After unpacking, allow
the TV set to reach the ambient room temperature
before you connect the set to the mains. Plug the
power cable to the mains socket outlet.
Antenna/Cable Connection
Connect the “aerial” or “cable TV” plug to the AERIAL
INPUT (ANT) socket located on the back of the TV.
Specications(TV)
TV Broadcasting PAL B/G D/K K
Receiving Channels VHF (BAND I/III) - UHF
(BAND U) - HYPERBAND
Number of Preset
Channels 1000
Channel Indicator On Screen Display
RF Aerial Input 75 Ohm (unbalanced)
Operating Voltage 220-240V AC, 50Hz.
Audio German+Nicam Stereo
Audio Output Power
(WRMS.) (10% THD) 2 x 2,5 W
Power Consumption 45W
Weight (kg) 5,15 kg
TV Dimensions WxHxD
(with stand) (mm) 530 x 376 x 135
TV Dimensions WxHxD
(without stand) (mm) 530 x 340 x 55
Operation temperature
and operation
humidity:
5ºC up to 45ºC, 85%
humidity max
Downloaded from www.vandenborre.be

Getting Started
English - 10 -
4
78
9
P+
P-
V+
V-
1
.,/@
23
56
0
OK
Q.MENU
EXIT
BACK
LANG.
SOURCE
2
/
1
/
Teletext
Press “ ”button to enter. Press again to activate mix
mode. Press once more to exit. Follow the instructions
displayed on digital teletext screen.
Digital Teletext (for UK only)
Press “”button to view digital teletext information.
Operate it with the coloured buttons, cursor buttons
and the OK button. The operation method may differ
depending on the contents of the digital teletext. Follow
the instructions displayed on the digital teletext screen.
When the “”button is pressed again, the TV returns
to television broadcast.
Remote Control
1. Standby
2. Play
3. Programme recording
4. Current language select
5. Rapid reverse
6. Coloured buttons (See footnote)
7. Numeric buttons
8. Channel list
9. Navigation buttons
10. OK /Select
11. Menu on / off
12. Back button / Index page (in TXT mode)
13. No function*
14. Media browser**
15. Electronic Programme Guide
16. Teletext
17. Volume up / down
18. Mute button
19. Programme up / down
20. Screen mode
21. Info / Reveal (in TXT mode)
22. My button 1
23. My button 2 (channel network type)
24. Exit
25. Q. Menu (quick settings)
26. Channel swap
27. Rapid advance
28. Subtitle on / off
29. Stop
30. Pause
31. AV / Source
Footnote:
Red, green, blue and yellow buttons are multi-
function; please follow on-screen prompts and
section instructions.
Using My button 1
Press MY BUTTON 1 for ve seconds when on a
desired source, channel or link, until the “MY BUTTON
IS SET” message is displayed on the screen. This
confirms that the selected MY BUTTON is now
associated with the selected function.
Using My button 2
Press MY BUTTON 2 for ve seconds when on a
desired source, channel or link, until the “MY BUTTON
IS SET” message is displayed on the screen. This
confirms that the selected MY BUTTON is now
associated with the selected function.
Downloaded from www.vandenborre.be

Getting Started
English - 11 -
NOTE: When connecting a device via the YPbPr or Side AV input, you must use the connection cables
to enable connection. See the illustrations above. |You can use YPbPr to VGA cable (not supplied) to enable
YPbPr signal via VGA input. |You cannot use VGA and YPbPr at the same time. |To enable PC audio, you will
need to use the SIDE AV CONNECTION cable’s WHITE & RED inputs. |If an external device is connected via
the SCART socket, the TV will automatically switch to AV mode.|When receiving DTV channels (Mpeg4 H.264)
or while in Media Browser mode, output will not be available via the scart socket. |When using the wall mounting
kit (optional), we recommend that you plug all your cables into the back of the TV before mounting on the wall. |
Insert or remove the CI module only when the TV is SWITCHED OFF. You should refer to the module instruction
manual for details of the settings.
Connector Type Cables Device
Scart
Connection
(back)
VGA
Connection
(back)
SIDE AV PC/YPbPr
Audio
Connection
(side) Side Audio
YPbPr or PC Connection Cable
(Not supplied)
HDMI
Connection
(back)
SPDIF
Connection
(back)
SIDE AV
Side AV
(Audio/Video)
Connection
(side) (Not supplied)
HEADPHONE Headphone
Connection
(side)
YPbPr Video
Connection
(back) PC to YPbPr Connection Cable (Not supplied)
USB
Connection
(side)
CI
Connection
(side)
CAM
module
Connections
Downloaded from www.vandenborre.be

Getting Started
English - 12 -
Switching On/Off
To Switch the TV On
Connect the power cord to the 220-240V AC, 50 Hz.
To switch on the TV from standby mode either:
Press the “ ” button, P+ / P- or a numeric button on
the remote control.
Press the side function switch until the TV comes on
from standby.
To Switch the TV Off
Press the “ “ button on the remote control or press
the side function switch until the TV switches into
standby mode.
To power down the TV completely, unplug the
power cord from the mains socket.
Note: When the TV is switched to standby mode, the standby
LED can blink to indicate that features such as Standby
Search, Over Air Download or Timer is active. The LED can
also blink when you switch on the TV from standby mode.
First Time Installation
IMPORTANT: The TV may require you to set and
conrm a PIN number. Selected PIN number cannot
be 0000. Enter a PIN number and confirm it by
entering once more. Press OK button to continue. If
the two PIN numbers match, your master PIN number
will be set.
WARNING: When you are required to enter a PIN
number for any menu operation you should use the
PIN that you have previously dened during the rst
time installation. If you have forgotten the PIN number
you have set during the rst time installation, you
should use the master PIN code, 4725.
When turned on for the first time, the language
selection screen is displayed. Select the desired
language and press OK.
The First Time Installation (FTI) screen will be
displayed next. Set your preferences using the
navigation buttons and when nished, press OK to
continue.
If Home Mode is selected, Store mode will be
disabled after the First Time Installation. Press OK
button to continue and select Yes to proceed.
You can activate Store mode option to be available
in “Other settings” menu and your TV’s features will
be illustrated on the top of the screen.
Default PIN code can change depending on the
selected country.
If you are asked to enter a PIN code for viewing a
menu option, use one of the following codes: 4725,
0000 or 1234.
Aerial Installation
If you select AERIAL option from the Search Type
screen, the television will search for digital terrestrial
TV broadcasts.
NOTE: You can press MENU button to cancel.
After all the available stations are stored, the Channel
List will be displayed on the screen. If you would like
the channels to be sorted according to the LCN (*),
please select “Yes” and then press OK.
Press MENU button to quit channel list and watch TV.
(*) LCN is the Logical Channel Number system that
organizes available broadcasts in accordance with a
recognizable channel sequence (if available).
Cable Installation
Select CABLE option and press OK button on the
remote control. To continue, you can select frequency
ranges from this screen.
Enter the frequency range manually by using the
numeric buttons and press OK to start the search.
Note: Searching duration will change depending on the
selected search step.
Media Playback via USB Input
You can connect a 2.5” and 3.5” inch (hdd with external power
supply) external hard disk drives or USB memory stick to your
TV by using the USB input of the TV.
IMPORTANT! Back up your files before making
any connections to the TV. Manufacturer will not be
responsible for any le damage or data loss. Certain
types of USB devices (e.g. MP3 Players) or USB hard
disk drives/memory sticks may not be compatible
with this TV. The TV supports FAT32 and NTFS disk
formatting but recording will not be available with
NTFS formatted disks.
While formatting a USB hard disk that has 1TB (Tera
Byte) or more file capacity, you can experience
problems with the formatting process. Do not
repeatedly quickly plug and unplug the drive. This
may cause physical damage to the USB player and
USB device itself. Do not pull out USB module while
playing a le.
First Time Installation - USB Connections
Downloaded from www.vandenborre.be

English - 13 -
Recording a Programme
IMPORTANT: When using a new USB hard disk drive,
it is recommended that you rst format the disk using
your TV’s “Format Disk” option.
Note : To record a programme, you should first
connect a USB disk to your TV while the TV is
switched off. You should then switch on the TV to
enable the recording feature.
To use the recording function, you need to connect
a USB disk or an external hard disk drive to the TV
and the connected USB disk should have at least 1
GB capacity and should have 2.0 speed compatibility.
If the connected USB device does not support 2.0
speed, an error message will be displayed.
Note: Recorded programmes are saved into the
connected USB disk. If desired, you can store/copy
recordings onto a computer; however, these les will
not be available to be played on a computer. You can
play the recordings only via your TV.
Note: Lip Sync delay may occur during the timeshifting.
Radio record is supported. The TV can record
programmes up to ten hours.
Recorded programmes are split into 4GB partitions.
If the writing speed of the connected USB disk is not
sufcient, the recording may fail and the timeshifting
feature may not be available.
It is recommended to use USB hard disk drives for
recording HD programmes.
Do not disconnect the USB/HDD during a recording.
This may harm the connected USB/HDD.
Multipartition support is available. A maximum of two
different partitions is supported. The rst partition of
the USB disk is used for PVR ready features. It also
must be formatted as the primary partition to be used
for the PVR ready features.
Some stream packets may not be recorded because
of signal problems, so sometimes video may freeze
during playback.
Record, Play, Pause, Display (for PlayListDialog)
keys can not be used when teletext is ON. If a
recording starts from timer when teletext is ON,
teletext is automatically turned off. Also teletext usage
is disabled when there is an ongoing recording or
playback.
Timeshift Recording
Press (PAUSE) button while watching a broadcast
to activate timeshifting mode. In timeshifting mode,
the programme is paused and simultaneously
recorded to the connected USB disk.
Press (PLAY) button again to resume the paused
programme from where you stopped. Press the STOP
button to stop timeshift recording and return to the
live broadcast.
Note: Timeshift cannot be used while in radio mode.
Note : You cannot use the timeshift fast reverse feature before
advancing the playback with the fast forward option.
Instant Recording
Press (RECORD) button to start recording an
event instantly while watching a programme. You can
press (RECORD) button on the remote control
again to record the next event on the EPG. In this
case, an OSD will be displayed, indicating the
programmed events for recording. Press (STOP)
button to cancel instant recording.
Note: You can not switch broadcasts or view the Media Browser
during the recording mode. While recording a programme or
during the timeshifting, a warning message appears on the
screen if your USB device speed is not sufcient.
Watching Recorded Programmes
Select the Recordings Library from the Media
Browser menu. Select a recorded item from the list (if
previously recorded). Press the OK button to view the
Play Options. Select an option then press OK button.
Note: Viewing main menu and menu items will not be available
during the playback.
Press the (STOP) button to stop a playback and
return to the Recordings Library.
Slow Forward
If you press (PAUSE) button while watching
recorded programmes, the slow forward feature will
be available. You can use button to slow forward.
Pressing button consecutively will change slow
forwarding speed.
RecordingConguration
Select the Recording Configuration item in the
Settings menu to congure the recording settings.
Format Disk: You can use Format Disk feature
for formatting the connected USB disk. Your pin is
required to use the Format Disk feature (default pin
is 0000).
Default PIN code can change depending on the
selected country.
If you are asked to enter a PIN code for viewing a
menu option, use one of the following codes: 4725,
0000 or 1234.
IMPORTANT: Note that ALL the data stored on the
USB disk will be lost and the disk format will be
converted to FAT32 if you activate this feature. If
your USB disk malfunctions, you can try formatting
the USB disk. In most cases formatting the USB disk
will restore normal operation; however, ALL the data
stored on the USB disk will be lost in such a case.
Note: If “USB is too slow” message is displayed on the
screen while starting a recording, try restarting the recording.
If you still get the same error, it is possible that your USB
disk does not meet the speed requirements. Try connecting
another USB disk.
Downloaded from www.vandenborre.be

English - 14 -
Media Browser Menu
You can play photo, music, and movie les stored on a
USB disk by connecting it to your TV. Connect a USB
disk to one of the USB inputs located on the side of
the TV. Pressing the MENU button while in the Media
Browser mode will access the Picture, Sound and
Settings menu options. Pressing the MENU button
again will exit from this screen. You can set your Media
Browser preferences by using the Settings Menu.
Loop/Shufe Mode Operation
Start playback with and
activate *
TV plays next file and loop
the list.
Start playback with OK and
activate *the same le will be played in a
loop (repeat).
Start playback with OK/ and
activate *the le will be played in a shufe.
* using the Green button
Quick Menu
Quick Settings menu allows you to access some options
quickly. This menu includes Power Save Mode, Picture
Mode, Equalizer Settings, Favourites and Sleep
Timer options. Press Q.MENU button on the remote
control to view quick menu. See the following chapters
for the details of the listed features.
Downloaded from www.vandenborre.be

English - 15 -
TV Menu Features and Functions
Picture Menu Contents
Mode You can change the picture mode to suit your preference or requirements. Picture mode
can be set to one of these options: Cinema, Game, Dynamic and Natural.
Contrast
Sets the lightness and darkness values of the screen.
Brightness Sets the brightness value for the screen.
Sharpness Sets the sharpness value for the objects displayed on the screen.
Colour Sets the colour value, adjusting the colours.
Power Save Mode Sets the Power Save Mode as Eco, Picture Off or Disabled.
(When the Mode is Dynamic, Power Save mode is automatically set as disabled.)
Backlight
(Optional)
This setting controls the backlight level. The backlight function will be inactive if the
Power Save Mode is set to Eco. The backlight cannot be activated in VGA, Media
Browser mode or while the picture mode is set to Game.
Noise Reduction If the broadcast signal is weak and the picture is noisy, use the Noise Reduction
setting to reduce the amount of noise.
Advanced Settings
Dynamic Contrast You can change the Dynamic Contrast ratio to desired value.
Colour Temp
Sets the desired colour tone.
Picture Zoom
Sets the desired picture size from picture zoom menu.
Note: Auto (Only available in Scart mode with SCART PIN8 high voltage/low voltage
switching)
Film Mode
Films are recorded at a different number of frames per second to normal television
programmes. Turn this feature on when you are watching lms to see the fast motion
scenes clearly.
Skin Tone Skin tone can be changed between -5 and 5.
Colour Shift
Adjust the desired colour tone.
RGB Gain You can congure the colour temperature values using the RGB Gain feature.
Reset
Resets the picture settings to factory default settings.(Except Game Mode)
Autoposition (in
PC mode) Automatically optimizes the display. Press OK to optimize.
H Position (in PC
mode)
This item shifts the image horizontally to the right hand side or left hand side of the
screen.
V Position (in PC
mode) This item shifts the image vertically towards the top or bottom of the screen.
Dot Clock (in PC
mode)
Dot Clock adjustments correct the interference that appear as vertical banding in dot
intensive presentations like spreadsheets or paragraphs or text in smaller fonts.
Phase (in PC
mode)
Depending on the resolution and scan frequency that you input to the TV set, you may
see a hazy or noisy picture on the screen. In such a case you can use this item to get a
clear picture by trial and error method.
While in VGA (PC) mode, some items in Picture menu will be unavailable. Instead, VGA mode settings will be added to the
Picture Settings while in PC mode.
Downloaded from www.vandenborre.be

English - 16 -
TV Menu Features and Functions
Sound Menu Contents
Volume Adjusts the volume level.
Equalizer Selects the equalizer mode. Custom settings can be made only when in user mode.
Balance This setting is used for emphasizing left or right speaker balance.
Headphone
Sets headphone volume.
Sound Mode You can select a sound mode. (if supported by the selected channel)
AVL (Automatic
Volume Limiting) Sets the sound to obtain xed output level between programmes.
Digital Out
Sets digital out audio type.
Settings Menu Contents
Conditional Access Controls conditional access modules when available.
Language
Congures language settings (may change depending on the country selected)
Preferred and current settings will be available. Current settings can be changed
only if supported by the broadcaster.
Parental
Congures parental settings. Enter correct password to change parental settings.
You can easily adjust menu lock, maturity lock (may change depending on the
country selected) and child lock in this menu. You can also set new pin number.
Timers Sets sleep timer to turn off the TV after a certain time. Sets timers for selected
programmes. (USB Record)
Recording
Conguration Displays the recording conguration menu (Usb connection required)
Date/Time Sets date and time. You can adjust the time zone if Time Setting Mode is set to Manual.
Sources
Enables or disables selected source options.
Other Settings: Displays other setting options of the TV set:
Menu Timeout Changes timeout duration for menu screens.
Scan Encrypted
Channels
When this setting is on, the search process will locate the encrypted channels as
well.
Blue Background Activates or deactivates the blue background system when the signal is weak or
absent.
Software Upgrade
To ensure that your TV always has the most up to date rmware.
Application Version Displays application version.
Hard of Hearing Enables any special feature sent from the broadcaster.
Audio Description
Audio description refers to an additional narration track for blind and visually
impaired viewers of visual media, including television and movies. You can use this
feature, only if the broadcaster supports that additional narration track.
Note: Audio description sound feature cannot be available in recording or time shifting mode.
Auto TV Off
You can set the timeout value of auto off feature. When the timeout value is
reached and the TV has not been operated for a specied amount of time, the TV
will go into standby mode.
Standby Search
(Optional)
If the Standby Search is set to On, when the TV is in standby mode, available
broadcasts will be searched. If the TV locates any new or missing broadcasts,
a menu screen will be displayed, asking you whether or not to execute these
changes. Channel list will be updated and changed after this process.
Downloaded from www.vandenborre.be

English - 17 -
TV Menu Features and Functions
Store Mode (Optional) If you are displaying the TV in a store, you can activate this mode. Whilst Store
Mode is enabled, some items in the TV menu may not be available.
Power Up Mode This setting congures the power up mode preference.
Install and Retune Menu Contents
Automatic Channel
Scan (Retune)
(If available)
Displays automatic tuning options. Digital Aerial: Searches and stores aerial
DVB stations. Digital Cable: Searches and stores cable DVB stations. Analogue:
Searches and stores analogue stations. Digital Aerial & Analogue: Searches and
stores aerial DVB and analogue stations. Digital Cable & Analogue: Searches and
stores cable DVB and analogue stations.
Manual Channel Scan This feature can be used for direct broadcast entry.
Network Channel
Scan Searches for the linked channels in the broadcast system.
Analogue Fine Tune You can use this setting for ne tuning analogue channels. This feature is not
available if no analogue channels are stored.
First Time Installation Deletes all stored channels and settings, resets TV to factory settings.
General TV Operation
Using the Channel List
The TV sorts all stored stations in the Channel List. You can edit this channel list, set favourites or set active
stations to be listed by using the Channel List options.
ConguringParentalSettings
To prohibit viewing of certain programmes, channels and menus can be locked by using the parental control system.
To display parental lock menu options, the PIN number should be entered. The factory default PIN number is
0000. After coding the correct PIN number, parental settings menu will be displayed.
Menu Lock: Menu lock setting enables or disables the menu access.
Maturity Lock: When set, this option gets the maturity information from the broadcast and if this maturity level
is disabled, disables access to the broadcast.
Child Lock: When Child Lock is set, the TV can only be controlled by the remote control. In this case the
control panel buttons will not work.
Set PIN: Denes a new PIN number.
Default PIN code can change depending on the selected country.
If you are asked to enter a PIN code for viewing a menu option, use one of the following codes: 4725, 0000
or 1234.
Electronic Programme Guide (EPG)
Some, but not all channels send information about the current and next programmes. Press the “” button
to view the EPG menu. Press Yellow button for “Timeline Schedule” (optional) and the following options will
be available.
Red button (Prev Day): Displays the programmes of the previous day.
Green button (Next day): Displays the programmes of the next day.
Yellow button (Zoom): Expands programme information.
Blue button (Filter): Views ltering options.
Downloaded from www.vandenborre.be

English - 18 -
SUBTITLE: Press “”button to view Select Genre
menu. Using this feature, you can search the
programme guide database in accordance with the
genre. Info available in the programme guide will
be searched and results matching your criteria will
be listed.
“i”: Displays detailed information on the programme
selected.
Numeric buttons (Jump): Jumps to the preferred
channel directly via numeric buttons.
OK: Displays programme options.
(Search): Displays “Guide Search” menu.
(Swap) : Shows the current programme.
(RECORD): The TV will start to record the
selected programme. You can press again to stop
the recording.
P+P- : More event info
IMPORTANT: Connect a USB disk to your TV while the TV
is switched off. You should then switch on the TV to enable
the recording feature.
Note: Switching to a different broadcast or source is not
available during a recording.
Programme Options
In EPG menu, press the OK button to enter the Event
Options menu.
Select Channel
In EPG menu, using this option, you can switch to the
selected channel.
Record / Delete Record Timer
After you have selected a programme in the EPG
menu, press the OK button. Select the Record
option and press the OK button. After this operation,
a recording will be scheduled for the selected
programme.
To cancel an already set recording, highlight that
programme and press the OK button and select
the option Delete Rec. Timer. The recording will be
cancelled.
Set Timer / Delete Timer
After you have selected a programme in the EPG
menu, press the OK button. Select the Set Timer on
Event option and press the OK button. You can set
a timer for future programmes. To cancel an already
set timer, highlight that programme and press the OK
button. Then select “Delete Timer” option. The timer
will be cancelled.
Note: It is not possible to record two channels at the same
time.
Software Upgrade
Your TV is capable of automatically finding and
updating new software upgrades via the Aerial/Cable
signal.
Software upgrade search via user interface
Simply navigate on your main menu. Choose Settings
and select Other Settings menu. In Other Settings
menu navigate on to the Software Upgrade item and
press OK button to check for a new software upgrade.
3 AM search and upgrade mode
While the TV is connected to an aerial signal, if
Automatic scanning in the Upgrade Options menu
is enabled, the TV wakes up at 03:00 and searches
broadcast channels for new software upgrades. If
new software is found and downloaded successfully,
the next time the TV powers up , it will have the new
software version.
Note: If the TV fails to turn on after the upgrade unplug the
TV for 2 minutes and plug in again.
Troubleshooting & Tips
Tv will not turn on
Make sure the power cord is plugged in securely to
wall outlet. The batteries in the remote control may
be exhausted. Press the Power button on the TV.
Poor picture
• Have you selected the correct TV system?
• Low signal level can cause picture distortion. Please
check antenna access.
• Check if you have entered the correct channel
frequency if you have done manual tuning.
• The picture quality may degrade when two devices
are connected to the TV at the same time. In such
a case, disconnect one of the devices.
No picture
• No Picture means that your TV is not receiving a
transmission. Have you pressed the correct button
on the remote control? Try once more. Also make
sure the correct input source has been selected.
• Is the antenna connected properly?
• Is the antenna cable damaged?
• Are suitable plugs used to connect the antenna?
• If you are in doubt, consult your dealer.
No sound
• Has the TV been set to mute? To cancel mute, press
the “ ” button, or increase the volume level.
• Sound is coming from only one speaker. Is the
balance set to one extreme? See Sound Menu
section.
Downloaded from www.vandenborre.be
Table of contents
Languages:
Other JVC TV DVD Combo manuals

JVC
JVC LT-32C345B User manual

JVC
JVC LT-32D210 User manual

JVC
JVC AV-20FD22 User manual

JVC
JVC LT-32D210 User manual

JVC
JVC LT19D200 - 19" LCD TV User manual

JVC
JVC LT-32DM22 User manual

JVC
JVC KW-V250BT User manual

JVC
JVC LED TV/DVD Combo User manual

JVC
JVC KW-V140BT User manual

JVC
JVC LT-32C675 User manual