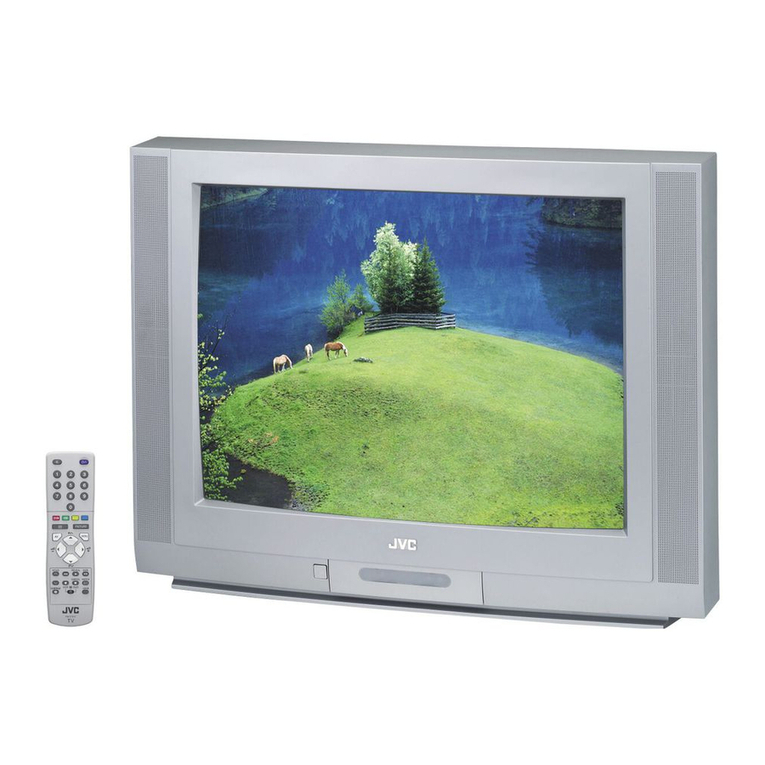
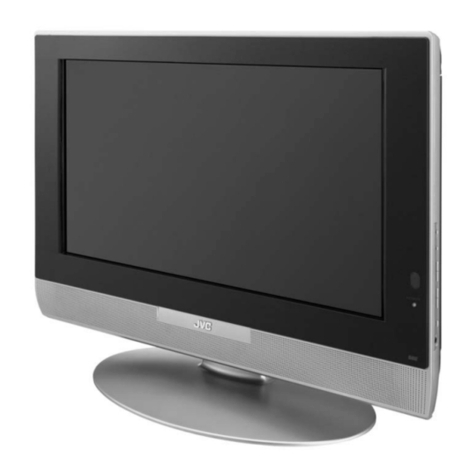
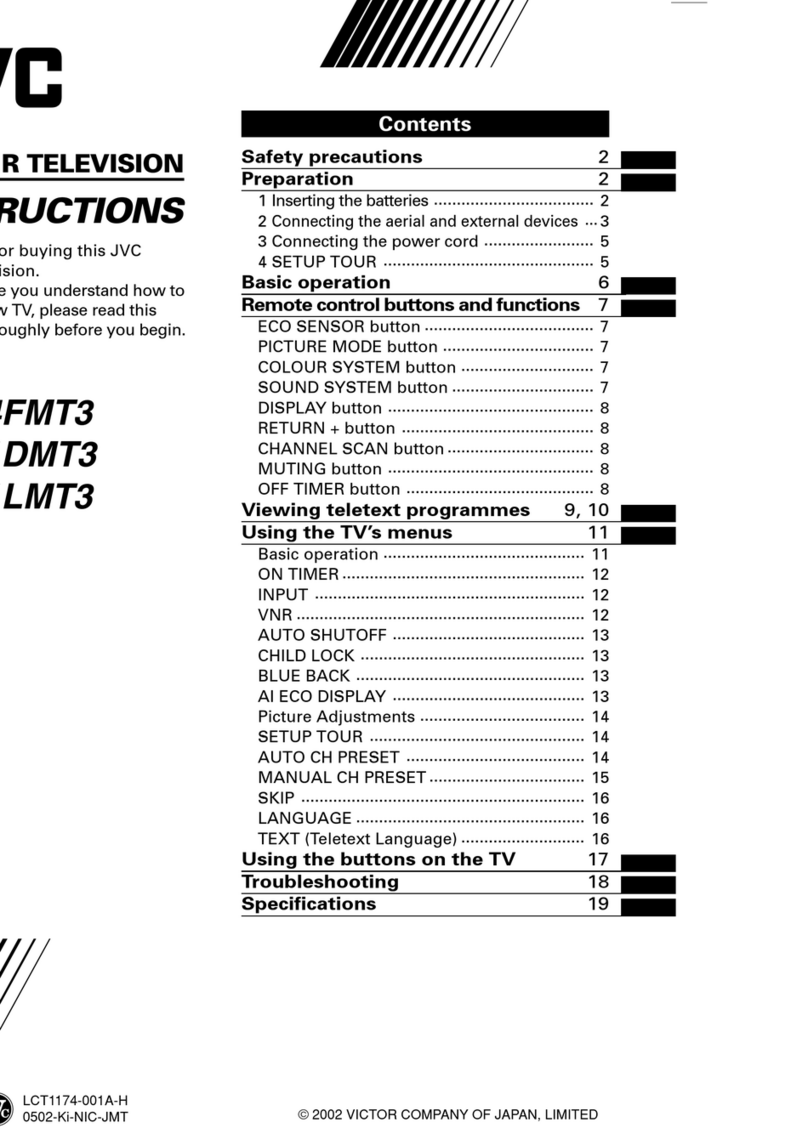
JVC HD-ILA TV HD-65S80DDU User manual

ENGLISH
DEUTSCH
FRANÇAIS
NEDERLANDS
CASTELLANO
ITALIANO
PORTUGUÊS
LCT2237-001A-A
INSTRUCTIONS
BEDIENUNGSANLEITUNG
MANUEL D’INSTRUCTIONS
GEBRUIKSAANWIJZING
MANUAL DE INSTRUCCIONES
ISTRUZIONI
INSTRUÇÕES
HD-65S80DDU
HD-58S80DDU
HD-ILA TV
LCT2237-001A-U_Cover.indd 2LCT2237-001A-U_Cover.indd 2 2/27/2007 2:38:55 PM2/27/2007 2:38:55 PM

i
ENGLISH
Dear Customer,
This apparatus is in conformance with the valid European directives and standards regarding
electromagnetic compatibility and electrical safety.
European representative of Victor Company of Japan, Limited is:
JVC Technology Centre Europe GmbH
Postfach 10 05 52
61145 Friedberg
Germany
DEUTSCH
Sehr geehrter Kunde, sehr geehrte Kundin,
dieses Gerät stimmt mit den gültigen europäischen Richtlinien und Normen bezüglich
elektromagnetischer Verträglichkeit und elektrischer Sicherheit überein.
Die europäische Vertretung für die Victor Company of Japan, Limited ist:
JVC Technology Centre Europe GmbH
Postfach 10 05 52
61145 Friedberg
Deutschland
FRANÇAIS
Cher(e) client(e),
Cet appareil est conforme aux directives et normes européennes en vigueur concernant la
compatibilité électromagnétique et à la sécurité électrique.
Représentant européen de la société Victor Company of Japan, Limited:
JVC Technology Centre Europe GmbH
Postfach 10 05 52
61145 Friedberg
Allemagne
NEDERLANDS
Geachte klant,
Dit apparaat voldoet aan de geldende Europese normen en richtlijnen inzake elektromagnetische
compatibiliteit en elektrische veiligheid.
De Europese vertegenwoordiger van Victor Company of Japan, Limited is:
JVC Technology Centre Europe GmbH
Postfach 10 05 52
61145 Friedberg
Duitsland
CASTELLANO
Apreciado cliente,
Este aparato cumple con las normativas y normas europeas respecto a la seguridad eléctrica y a
la compatibilidad electromagnética.
El representante europeo de Victor Company of Japan, Limited es:
JVC Technology Centre Europe GmbH
Postfach 10 05 52
61145 Friedberg
Alemania
ITALIANO
Gentile Cliente,
Questa apparecchiatura è conforme alle direttive e alle norme europee relative alla compatibilità
elettromagnetica e alla sicurezza elettrica.
Il rappresentante europeo della Victor Company of Japan, Limited è:
JVC Technology Centre Europe GmbH
Postfach 10 05 52
61145 Friedberg
Germania
PORTUGUÊS
Caro Cliente,
Este aparelho encontra-se em conformidade com as directivas Europeias válidas e padrões
referentes à compatibilidade magnética e segurança eléctrica.
O representante europeu da Victor Company of Japan, Limited é:
JVC Technology Centre Europe GmbH
Postfach 10 05 52
61145 Friedberg
Alemanha
Intro_WEEE.indd iIntro_WEEE.indd i 2/27/2007 2:39:36 PM2/27/2007 2:39:36 PM

ii
Information for Users on Disposal of Old Equipment ENGLISH
Attention:
This symbol is only
valid in the European
Union.
[European Union]
This symbol indicates that the electrical and electronic equipment should not be
disposed as general household waste at its end-of-life. Instead, the product should
be handed over to the applicable collection point for the recycling of electrical and
electronic equipment for proper treatment, recovery and recycling in accordance with
your national legislation.
By disposing of this product correctly, you will help to conserve natural resources
and will help prevent potential negative effects on the environment and human health
which could otherwise be caused by inappropriate waste handling of this product. For
more information about collection point and recycling of this product, please contact
your local municipal office, your household waste disposal service or the shop where
you purchased the product.
Penalties may be applicable for incorrect disposal of this waste, in accordance with
national legislation.
(Business users)
If you wish to dispose of this product, please visit our web page www.jvc-europe.com
to obtain information about the take-back of the product.
[Other Countries outside the European Union]
If you wish to dispose of this product, please do so in accordance with applicable
national legislation or other rules in your country for the treatment of old electrical and
electronic equipment.
Informations relatives à l’élimination des appareils usagés,
à l’intention des utilisateurs FRANÇAIS
Attention:
Ce symbole n’est
reconnu que dans
l’Union européenne.
[Union européenne]
Lorsque ce symbole figure sur un appareil électrique et électronique, cela signifie
qu’il ne doit pas être éliminé en tant que déchet ménager à la fin de son cycle de
vie. Le produit doit être porté au point de pré-collecte approprié au recyclage des
appareils électriques et électroniques pour y subir un traitement, une récupération et
un recyclage, conformément à la législation nationale.
En éliminant correctement ce produit, vous contriburez à la conservation des
ressources naturelles et à la prévention des éventuels effets négatifs sur
l’environnement et la santé humaine, pouvant être dus à la manipulation inappropriée
des déchets de ce produit. Pour plus d’informations sur le point de pré-collecte et le
recyclage de ce produit, contactez votre mairie, le service d’évacuation des ordures
ménagères ou le magasin dans lequel vous avez acheté le produit.
Des amendes peuvent être infligées en cas d’élimination incorrecte de ce produit,
conformément à la législation nationale.
(Utilisateurs professionnels)
Si vous souhaitez éliminer ce produit, visitez notre page Web www.jvc-europe.com
afin d’obtenir des informations sur sa récupération.
[Pays ne faisant pas partie de l’Union européenne]
Si vous souhaitez éliminer ce produit, faites-le conformément à la législation
nationale ou autres règles en vigueur dans votre pays pour le traitement des
appareils électriques et électroniques usagés.
Benutzerinformationen zur Entsorgung alter Geräte DEUTSCH
Hinweis:
Dieses Symbol ist nur
in der Europäischen
Union gültig.
[Europäische Union]
Dieses Symbol zeigt an, dass das elektrische bzw. elektronische Gerät nicht als
normaler Haushaltsabfall entsorgt werden soll. Stattdessen sollte das Produkt
zur fachgerechten Entsorgung, Weiterverwendung und Wiederverwertung in
Übereinstimmung mit der Landesgesetzgebung einer entsprechenden Sammelstelle
für das Recycling elektrischer und elektronischer Geräte zugeführt werden.
Die korrekte Entsorgung dieses Produkts dient dem Umweltschutz und verhindert
mögliche Schäden für die Umwelt und die menschliche Gesundheit, welche durch
unsachgemäße Behandlung des Produkts auftreten können. Weitere Informationen
zu Sammelstellen und dem Recycling dieses Produkts erhalten Sie bei Ihrer
Gemeindeverwaltung, Ihrem örtlichen Entsorgungsunternehmen oder in dem
Geschäft, in dem Sie das Produkt gekauft haben.
Für die nicht fachgerechte Entsorgung dieses Abfalls können gemäß der
Landesgesetzgebung Strafen ausgesprochen werden.
(Geschäftskunden)
Wenn Sie dieses Produkt entsorgen möchten, besuchen Sie bitte unsere Webseite
www.jvc-europe.com, um Informationen zur Rücknahme des Produkts zu erhalten.
[Andere Länder außerhalb der Europäischen Union]
Wenn Sie dieses Produkt entsorgen möchten, halten Sie sich dabei bitte an
die entsprechenden Landesgesetze und andere Regelungen in Ihrem Land zur
Behandlung elektrischer und elektronischer Geräte.
Informatie voor gebruikers over het weggooien van oude
apparatuur NEDERLANDS
Let op:
Dit symbool is alleen
geldig in de Europese
Unie.
[Europese Unie]
Deze markering geeft aan dat de elektrische en elektronische apparatuur bij het
einde van de gebruiksduur niet bij het huishoudelijk afval mag worden gegooid. Het
product moet in plaats daarvan worden ingeleverd bij het relevante inzamelingspunt
voor hergebruik van elektrische en elektronische apparatuur, voor juiste verwerking,
terugwinning en hergebruik in overeenstemming met uw nationale wetgeving.
Door dit product naar het inzamelingspunt te brengen, werkt u mee aan het behoud
van natuurlijke hulpbronnen en met het voorkomen van potentiële negatieve effecten
op het milieu en de volksgezondheid, die anders veroorzaakt zouden kunnen
worden door onjuiste afvalverwerking van dit product. Neem voor meer informatie
over inzamelingspunten en hergebruik van dit product contact op met de gemeente
in uw woonplaats, het afvalverwerkingsbedrijf of de winkel waar u het product hebt
aangeschaft.
Er kunnen boetes gelden voor een onjuiste verwijdering van dit afval, in
overeenstemming met de nationale wetgeving.
(Zakelijke gebruikers)
Bezoek als u dit product wilt weggooien onze website www.jvc-europe.com voor
informatie over het terugnemen van het product.
[Landen buiten de Europese Unie]
Wanneer u dit product wilt verwijderen, houdt u dan aan de geldende nationale
wetgeving of andere regels in uw land voor de verwerking van oude elektrische en
elektronische apparatuur.
Intro_WEEE.indd iiIntro_WEEE.indd ii 2/27/2007 2:40:16 PM2/27/2007 2:40:16 PM
iii
Información para los usuarios sobre la eliminación de
equipos usados CASTELLANO
Atención:
Este símbolo sólo es
válido en la Unión
Europea.
[Unión Europea]
Este símbolo indica que los aparatos eléctricos y electrónicos no deben desecharse
junto con la basura doméstica al final de su vida útil. El producto deberá llevarse al
punto de recogida correspondiente para el reciclaje y el tratamiento adecuado de
equipos eléctricos y electrónicos de conformidad con la legislación nacional.
Si desecha el producto correctamente, estará contribuyendo a conservar los recursos
naturales y a prevenir los posibles efectos negativos en el medio ambiente y en la
salud de las personas que podría causar el tratamiento inadecuado del producto
desechado. Para obtener más información sobre el punto de recogida y el reciclaje
de este producto, póngase en contacto con su oficina municipal, su servicio de
recogida de basura doméstica o la tienda en la que haya adquirido el producto.
De acuerdo con la legislación nacional, podrían aplicarse multas por la eliminación
incorrecta de estos desechos.
(Empresas)
Si desea desechar este producto, visite nuestra página Web www.jvc-europe.com
para obtener información acerca de la retirada del producto.
[Otros países no pertenecientes a la Unión Europea]
Si desea desechar este producto, hágalo de conformidad con la legislación nacional
vigente u otras normativas de su país para el tratamiento de equipos eléctricos y
electrónicos usados.
Informazioni per gli utenti sullo smaltimento delle
apparecchiature obsolete ITALIANO
Attenzione:
Questo simbolo è
valido solo nell’Unione
Europea.
[Unione Europea]
Questo simbolo indica che l’apparecchiatura elettrica ed elettronica a cui è relativo
non deve essere smaltita tra i rifiuti domestici generici alla fine della sua vita utile. Il
prodotto, invece, va consegnato a un punto di raccolta appropriato per il riciclaggio di
apparecchiature elettriche ed elettroniche, per il trattamento, il recupero e il riciclaggio
corretti, in conformità alle proprie normative nazionali.
Mediante lo smaltimento corretto di questo prodotto, si contribuirà a preservare le
risorse naturali e a prevenire potenziali effetti negativi sull’ambiente e sulla salute
umana che potrebbero essere provocati, altrimenti, da uno smaltimento inappropriato
del prodotto. Per ulteriori informazioni sul punto di raccolta e il riciclaggio di questo
prodotto, contattare la sede comunale locale, il servizio di smaltimento rifiuti domestici
o il negozio in cui si è acquistato il prodotto.
L’utente è responsabile del conferimento dell’apparecchio a fina vita alle appropriate
strutture di raccolta, pena le sanzioni previste dalla vigente legislazione sui rifiuti.
(Per gli utenti aziendali)
Qualora si desideri smaltire questo prodotto, visitare la nostra pagina web www.jvc-
europe.com per ottenere informazioni sul ritiro del prodotto.
[Per altre nazioni al di fuori dell’Unione Europea]
Qualora si desideri smaltire questo prodotto, effettuare lo smaltimento in conformità
alla normativa nazionale applicabile o alle altre leggi della propria nazione relative al
trattamento delle apparecchiature elettriche ed elettroniche obsolete.
Informações para os Utilizadores sobre a Eliminação de
Equipamento Antigo PORTUGUÊS
Atenção:
Este símbolo apenas
é válido na União
Europeia.
[União Europeia]
Este símbolo indica que o equipamento eléctrico e electrónico não deve ser
eliminado como um resíduo doméstico geral, no fim da respectiva vida útil. Pelo
contrário, o produto deve ser entregue num ponto de recolha apropriado, para
efectuar a reciclagem de equipamento eléctrico e electrónico e aplicar o tratamento,
recuperação e reciclagem adequados, de acordo com a respectiva legislação
nacional.
Ao eliminar este produto da forma correcta, ajudará a conservar recursos naturais
e ajudará a evitar potenciais efeitos negativos no ambiente e saúde humana, que
poderiam ser causados pelo tratamento residual inadequado deste produto. Para
mais informações sobre o ponto de recolha e reciclagem deste produto, contacte a
respectiva entidade local, o serviço de eliminação de resíduos ou a loja onde adquiriu
o produto.
Caso estes resíduos não sejam correctamente eliminados, poderão ser aplicadas
penalizações, em conformidade com a respectiva legislação nacional.
(utilizadores profissionais)
Se pretender eliminar este produto, visite a nossa página da web em www.jvc-
europe.com para obter informações sobre a devolução do produto.
[Outros países fora da União Europeia]
Se pretender eliminar este produto, faça-o de acordo com a legislação nacional
aplicável ou outras regras no seu país para o tratamento de equipamento eléctrico e
electrónico velho.
Intro_WEEE.indd iiiIntro_WEEE.indd iii 2/27/2007 2:40:17 PM2/27/2007 2:40:17 PM

ENGLISH
1
IMPORTANT! PREPARE USE
SETTINGS
TROUBLE?
Expanding the world of beautiful images
Enjoy rich multi-media with JVC
VHF/UHF
Digital camera
Video camera
Game console
Audio components
VCR DVD player
DVD recorder
Personal
Computer
First things first!
Warning············································ 2
Precautions ······································ 3
Replacing the lamp ·························· 4
Getting started
Names of all the parts ······················ 6
Basic connections ···························· 7
Installation ········································ 8
Initial settings ··································· 9
Editing channels····························· 10
· Registering channels, etc.
Connecting external devices·········· 11
Let’s try it out
Enjoying your new TV! ··················· 12
· TV / Teletext / Video / etc.
Watching TV··································· 13
Viewing teletext ······························ 14
Watching videos / DVDs ················ 15
Try the advanced features
Useful functions······························ 16
· Take a snapshot
· View and search in multi-picture mode
· “Sleep timer” / “Child lock”
Operate JVC recorders and other
devices ··········································· 17
Just the way you like it
Customising your TV······················ 18
Advanced picture adjustment········· 19
·
Watch a more natural picture / Reduce noise
· Set the aspect ratio, etc.
When you have trouble
Troubleshooting ····························· 20
Technical information ····················· 22
“CH/CC” List··································· 23
Specifications ································· 23
Contents
LCT2237-001A-A.indb 1LCT2237-001A-A.indb 1 4/5/2007 11:20:51 AM4/5/2007 11:20:51 AM

ENGLISH
2
Hold the TV so as not to scratch the
screen!
Do not touch the screen when carrying the TV.
Do not hold by the
screen frame when
moving the TV!
This could cause the screen frame to
detach, causing the TV to fall. Hold the TV
as illustrated on the right.
Ensure ample room to avoid
overheating!
“Care when setting” (P. 8)
Never dismantle the rear panel!
It may cause an electric shock.
Never block the ventilation holes!
It may cause overheating or a fire.
Handle screen with care!
Use a soft, dry cloth when cleaning.
Never try to repair
the TV yourself!
If the problem cannot be solved
in “Troubleshooting” (P. 20),
unplug the power cord and
contact your retailer.
If the TV is damaged
or behaving strangely,
stop using it at once!
Unplug the power cord and contact
your retailer.
Warning
For more details on installation, usage and safety Consult your retailer
Never expose to rain or
moisture!
To prevent fire or electric
shock, never allow liquids to
enter the unit.
Please follow all the guidelines below
Never listen with
headphones at high
volume!
It may damage your hearing.
Never place anything on
the TV!
Placing liquids, naked flames,
cloths, paper, etc. on the TV may
cause a fire.
Never insert objects into
the cabinet openings!
It may cause a fatal electric
shock. Take care when
children are near.
Unplug the power cord
when going out!
The power buttons on the
remote control and the
TV unit cannot completely
turn off the TV. (Make
appropriate arrangements
for bedridden people.)
Make sure that the cooling
process (P. 3) has completed before
unplugging the power cord.
Make enough room for
inserting and removing
the power plug!
Place the TV as
close to the outlet as
possible!
The main power supply for this TV is
controlled by inserting or removing the
power plug.
Never cut or damage
the power cord!
If the power plug is
not the right shape, or
the power cord is not
long enough, use an
appropriate plug adapter
or extension cable.
(Consult your retailer.)
Follow this manual
regarding setup!
Connect only to a 220-240V, 50Hz AC
outlet.
On disposal of the
TV!
Follow the instruction in
“Information for Users
on Disposal of Old
Equipment” (P.ii to iii).
Do not allow the TV to fall
or drop down!
Follow the instructions below to avoid serious
injuries.
1 Remove the pedestals on the TV only in the
cases allowed in “Installation” (P. 8).
2 Do not lean or rest your elbows on the TV.
3 Do not allow children to hang from the TV.
LCT2237-001A-A.indb 2LCT2237-001A-A.indb 2 4/5/2007 11:21:56 AM4/5/2007 11:21:56 AM

ENGLISH
3
IMPORTANT! PREPARE USE
SETTINGS
TROUBLE?
Precautions
This TV uses a lamp to project the picture on the screen. Misoperations may shorten the lamp life orThis TV uses a lamp to project the picture on the screen. Misoperations may shorten the lamp life or
cause malfunction of the lamp.cause malfunction of the lamp.
Before operating the TV, read all the instructions below.Before operating the TV, read all the instructions below.
Please follow all the guidelines below
The lamp is a
consumable item
When the lamp has blown, replace the
lamp; otherwise, the picture cannot be
displayed. For details “Replacing the
lamp” (P. 4, 5)
Follow the instructions
on “Replacing the
lamp” when replacing
the lamp (P. 4, 5)
Handle the lamp carefully and correctly;
otherwise, it may cause a burn or an
electric shock. In addition, it may shorten
lamp life or cause malfunction of the TV.
When the power is
turned on, the warming
up commences
Immediately after the TV is turned on, the
picture is displayed only dimly. It takes about
one minute for the lamp to warm up. Once
the lamp has warmed up, you can enjoy the
pictures at their normal brightness.
During this warming-up period, the LAMP
indicator blinks every 2 seconds.
While the LAMP
indicator is blinking, the
TV cannot be turned off
Condensation on the
lamp and screen
When the heater is turned on or the TV is
moved from a cold place to a warm place,
droplets of water may form on the lamp and
screen. This is called condensation. If the
TV is used while this condensation is still
present, the picture may seem distorted, and
the inside of the screen may become dirty.
In this case, wait until the condensation has
gone before using the TV.
Do not turn the power on
and off repeatedly in a
short amount of time
It subjects the TV and the lamp to stress and
may lead to malfunctions and shorten the
lamp life.
This TV has a fan to cool the lamp
When the lamp is hotter, the fan works harder to cool the
lamp. In such a case, the noise of the fan becomes louder but
it is not malfunction.
Keep children or pets away from
the air ducts
Long exposure to the warm air from the ducts may cause a
minor burn.
When the power is
turned off, the cooling
down is performed
When the TV is turned off, the picture on
the screen disappears gradually. Once the
screen is dark, cooling down is performed for
about 1 minute.
During this cooling-down period, the LAMP
indicator blinks every 2 seconds.
Do not unplug the TV while the lamp is
cooling down. This may cause the internal
circuits and the lamp to overheat and shorten
the lamp life.
While the LAMP
indicator is blinking, the
TV cannot be turned on
You can turn on the TV within 15 seconds
after turning off.
Do not keep the TV on
for more than 24 hours
consecutively
The lamp life may be shortened.
Do not project a still
picture for a long time
Because of the ILA characteristics, still
picture may stick on the screen. (The picture
will disappear over time.)
Never open the lamp
cover except when
replacing the lamp
Exposing the lamp is dangerous because...
The lamp becomes extremely hot while in
use, it may cause a burn.
Touching metallic portion of the lamp may
cause electric shock.
Ultraviolet rays are emitted from the lamp.
Never replace the lamp
immediately after use
Since the lamp becomes extremely hot while
in use, it may cause a burn.
Never touch the lamp
glass
Dirt or oil from the finger may cause the lamp
to break.
For more details on installation, usage and safety Consult your retailer
LCT2237-001A-A.indb 3LCT2237-001A-A.indb 3 4/5/2007 11:21:57 AM4/5/2007 11:21:57 AM

ENGLISH
4
Preparation
Replacing the lamp
Replacement Lamp Kit:
PK-CL120E
High-pressure 120 W mercury lamp
Possible causes of shortened lamp life
Turning on/off the TV repeatedly in a short amount of time.
Keeping the TV turned on for more than 24 hours consecutively.
Use only the specified
Replacement Lamp Kit!
This lamp is for use with JVC modelThis lamp is for use with JVC model
televisions. Using the lamp with atelevisions. Using the lamp with a
different television or other product coulddifferent television or other product could
cause a malfunction and/or damage tocause a malfunction and/or damage to
the television or lamp.the television or lamp.
Lamp needs to be replaced.
Please refer to the manual
for replacement instructions.
After replacing the lamp,
please reset the timer in the
TV menu.
Press OK, if you do not want
to see this message again.
To make the message disappear
Turn the TV off Wait until the
LAMP indicator
stops blinking
Unplug the TV
Wait for at least 1 hour until the lamp
has fully cooled
The TV uses a lamp to project the picture onto the screen. When the lamp has blown or when theThe TV uses a lamp to project the picture onto the screen. When the lamp has blown or when the
picture becomes dark, replace the lamp.picture becomes dark, replace the lamp.
Before replacing the lamp, read all the instructions carefully.Before replacing the lamp, read all the instructions carefully.
If you feel unsure about replacing the lamp yourself Consult your retailer
Prepare the Replacement Lamp Kit
For purchasing the Replacement Lamp Kit,
consult your retailer.
When the lamp is near to its end...
The following message appears on the screen.
After the usage time of the lamp has reached 6500 hours, this message appears every time youAfter the usage time of the lamp has reached 6500 hours, this message appears every time you
turn on the TV.turn on the TV.
Remove the lamp cover
Remove the lamp unit
Philips head type screw
driver (cross-head type)
1
If you feel any
warmth near the
lamp, DO NOT
TOUCH IT!
Never attempt to replace the lamp with the TV
plugged in!
Attempting to replace the lamp with the TV plugged in could lead to a severeAttempting to replace the lamp with the TV plugged in could lead to a severe
electrical shock.electrical shock.
Never replace the lamp before it has fully cooled!
The lamp becomes extremely hot while in use, which may cause a burn. AfterThe lamp becomes extremely hot while in use, which may cause a burn. After
turning off the TV, wait for at least 1 hour.turning off the TV, wait for at least 1 hour.
1
3
2
!
!
!
2Remove the lamp unit
Do not drop
the lamp!
Loosen Remove
!
Before replacing the lamp, read all the instructions.
LCT2237-001A-A.indb 4LCT2237-001A-A.indb 4 4/5/2007 11:21:57 AM4/5/2007 11:21:57 AM

ENGLISH
5
IMPORTANT! PREPARE USE
SETTINGS
TROUBLE?
Set Up
Auto Program
Decorder(EXT-2)
Component Auto Select
HDMI Setting
On
Off
EXT Setting
Edit/Manual
Language
Lamp Timer Reset
PC Position
Set Up
Select “Set Up”
Display the menu bar
Select “Lamp Timer Reset”
Finish
Install the NEW lamp unit
Reinstall the lamp cover
Tighten the screw.
The lamp timer is
reset successfully.
Press OK to reset
the lamp timer.
1
2
3
4
Finally, the lamp has been replaced!
1
3
Turn the TV on
Plug in the TV
Reset the lamp timer
If the lamp unit is not installed securely (e.g. flat
in the lamp housing area), the TV won’t turn on.
In this case, reinstall the lamp unit.
Never dispose of the lamp with normal trash!
The lamp contains a small amount of mercury.The lamp contains a small amount of mercury. Follow the instruction in
“Information for Users on Disposal of Old Equipment” (P.ii to iii).
If the power lamp and LAMP indicator blink rapidly after turning on the TV
“Lamp” (P. 21)
Insert
Make sure the lamp sits securely
and flat in the housing area.
Re-tighten
Unpack
Do not drop the lamp!
Do not shock the glass
surface of the lamp!
It may shatter the lamp causing injuries.It may shatter the lamp causing injuries.
Never touch the
glass surface of the
lamp!
Oils deposited from the finger mayOils deposited from the finger may
cause a difference in temperaturecause a difference in temperature
when the lamp heats up to itswhen the lamp heats up to its
operating temperature, causingoperating temperature, causing
the lamp to break.the lamp to break.
2
4
5
6
7
1select
2next
1select
2next
LCT2237-001A-A.indb 5LCT2237-001A-A.indb 5 4/5/2007 11:21:58 AM4/5/2007 11:21:58 AM

6
ENGLISH
Names of all the parts
Turn on “3D Sound” (P. 13)
Take snapshots of the
screen (P. 16)
Watch in multi-picture
mode (P. 16)
Hold the current page
Bookmark pages
Reveal hidden pages
Enlarge the text
Switch briefly between
teletext and TV
To index page
Return to TV
Power On / Off
Change channel / page
Watch video, etc. (P. 15)
Select and confirm settings in
menus
To previous channel
Change channel / page
Switch between “TV / VCR /
DVR / DVD / HC” (P. 17)
When watching TV / Video
Change the aspect ratio (P. 13)
Mute
When viewing teletext (P. 14)
Use two “AAA/R03” dry cell batteries.
Insert the batteries from the -end, making sure the +and -
polarities are correct.
Channel information (P. 13)
Display on-screen menu (P. 18)
Remove the terminal cover About the LAMP indicator
Remote control
(RM-C1900S)
“AAA/R03” Batteries
Check accessories
For confirming
the TV works
Colour buttons
Volume
To teletext (P. 14)
Connecting terminals on the back of the TV
“Connecting External devices” (P. 11)
Press to remove.
The LAMP indicator blinks as follows.
When turning on the TV, the LAMP indicator blinks for
about 1 minute every 2 seconds.
The lamp is warming up. During this period, the TV
cannot be turned off.
After turning off the TV, the LAMP indicator blinks in
orange for about 1 minute every 2 seconds.
Cooling is performed. During the cooling period, the
TV cannot be operated.
If the LAMP indicator blinks rapidly
“Lamp” (P. 21)
When watching TV (P. 13)
When operating a JVC VCR
or DVD (P. 17)
Change channel / page
Volume
Display on-screen
menu / set
Switch between
TV / AV devices
Audio input
terminals
PC IN terminal
Video input terminal
(S-Video, composite)
To headphones
(P. 11)
WARNING:
Batteries shall not be exposed to excessive
heat such as direct sunshine, fire or the like.
Power On / Off
Remote
control sensor
Power lamp
ON: Lit (White)
OFF: Unlit
To change the brightness of the
power lamp
“Illumination” (P. 18)
LAMP
indicator
Insert the batteries
LCT2237-001A-A.indb 6LCT2237-001A-A.indb 6 4/5/2007 11:21:59 AM4/5/2007 11:21:59 AM

ENGLISH
7
IMPORTANT! PREPARE USE
SETTINGS
TROUBLE?
EXT- 2 (S )
EXT- 1 (S )
Connect the aerial
Basic connections
VCR / DVD recorder
After all the connections have been made, insert the plug into an AC outlet.
Connect “T-V LINK” compatible recording device to “EXT-2”.
“T-V LINK” “What is “T-V LINK”?” (P. 9)
After all the connections have been made, insert the plug into an AC outlet.
AERIAL
EXT-1
Connect a VCR / DVD recorder
AERIAL
Please read the user manuals of each device carefully before setup.
It is necessary to connect an aerial to watch TV.
Connect with other devices “Connecting external devices” (P. 11)
EXT-2
LCT2237-001A-A.indb 7LCT2237-001A-A.indb 7 4/5/2007 11:21:59 AM4/5/2007 11:21:59 AM

8
ENGLISH
Installation
200mm
150mm
When installing the TV, install it according to the instructions below:
Install the TV on a level and stable surface.
Never expose to rain or moisture.
To prevent fire or electric shock, never allow liquids to enter the unit.
Make enough room for inserting and removing the power plug!
Place the TV as close to the outlet as possible!
The main power supply for this TV is controlled by inserting or removing the power plug.
To avoid overheating, ensure that the unit has ample room.
Connect the power cord only to a 220-240 V, 50 Hz AC outlet
Care when setting
200mm150mm
Warning
On the front and rear of the TV, pedestals are attached to prevent
the TV from falling over. Do not remove the pedestals for normal use;
otherwise, the TV may fall over and it could cause serious injuries.
Remove the pedestal(s) only in the following cases;
When attaching the TV to the wall
When the instructions supplied for JVC optional goods require you to remove the pedestal(s)
Front pedestal
Rear pedestal
When installing the TV right on the wall
Remove the rear pedestal and install the TV as in the procedure
below.
CAUTION:
Remove the rear pedestal on a level and stable surface.
Use the optional JVC TV stand
Refer to the instructions supplied for the JVC TV stand for installation.
When installing the TV on a TV stand
1Remove the cover. 2Remove the screws with a
Phillips type screwdriver.
3Slide out the rear pedestal
gently.
4Attach the TV to the wall.
Be sure to install the TV by two persons.
LCT2237-001A-A.indb 8LCT2237-001A-A.indb 8 4/5/2007 11:21:59 AM4/5/2007 11:21:59 AM

ENGLISH
9
IMPORTANT! PREPARE USE
SETTINGS
TROUBLE?
CH
>>
0%
Auto Program
02
> Language
>
United Kingdom
Country
Deutschland
France
Italia
Nederland
Belgium
Ireland
Switzerland
Danmark
Sverige
Norge
Suomi
Auto Program
01
AV
PR
02
03
04
05
06
07
08
09
ID CH/CC
BBC1 CH
02
CH 03
CH 04
CH 05
CH 06
CC 01
CC
CC 03
CC 04
02
> Edit
------
Download TV Recording Device
T-V LINK
Initial settings
Set the menu language, installation location and automatically register the TV channels.
These channels can be edited later in “Editing channels” (P. 10).
(Channel data on the TV can be sent to a connected
recording device that is compatible with “T-V LINK”.)
To the previous screen
If the “JVC” logo does not appear or
if you wish to make changes later
“Language” and “Auto Program” (P. 18)
Exit
BACK
TV
What is “T-V LINK”?
Connecting the TV to a “T-V LINK”
compatible device allows :
Channels on the TV to be instantly
registered on the device.
The “DIRECT REC” function to be
used.
“Technical information” (P. 22)
“T-V LINK” variations
“T-V LINK” (JVC) “Q-LINK” (Panasonic)
“Megalogic” (Grundig) “Data Logic” (Metz)
“SMARTLINK” (Sony) “Easy Link” (Philips)
Begin
Select a language
Select the country of installation
Automatically register channels
Check what was registered
select
1select
For the next page “ ” (Yellow)
Shown only when powering on for the first time.
The power on the unit can also be used.
Edit channels
⁄in “Editing channels”
(P. 10)
When not using “T-V LINK”
When using “T-V LINK”
If “Feature Not Available”
appears :
Is the “T-V LINK” compatible
device connected to “EXT-2”?
Is the device turned on?
If “ACI Start” appears, select and start settings.
(This will set up cable television channels.)
“What is “ACI” (Automatic Channel Installation)?”
(P. 22)
Finish
1
3
2
4
6
2set
Confirm
5
The remote control
doesn’t work
Confirm the mode is set to
“TV”.
When turning on the TV, it takes about
1 minute to project the picture to its full
brightness.
When turning off the TV, it takes about 5
seconds to make the screen dark. After
that, cooling is performed for about 1
minute.
“About the LAMP indicator” (P. 6)
LCT2237-001A-A.indb 9LCT2237-001A-A.indb 9 4/5/2007 11:22:00 AM4/5/2007 11:22:00 AM

10
ENGLISH
Download TV Recording Device
T-V LINK
Set Up
Set Up
Auto Program
Component Auto Select
EXT Setting
PC Position
Off
Off
HDMI Setting
Edit/Manual
Decoder(EXT-2)
Language
Lamp Timer Reset
01
AV
PR
02
03
04
05
06
07
08
09
ID CH/CC
BBC1 CH
02
CH 03
CH 04
CH 05
CH 06
CC 01
CC
CC 03
CC 04
02
> Edit
------
01
AV
PR
02
03
04
05
06
07
08
09
ID CH/CC
BBC1 CH
CH
CH
CH
CH
CC
CC
CC
CC
>Edit
04
03
05
06
01
03
04
02
02
------
> Edit
01
AV
PR
02
03
04
05
06
07
08
09
ID CH/CC
BBC1 CH
CH
CH
CH
CH
CC
CC
CC
03
04
05
06
01
03
04
02
CC
02
------
01
AV
PR
02
03
04
05
06
07
08
09
ID CH/CC
BBC1 CH
CH
CH
CH
CH
CC
CC
CC
CC
A
> Edit
03
04
05
06
01
03
04
02
02
------
> Edit
01
AV
PR
02
03
04
05
06
07
08
09
ID CH/CC
BBC1 CH
CH
CH
CH
MBC
M6
ID List
MCM
MDR
MOVIE
MTV
MTV3
CH
CC
CC
CC
CC
M
03
04
05
06
01
03
04
02
02
------
01
AV
PR
02
03
04
05
06
07
08
09
ID CH/CC
BBC1 CH
CH
CH
CH
CH
CC
CC
CC
CC
> Edit
03
04
05
06
01
03
04
02
02
JVC
------
01
AV
PR
02
03
04
05
06
07
08
09
ID CH/CC
BBC1 CH
CH
CH
CH
CH
CC
CC
CC
CC
>Edit
03
04
05
06
01
02
02
03
------
01
AV
PR
02
03
04
05
06
07
08
09
ID CH/CC
BBC1 CH
CH
CH
CH
CH
CC
CC
CC
CC
>Edit
03
04
05
06
01
02
02
03
12
------
>
01
AV
PR
02
03
04
05
06
07
ID CH/CC
CH
CH
CH
CH
CC
CC
CC
Edit
03
04
05
06
01
03
02
------
>
11
10
PR
12
13
14
15
16
17
ID CH/CC
CH 02 (B/G)
CC 05
Manual
ID
> Manual
11
10
PR
12
13
14
15
16
17
CH/CC
CH 03 (B/G)
CC 05
ID
>
11
10
12
13
14
15
16
17
CH/CC
CH 08
CC 05
PR
Edit
ID
> Manual
11
10
PR
12
13
14
15
16
17
CH/CC
CH 08 (D/K)
CC 05
Display the menu bar
Select “Set Up”
Select “Edit / Manual”
Confirm settings
Finish
When coming from “Initial settings” (P. 9), skip to ⁄.
Select a row
Edit
Move a
channel’s
position
MOVE
Editing channels
Edit the channels registered with “Auto Program” in “Initial settings” (P. 9).
To the previous
screen
Exit
1
2
3
4
5
6
7
If “Feature Not Available”
appears :
Is the “T-V LINK”
compatible device
connected to “EXT-2”?
Is the device turned on?
“T-V LINK” (P. 9)
When not using
“T-V LINK”
When using
“T-V LINK”
Edit a
channel
name
ID
Insert a
channel
INSERT
Delete a
channel
DELETE
Register
a new
channel
MANUAL
select
move out move in
select
enter
the first
character
next
column
From high
frequencies
or
/
select a system
When selecting a preset name from the “ID List”
When manually naming a channel
Receives the
broadcast
signal.
If necessary, press 3to change the
broadcasting system.
“Receivable broadcast systems”
(P. 22)
Auto-search begins,
and the nearest
frequency is imported.
Repeat the previous
steps until the
desired channel is
displayed
From low
frequencies
“CH/CC” List (P. 23)
1Begin 2Select a destination 3Finish
1Begin 2Enter a channel name
2Select a “CH / CC” 3Enter a number
2
Beginning channel search
1Begin
3Set
Adjust
Picture fine tuning
Sound fine tuning
1select
2next
1select
2next
1select
2set
1enter
2
next
column
3set
1Begin
1Delete
(red)
(red)
select
LCT2237-001A-A.indb 10LCT2237-001A-A.indb 10 4/5/2007 11:22:01 AM4/5/2007 11:22:01 AM

ENGLISH
11
IMPORTANT! PREPARE USE
SETTINGS
TROUBLE?
EXT- 2
EXT- 3 AU DI O
(ANALOGUE)
VIDEO/ AUDIO
(DIGITAL)
2
LICENSED UND ER
THE FOLLOWING
U.S.PATENTS
6,183,091 6,419,362
1
AU DI O O UT
(S
L
R
)
EXT- 1 (S )
L
Y
P
B/CB
PR/CR
R
L
R
AERIAL
Connecting external devices
You can connect many different devices to the rear panel of the TV.
Please read the user manuals of each device before setting up.
(Connecting cables are not supplied for this TV.)
DVD player
(HDMI compatible)
Amplifier
(L) (R)
VCR / DVD recorder
(“T-V LINK” compatible)
AUDIO
OUT
Satellite broadcast / Digital
broadcast tuner
Game consoles
Check for PC compatibility
“Technical information” (P. 22)
Use a cable with ferrite cores and no longer than
of 3 m to avoid electromagnetic disturbance.
DVD player
PC
Video camera
EXT-1
EXT-2
(T-V LINK)
EXT-3
: signal direction
Connect “DVI” devices
(P. 22)
“T-V LINK” (P. 9)
Headphones
Headphone
EXT-1 Watching videos
Output Input
· Composite signal
· Sound L / R
·
Composite signal /
RGB / S-VIDEO
· Sound L / R
Use S-VIDEO “S-IN” (P. 15)
EXT-2 Dubbing videos
Using “T-V LINK”
Output Input
· Composite signal
· Sound L / R
·
Composite signal /
RGB / S-VIDEO
· Sound L / R
· T-V LINK
Use S-VIDEO “S-IN” (P. 15)
Select dubbing sources
“DUBBING” (P. 15)
Connect a decoder
“Decoder (EXT-2)” (P. 18)
EXT-3 Watching DVDs
Output Input
Component signal
(P. 23)
· Sound L / R
“Component Auto Select”
(P. 18)
EXT-4 Watching videos
(front panel)
Output Input
· Composite signal
/ S-VIDEO
· Sound L / R·
Use S-VIDEO “S-IN” (P. 15)
EXT-5
EXT-6
Connecting
HDMI devices
Output Input
· HDMI signal
(P. 23)
· Sound L / R
(EXT-5 only)
“HDMI Setting” (P. 18)
EXT-6 input does not support
analogue sound.
Use HDMI CEC
“What is “HDMI CEC”?” (P. 22)
AUDIO OUT
Listening to the TV through external
speakers
Output
· Sound L / R
VCR / DVD / other devices
EXT-6
(HDMI)
EXT-5
(HDMI)
Satellite broadcast /
Digital broadcast tuner
(HDMI compatible)
Audio signals received
from EXT-5 and EXT-6
cannot be sent to the
“AUDIO OUT” terminal.
Analogue Audio input (EXT-5)
“HDMI setting (P. 18)
Right side panel
Front panel
EXT-4
LCT2237-001A-A.indb 11LCT2237-001A-A.indb 11 4/5/2007 11:22:03 AM4/5/2007 11:22:03 AM

ENGLISH
12
Picture
TV mode TV and Text mode
Text mode
Watching TV
View channel information
Change the aspect ratio
Enjoy “3D Sound”
Register your favourite channels
13
PAGE
Viewing teletext
Bookmark your favourite page
Hold the current page
Reveal hidden pages
Enlarge the text
To the index page
Switch briefly from teletext to TV
14
PAGE
Enjoying your new TV!
Watching videos/
DVDs
PC position adjustment
Watch high quality video (S-VIDEO)
Name connected devices
Dub videos
15
PAGE
18
PAGE
Customising
your TV
Adjust the picture
Adjust the sound
Basic settings
(channel settings, etc.)
Advanced settings
(sleep-timer / child lock, etc.)
LCT2237-001A-A.indb 12LCT2237-001A-A.indb 12 4/5/2007 11:22:04 AM4/5/2007 11:22:04 AM

ENGLISH
13
IMPORTANT! PREPARE USE
SETTINGS
TROUBLE?
BBC
1
12 : 00
16 : 9 Zoom
High
3D Sound
Set 1 - 4?
Programmed!
Favourite 1 - 4?
1BBC
1
AV
02
03
04
05
06
07
08
09
PR List
01 BBC1
------
Auto
Panoramic
14:9 Zoom
16:9 Zoom
16:9 Zoom Subtitle
Full
Zoom
Regular
>
1PR 01
2PR 03
4PR 07
3PR 05
Favourite Setting
>
1PR 01
2PR 03
4PR 07
3
Favourite Setting
Select a channel
up
down
Power on
2The white power lamp on
the TV lights
INFORMATION
Channel
information and
clock
Watching TV
Mute
Note
To completely turn off the TV, unplug
the power plug.
Press again to turn the screen off
and put the TV into standby mode.
Move up or down a channel
Switch between mono / stereo /
bilingual broadcasting
“Stereo / t·u” ( P. 18)
To the previous channel
Volume
ZOOM
Change the aspect
ratio
3D SOUND
Enjoy ambient
sound
FAVOURITE CHANNEL
Register a
channel to a button
PR List Channel information
Time (in case of having viewed teletext)
(No indication)
High : For stereo sound
Low : For stereo sound (when the sound distorts in “High” mode)
Mono : For mono sound (emulates a stereo-like sound)
Off : Turns off “3D Sound”
Press the number
to register it on
Hold down
for 3 seconds
Disappears after
a few seconds
Press the
number you
registered
select delete
select
Select a page
Channels
registered in
“Initial settings” will
appear here.
Select and view a channel
Using “Auto”
“Auto in “Zoom”” (P. 22)
When 1080p (1125p) / 1080i (1125i)
/ 720p (750p) signal is received,
the signal will be displayed as
“Full”. The zoom menu will not be
displayed.
In PC mode, “Regular” or “Full” can
be selected.
Move the picture with
1or 4while this bar is
displayed
Customisations
(P. 18) to the picture
of a favourite
channel get saved
as well.
Recall the favourite channel
Check your favourite channels Press “ ” and confirm that the channels
you have registered have a dbeside them
Delete a favourite channel
“MENU” “Features” “Favourite Setting”
While the channel
is displayed
Basic operations using the front buttons
Power on
Change the channel
Volume
1
2
1select
2view
1select
2set
3
Set to “TV”
1
E.g.
1 :
15 :
When turning on the TV, it takes about 1 minute to project the picture to its full brightness.
When turning off the TV, it takes about 5 seconds to make the screen dark. After that, cooling is
performed for about 1 minute.
“About the LAMP indicator” (P. 6)
LCT2237-001A-A.indb 13LCT2237-001A-A.indb 13 4/5/2007 11:22:05 AM4/5/2007 11:22:05 AM

ENGLISH
14
Enter a teletext page
up
down
When watching TV
TV
TEXT
Display your
favourites list
1
(RED) (GREEN) (YELLOW) (BLUE)
Select a coloured button to save your page to
Enter the number of the page to save
Save
2
3
4
TEXT
This TV can display TV broadcasts and teletext on the same channel in two windows.
to sub-page
Viewing teletext
Move up or down a page
Bookmark
your favourite
page
LIST MODE
Recall your favourite page Press the coloured button as in step 2
2
View sub-pages
.....
Hold the current page
Display hidden information
(answers to quizzes, etc.)
Returns to page “100” or a previously
designated page
Double the size of the
displayed text
Leave the current page open, while you
switch to watch TV
Hold the
current page
HOLD
Switch briefly
from teletext
to TV
CANCEL
Release Press “ ” again
Useful when running a page search.
Reveal
hidden pages
REVEAL
To the
index page
INDEX
Enlarge
the text
SIZE
1
(red)
LCT2237-001A-A.indb 14LCT2237-001A-A.indb 14 4/5/2007 11:22:06 AM4/5/2007 11:22:06 AM

ENGLISH
15
IMPORTANT! PREPARE USE
SETTINGS
TROUBLE?
>
EXT-1 Dubbing
EXT-2
EXT-3
EXT-4
EXT Setting
TV
>
EXT-1 Dubbing
EXT-2
EXT-3
EXT Setting
TV
EXT-4
>
EXT-1 Dubbing
EXT-2
EXT-3
EXT-4
EXT Setting
TV
ID List
VHS
S-VHS
DVC
CAM
SAT
STB
GAME
DVD
DVR
>
EXT-1 Dubbing
EXT-2
EXT-3
EXT Setting
TV
EXT-4
ID List
VHS
S-VHS
DVC
CAM
SAT
STB
GAME
DVD
DVR
>
EXT-1 Dubbing
EXT-2
EXT-3
EXT Setting
TV
EXT-4
>
EXT-1
DVD
Dubbing
EXT-2
EXT-3
EXT Setting
TV
EXT-4
>
EXT-1 Dubbing
EXT-2
EXT-3
EXT Setting
TV
EXT-4
>
EXT-1 Dubbing
EXT-2
EXT-3
EXT Setting
TV
EXT-4
Set Up
Set Up
Auto Program
Component Auto Select
PC Position
Off
Off
HDMI Setting
Edit/Manual
Decoder(EXT-2)
EXT Setting
Language
Lamp Timer Reset
1
2
3
4
5
6
7
EXT-1
EXT-2
EXT-3
EXT-4
HDMI1
HDMI2
PC
EXT Mode
0AV
Set Up
Auto Program
Component Auto Select Off
Off
HDMI Setting
Edit/Manual
Decoder(EXT-2)
EXT Setting
Language
PC Position
Lamp Timer Reset
PC Position
Set Up
Operate the connected device and play a video
Select the video source
1
Watching videos / DVDs
To TV
2
Display the menu bar
select
Select “Set Up” Select “EXT Setting”
1
Switch
to S-VIDEO
input
S-IN
2
The device
selection
display will
change from
“E1” to “S1”.
Cancel this mode Press “ ” in 2again
Set up
dubbing on
“EXT-2”
DUBBING
Edit names
of connected
devices
ID LIST
1
Select the “EXT” connected to S-VIDEO
2Set the S-VIDEO mode
1Select an “EXT” to assign a name to 2Show the name list
1Select the arrow 2Select the dubbing source
3Select a name from the list
select
select
2set
1select
select
y
1select
2next
1select
2next
Clear the name Select the blank space in 3
Advanced functions
Operate JVC recorders and other devices (P. 17)
E.g. For EXT-1
2watch
1select
Select the video source using the front
buttons
1
Select the video
source
2
3
Display the menu bar
Select “Set Up” Select “PC Position”
1select
2next
PC position adjustment
1select
2next
1adjust
2set
Shown only when “PC” is selected.
Reset position
1
2
3
LCT2237-001A-A.indb 15LCT2237-001A-A.indb 15 4/5/2007 11:22:08 AM4/5/2007 11:22:08 AM

ENGLISH
16
>
Off
Sleep Timer
Sleep Timer
Child Lock
Appearance
Blue Back
Favourite Setting
Type A
On
Illumination Bright
Features
Sleep Timer
Child Lock
Appearance
Blue Back
Favourite Setting
Type A
On
Illumination Bright
Features
>
Set ID No.
ID
Child Lock
01
AV
PR
02
03
04
05
06
07
08
09
CH/CC
BBC1 CH
CH
CH
CH
CH
CC
CC
CC
CC
------
02
03
04
05
06
01
03
04
02
>>
Current programme
Still picture
Selecting “ ” returns to normal viewing mode
Not available in the following cases:
– when in PC mode
– when 1080p (1125p) signal is received
(For wide aspect ratio signals)
Only the selected frame
has a moving picture.
Main Sub Main
Sub
Main
Select the number
of screens
Take
snapshots of
the screen
FREEZE
Watch in dual-picture mode
E.g. You can watch TV and video at the same time.
Move up or down a page
Not available for EXT-5 or EXT-6 input.
Useful functions
Cancel
Press “ ” again, or change the channel
Not available in the following cases:
– when the SUB-PICTURE is displayed
– when in PC mode
– when 1080p (1125p) signal is received
You cannot save or export the snapshot.
Select a channel in 12-screen mode
All registered channels are displayed as still images.
Switch between the
sound sources
Change the channel
(Main)
(Sub)
Watch in
multi-picture
mode
MULTI-PICTURE
2set
1select
1select a
channel
2watch
2
3
2
3
4
Set a time
for the TV to
turn itself off
SLEEP TIMER
Cancel Set the time to “0” in step 3
Remaining time
You can confirm the remaining time at step 3, after repeating this process.
Stop children
from
watching
specific
channels
CHILD LOCK
select “Child Lock”
1select a
channel
View a locked channel
Use the numerical buttons to enter the channel number. When nappears, press
“” and enter your “ID No.”.(If you forget your “ID No.”, check it in step 3.)
2next
1select “Sleep Timer”
2set
1select a time in minutes
3set
1enter an “ID No.”
(a secret number of your choice)
2to the next column
3set2lock / release
Display “Features” menu
“Customising your TV” (P. 18)
1
Display “Features” menu
“Customising your TV” (P. 18)
1
LCT2237-001A-A.indb 16LCT2237-001A-A.indb 16 4/5/2007 11:22:09 AM4/5/2007 11:22:09 AM
This manual suits for next models
1
Table of contents
Other JVC TV manuals

JVC
JVC AV14BJ8EES User manual

JVC
JVC I'Art Pro AV-56WP94 Manual

JVC
JVC AV-14FT Use and maintenance manual

JVC
JVC 0403-NIC-JMT User manual

JVC
JVC AV-25MS16/H User manual

JVC
JVC Operator's manual User manual

JVC
JVC LT-50VA3035 User manual

JVC
JVC AV-21W33 User manual

JVC
JVC InteriArt LT-30E45SU User manual

JVC
JVC LT-37DF7BC User manual