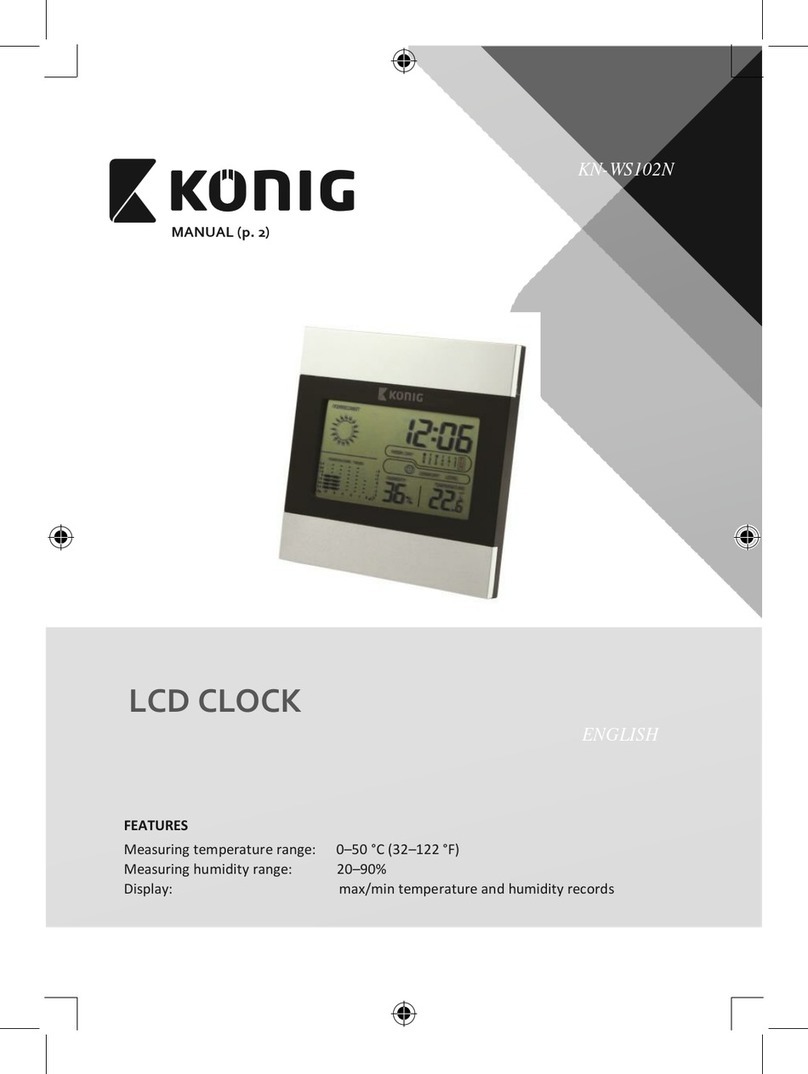
König KN-WS101N User manual

KN-WS101N
MANUAL (p. 2)
ANLEITUNG (S. 5)
MODE D’EMPLOI (p. 8)
GEBRUIKSAANWIJZING (p. 11)
MANUALE (p. 14)
MANUAL DE USO (p. 17)
MANUAL (p. 20)
HASZNÁLATI ÚTMUTATÓ (o. 23)
KÄYTTÖOHJE (s. 26)
BRUKSANVISNING (s. 29)
NÁVOD K POUŽITÍ (s. 32)
MANUAL DE UTILIZARE (p. 35)
ΕΓΧΕΙΡΙΔΙΟ XPHΣHΣ (σελ. 38)
BRUGERVEJLEDNING (s. 41)
VEILEDNING (s. 43)
ИНСТРУКЦИЯ (45 стр.)
KILAVUZ (s. 48)
KASUTUSJUHEND (lk. 50)
NÁVOD (s. 53)
ROKASGRĀMATA (lpp. 55)
NAUDOJIMO VADOVAS (58 p.)
PRIRUČNIK (str. 61)
РЪКОВОДСТВО (p. 64)
INSTRUKCJA OBSŁUGI (str. 67)
PRIROČNIK (str. 70)
LCD Clock

ENGLISH
2
FEATURES
Measuring temperature range: 0–50 °C (32 °F–122 °F)
Measuring humidity range: 20%–90%
Max/min temperature and humidity records
Calendar: 2001–2099
Power: 2x UM-4/AAA (not included)
OPERATION
Press MODE once to view the calendar.
Press MODE again to view the alarm time.
SETTING THE TIME
Press MODE and hold for 3 seconds to enter the time setting mode.
The hour digits will blink and can be set by pressing UP or DOWN for setting
hour.
Press MODE again:
The minute digits will blink and can be set by pressing UP or DOWN for setting
minute.
SETTING THE ALARM
Press MODE to view the alarm time.
Press MODE and hold for 3 seconds to enter the alarm setting mode.
The hour digits will blink and can be set by pressing UP or DOWN for setting
the hour.
Press MODE again:
The minute digits will blink and can be set by pressing UP or DOWN for setting
the minute.
SETTING THE CALENDAR
Press MODE to view the calendar.
Press MODE and hold for 3 seconds to enter the calendar setting mode.
The year digits will blink and can be set by pressing UP or DOWN for setting the
year.
Press MODE again:
The month digits will blink and can be set by pressing UP or DOWN for setting
the month.
Press MODE again:
The day digits will blink and can be set by pressing UP or DOWN for setting
the day.

ENGLISH
3
ALARM ON/OFF
Press UP to turn the alarm on/o.
MAX/MIN
Press MAX/MIN to view the MAXIMUM temperature and humidity record.
Press MAX/MIN again to view the MINIMUM temperature and humidity record.
12/24 FORMAT HOUR
Press UP for 3 seconds to switch to 12 or 24 hour format time display.
TEMPERATURE DISPLAY FORMAT
Press DOWN to switch the display between °C/°F. Press SNOOZE/LIGHT in alarm
and press SNZ/LIGHT for snooze mode. Press SNZ/LIGHT to turn backlight
on/o.

ENGLISH
4
CAUTION
RISK OF ELECTRIC SHOCK
DO NOT OPEN
Safety precautions:
To reduce risk of electric shock, this product should ONLY be opened by an authorized
technician when service is required.
Disconnect the product from mains and other equipment if a problem should occur.
Do not expose the product to water or moisture.
Maintenance:
Clean only with a dry cloth.
Do not use cleaning solvents or abrasives.
Warranty:
Any changes and/or modications to the product will void the warranty. We cannot accept any liability for damage
caused by incorrect use of this product.
General:
Designs and specications are subject to change without notice. All logos, brands and product names are trademarks or
registered trademarks of their respective holders and are hereby recognized as such.
Keep this manual and packaging for future reference.
Attention:
This product is marked with this symbol. It means that used electrical and electronic products should not be
mixed with general household waste. There is a separate collections system for these products.
This product has been manufactured and supplied in compliance with all relevant regulations and directives, valid for all
member states of the European Union. It also complies to all applicable specications and regulations in the country of
sales.
Formal documentation is available upon request. This includes, but is not limited to: Declaration of Conformity (and
product identity), Material Safety Data Sheet, product test report.
Please contact our customer service desk for support:
via website: http://www.nedis.com/en-us/contact/contact-form.htm
via telephone: +31 (0)73-5993965 (during oce hours)
NEDIS B.V., De Tweeling 28, 5215 MC ’s-Hertogenbosch, THE NETHERLANDS

DEUTSCH
5
FUNKTIONEN
Temperaturmessbereich: 0–50 °C (32 °F–122 °F)
Messbereich Luftfeuchtigkeit: 20%–90%
Aufzeichnung der Maximal-/Minimalwerte für Temperatur und Luftfeuchtigkeit
Datum: 2001–2099
Stromversorgung: 2x AAA/UM-4, (nicht im Lieferumfang)
BETRIEB
Datum: Taste MODE einmal drücken.
Weckzeit: Taste MODE noch einmal drücken.
UHRZEIT EINSTELLEN
Halten Sie die Taste MODE 3 Sekunden lang gedrückt, um in den Modus für die
Einstellung der Uhrzeit zu wechseln.
Die Stundenanzeige beginnt zu blinken und kann mit den Tasten UP und
DOWN eingestellt werden.
Taste MODE ein weiteres Mal drücken:
Die Minutenanzeige beginnt zu blinken und kann mit den Tasten UP und
DOWN eingestellt werden.
WECKZEIT EINSTELLEN
Drücken von MODE wechselt zur Anzeige der Weckzeit.
Halten Sie die Taste MODE 3 Sekunden lang gedrückt, um in den Modus für die
Einstellung der Weckzeit zu wechseln.
Die Stundenanzeige beginnt zu blinken und kann mit den Tasten UP und
DOWN eingestellt werden.
Taste MODE ein weiteres Mal drücken:
Die Minutenanzeige beginnt zu blinken und kann mit den Tasten UP und
DOWN eingestellt werden.
DATUM EINSTELLEN
Drücken von MODE wechselt zur Anzeige des Datums.
Halten Sie die Taste MODE 3 Sekunden lang gedrückt, um in den Modus für die
Einstellung des Datums zu wechseln.
Die Zier für die Anzeige des Jahrs beginnt zu blinken und kann mit den Tasten
UP und DOWN eingestellt werden.
Taste MODE ein weiteres Mal drücken:
Die Monatsanzeige beginnt zu blinken und kann mit den Tasten UP und DOWN
eingestellt werden.

DEUTSCH
6
Taste MODE ein weiteres Mal drücken:
Die Anzeige des Tags beginnt zu blinken und kann mit den Tasten UP und
DOWN eingestellt werden.
ALARM EIN-/AUSSCHALTEN
Drücken Sie die Taste UP, um den Wecker ein-/auszuschalten.
MAX/MIN
Drücken Sie die Taste MAX/MIN, um auf die Anzeige der Höchstwerte
umzuschalten.
Drücken Sie die Taste MAX/MIN erneut, um auf die Anzeige der Tiefstwerte
umzuschalten.
UHRZEIT-FORMAT ÄNDERN (12-/24-Stundenuhr)
Drücken Sie die Taste UP 3 Sekunden lang, um die Anzeige der Uhrzeit zu
wechseln.
FORMAT DER TEMPERATURANZEIGE
Drücken Sie die Taste DOWN, um die Anzeige auf °C oder °F zu ändern. Drücken
der Taste SNOOZE/LIGHT aktiviert die Schlummerfunktion des Weckers.
Drücken Sie die Taste SNZ/LIGHT, um die Anzeigebeleuchtung ein- oder
auszuschalten.

DEUTSCH
7
VORSICHT
STROMSCHLAGGEFAHR
NICHT ÖFFNEN
Sicherheitsvorkehrungen:
Um das Risiko eines elektrischen Schlags zu verringern, sollte dieses Produkt
AUSSCHLIESSLICH von einem autorisierten Techniker geönet werden.
Trennen Sie das Produkt von anderen Geräten, wenn ein Problem auftreten sollte.
Setzen Sie das Gerät nicht Wasser oder Feuchtigkeit aus.
Wartung:
Nur mit einem trockenen Tuch säubern.
Keine Reinigungs- oder Scheuermittel verwenden.
Garantie:
Alle Änderungen und/oder Modizierungen an dem Produkt haben ein Erlöschen der Garantie zur Folge. Wir
übernehmen keine Haftung für Schäden durch unsachgemäße Verwendung dieses Produkts.
Allgemeines:
Design und technische Daten unterliegen unangekündigten Änderungen. Alle Logos, Marken und Produktnamen sind
Marken oder eingetragene Marken ihrer jeweiligen Eigentümer und werden hiermit als solche anerkannt.
Bitte bewahren Sie Bedienungsanleitung und Verpackung für spätere Verwendung auf.
Achtung:
Dieses Produkt ist mit diesem Symbol gekennzeichnet. Es bedeutet, dass die ausgedienten elektrischen
und elektronischen Produkte nicht mit dem allgemeinen Haushaltsmüll entsorgt werden dürfen. Für diese
Produkte stehen gesonderte Sammelsysteme zur Verfügung.
Dieses Produkt wurde hergestellt und geliefert in Übereinstimmung mit allen geltenden Vorschriften und Richtlinien,
die für alle Mitgliedsstaaten der Europäischen Union gültig sind. Es entspricht allen geltendenVorschriften und
Bestimmungen im Land des Vertriebs.
Eine formale Dokumentation ist auf Anfrage erhältlich. Diese beinhaltet unter anderem, jedoch nicht ausschließlich:
Konformitätserklärung (und Produktidentität), Sicherheitsdatenblatt,Testreport des Produkts.
Wenden Sie sich bei Fragen bitte an unseren Kundendienst:
per Internet: http://www.nedis.de/de-de/kontakt/kontaktformular.htm
per Telefon: Niederlande +31 (0)73-5993965 (während der Geschäftszeiten)
NEDIS B.V., De Tweeling 28, 5215 MC ’s-Hertogenbosch, NIEDERLANDE

FRANÇAIS
8
CARACTÉRISTIQUES
Mesure des variations de température: 0–50 °C (32 °F–122 °F)
Mesure des variations du taux d’humidité: 20%–90%
Rapport de la température et du taux d’humidité max-min
Calendrier: 2001–2099
Alimentation: 2x UM-4/AAA (non inclus)
OPÉRATION
Appuyez une fois sur MODE pour visualiser le calendrier.
Appuyez à nouveau sur MODE pour visualiser l’heure de réveil.
REGLAGE DE L’HEURE
Pressez et maintenez enfoncé MODE durant 3 secondes pour entrer dans le
réglage de l’heure.
Les chires des heures clignoteront et peuvent être réglés en appuyant sur UP
ou DOWN pour régler l’heure.
Pressez MODE de nouveau :
Les chires des minutes clignoteront et peuvent être réglés en appuyant sur UP
ou DOWN pour régler les minutes.
RÉGLAGE DU RÉVEIL
Appuyez sur MODE pour visualiser l’heure de réveil.
Appuyez et maintenez le bouton MODE pendant 3 secondes pour entrer en
mode de réglage de l’heure de réveil.
Les chires des heures clignoteront et peuvent être réglés en appuyant sur UP
ou DOWN pour régler l’heure.
Pressez MODE de nouveau :
Les chires des minutes clignoteront et peuvent être réglés en appuyant sur UP
ou DOWN pour régler les minutes.
RÉGLAGE DE LA DATE SUR LE CALENDRIER
Appuyez sur MODE pour visualiser le calendrier.
Appuyez et maintenez le bouton MODE pendant 3 secondes pour entrer en
mode de réglage de la date du calendrier.
Les chires de l’année clignoteront et peuvent être réglés en appuyant sur UP
ou DOWN pour régler l’année.
Pressez MODE de nouveau :
Les chires du mois clignoteront et peuvent être réglés en appuyant sur UP ou
DOWN pour régler le mois.

FRANÇAIS
9
Pressez MODE de nouveau :
Les chires du jour clignoteront et peuvent être réglés en appuyant sur UP ou
DOWN pour régler le jour.
ALARME MARCHE/ARRET
Pressez UP pour allumer ou éteindre l’alarme.
MAX/MIN
Pressez MAX/MIN pour acher la température et le taux d’humidité MAXIMUM.
Pressez MAX/MIN pour acher la température et le taux d’humidité MINIMUM.
FORMAT 12/24 HEURES
Pressez UP Durant 3 secondes pour passer du format 12 au format 24 heures
pour l’achage de l’heure.
FORMAT D’AFFICHAGE DE LA TEMPÉRATURE
Pressez DOWN pour passer d’un achage à l’autre °C/°F. Pressez SNOOZE/
LIGHT lors de l’alarme et pressez SNZ/LIGHT pour le mode snooze. Pressez SNZ/
LIGHT pour allumer ou éteindre le rétro-éclairage.

FRANÇAIS
10
ATTENTION
RISQUE DE CHOC ELECTRIQUE
NE PAS OUVRIR
Précautions de sécurité:
Pour réduire le risque de choc électrique, ce produit ne doit être ouvert que par un
technicien qualié si une réparation s’impose.
Débranchez l'appareil et les autres équipements du secteur s'il y a un problème.
Ne pas exposer l’appareil à l’eau ni à l’humidité.
Entretien:
Ne nettoyez l'appareil qu'avec un chion sec.
N'utilisez pas de solvants ni des produits abrasifs.
Garantie:
Toutes altérations et/ou modications du produit annuleront la garantie. Nous ne serons tenus responsables d'aucune
responsabilité pour les dommages dus à une utilisation incorrecte du produit.
Generale:
Le design et les caractéristiques techniques sont sujets à modication sans notication préalable. Tous les logos de
marques et noms de produits sont des marques déposées ou immatriculées dont leurs détenteurs sont les propriétaires
et sont donc reconnues comme telles dans ce document.
Conservez ce manuel et l'emballage pour toute référence ultérieure.
Attention:
Ce symbole gure sur l'appareil. Il signie que les produits électriques et électroniques ne doivent pas être
jetés avec les déchets domestiques. Le système de collecte est diérent pour ces produits.
Ce produit est fabriqué et délivré en conformité avec toutes les directives et règlements applicables et en vigueur dans
tous les états membre de l'Union Européenne. Il est également conforme aux spécications et à la réglementation en
vigueur dans le pays de vente.
La documentation ocielle est disponible sur demande. Cela inclut mais ne se limite pas à: La déclaration de conformité
(et à l'identication du produit), la che technique concernant la sécurité des matériaux, les rapports de test du produit.
Veuillez contacter notre centre de service à la clientèle pour plus d'assistance:
via le site Web: http://www.nedis.fr/fr-fr/contact/formulaire-de-contact.htm
via téléphone: +31 (0)73-5993965 (aux heures de bureau)
NEDIS B.V., De Tweeling 28, 5215 MC ’s-Hertogenbosch, PAYS-BAS

NEDERLANDS
11
KENMERKEN
Temperatuurbereik: 0–50 °C (32 °F–122 °F)
Hygrometerbereik: 20%–90%
Max./Min. temperatuur- en vochtigheidsregistraties
Kalender: 2001–2099
Voeding: 2x UM-4/AAA (niet inbegrepen)
BEDIENING
Druk eenmaal op MODE om de kalender weer te geven.
Druk nogmaals op MODE om de alarmtijd weer te geven.
DE TIJD INSTELLEN
Druk op MODE en houd deze 3 seconden ingedrukt om de tijdinstellingsmodus
te openen.
De uurcijfers zullen knipperen en kunnen worden ingesteld door op UP of
DOWN te drukken voor het instellen van het uur.
Druk nogmaals op MODE:
De minuutcijfers zullen knipperen en kunnen worden ingesteld door op UP of
DOWN te drukken voor het instellen van de minuten.
HET ALARM INSTELLEN
Druk op MODE om de alarmtijd weer te geven.
Houd MODE gedurende 3 seconden ingedrukt om te beginnen met de
alarminstelling.
De uurcijfers zullen knipperen en kunnen worden ingesteld door op UP of
DOWN te drukken voor het instellen van het uur.
Druk nogmaals op MODE:
De minuutcijfers zullen knipperen en kunnen worden ingesteld door op UP of
DOWN te drukken voor het instellen van de minuten.
DE KALENDER INSTELLEN
Druk op MODE om de kalender weer te geven.
Houd MODE gedurende 3 seconden ingedrukt om te beginnen met het
instellen van de kalender.
De jaarcijfers zullen knipperen en kunnen worden ingesteld door op UP of
DOWN te drukken voor het instellen van het jaar.
Druk nogmaals op MODE:
De maandcijfers zullen knipperen en kunnen worden ingesteld door op UP of
DOWN te drukken voor het instellen van de maand.

NEDERLANDS
12
Druk nogmaals op MODE:
De dagcijfers zullen knipperen en kunnen worden ingesteld door op UP of
DOWN te drukken voor het instellen van de dag.
ALARM AAN/UIT
Druk op UP om het alarm aan/uit te zetten.
MAX/MIN
Druk op MAX/MIN om de MAXIMALE temperatuur- en
luchtvochtigheidregistratie te bekijken.
Druk op MAX/MIN om de MINIMALE temperatuur- en
luchtvochtigheidregistratie te bekijken.
12/24-UURSFORMAAT
Druk op UP en houd de 3 seconden ingedrukt om naar de 12 of 24-uurs
tijdsweergave te schakelen.
TYPE TEMPERATUURWEERGAVE
Druk op DOWN om het scherm tussen °C/°F te schakelen. Druk op SNZ/LIGHT
wanneer de wekker afgaat om naar de sluimermodus te schakelen. Druk op
SNZ/LIGHT om de achtergrondverlichting aan/uit te schakelen.

NEDERLANDS
13
VOORZICHTIG
GEVAARVOOR ELEKTRISCHE SCHOK
NIET OPENEN
Veiligheidsmaatregelen:
Om het risico op elektrische schokken te voorkomen mag dit product ALLEEN worden
geopend door een erkende technicus wanneer er onderhoud nodig is.
Koppel het product los van de elektrische voeding en van andere apparatuur als er zich
problemen voordoen.
Stel het product niet bloot aan water of vocht.
Onderhoud:
Uitsluitend reinigen met een droge doek.
Gebruik geen reinigingsmiddelen of schuurmiddelen.
Garantie:
Eventuele wijzigingen en/of aanpassingen aan het product zullen de garantie ongeldig maken. Wij aanvaarden geen
aansprakelijkheid voor schade veroorzaakt door onjuist gebruik van dit product.
Algemeen:
Ontwerpen en specicaties kunnen zonder kennisgeving worden gewijzigd. Alle logo’s, merken en productnamen zijn
handelsmerken of geregistreerde handelsmerken van de respectievelijke eigenaren en worden hierbij als zodanig erkend.
Bewaar deze gebruiksaanwijzing voor latere raadpleging.
Opgelet:
Dit product is voorzien van dit symbool. Dit symbool geeft aan dat afgedankte elektrische en elektronische
producten niet met het gewone huisafval verwijderd mogen worden. Voor dit soort producten zijn er speciale
inzamelingspunten.
Dit product is vervaardigd en geleverd in overeenstemming met de relevante reglementen en richtlijnen die voor alle
lidstaten van de Europese Unie gelden. Het voldoet ook aan alle toepasselijke specicaties en reglementen van het land
van verkoop.
Op aanvraag is ociële documentatie verkrijgbaar. Inclusief, maar niet uitsluitend: Conformiteitsverklaring (en
productidentiteit), materiaalveiligheidsinformatie en producttestrapport.
Wend u tot onze klantenservice voor ondersteuning:
via de website: http://www.nedis.nl/nl-nl/contact/contact-formulier.htm
telefonisch: +31 (0)73-5993965 (tijdens kantooruren)
NEDIS B.V., De Tweeling 28, 5215 MC ’s-Hertogenbosch, NEDERLAND

ITALIANO
14
CARATTERISTICHE
Range di misurazione temperatura: 0–50 °C (32 °F–122 °F)
Range di misurazione umidità: 20%–90%
Registrazione della temperatura e umidità massima e minima
Calendario: 2001–2099
Power: 2x UM-4/AAA (non fornite)
FUNZIONAMENTO
Premere una volta MODE per visualizzare il calendario.
Premere di nuovo MODE per visualizzare l'ora della sveglia.
IMPOSTARE L'ORA
Premere e tener premuto il pulsante MODE per 3 secondi per entrare nella
modalità di impostazione ora.
Le cifre dell'ora lampeggeranno e potranno essere settate premendo UP o
DOWN per impostare l'ora.
Premere MODE nuovamente:
Le cifre dei minuti lampeggeranno e potranno essere settate premendo UP o
DOWN per impostare i minuti.
IMPOSTAZIONE DELLA SVEGLIA
Premere MODE per visualizzare l'ora della sveglia.
Premere e tenere premuto per 3 secondi MODE per accedere alle impostazioni
della sveglia.
Le cifre dell'ora lampeggeranno e potranno essere settate premendo UP o
DOWN per impostare l'ora.
Premere MODE nuovamente:
Le cifre dei minuti lampeggeranno e potranno essere settate premendo UP o
DOWN per impostare i minuti.
IMPOSTAZIONE DEL CALENDARIO
Premere MODE per visualizzare il calendario.
Premere e tenere premuto per 3 secondi MODE per accedere alle impostazioni
del calendario.
Le cifre dell'anno lampeggeranno e potranno essere settate premendo UP o
DOWN per impostare l'anno.
Premere MODE nuovamente:
Le cifre del mese lampeggeranno e potranno essere settate premendo UP o
DOWN per impostare il mese.

ITALIANO
15
Premere MODE nuovamente:
Le cifre del giorno lampeggeranno e potranno essere settate premendo UP o
DOWN per impostare il giorno.
ACCENSIONE/SPEGNIMENTO SVEGLIA
Premere UP per accendere o spegnere la sveglia.
MAX/MIN
Premere MAX/MIN per visualizzare le rilevazioni della temperatura ed umidità
MASSIME.
Premere MAX/MIN nuovamente per visualizzare le rilevazioni della temperatura
ed umidità MINIME.
FORMATO ORA 12/24
Premere UP per 3 secondi per passare dal formato ora 12 a 24 per la
visualizzazione dell'ora.
FORMATO DI VISUALIZZAZIONE TEMPERATURA
Premere DOWN per passare dalla visualizzazione in °C a °F. Premere SNOOZE/
LIGHT in modalità sveglia e premere SNZ/LIGHT per la modalità sonnellino.
Premere SNZ/LIGHT per accendere/spegnere la luce di sfondo.

ITALIANO
16
PRECAUZIONI
RISCHIO DI SCOSSE ELETTRICHE
NON APRIRE
Precauzioni di sicurezza:
Per ridurre il rischio di scosse elettriche, il presente dispositivo deve essere aperto SOLO
da un tecnico autorizzato, nel caso sia necessario ripararlo.
Scollegare il prodotto dalla rete di alimentazione e da altri apparecchi se dovesse
vericarsi un problema.
Non esporre l'apparecchio ad acqua o umidità.
Manutenzione:
Pulire solo con un panno asciutto.
Non utilizzare solventi detergenti o abrasivi.
Garanzia:
Qualsiasi modica e/o cambiamento al prodotto annullerà la garanzia. Non si accettano responsabilità per danni causati
da un uso non corretto di questo prodotto.
Informazioni generali:
Il design e le caratteristiche tecniche sono soggetti a modica senza necessità di preavviso.Tutti i marchi, loghi e nomi dei
prodotti sono marchi commerciali o registrati dei rispettivi titolari e sono riconosciuti come tali in questo documento.
Conservare questo manuale e la confezione per riferimenti futuri.
Attenzione:
Il prodotto è contrassegnato con questo simbolo, con il quale si indica che i prodotti elettrici ed elettronici non
devono essere gettati insieme ai riuti domestici. Per questi prodotti esiste un sistema di raccolta dierenziata.
Il presente prodotto è stato realizzato e fornito in conformità a tutte le norme e le direttive vigenti, con validità in tutti
gli stati membri della Comunità Europea. Inoltre è conforme alle speciche e alle normative applicabili nel paese in cui è
stato venduto.
La documentazione uciale è disponibile su richiesta. Essa include a titolo esemplicativo ma non limitativo:
Dichiarazione di conformità (e di identità del prodotto), scheda di sicurezza dei materiali, rapporto di prova del prodotto.
Contattare il nostro servizio clienti per assistenza:
tramite il nostro sito web: http://www.nedis.it/it-it/contatti/modulo-contatto.htm
tramite telefono: +31 (0)73-5993965 (in orario di ucio)
NEDIS B.V., De Tweeling 28, 5215 MC ’s-Hertogenbosch, Paesi Bassi

ESPAÑOL
17
CARACTERISTICAS
Rango de medición de temperatura: 0–50 °C (32 °F–122 °F)
Rango de medición de humedad: 20%–90%
Temperatura max/min y registro de humedad
Calendario: 2001–2099
Alimentación: 2x UM-4/AAA (no incluidas)
FUNCIONAMIENTO
Pulse la tecla MODE una vez para ver el calendario.
Pulse MODE otra vez para ver la hora de la alarma.
AJUSTE DE LA HORA
Mantenga pulsada la tecla MODE durante 3 segundos para entrar en el modo
de ajuste de tiempo.
Los dígitos de la hora parpadearan. Para ajustar la hora pulse los botones
UP y DOWN.
Pulse MODE de nuevo:
Los dígitos de los minutos parpadearan. Para ajustar los minutos pulse los
botones UP y DOWN.
CONFIGURAR LA ALARMA
Pulse MODE hasta ver la hora de la alarma.
Mantenga pulsada la tecla MODE durante 3 segundos para entrar en el modo
de ajuste de la hora de la alarma.
Los dígitos de la hora parpadearán. Para ajustar la hora pulse los botones
UP y DOWN.
Pulse MODE de nuevo:
Los dígitos de los minutos parpadearan. Para ajustar los minutos pulse los
botones UP y DOWN.
CONFIGURAR EL CALENDARIO
Pulse la tecla MODE para ver el calendario.
Mantenga pulsada la tecla MODE durante 3 segundos para entrar en el modo
de conguración del calendario.
Los dígitos de año parpadearán. Para ajustar el mes pulse los botones
UP y DOWN.
Pulse MODE de nuevo:
Los dígitos de día parpadearán. Para ajustar los dígitos de día pulse los botones
UP y DOWN.

ESPAÑOL
18
Pulse MODE de nuevo:
Los dígitos de día parpadearán. Para ajustar los dígitos de día pulse los botones
UP y DOWN.
ALARMA ENCENDIDA/APAGADA
Pulse UP para encender o apagar la alarma.
MAX/MIN
Presione MAX/MIN para ver la temperatura máxima y el registro de humedad.
Presione MAX/MIN de nuevo para ver la temperatura mínima y registro de
humedad.
FORMATO DE HORA 12/24
Presione UP durante 3 segundos para cambiar el formato de hora 12 o 24.
FORMATO DE PRESENTACIÓN DE LA TEMPERATURA
Pulse ABAJO para cambiar la visualización entre °C/°F. Pulse SNOOZE/LIGHT en
la alarma y pulse SNZ/LIGHT para el modo de repetición. Pulse SNZ/LIGHT para
encender o apagar la retroiluminación de encendido/apagado.

ESPAÑOL
19
PRECAUCIÓN
RIESGO DE ELECTROCUCIÓN
NO ABRIR
Precauciones de seguridad:
Para reducir el peligro de descarga eléctrica, este producto SÓLO lo debería abrir un
técnico autorizado cuando necesite reparación.
Desconecte el producto de la toma de corriente y de los otros equipos si ocurriera algún
problema.
No exponga el contestador al agua o a la humedad.
Mantenimiento:
Límpielo sólo con un paño seco.
No utilice disolventes de limpieza ni productos abrasivos.
Garantía:
Cualquier cambio y/o modicación del producto anulará la garantía. No podemos asumir ninguna responsabilidad por
ningún daño debido a un uso incorrecto de este producto.
General:
Las ilustraciones y las especicaciones podrán sufrir cambios sin previo aviso.Todas las marcas de logotipos y nombres de
productos constituyen patentes o marcas registradas a nombre de sus titulares correspondientes, reconocidos como tal.
Conserve este manual y el embalaje en caso de futura necesidad.
Atención:
Este producto está señalizado con este símbolo. Esto signica que los productos eléctricos y electrónicos
usados no deberán mezclarse con los desechos domésticos generales. Existe un sistema de reciclaje por
separado para estos productos.
Este producto se ha fabricado y distribuido de conformidad con todas las normativas y directivas relevantes, válidas para
todos los estados de la Unión Europea. También cumple con todas las especicaciones y normativas en el país en el cual
se comercializa.
Previa solicitud, podremos proporcionarle la documentación formal. Esta documentación incluye, entre otros: Declaración
de conformidad (e identidad del producto), hoja de datos de seguridad del material, informe sobre las pruebas realizadas
al producto.
Póngase en contacto con nuestro servicio de atención al cliente para obtener información adicional:
por medio de nuestro sitio web: http://www.nedis.es/es-es/contacto/formulario-de-contacto.htm
o llamando por teléfono: +31 (0)73-5993965 (en horario de ocina)
NEDIS B.V., De Tweeling 28, 5215 MC ’s-Hertogenbosch, PAÍSES BAJOS

PORTUGUÊS
20
FUNÇÕES
Medir a variação da temperatura: 0–50 °C (32 °F–122 °F)
Medir a variação da humidade: 20%–90%
Registos da temperatura e humidade máxima/mínima
Calendário: 2001–2099
Alimentação: 2x pilhas UM-4/AAA (não incluídas)
FUNCIONAMENTO
Premir o botão MODE uma vez para visualizar o calendário.
Voltar a premir o botão MODE para visualizar a hora denida no alarme.
DEFINIR A HORA
Premir e manter premido o botão MODE durante 3 segundos para aceder ao
modo de denição da hora.
Os dígitos da hora piscam e podem ser denidos premindo as setas para UP ou
para DOWN para denir a hora.
Voltar a premir o botão MODE:
Os dígitos dos minutos piscam e podem ser denidos premindo as setas para
UP ou para DOWN para denir os minutos.
DEFINIR O ALARME
Premir o botão MODE para visualizar a hora denida no alarme.
Premir o botão MODE e mantenha-o premido durante 3 segundos para aceder
ao modo de denição do alarme.
Os dígitos da hora piscam e podem ser denidos premindo as setas para UP ou
para DOWN para denir a hora.
Voltar a premir o botão MODE:
Os dígitos dos minutos piscam e podem ser denidos premindo as teclas para
UP ou para DOWN para denir os minutos.
DEFINIR O CALENDÁRIO
Premir o botão MODE para visualizar o calendário.
Premir o botão MODE e mante-lo premido durante 3 segundos para aceder ao
modo de denição do calendário.
Os dígitos do ano piscam e podem ser denidos premindo as setas para UP ou
para DOWN para denir o ano.
Voltar a premir o botão MODE:
Os dígitos do mês piscam e podem ser denidos premindo as setas para UP ou
para DOWN para denir o mês.
Table of contents
Languages:
Other König Clock manuals