14 15
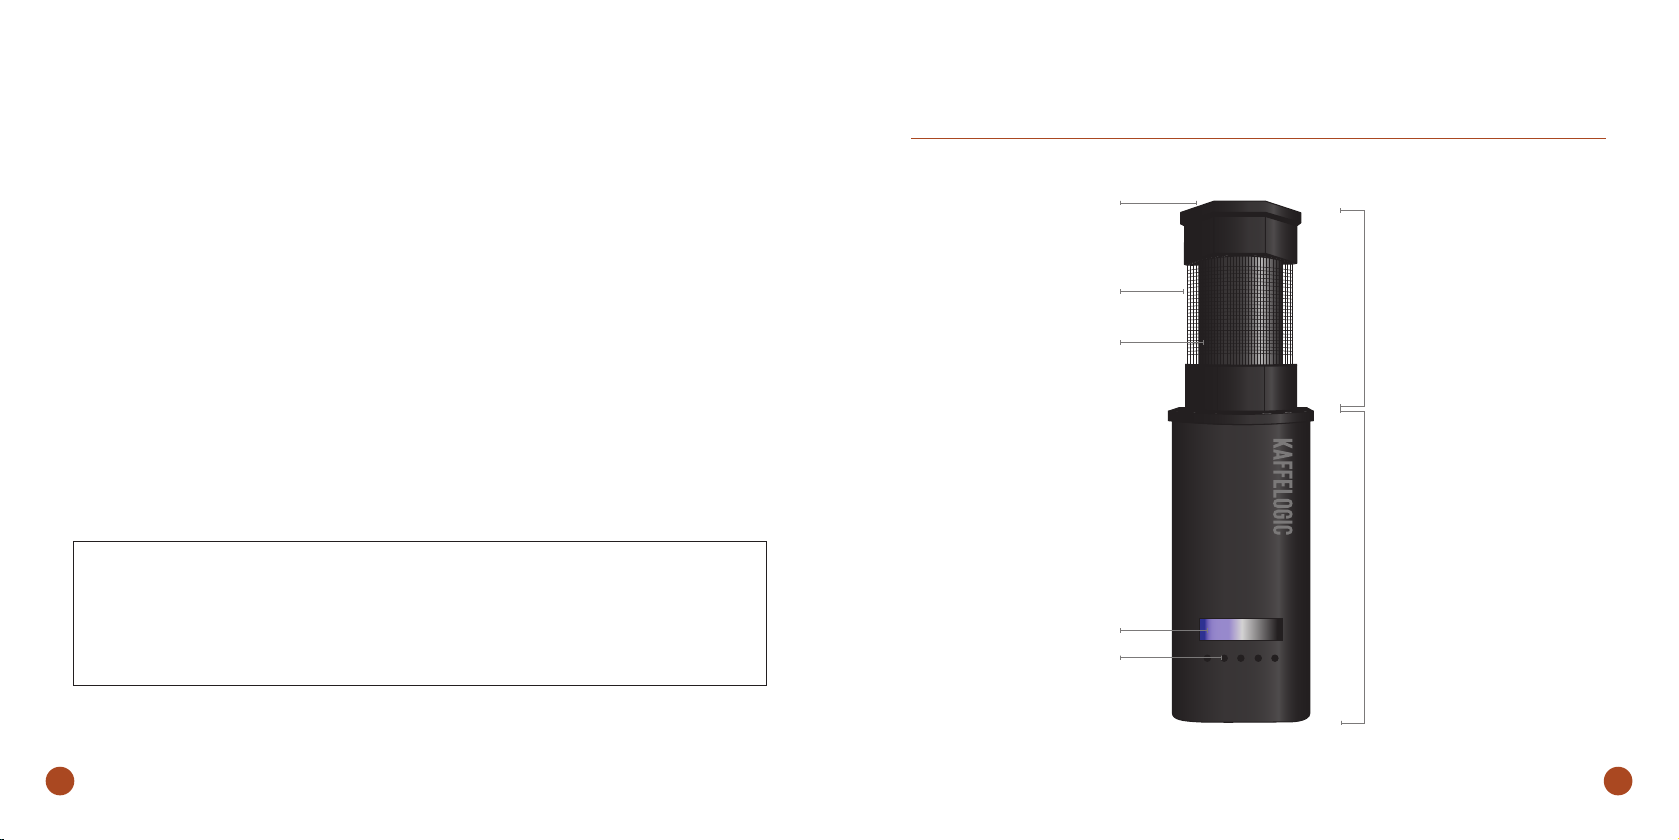
KAFFELOGIC - Nano 7.0 KAFFELOGIC - Nano 7.0
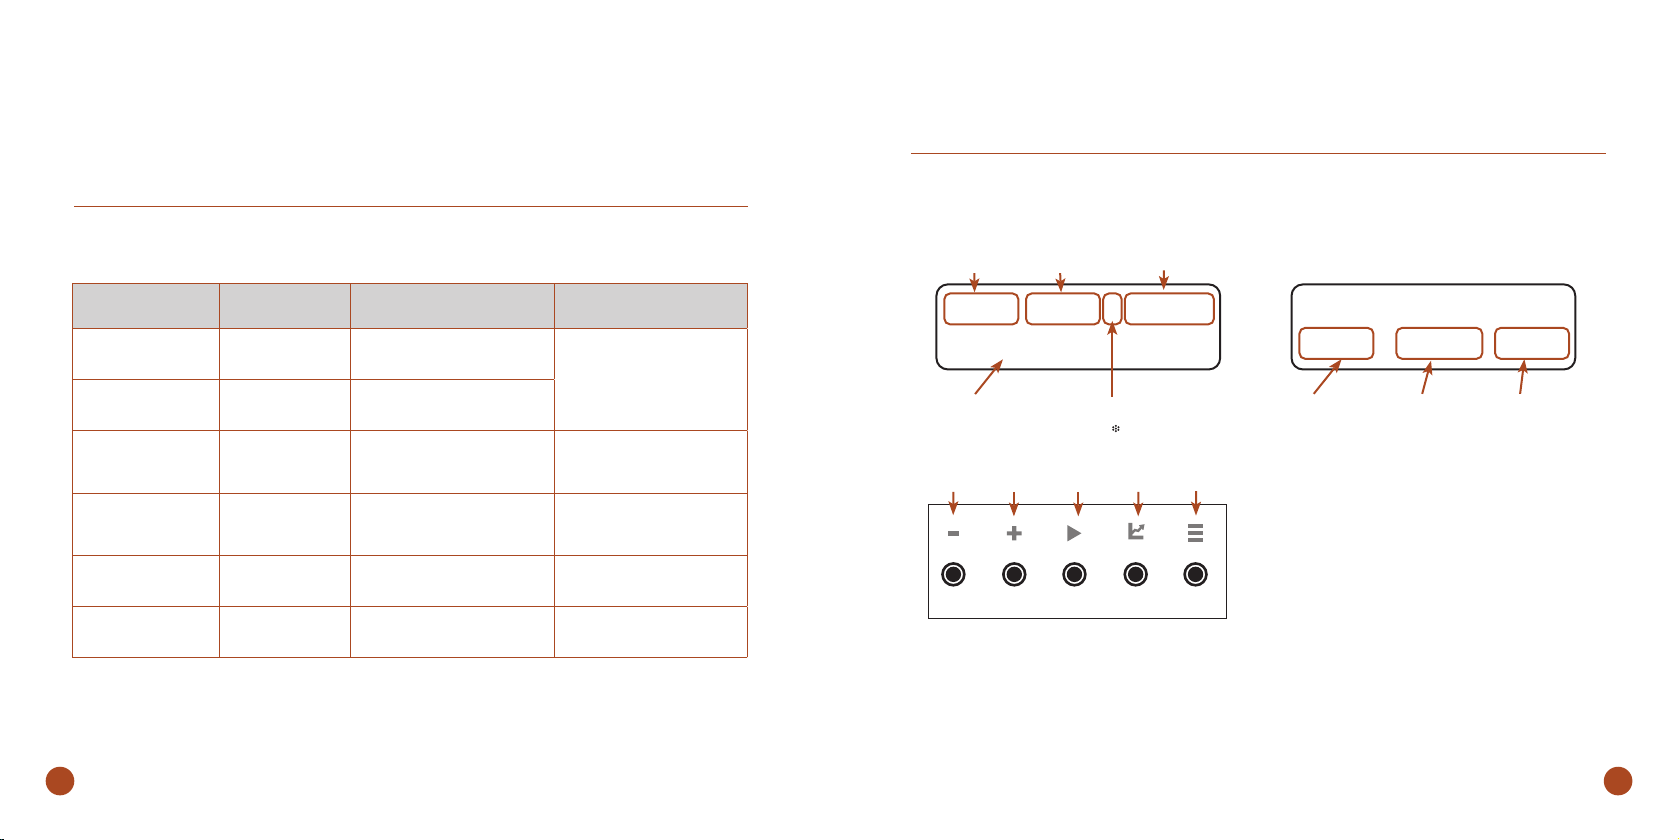
TIMER MODE
The roaster has a timer mode so that you
can use it as a brew timer. Put the roaster
into timer mode by pressing both Profiℓe
and Menu buttons together.
Press Profiℓe & Menu buttons together
again to go back to automatic roasting
mode.
In timer mode the button starts and
stops the timer, but it does not control the
heat or the fan. The lighter/darker buttons
are used to manually control the heat and
fan, which can be useful when developing
profiles: for example, you can observe
how the beans fluidize by running the
fan without any heat. You can even do an
entire roast manually; so long as the timer
is running and the heat is on, a log file will
be recorded.
Memory stick file structure
The ‘kaffelogic’ folder contains 3 sub-
folders: ‘roast-logs’, ‘roast-profiles’, and
‘firmware’. If you are creating these
folders yourself take care to ensure
the spelling is correct and there are no
capital letters.
RESET
Occasionally the memory where the
profile details are stored can become
corrupt, for example a power failure
during a roast could cause this.
This can cause unusual characters
to appear on the display and the
roaster may become unresponsive. To
reset the roaster and restore factory
defaults, hold down the button while
you turn the roaster on. If you do this,
you will have to load your profile and
set your chosen level again.
UPDATES
Updates can be downloaded to a
memory stick using Kaffeℓogic Studio or
from kaffelogic.com/support. Updates
are saved in a folder called ‘firmware’, a
sub folder of the ‘kaffelogic’ folder on
the memory stick. Then put the memory
stick in the roaster and reset it (i.e. hold
down thebutton while you turn the
roaster on). The firmware update will
install automatically and the level and
profile will return to default values. You
will have to load your profile and set
your chosen level again.
IN THE UNLIKELY EVENT OF AN EMERGENCY:
You can stop the roast early by pressing then - while it is roasting. Stopping the
roast early puts the machine straight into cool down. (Turning the machine off will
also stop the roast – it will automatically enter cool down if you turn it back on again
straight away.)
1. Check that the roast chamber is empty
before you add green beans. Hold the
roaster upside down and gently shake
to dislodge any beans that get stuck.
If you need to reach inside the roast
chamber to dislodge a bean be careful
not to touch the thermocouple probe
because it is fragile.
2. If chaff falls into the roast chamber
it is important that you remove it
immediately before it has a chance
to work its way inside the appliance
where it may create a fire risk. If
there are just a few bits of chaff
in the chamber, blow gently into
the chamber to remove them.
Alternatively, put the roaster into
timer mode: press Profiℓe and Menu
buttons together. Then turn on the fan
using the + button. Press Profiℓe and
Menu buttons again to stop the fan
and return to automatic mode.
3. If you spill chaff on the bench you
should clean it up before operating
the roaster. This is to prevent chaff
being drawn into the air intake slots in
the base of the roaster.
4. If a granular or powdery substance
such as rice or flour gets into the
roast chamber you should have a
service technician strip and clean
the appliance before you attempt
to use it again. This is because such
substances can fit between the fins
and get onto the element or fan
motor inside the appliance.
FURTHER INFORMATION ABOUT THE ROASTER