KaiDeng K70 Sky Warrior User manual

2.4 GHZ 6 AXIS R/C QUADCOPTER
1.Four-Rotor design allows great speed and maneuverability for indoor
and outdoor use.
2.Built-in 6-axis Gyro ensures excellent stability.
3.loading capacity up to 500g.
4.Auto hover/Headless function/One key to return.
5.360-degree 3-dimensional stunt and tumbling function.
6.WIFI Photo/Video.
7. 2MP camera Photo/Video.
8. 5MP camera Photo/Video.
9. 5.8G FPV real time transmission.
FEATURE:
The materials and specifications stated in this instruction manual
are for reference only.

-1-
Sky warrior K70
Key Introduction of K70 Remote Controller
Specification of K70
Preparation before flight
Basic Operation Guide
Special function button guide
CF mode
Upgrade accessories (Selective Buying)
Drone accessories (Selective Buying)
Trouble Shooting
Catalog

Sky warrior K70
-2-
Wonderful design could win player’s favor.
High pixel and stable flying could bring much more entertainment.
1.LED Light
2.Blade
3.Landing Gear
4.Camera
5.Motor
6.Protect Shield
Key Introduction of K70 Remote Controller
1
1
2
3
4
5
6
2
3
4
5
6
7
8
9
10
11
12
13
14
1. one key to return
2. Short press to take photo/long
press to record video( Point : the
drone will blink one time when
taking photo/blink three times when
recording/blink two times when
saving the photo or video)
3. camera lens up/down
4. left control stick
5. left/right turning trimmer
6. LED light control switch
7. CF mode
8. 3D flip
9. power switch
10. left/right side-fly trimmer/long
press to right side before power
on to switch the left/right control
stick(The remote controller makes
a sound DI indicating the switch
success)
11. forward/backward trimmer
12. right control stick
13. one key to launch/auto landing
(long press 3 seconds to stop)
14. Speed switch (Slow speed-one
sound DI/middle speed-two sound
DI DI/high speed-three sound DI
DI DI)

-3-
Ɣ$LUFUDIW
Ɣ5HPRWHFRQWUROOHU
Ɣ'URQHLQVWDOOWLRQ'LVDVVHPEO\
%DWWHU\LQVWDOOVWLRQ
539mm
159.6mm
163mm
559mm
Specification of K70
LWH 539X559X178MM
Weight Aprx 580g ( Basic version)
Max Flight Time 8 MIN
Operating Temperature Range 0°C to 40°C
Lens Angle Control Range 90°
SD Card Types 4G Micro SD Card
Battery Capacity 2000mAh
LWH 159.6X163X92MM
Weight 233g (without battery)
Operating Temperature Range 0°C to 40°C
Battery 4*1.5V AA
3UHSDUDWLRQEHIRUHIOLJKW
1.Use screwdriver to loose the battery cover in counterclockwise direction as
figure(1)show.
2.Pull out the battery cover and remove it as figure(2)show.
3.Plug the battery into the socket on the drone as figure(3)show.
4.Place the battery into battery base(figure 4).
5.Match the battery cover and base and then fix it.(figure 5).
6.Use screwdriver to tighten the battery cover in counterclockwise direction as
figure(6)show.

-4-
Ɣ/DQGLQJJHDULQVWDOODWLRQ
Ɣ&DPHUDLQVWDOODWLRQGLVDVVHPEO\
Ɣ/DQGLQJJHDUGLVDVVHPEO\
Figure 1 Figure 2
Figure 1 Figure 2
Figure 1 Figure 2
Figure 3
Figure 4 Figure 5 Figure 6
1.Insert the landing gear firmly to the slots on the drone.( Figure1)
2.Use screwdriver to tighten the landing gear in clockwise direction. ( Figure2)
1.Use screwdriver to loose the landing gear in anti-clockwise direction.
2.Take out the landing gear.
&DPHUDLQVWDOODWLRQ
1.Insert the SD card to the camera.
2.Use screwdriver to tighten the camera in clockwise
direction as figure (1)show.

-5-
Ɣ%ODGHLQVWDOODWLRQ'LVDVVHPEO\
Figure 1 Figure 2 Figure 3 Figure 4
&DPHUDGLVDVVHPEO\
1. Use screwdriver to loose the camera in anti-
clockwise direction.
2. Take out the camera.
NOTE: Please make sure the drone is off while mount/dismount the camera.
NOTE: It is important for the correct blade to be put on the correct motor or the
drone will not fly correctly. A letter is marked on each blade to indicate
which motor it should go on.
%ODGHLQVWDOODWLRQ
1.Insert the blade into main axis as figure (1)show.
2.Insert the main axis sleeve into main axis tube as figure (2) show. Make
sure the notch of the main axis sleeve match with the hole on the main axis
tube and then insert the iron axis.
3.Install the iron axis inside the main axis sleeve then rotate it in clockwise
direction in 90°as figure (3) show.
4.Insert the blade cover into main axis as figure (4) show.
%ODGHGLVDVVHPEO\
1.Pull out the blade cover as figure (1) shows.
2.Rotate the main axis sleeve in counterclockwise direction until the iron axis
is match with the notch on the main axis sleeve as figure (2)show.
3.Pull out the iron axis according to figure (3) show. And pull out the main axis
sleeve.
4.Pull out the blade as shown in figure (4).

-6-
Ɣ3URWHFWVKLHOGLQVWDOODWLRQGLVDVVHPEO\
Ɣ0RWRULQVWDOODWLRQ'LVDVVHPEO\
Figure 1 Figure 2
Figure 1 Figure 2
3URWHFWVKLHOGLQVWDOODWLRQ
3URWHFWVKLHOGGLVDVVHPEO\
1.Insert protect shield into the slot on the drone as shown in figure (1).
2.Use screwdriver to tighten the screw on the protect shield in clockwise
direction as shown in figure (2).
1.Use screwdriver to loose the protect shield in anti-clockwise direction.
2.Take out the protect shield.
,QVWDOODWLRQ
1.Insert the motor to the motor base then use screwdriver in clockwise
direction to tighten the screws on the front side of the motor as figure (1)
show.
2.Plug the motor to the motor socket as figure (2) show.
3.Close the motor cover then use screwdriver in clockwise direction to tighten
it as figure (3) show.
See diagram below:

-7-
Ɣ&KDUJLQJWKHEDWWHU\
Figure 1 Figure 2 Figure 3
'LVDVVHPEO\
1. Use screwdriver to loose the screws on the motor cover in anti-clockwise
direction. Figure(1)
2.Pull out the motor socket as figure (2) show.
3.Use screwdriver in counterclockwise direction to loose the screws on the
motor as figure (3) show.
Connect the charger and adaptor, and then connect the 3S plug on the
battery with adaptor, then plug the charger in battery socket, at this time
the red light and green light are on, the green light will off after finished
charging.
Note:1. Cut off the power before you pull out the
battery.
2. Be cautious about the polarity when
connecting the battery and adaptor,
reverse is prohibit.
Note:
In case that the quadcopter might descend to a further or insecure zone due to the
low battery power when flying in outdoor, the quadcopter is specially designed with
the function of secure warning. When the battery power is too low, the led light
would turn from constant on to flickering. Then the operator would have time to
take back the quadcopter and change the battery or recharge it for the next flight.

-8-
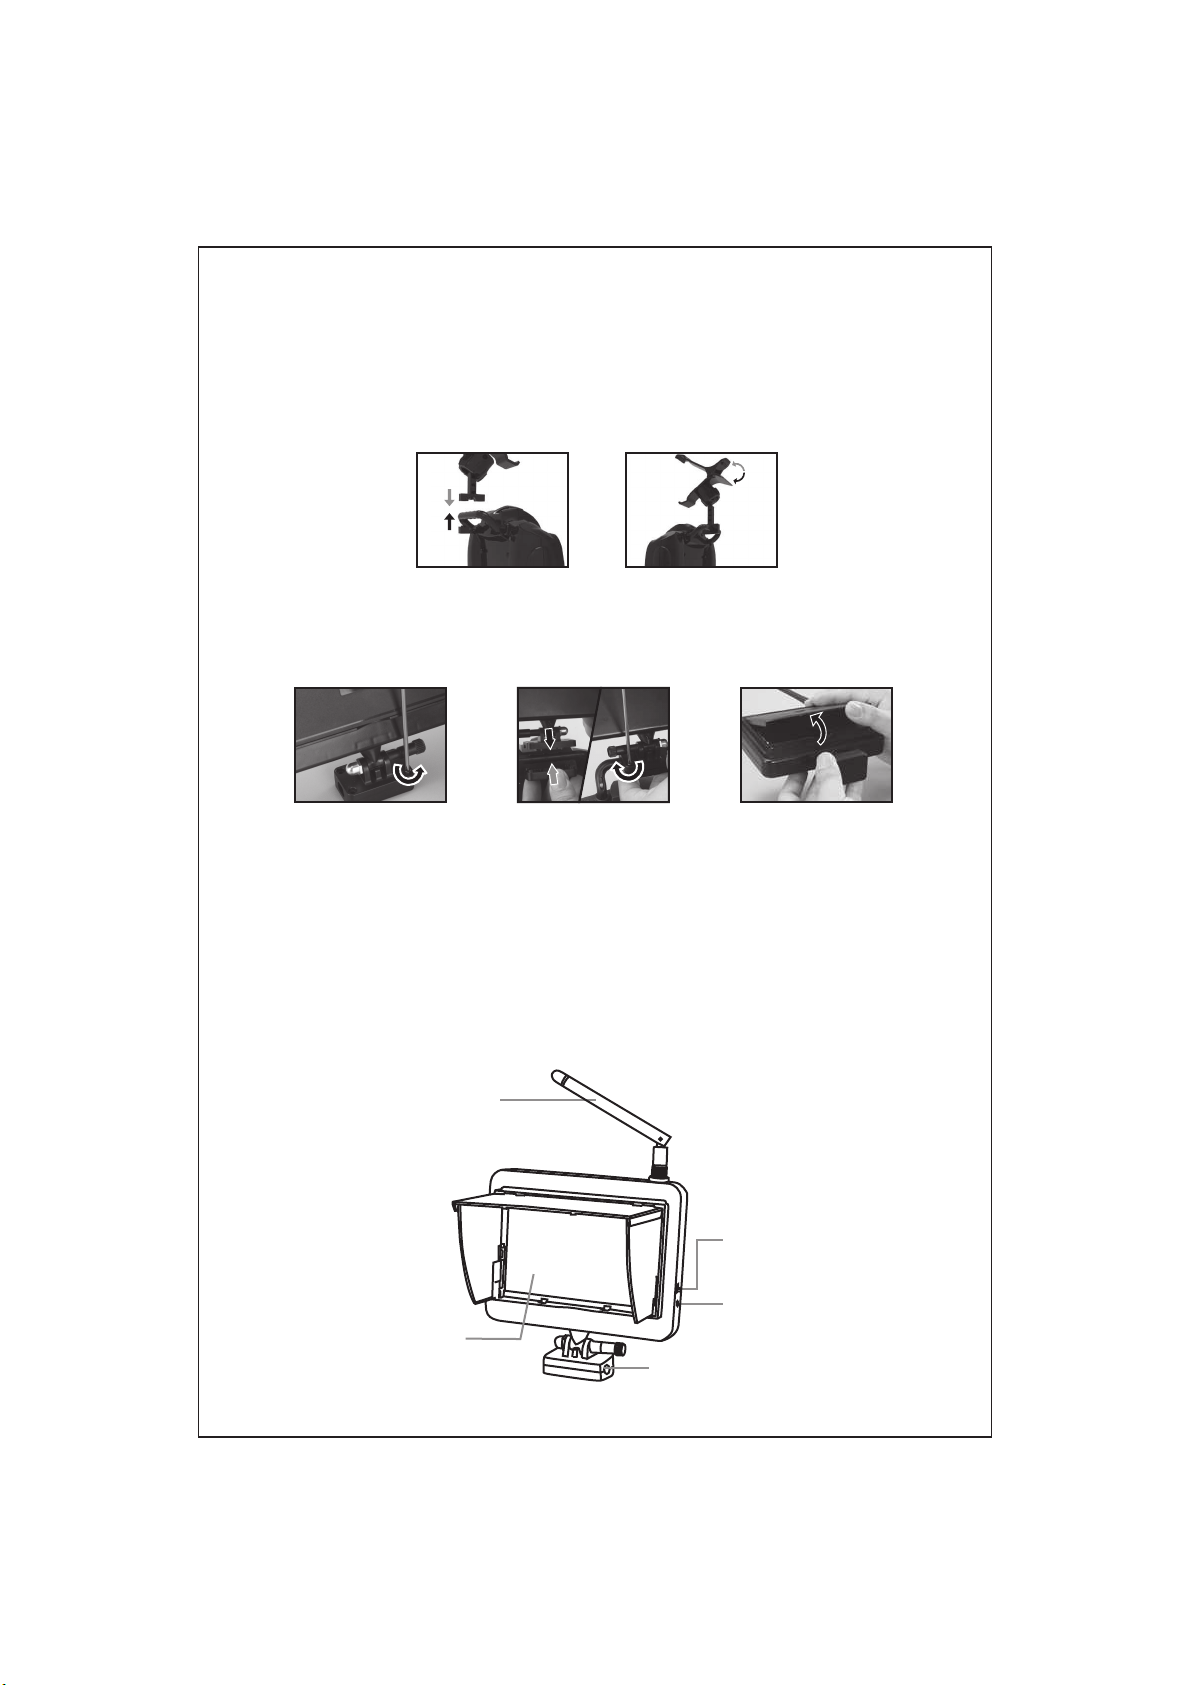
Ɣ5HPRWHFRQWUROOHUSUHSDUDWLRQ
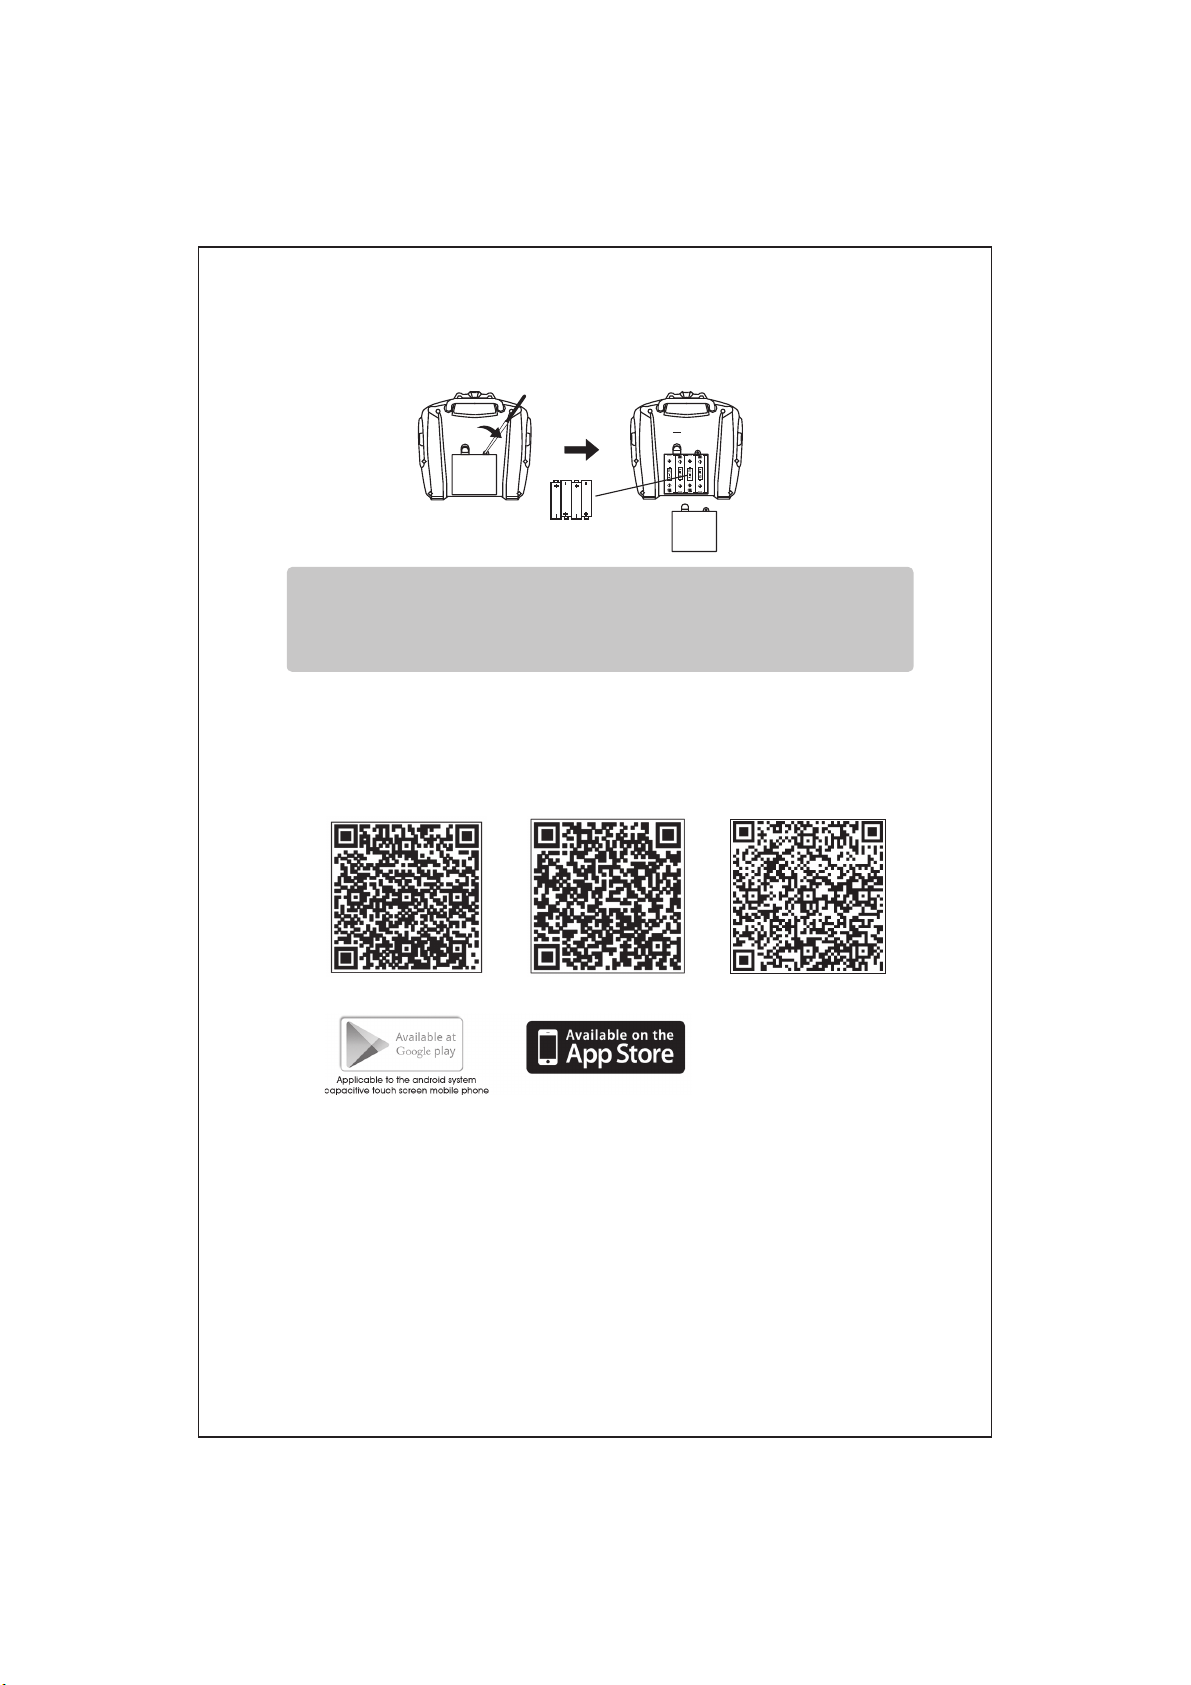
1.Take out the battery cover on the back of the controller.
2.Insert 4*1.5V AA battery then put on the battery cover.
Remote controller low power indicator:When the remote controller under low power
status,the light on the remote controller change from constantly in to flicker,and the
buzzer on the remote controller make the alarm sound "DI DI" continuously.
6RIWZDUHLQVWDOODWLRQ
Ɣ6PDUWSKRQHSDGWDEOHWKDUGZDUHVRIWZDUHLQVWDOODWLRQ
Two-dimension code is provided on color box packing and back cover of
specification to scan.
Connection instruction:
1.Turn on the drone, the FPV indicate light blink slowly, which shows the
drone is ready to connect with phone.
2.Open your phone and into “settings” , turn on the WIFI, search the KD-
**** from the signal list, connect the signal, exit “setting” option until the
signal shows connected.
3.Open the PANTONMA APP, click “MY DRONE” into control interface. The
indicate light on the drone will on, which means is connected.The phone
shows the real time image. The wifi signal in full grid showing the
strongest signal.
QR code for google play QR code for IOS QR code for 360

-9-
Ɣ6PDUWSKRQHLQVWDOODWLRQ
Ɣ*)39&RQQHFWLRQ,QVWUXFWLRQ
Figure 1 Figure 2
Antenna
Power switch
Charge socket
Liquid crystal
display (LCD)
Fixation kits
Ɣ*)39GLVSOD\
1.Use screwdriver in anti-clockwise direction to loose the screws in the fixed
clip as figure (1) show.
2.Put the fixed clip on the handle of the controller then use screwdriver in
clockwise direction to tighten it as figure (2) show.
1.Use screw driver to loose the screws on the fixation kits and open the
fixation kits as figure 1 show.
2.Fix the handle on the remote and the fixation kits, and then use
screwdriver in clockwise direction to tighten the screws as figure 2 show.
3.Open the shield cover and turn on the power as figure 3 show.
Figure 1 Figure 2 Figure 3

-10-
Ɣ(QWHULQJLQWRSUHIO\VWDWXV
Figure 1 Figure 2
*)393RZHU6ZLWFK *)39&KDUJLQJ6ORW
1.Turn on the power switch of the remote controller as figure (1) show, the
light indicator will blink when power on and the buzzer makes the sound
“DI DI” continuously.
2.Push the throttle lever from the lowest position to the highest position as
the figure (2) show, the buzzer makes the sound “DI DI” continuously, then
pull back the throttle lever to the lowest position, the buzzer makes the
sound “DI”, the lights on the remote controller change from flicker to
constantly on, which indicate the frequency matching successfully. After
matching the frequency, the drone enter into detection status, the detection
time is about 3 second under the circumstance of no shaking of the drone,
then the drone makes one sound “DI”, and the light flicker once, after all the
drone detection is finished and enter into pre-fly status.
Ɣ&KDUJHWKH*)39PRQLWRU
1.Insert the USB pin to the
monitor and connect the
USB with adaptor or computer
to charge the monitor.

-11-
Ascend/
descend
Turn left/
right
Turn left/
right
adjustment
Forward/
backward
Left/ right
side fly
Forward/
backward
adjustment
Left/ right
side fly
adjustment
Push up/down the left control
stick, the quadcopter ascends/
descends accordingly.
Push left/ right the left control
stick, the quadcopter turn left/
right accordingly.
If the quadcopter keeps moving
forward/ backward without control,
push the trimmer down/ up until it
turns balanced.
When hovering, if the quadcopter
keeps left/ right side fly without
control, push the trimmer right/ left
until it turns balanced.
When hovering, if the quadcopter
keeps turn left/ right fly without
control, push the trimmer right/ left
until it turns balanced.
Push up/ down the right control
stick, the quadcopter moves
forward/ backward.
Push left/ right the right control
stick, the quadcopter make left/
right side fly.
%DVLF2SHUDWLRQ*XLGH
Here are the basic operation guide(Mode 1), the left stick controls altitude and
direction, while the right stick controls the rotation forward, backward, left or
right movement.

Ɣ6SHFLDOIXQFWLRQEXWWRQJXLGH
-12-
$XWRKRYHU
3D Flip
6SHHGVZLWFK
Push the throttle up slightly and release it, the drone will stick to a specific
height steadily, push the throttle down when decent the drone.
Ascending the drone to 2 meters high, press the 3D flip button(remote
controller will make two sound didi continuously, the sound will stop when
finished the movement) and then push the right control stick in any direction
at the utmost, the drone will roll over accordingly.
NOTE: The 3D function can not work under low power and carrying camera.
The sky warrior features 3 speed modes. Low speed is for beginners and high
speed for advanced users.
The default speed is 35%,press the speed switch button you will hear “DI DI”
which indicate it switch to middle speed 75%, and press again with “DI DI DI”
indicate it switch to high speed 100%. Press again with “DI” back to default
low speed.

Ɣ&)PRGH
-13-
One key to return
When in CF mode, press the “one key to return” key, the quadcopter will fly
towards the operator. Press this key again or push up the right control stick to
exit this function.(To make a safe return, push the right control stick to left/right
if the quadcopter’ s return deviates to right/left).
CF mode:
([LWWKH&)PRGH
$GMXVWWKHGLUHFWLRQLQ&)PRGH
After matching of the quadcopter and the remote control, press the CF mode
button on the remote control, the buzzer in the remote control makes the
sound "di", the lights of the quadcopter change from constantly on to flickering,
the quadcopter turns in CF mode.
When the quadcopter is in CF mode, press the CF mode button on the remote
control, the buzzer makes the sound “di” , the lights of the quadcopter change
from flickering to constantly on, the quadcopter exit the CF mode.
When the quadcopter is in CF mode, it is necessary to adjust the direction first.
Make sure the front of the quadcopter points ahead in the same direction of the
operater(figure.1), then push the left and right control stick to the lower left
direction at the same time for about 2 seconds(figure.2), the indication lights of
the quadcopter change from slowly flickering to fast flickering for 2 seconds,
which means the direction adjustment is finished.

-14-
&RQWUROWKHGLUHFWLRQVLQ&)PRGH
In CF mode, the forward direction is the direction which the quadcopter
pointed to in the previous step. The operator should face this forward direction,
otherwise the direction will not in the correct control. Please follow the below
steps:
+LQWV
1. To make the quadcopter flying in CF mode, a direction adjustment and
confirmation step is important, and the operator should face the direction to
which the front of the quadcopter pointed. The orientation of the operator
should not change to avoid effect on controlling the quadcopter.
2. When in CF mode, if the direction of the quadcopter is not in accordance with
the operator or makes deviation, please stop flying to make a readjustment and
confirmation of the direction.
Push the right control stick up,
the quadcopter flies forward
based on the direction which
the operator faced in the
adjustment step.
Push the control stick to make
right side fly, the quadcopter
will make right side fly based on
the direction which the operator
face in the adjustment step.
Push the control stick to make
a right turn, the quadcopter will
turn right based on the direction
which the operator faced in the
adjustment step.
Push the control stick to make
a left turn, the quadcopter will
turn left based on the direction
which the operator faced in the
adjustment step.
Push the right control stick
down, the quadcopter flies
backwards based on the
direction which the operator
faced in the adjustment step.
Push the control stick to make
left side fly, the quadcopter
will make left side fly based on
the direction which the
operator faced in the
adjustment step.
Figure(1)Figure(2)

Ɣ8SJUDGHDFFHVVRULHV6HOHFWLYH%X\LQJ
Ɣ'URQHDFFHVVRULHV6HOHFWLYH%X\LQJ
706
Main body
709
Landing gear
710
Mobile fixed clip
712
Charger
711
Protect shield(black)
707
Base body
708
Blade
713
Battery
-15-
701 702
705
200W Camera
Resolution of photo/
video: 1280X720
500W Camera
Resolution of photo/
video:1980X1080
703
FPV WIFI+0.3MP
Camera resolution
of photo/video:
640X480
704
FPV WIFI+2MP Camera
Resolution of photo/video:
1280X720
FPV 5.8G +2MP
Camera resolution
of photo/video:
1280X720

Ɣ7URXEOH6KRRWLQJ
714
Card reader
715
SD Card
716
Long tube frame
717
Short tube frame
-16-
718
Gear accessory
719
Switch
720
Motor
721
Blade cover
722
Remote controller
Make correct adjustments but
the quadcopter still couldn’t
turn balanced
The quadcopter becomes out
of control after crashing
1. The blades are distorted
2.The motor doesn’t work properly
1. Replace the blades
2. Replace the motor
Three-axis acceleration sensor
lose its balance after crashing
Put the quadcopter on the
ground for 5-10 seconds
The indication light of the
quadcopter is flashing and
without reaction
The quadcopter’s blades turn
around but the quadcopter
cannot take off
The quadcopter shakes hardly
1.The quadcopter and the
transmitter are out of radio
connection.
2.Insufficient battery power
1.Repeat the connecton
procedure.
2.Recharge the battery
1. Insufficient battery power
2. The blades are distorted
1.Recharge the battery
2.Replace the blades
The blades are distorted Replace the blades
Problem Reason Solution

6RIWZDUHLQVWDOODWLRQ
6PDUWSKRQHSDGWDEOHWKDUGZDUHVRIWZDUHLQVWDOODWLRQ
Two-dimension code is provided on color box packing and back cover of
specification to scan.
Warning: Changes or modifications to this unit not expressly approved by the
party responsible for compliance could void the user’ s authority to operate the
equipment.
NOTE: This equipment has been tested and found to comply with the limits for
a Class B digital device, pursuant to Part 15 of the FCC Rules. These limits are
designed to provide reasonable protection against harmful interference in a
residential installation. This equipment generates, uses and can radiate radio
frequency energy and, if not installed and used in accordance with the
instructions, may cause harmful interference to radio communications.
However, there is no guarantee that interference will not occur in a particular
installation. If this equipment does cause harmful interference to radio or
television reception, which can be determined by turning the equipment off and
on, the user is encouraged to try to correct the interference by one or more of the
following measures:
- Reorient or relocate the receiving antenna.
- Increase the separation between the equipment and receiver.
- Connect the equipment into an outlet on a circuit different from that to which
the receiver is connected.
- Consult the dealer or an experienced radio/TV technician for help.
QR code for google play QR code for IOS QR code for 360
Table of contents
Other KaiDeng Quadcopter manuals