CONTENT
Introduction
Specifications
-Aircraft
-Remote Controller
-Mobile Device Control
-APP
-Camera
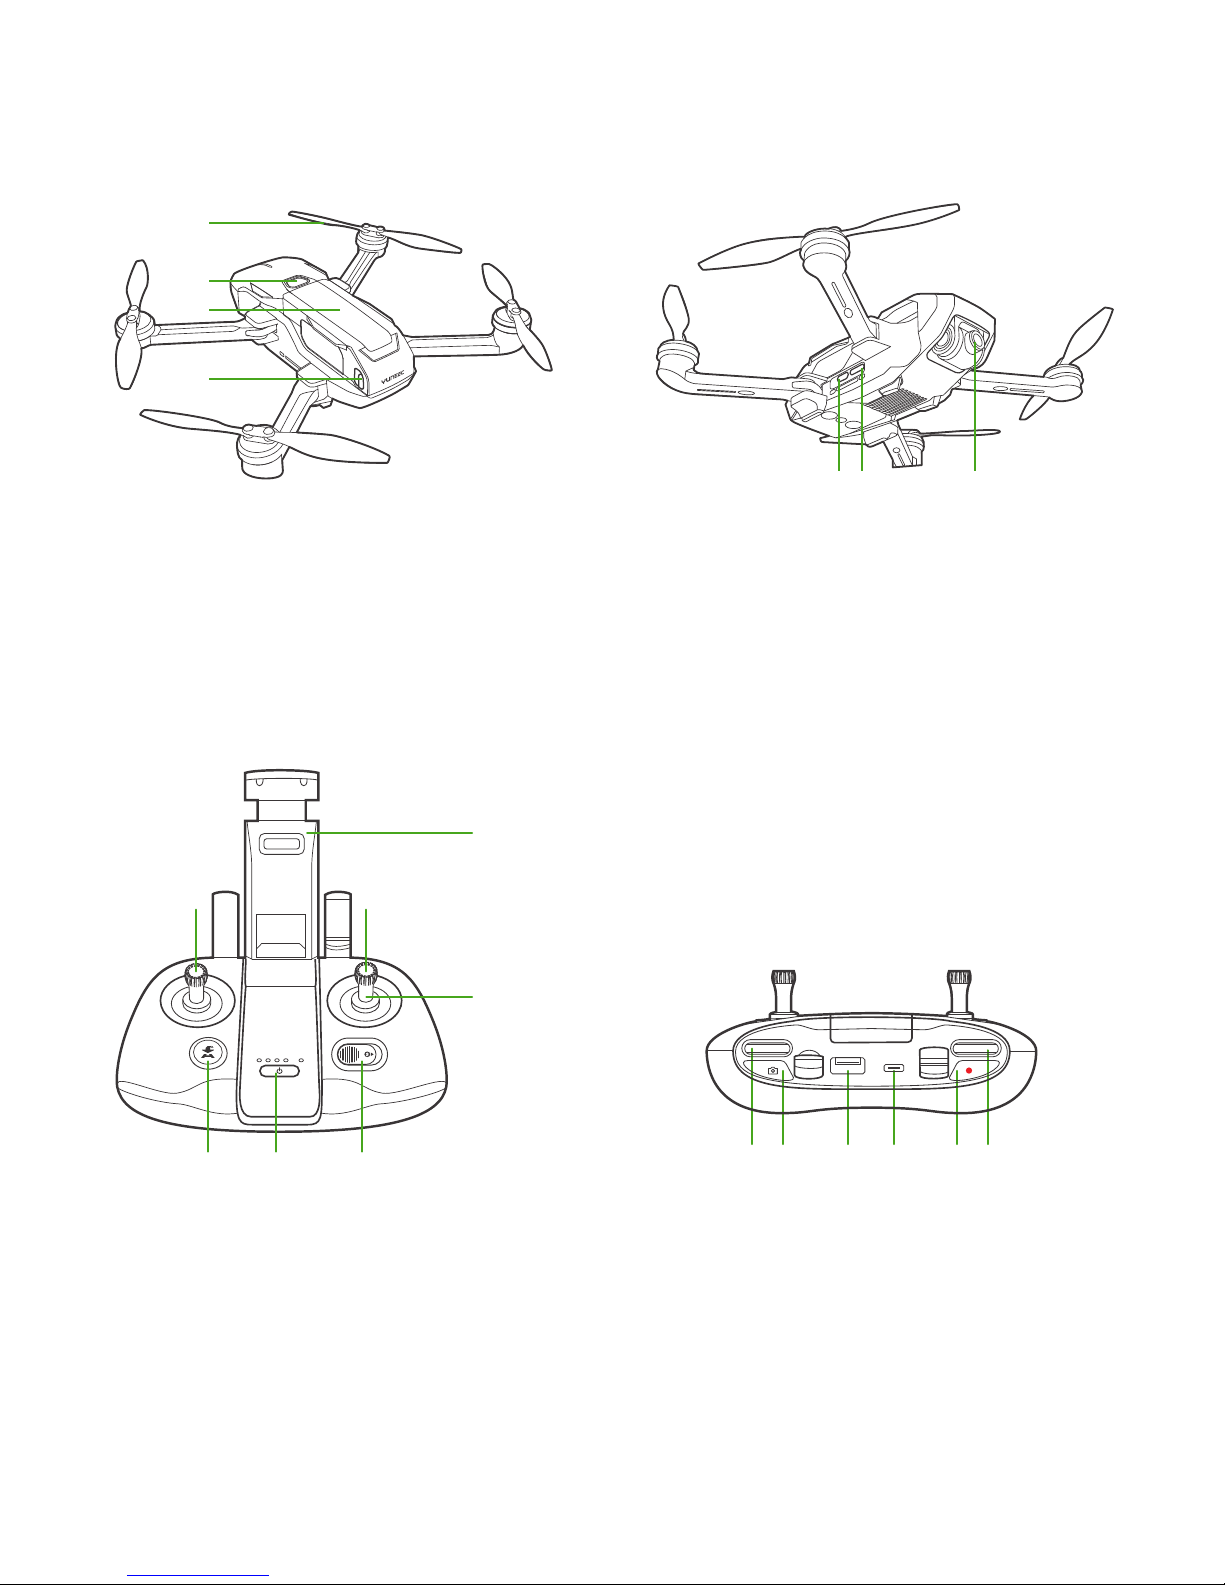
Overview
-Aircraft
-Remote Controller
Charging the Remote Controller
Preparing the Aircraft
Charging the Flight Battery
SD Card Installation
Installing the Smart Device
Powering ON/OFF
Binding
-Scan QR Code
-Manual Connection
Compass Calibration
Placement Before Takeoff
Take Off
-Auto Take-off
-Manual Take-off
Direction Control
Optimal Transmission Zone
Taking Photos and Recording Videos
-To Take a Still Photo
-To Start/Stop Recording Video
-Camera Tilt Control
Voice Control
Instant Social Sharing
................................................................................ 04
............................................................................. 04
......................................................................................... 04
............................................................................. 05
...................................................................... 05
................................................................................................ 05
.......................................................................................... 05
....................................................................................... 07
........................................................................................... 07
............................................................................. 07
................................................ 08
.................................................................. 08
....................................................... 08
................................................................... 09
......................................................... 09
......................................................................... 09
........................................................................................... 10
................................................................................... 10
............................................................................ 11
..................................................................... 12
............................................................ 14
.......................................................................................... 14
..................................................................................... 14
................................................................................. 14
............................................................................ 15
........................................................ 15
....................................... 16
...................................................................... 16
.............................................................. 16
.......................................................................... 16
.............................................................................. 16
.................................................................. 17
Flight Modes
-Angle Mode
-Sport Mode
Advanced Functions
-Journey
-POI
-Visual Tracking
Return to Home
-Smart RTH
-Low Battery RTH
-Failsafe RTH
Landing
-Auto Land
-Manual Land
LED Status Indication
Firmware Update
Disclaimer
Collection and Processing of Data
Battery Warnings and Usage Guidelines
General Safety Precautions and Warnings
Camera Usage Warnings
FCC Statement
RF Exposure Warning
IC Radiation Exposure Statement for Canada
NCC Warning Statement
CE Warning Statement
EU Compliance Statement
Customer Service
02