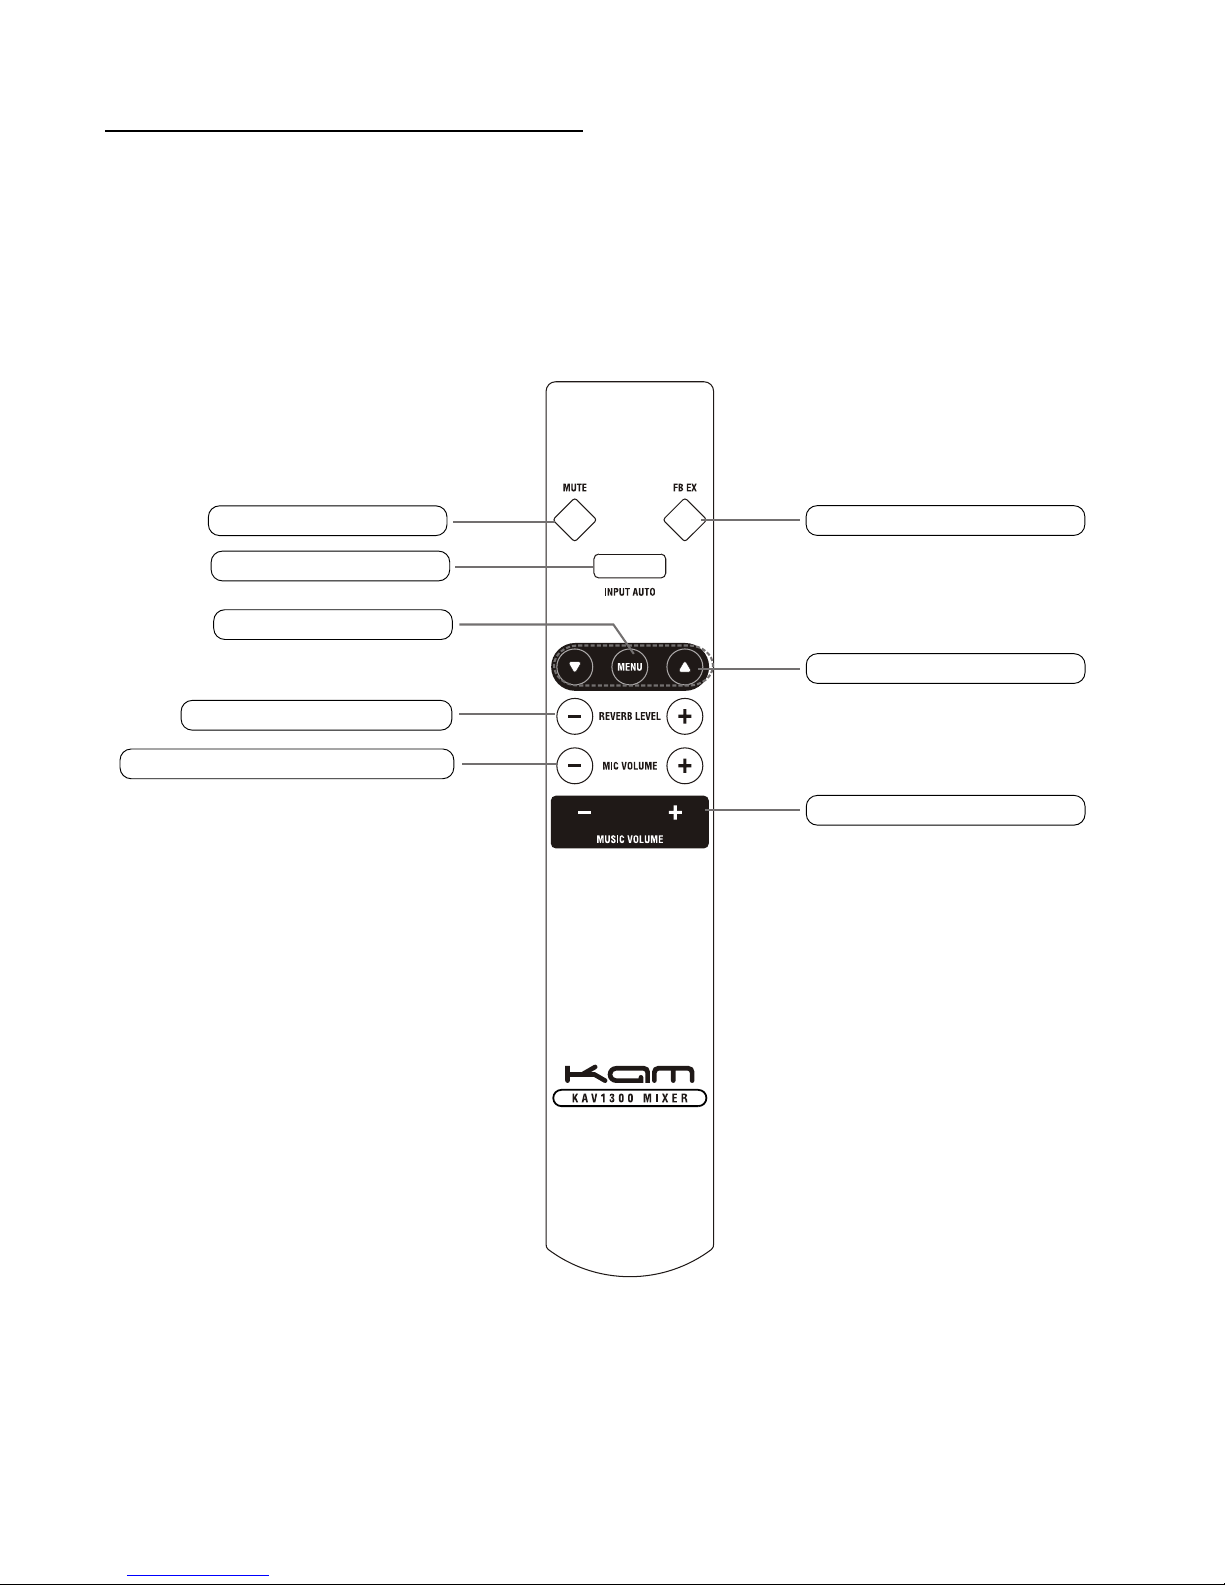
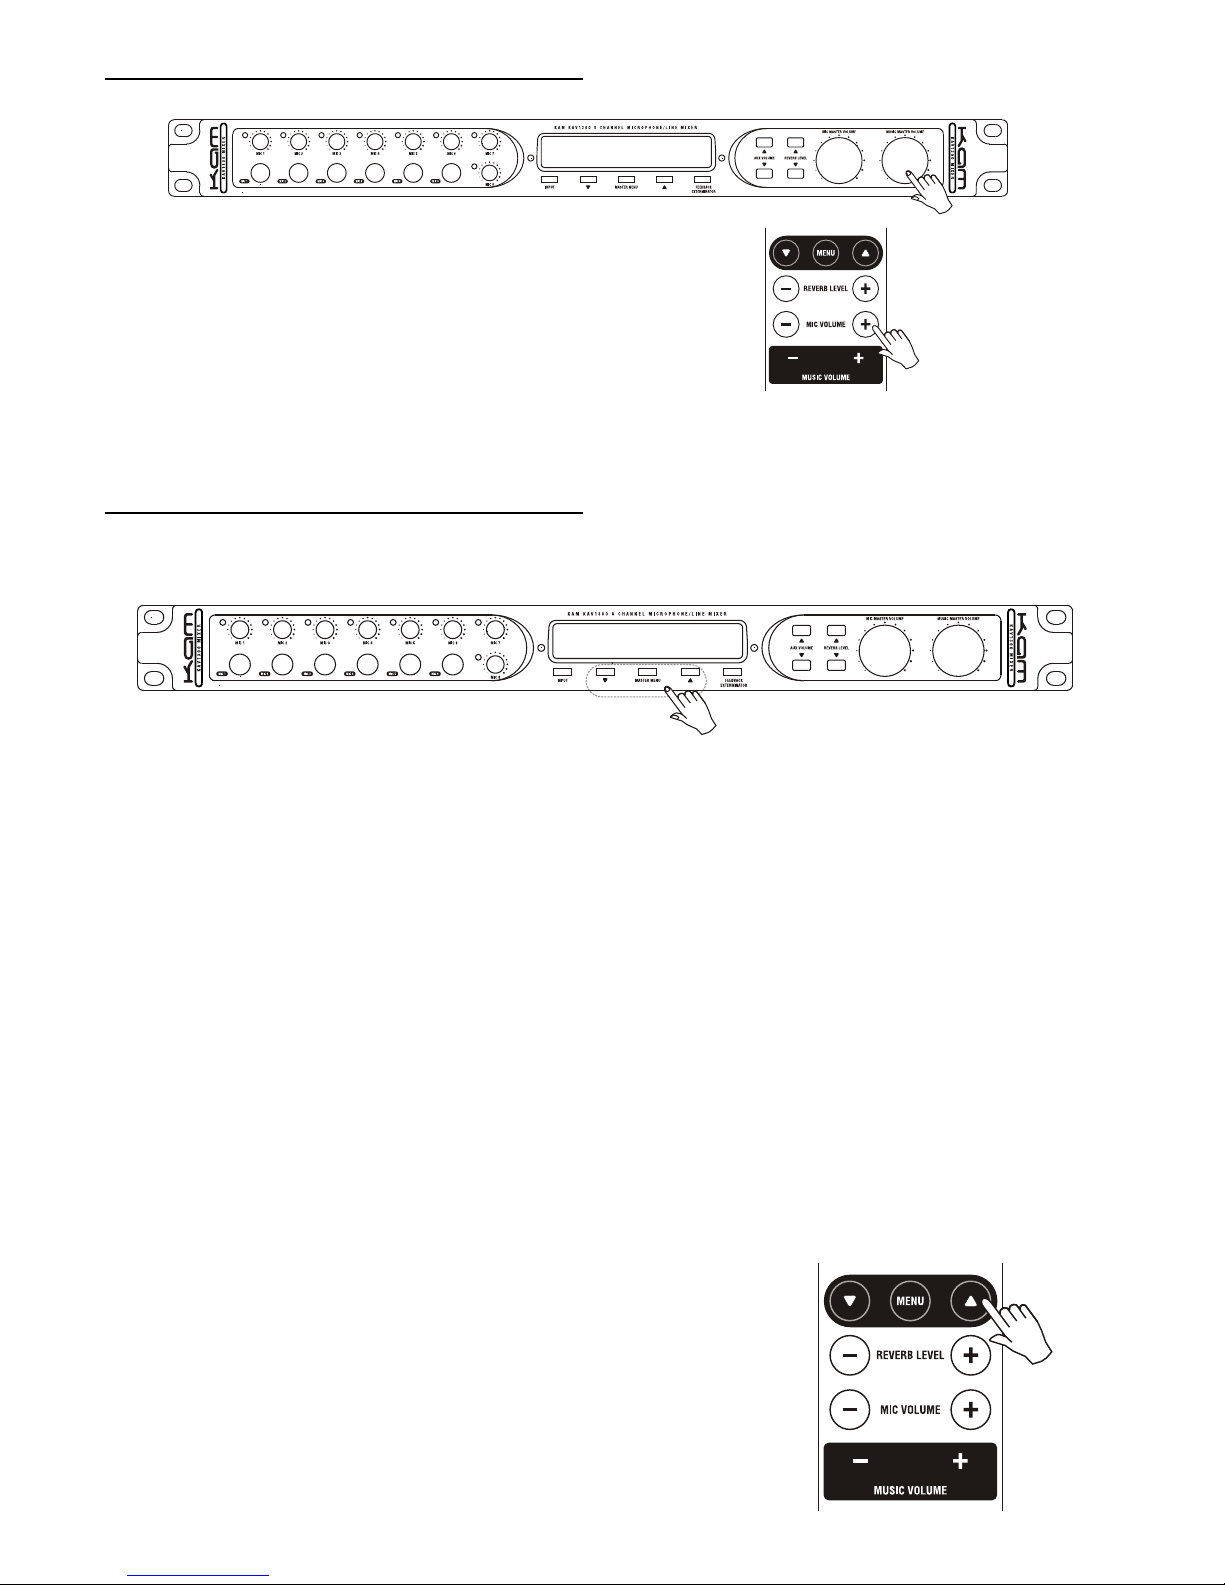
SETTING THE MIC FREQUENCY
Press the main menu button until fb ex2 is displayed in the screen
Press the up/down arrow selection buttons to change setting ( range 1-6 )
This is effectively the mic tuning
This function is also available on the remote control press the main menu button
use the up/down buttons until the fb ex2 is displayed in the screen
then use the up/down buttons to select desired setting
REVERB TIME SET
Press the main menu select button until mic rev-t is displayed in the screen
Using the up/down buttons select the desired effect (range from 0-100 ms)
This function is also available on the remote control press the
main menu button use the up/down buttons until the
mic rev-t is displayed in the screen then use the up/down
buttons to select desired setting
SETTING THE MIC ECHO DELAY
Press the main menu button until mic pre-d is displayed in the screen
Using the up/down buttons select the desired effect (range from 0-250 ms)
This function is also available on the remote control press the
main menu button the until the mic pre-d displayed in the screen
then use the up/down buttons to select desired setting
2.Turn MENU button on remote control, press " " To
F.B TIME to set parameter value.
1Connect MIC, turn the frequency of relative MIC(MIC4,MIC5,MIC6,MIC7,MIC8) and press " " Of
REV LEVEL to set the frequency value to adjust level.
Effect lever set
2.Connect MIC,turn the frequency of relative MIC(MIC4,MIC5,
MIC6,MIC7,MIC8)to proper position and press "+/-" Of REV LEVEL
on remote control to adjust level.
MIC change frequency set
Main function of MIC change frequencfy set is to set MIC tune(range from 1-6 )
1.Press MASTER MENU On front panel, choose FB.EX*2 and press " " To set parameter value;
e.g,FB.EX2 6
2.Turn MENU botton on remote control,chooseFB.EX2
and press " " To set parameter value.
Operation introduction
10
Reverb time set
People can hear difference effect of room size from reverb time
Press MASTER MENU on front panel, choose MIC REVT and press to set parameter value;
E.g, MIC REV-T 100ms.
2.Press MENU on remote control, choose MIC REV-T
and press " " to set parameter value.
1.Press MASTER MENU on front panel, choose MIC PRE-D and press " " to set parameter value;
E.g, MIC PRE-D 100ms.
2.Press MENU on remote control, choose MIC PRE-D
and press " " to set parameter value.
MIC Echo delay set
Main function of echo delay set is to give you the great echo effect depends on the delay time you set.(range
from 2~250ms)
Operation introduction
11
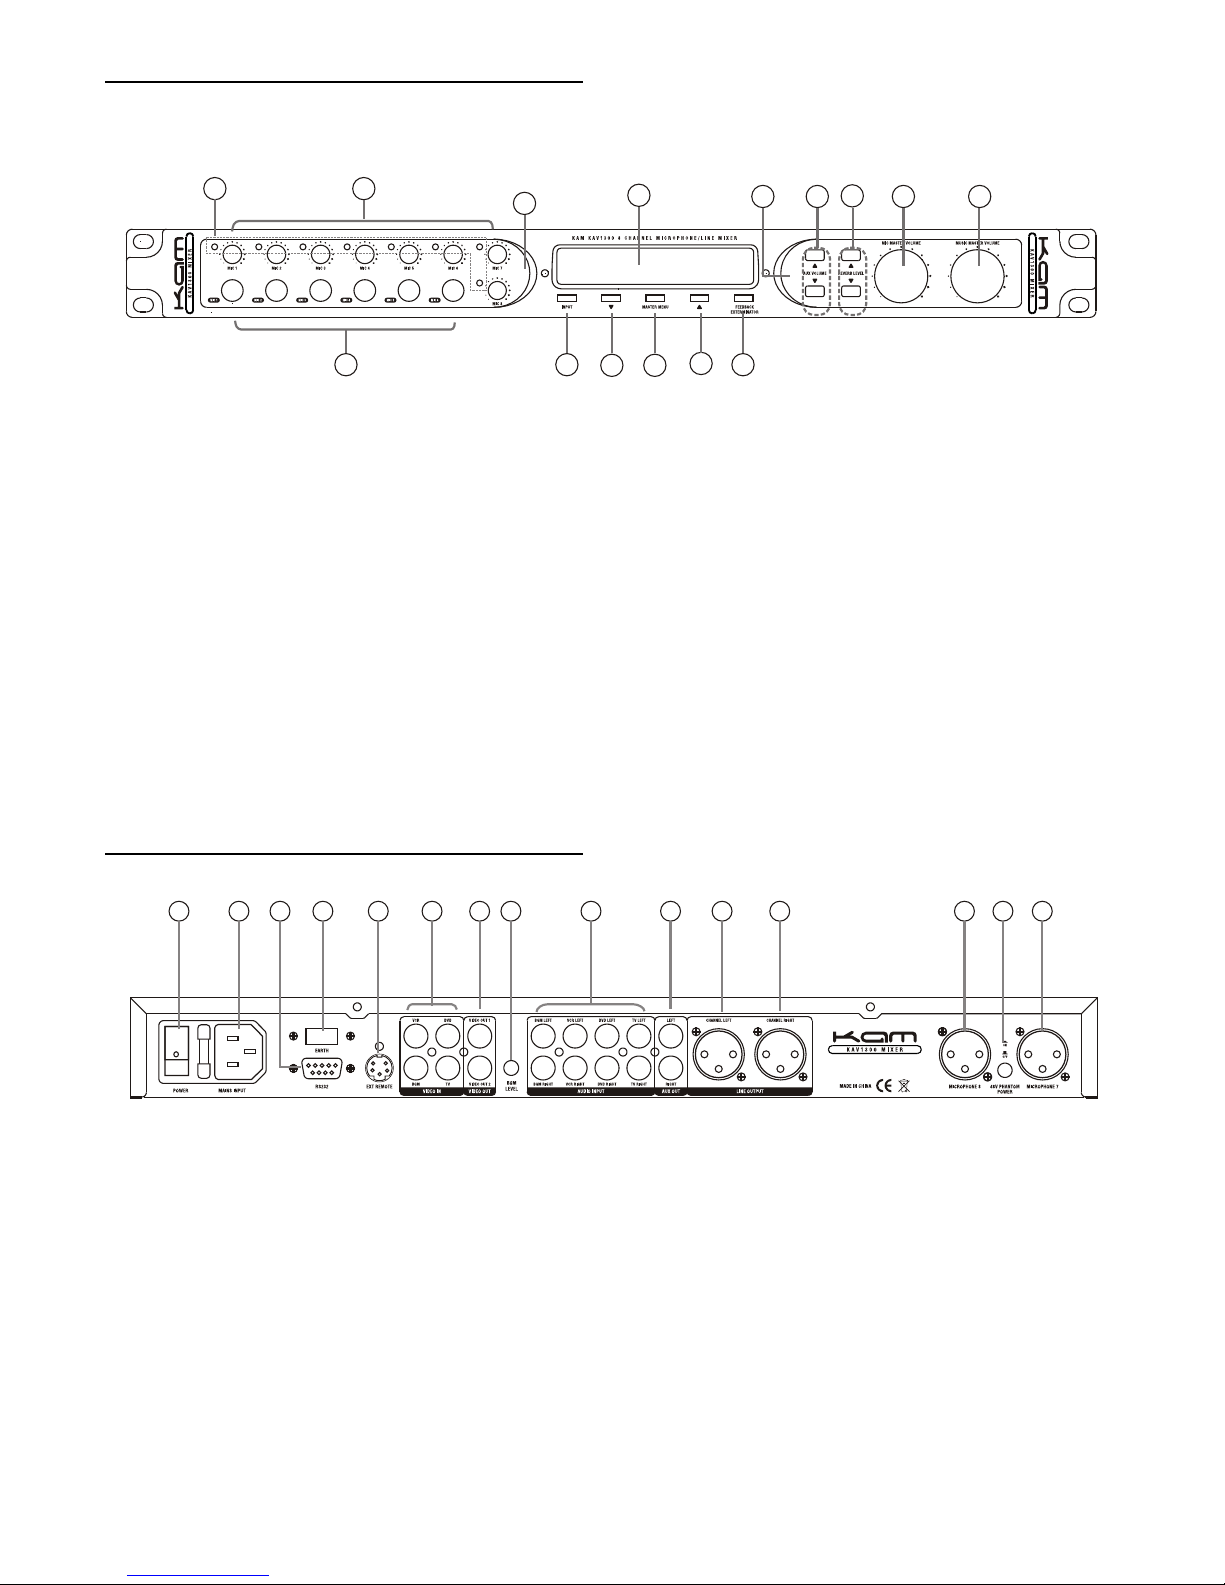
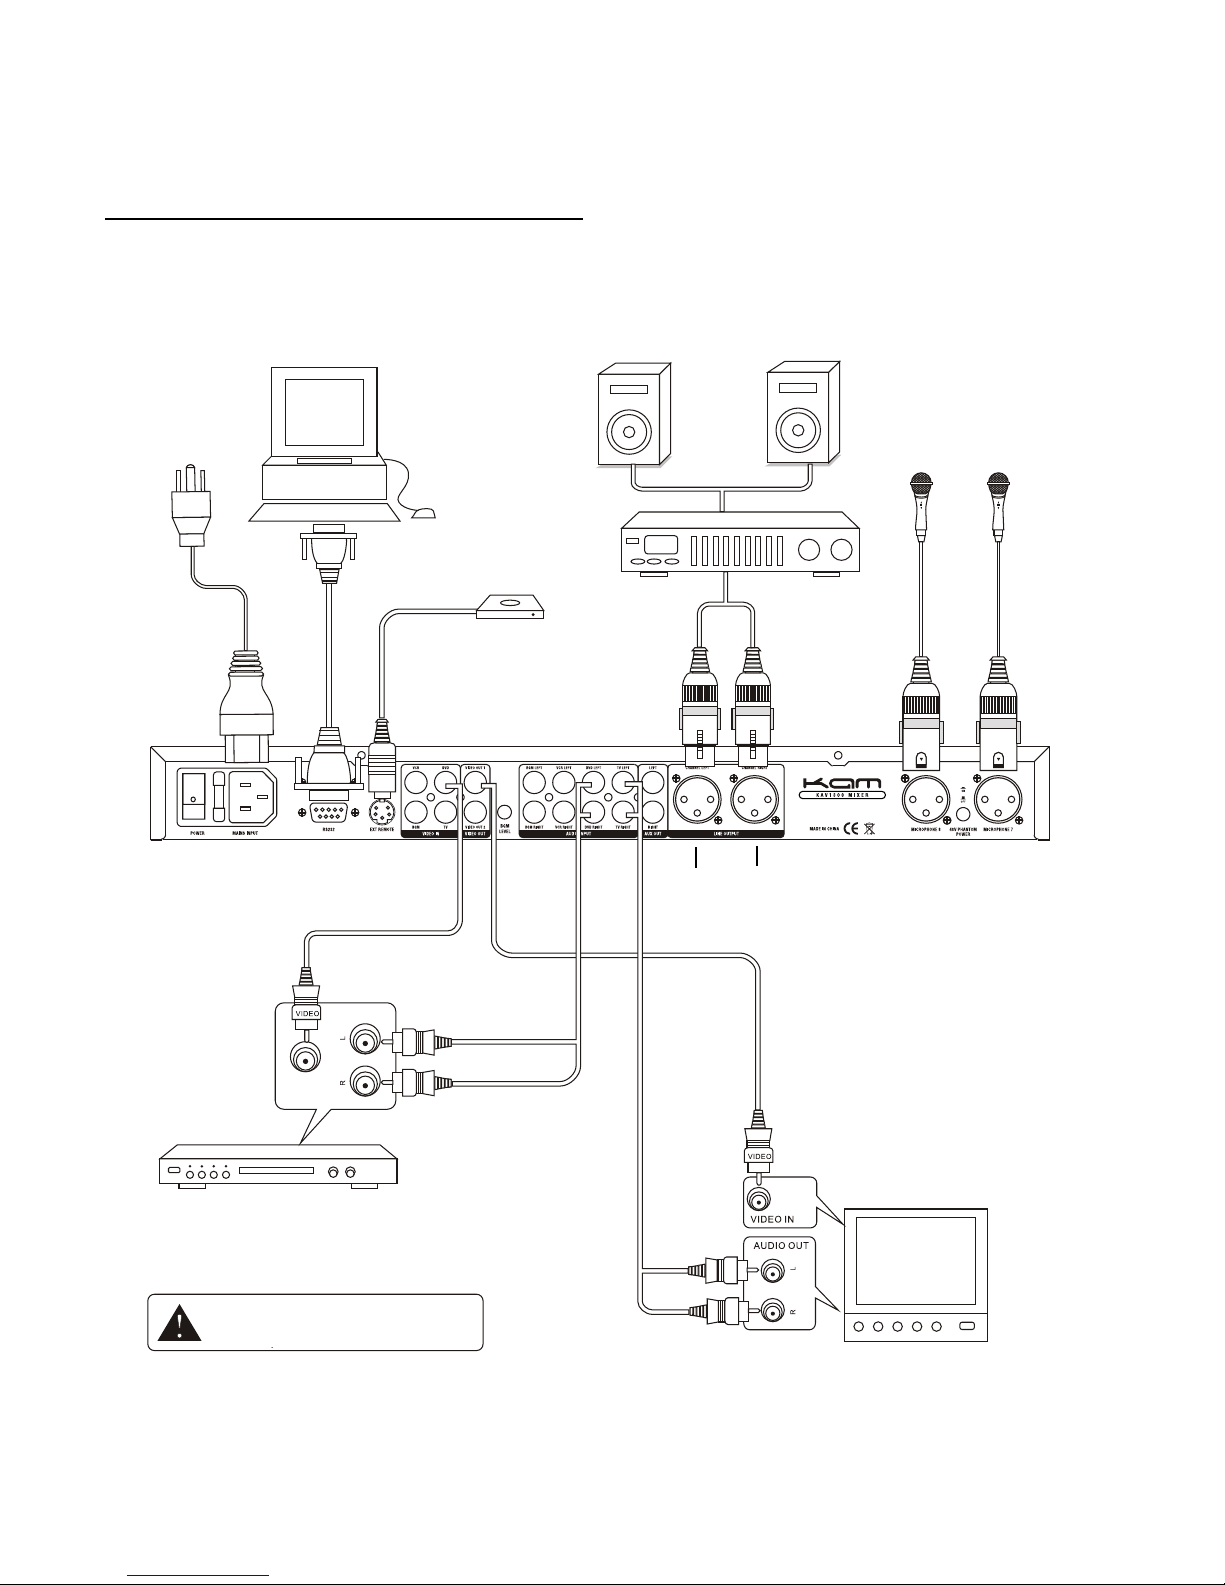
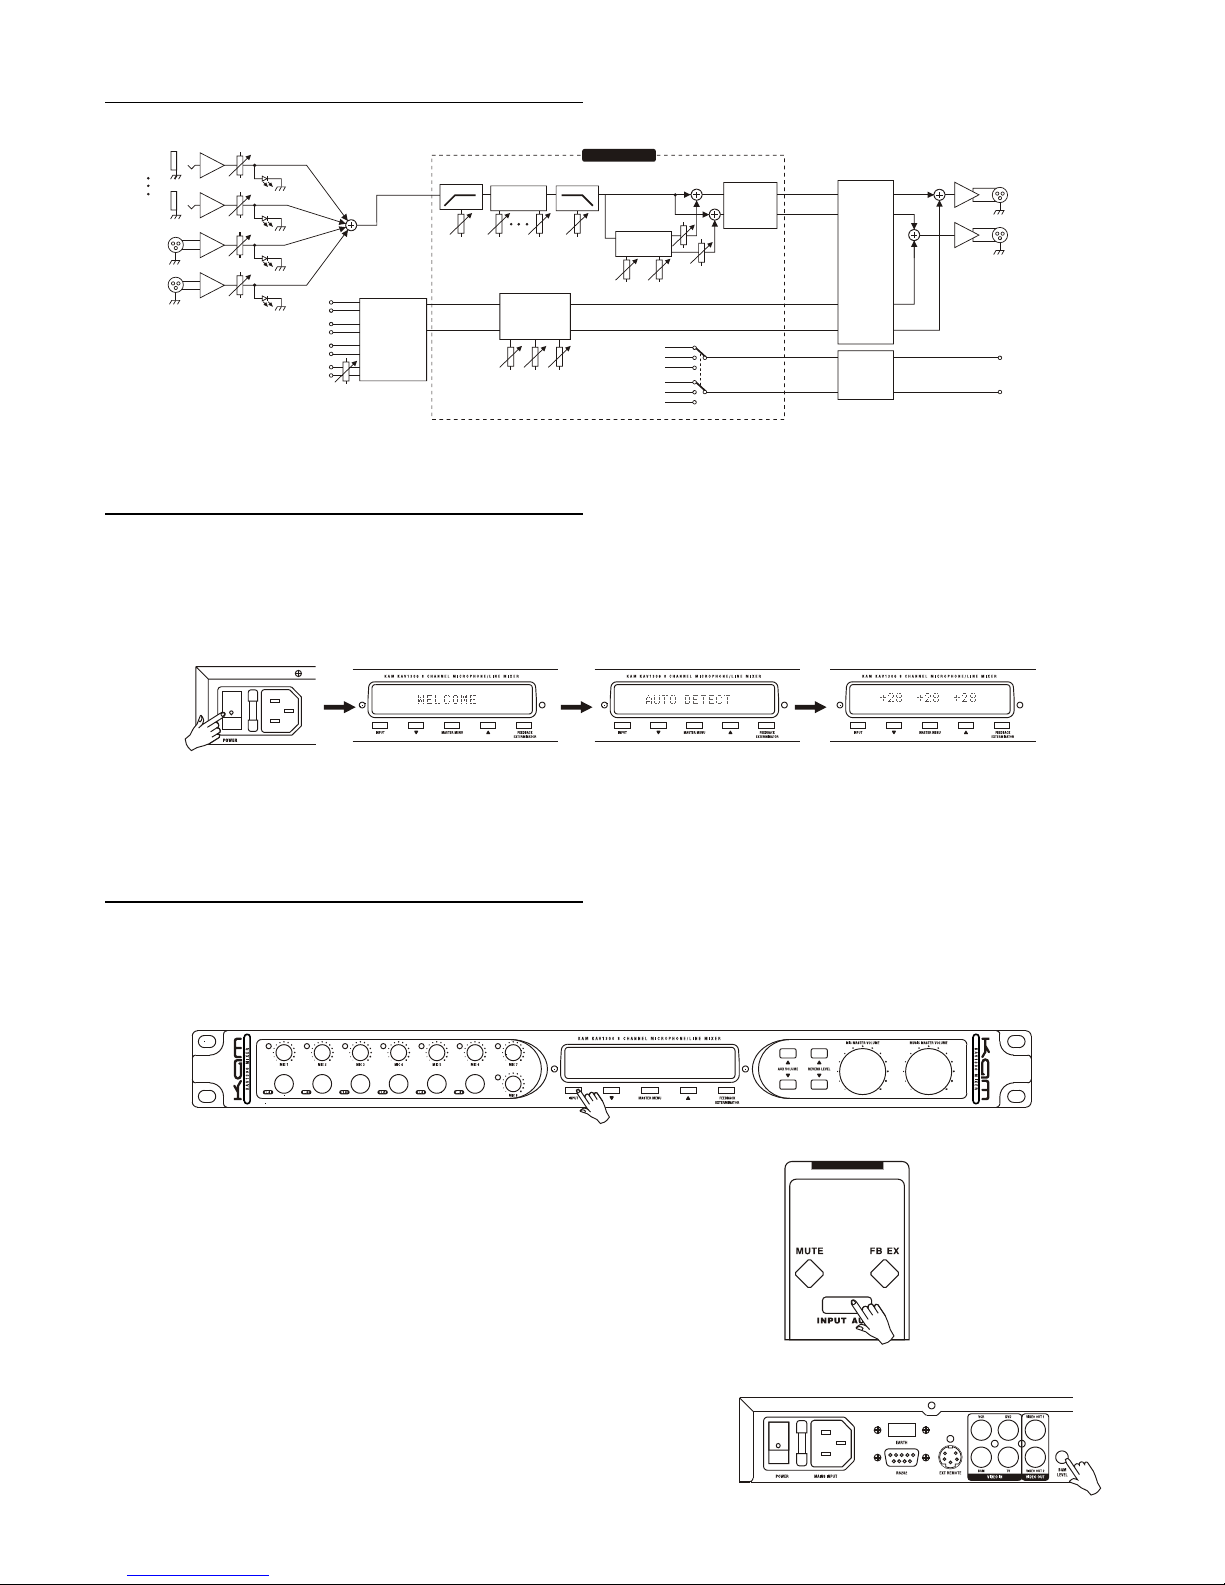
SCHEMATIC DIAGRAM
OPERATION INSTRUCTIONS
Connect the mains supply and press the power button as ( pic 1)
The power led will light and the display welcome will appear (pic2 )
The auto detect will appear ready to scan input devices ( pic 3 )
The input button will flash ready for you to select the desired input source or choose the auto scan function
Note: the value from left to right in the display is effect level-mic volume-music-volume see pic 4 above
OPERATION SELECT BUTTON
The input select button selects the desired input source there are 4 separate input choices (bgm ,dvd,tv,vcr,)
and auto input detect
Press the input select button to choose input ie. Dvd your selection will be displayed on the display screen
This function is also available on the remote control pressing the
input select button Will change the input source and your selection
will be displayed in the screen
When no signal is being received when the auto detect function is
selected any signal detected will automatically be selected the
sensitivity of detection can be adjusted with the bgm adjuster
Schematic chart
MIC1
MIC6
MIC7
MIC8
R
L
R
L
BGM
VCR
DVD
TV
L
R
R
L
SEVEN EQ
R
L
R
L
R
L
Cut low frequency
Left and right
balance output
MIC
volume
control
Music
volume
control
Output
frequency
control
MIC output R
Music output R
Assistant
output L
Assistant
output R
Anti whistle
Reverb
Echo proportion
Delay time
AUX output chose
MIC output L
Music ouput L
Mic L+Music L
MIC output R
Music output R
Mic R+Music R
DSP processor
Treble middle
bass
volume
control
Signal change
and
auto change
MIC direct signal
(L/R)assistant
line output
MIC output L
Music output L
Cut high frequency
6
2 3 4
Operation introduction
Begin
Note: the value from left to right of picture4 means:"effect level" mic volume. music volume
Input volume chose(input)
INPUT button function is supply input siganl,have 4 separate input choice and auto check input
function,(BGM,DVD,TV,VCR and AUTO DETECT)
1.Press "INPUT" button, chosen signal display on the screen, for example, input DVD signal, display on the
point screen
2.Press "INPUT AUTO" button on remote control input
relative signal,auto check will display on the screen
3.When no signal input and choose auto signal,input level trimmed by BGM LEVEL;change to relative signal
channel auto as soon as machine check have signal input
Connect with power and press POWER button(as pic 1):power LED glittering and screen display"welcome"
(as pic 2),machine auto to check input channel(as pic3).Then "input" LED glittering; after checking machine
come into operation state, screen display(as pic4)
7
234
Operation introduction
Begin
Note: the value from left to right of picture4 means:"effect level" mic volume. music volume
Input volume chose(input)
INPUT button function is supply input siganl,have 4 separate input choice and auto check input
function,(BGM,DVD,TV,VCR and AUTO DETECT)
1.Press "INPUT" button, chosen signal display on the screen, for example, input DVD signal, display on the
point screen
2.Press "INPUT AUTO" button on remote control input
relative signal,auto check will display on the screen
3.When no signal input and choose auto signal,input level trimmed by BGM LEVEL;change to relative signal
channel auto as soon as machine check have signal input
Connect with power and press POWER button(as pic 1):power LED glittering and screen display"welcome"
(as pic 2),machine auto to check input channel(as pic3).Then "input" LED glittering; after checking machine
come into operation state, screen display(as pic4)
7