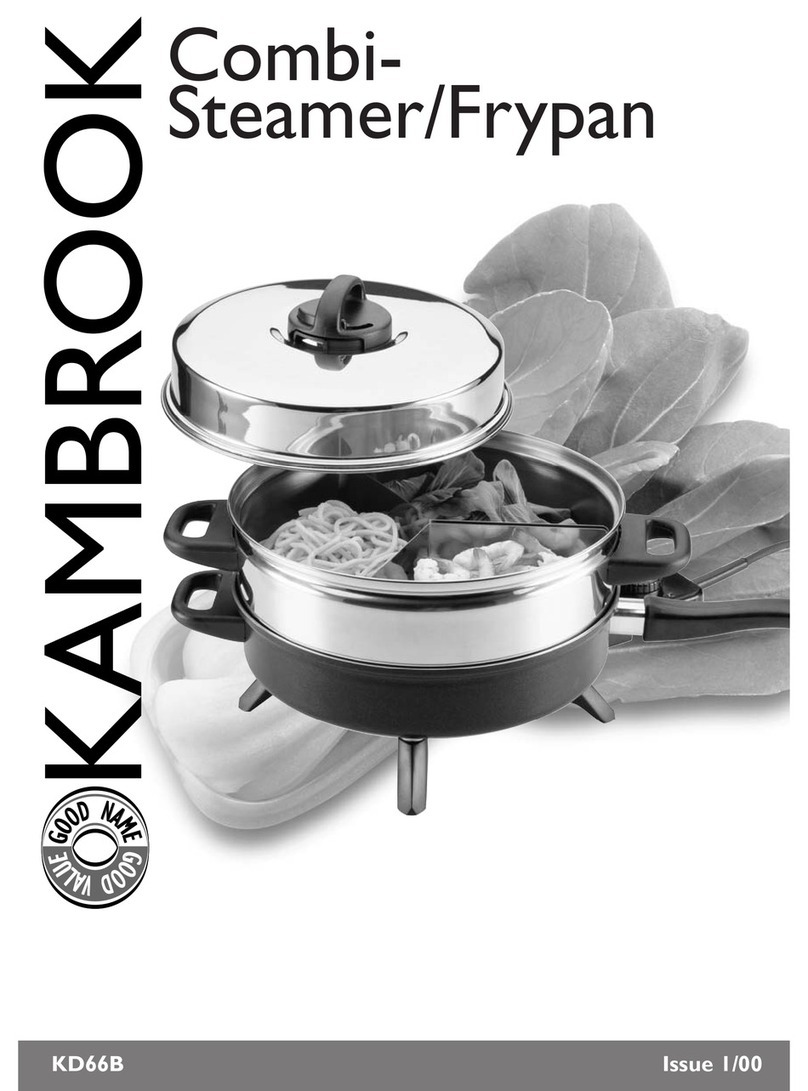
Kambrook KFS200BLK User manual

Due to continual improvement in design or otherwise, the product you
purchase may differ slightly from the illustration in this book. Issue B14
Kambrook - New Zealand
Private Bag 94411
Botany, Manukau
Auckland 2163
New Zealand
Customer Service Line/
Spare Parts 0800 273 845
Customer Service Fax 0800 288 513
www.kambrook.co.nz
Kambrook - Australia
Building 2, Port Air Industrial Estate
1A Hale Street
Botany NSW 2019
Australia
Customer Service Line 1300 139 798
Customer Service Fax 1800 621 337
www.kambrook.com.au

KFS200BLKINSTRUCTION BOOKLET

Important
Please retain your instruction
book for future use.
In the event that you need some assistance with your
Kambrook appliance, please contact our Customer Service
Department on 1300 139 798 (Australia) or 0800 273 845
(New Zealand). Alternatively, visit us on our website at
www.kambrook.com.au or www.kambrook.co.nz

Contents
Kambrook Recommends
Safety First
p4
Your Kambrook STEAMini
BPA Free Food Steamer
p6
Using Your Kambrook
Food Steamer
p7
Steaming Charts p9
Care, Cleaning and Storage p15
Recipes p17

4
Kambrook Recommends Safety First
IMPORTANT: Please retain your
instruction book for future use.
At Kambrook, we believe that safe performance is the first priority in any
consumer product, so that you, our valued customer can confidently
use and trust our products. We ask that any electrical appliance that
you use be operated in a sensible fashion with due care and attention
placed on the following important operating instructions.
Important Safeguards For Your Kambrook
STEAMini BPA FREE Food Steamer
• Carefully read all instructions before
operating the food steamer for the first time
and save for future reference.
• Remove and safely discard any packaging
material and promotional labels before using
the food steamer for the first time.
• To eliminate a choking hazard for young
children remove and safely discard the
protective cover fitted to the power plug of
this food steamer.
• When unpacking the food steamer, check
to see you have received all the items
listed in the parts list, before discarding the
packaging.
• Do not place the food steamer near the
edge of a bench or table during operation.
Ensure that the surface is level, clean and
free of water and other substances.
• Do not operate the food steamer on an
incline plane. Do not operate the food
steamer unless the element is fully immersed.
Do not move the food steamer while it is
switched on.
• Always operate the food steamer on a stable
and heat resistant surface.
• Do not operate the food steamer on a sink
drain board.
• Always ensure the food steamer is properly
assembled before use. Follow the instructions
provided in this book.
• Use the removable steaming baskets and
other steaming accessories supplied with the
food steamer. Do not use any other steaming
basket or steaming accessories on the food
steamer base.
• Do not use a damaged or dented steaming
basket. If damaged or dented, replace
steaming basket before using.
• Only use clean tap water in the food
steamer’s water reservoir. Do not use wine,
stock or other liquid.
• Never operate the food steamer without
water in the food steamer water reservoir.
• Ensure the removable food steaming basket
is correctly positioned on the food steamer
base before you commence cooking.
• Never plug in or switch on the food steamer
without having the steaming basket and lid
placed on food steamer base.
• When positioning the lid on a steamer
basket, ensure the steam vent (if any) on
the lid faces toward the rear of the food
steamer. Lift and remove the lid carefully and
away from yourself to avoid scalding from
escaping steam.
• Do not place anything, other than the lid
and food steaming basket, on top of the
food steamer when assembled, when in use
and when stored.
• Always take care when lifting the steaming
baskets and juice collection tray as the
steam and water condensation can cause
burns.

5
Important safeguards for all electrical
appliances
• Fully unwind the power cord before use.
• Connect only to a 230V or 240V power outlet.
• Do not let the power cord hang over the
edge of a bench or table, touch hot surfaces
or become knotted.
• To protect against electric shock, do not
immerse the power cord, power plug or
appliance in water or any other liquid or
allow moisture to come in contact with
the part, unless it is recommended in the
cleaning instructions.
• The appliance is not intended for use by
persons (including children) with reduced
physical, sensory or mental capabilities,
or lack of experience and knowledge,
unless they have been given supervision or
instruction concerning use of the appliance
by a person responsible for their safety.
• Children should be supervised to ensure that
they do not play with the appliance.
• It is recommended to regularly inspect the
appliance. To avoid a hazard, do not use
the appliance if power cord, power plug or
appliance becomes damaged in any way.
Return the entire appliance to the nearest
authorized Kambrook service centre for
examination and / or repair.
• Any maintenance other than cleaning
should be performed at an authorised
Kambrook Service Centre.
• This appliance is for household use only. Do
not use this appliance for anything other
than its intended use. Do not use in moving
vehicles or boats. Do not use outdoors.
Misuse may cause injury.
• The installation of a residual current device
(safety switch) is recommended to provide
additional safety protection when using
electrical appliances. It is advisable
that a safety switch with a rated residual
operating current not exceeding 30mA be
installed in the electrical circuit supplying
the appliance. See your electrician for
professional advice.
• Always turn the appliance to the OFF
position, switch off at the power outlet
and unplug at the power outlet when the
appliance is not in use.
• Before cleaning, always turn the appliance
to the OFF position, switch off at the power
outlet, unplug at the power outlet and
remove the power cord, if detachable, from
the appliance and allow all parts to cool.
• Do not place this appliance on or near
a heat source, such as hot plate, oven or
heaters.
• Position the appliance at a minimum
distance of 20cm away from walls, curtains
and other heat or steam sensitive materials
and provide adequate space above and on
all sides for air circulation.
• Do not boil eggs in the water reservoir
• Do not touch hot surfaces; use the steamer
handle (if any) for lifting and carrying the
food steamer and use oven mitts to remove
the lid, steamer basket and rice/sauce
cooking bowl.
• Do not place food or liquid other than water
in the food steamer base. Only the steaming
baskets and rice cooking bowl are designed
to contain food.
• Do not place any part of the food steamer
in a gas, electric or microwave oven or on a
hot gas or electric burner.
• Do not place your face or any other body
part over the food steamer whilst in use as
the steam can cause serious burns.
• Extreme caution must be used when the
food steamer contains hot food and liquids.
Improper use may result in injury. Do not
move the food steamer during steaming.
• The temperature of accessible surfaces will
be high when the food steamer is operating
and for some time after use.
• Care should be taken when handling the
food steamer after steaming, ensuring that
the food steamer body and parts are not
touched as these may still be hot due to
residual heat.
• Avoid unnecessary removal of the lid and
steaming baskets during cooking, as steam
surrounding the food will escape.
• Do not leave the food steamer unattended
when in use.
• Do not use chemicals, steel wool, metal
scouring pad or abrasive cleaners to clean
the outside of the food steamer housing or
steamer basket as these can damaged the
housing or the steamer basket.
• To prevent damage to the food steamer
do not use alkaline cleaning agents
when cleaning, uses a soft cloth and mild
detergent.
• Do not store the food steamer with water
in the water reservoir. Always empty the
reservoir after use.
• Keep the food steamer clean. Follow the
cleaning instructions provided in this book.
6
Your Kambrook STEAMini BPA FREE Food Steamer
1. 60 minute timer with auto-off
2. Power ‘ON’ indicator light
3. 3 litre steaming basket
4. 2 litre steaming basket
5. Lid
6. Juice collection tray
7. Water reservoir
8. Element protection cover
Not Shown
• Rice cooking bowl
LABORATORY TESTS SHOW WATER NOT CONTAINING
BPA THAT IS BOILED IN THIS KETTLE WILL BE BPA FREE
TO A RESOLUTION OF 1 PART PER MILLION.
BPA FREE
MATERIALS*
*
Laboratory tests show
water not containing
BPA that is boiled in
this kettle will be BPA
free to a resolution of
1 part per million.
BPA FREE
MATERIALS*
*
BPA FREE
MATERIALS*
Laboratory tests show
water not containing
BPA that is boiled in
this kettle will be BPA
free to a resolution of
1 part per million.
*
B PA
FREE
MATERIALS*
All parts that come
into contact with
food are BPA free.
*

7
Using Your Kambrook Food Steamer
Before First Use
Remove and safely discard all
packaging material and promotional
labels from the food steamer.
Wash the removable steaming
baskets, rice cooking bowl, lid and
juice collection tray in warm soapy
water, rinse and dry thoroughly. Also
wipe the inside of the water reservoir
before using the food steamer for the
first time.
Operating Your Kambrook
Food Steamer
1. Remove the lid, steaming baskets
and juice collection tray from the
steamer base and ensure that
the element protection cover
is correctly positioned over the
heating element by aligning
the three holes in the element
protection cover with the three
protruding nubs around the
element and push on until the
cover is firmly in place (see Fig. 1).
Fig. 1
2. Pour clean tap water into
the water reservoir, up to the
maximum ‘HI FILL’ (900 ml) mark
found on the inside of the water
reservoir (see Fig. 2). If you are
cooking for a long period of time,
ensure that the water level does
not fall below the minimum
‘LO FILL’ (300ml) mark.
WARNING: Only use
clean tap water in the
food steamer’s water
reservoir. Do not use wine,
stock or other liquid.
Fig. 2
Place the juice collection tray into
position on top of the steamer base.
One Layer Cooking:
1. Place the large 3L steaming
basket into position on top of the
juice collection tray.
2. Place the food into the basket.
3. Cover with lid.
NOTE: The large 3L steaming
basket must be used if steaming
in only one basket; the smaller
basket can be added during the
steaming process for food that
needs less steaming time.
Two Layer Cooking:
1. Place the large 3L steaming
basket into position on top of the
juice collection tray. Place the
food into the basket.
LO FILL
HI FILL

8
Using Your Kambrook Food Steamer Continued...
2. Place the small 2L steaming
basket on top of the larger
basket. Place the food into the
2L steaming basket.
3. Cover with lid.
CAUTION: When
positioning the lid on
a steamer basket,
ensure the steam vent
(if any) on the lid faces
toward the rear of the
food steamer. Lift and
remove the lid carefully
and away from yourself
to avoid scalding from
escaping steam.
NOTE: Denser foods or foods
that take longer to cook should
be placed in the lower steaming
basket as it gets a higher
concentration of steam. Also,
foods such as meat or chicken
should be placed on the lower
steaming basket to avoid juices
dripping onto foods below.
NOTE: The rice cooking bowl
can be placed into the 3L
steaming basket for cooking/
steaming food as described in
steaming charts and recipes.
4. Plug the power cord into a 230V
or 240V power outlet and switch
on.
5. Turn the timer dial to the desired
cooking time - this will activate
the steamer base and the
‘POWER’ indicator light will
illuminate. Steaming will start
within 30 seconds. When cooking
time has elapsed and the timer
dial has counted down, the food
steamer will switch off, a bell will
ding and the ‘POWER’ indicator
light will go out.
6. Dismantle the steaming baskets to
remove the cooked food, taking
care as lid, steaming baskets,
steam, and water condensation
will be very hot.
7. Switch off at the power outlet and
unplug the power cord.
CAUTION: Avoid
unnecessary removal
of the lid and steaming
baskets during cooking,
as steam surrounding
the food will escape.
WARNING: Do not touch
hot surfaces; use oven
mitts to remove the lid,
steaming baskets, and
rice cooking bowl.
CAUTION: Always take
care when lifting the
steamer bowls and
juice collection tray, as
the steam and water
condensation can
cause burns.

9
8. Allow the steamer base and juice
collection tray to cool before
dismantling, discarding liquid and
cleaning.
Refill water reservoir
If steaming for a long period of
time (over 1 hour), the water reservoir
will have to be refilled so as not to
boil dry.
Be careful as the food steamer will be
very hot.
1. Swtich off at the power outlet and
unplug the power cord.
2. With oven mitts on, remove the
basket(s) and lid and place on a
heat-resistant surface.
3. Use tongs to lift the removable
juice collection tray (See. Fig. 3)
and empty in the sink. Do not
empty the juices collected in the
water reservoir.
Fig. 3
4. Fill a measuring cup with water
and refill the food steamer up
to the maximum ‘HI FILL’ mark.
Replace juice collection tray on
top and the basket(s) and lid.
5. Plug the power cord back into
the power outlet and switch on.

10
Steaming Charts
All recipes and information
provided in steaming charts rely on
the preceding assembly instructions
being followed. For example, the
element protection cover should
be placed over heating element,
the water reservoir filled with water
to the ‘HI FILL’ maximum level, the
juice collection tray placed onto the
steamer base and steaming baskets
and lid placed on top. The rice
cooking bowl can be utilised when
required.
For best results
Estimated steaming times are listed in
charts on the following page however
the freshness, quality and size of the
food, as well as personal preference,
will affect how quickly ingredients will
take to steam. Adjust water amounts
and cooking times as desired.
To ensure good results:
• Remove food immediately after
steaming is completed. Food will
continue to cook slightly due to the
accumulated steam if you leave it
in the steamer.
• Food should be arranged evenly in
steaming baskets. Foods of uniform
size will steam at a similar rate.
Vegetables
Clean the vegetables thoroughly.
Cut off stems, trim, chop and peel if
required.
Smaller, even-sized pieces of
vegetables will steam faster than
larger pieces.
When steaming several different
vegetables at once, place the largest
and firmest in the steamer first. Add
other vegetables according to size
during the steaming time.
Steaming time will decrease slightly if
steaming smaller portions.
Frozen vegetables should not be
thawed before steaming.
If steaming vegetables that have
been frozen always separate and stir
once during steaming.
If a sauce or liquid is to be prepared
with the vegetables, use the rice
cooking bowl for steaming.

11
VEGETABLE QUANTITY APPROX TIME
IN MINUTES
Artichokes 2 whole, with tops trimmed 20
Asparagus 500g 7
Baby corn 125g 5
Bok choy 350g bunch, cut in half lengthways 5
Beetroot 500g, whole (approx 4 ), cleaned and trimmed 35
Broccoli, florets 500g 6
Broccolini 175g bunch, whole, ends trimmed 8
Brussel sprouts 500g, cut in half 8
Cabbage 500g, coarsely shredded 12
Capsicum 500g, halved, seeds removed 5
Carrots 500g, sliced 7
Cauliflower, florets 500g 8
Chinese cabbage Shredded into 1cm thick pieces 5
Corn, on cob 3 to 5 cobs 15
Eggplant 500g, thickly sliced 8
Green beans 500g, cut or whole 5
Mushrooms 500g, whole 5
Onions 250g, thinly sliced 6
Parnsip 500g, peeled and sliced 12
Peas 500g, shelled 3
Sugar snap peas 150g, topped 3
Potatoes (New) 500g, whole (approx 8) 15
Potatoes (Red or White) 500g, whole (approx 3) 20
Pumpkin 500g, peeled and cut into 3cm pieces 15
Snow peas 250g, topped 3
Spinach 250g 2
Squash 500g, whole 8
Sweet potatoes 500g, cut into 3cm pieces 15
Turnips/Swedes 500g, quartered 15
Zucchini 500g, sliced 7
Frozen vegetables 500g (green beans, broccoli, brussel sprouts,
carrots, cauliflower, peas….) 5

12
RICE VARIETY CUPS OF
RICE
CUPS OF
WATER
APPROX TIME IN
MINUTES
White rice long grain, Basmati, Jasmine 1 1 1/4 25
White rice Medium grain 1 1 1/4 25
Brown rice Medium grain 1 2 60
Wild rice 1 2 60
GRAIN AND
CEREAL
CUPS OF
CEREAL
CUPS OF
WATER
APPROX TIME IN
MINUTES
Oatmeal 1 2 15
Quinoa 1 1 1/2 20
Rolled oats 1 2 15
Cracked wheat
(burghul) 1 1 1/2 15
Rice, Grains, and Cereals
1. Wash rice in a fine sieve under
cold running water until rice water
runs clear. Drain well.
2. Place measured rice and water
quantities into the rice cooking
bowl.
3. Place the rice cooking bowl into
the 3L steaming basket.
4. Cover with the lid and turn
the timer dial to the required
steaming time.
5. To produce firmer rice, slightly
decrease the water specified
in the rice cooking chart. To
produce softer rice, slightly
increase the water quantity and
cook a little longer.
6. Rice may be seasoned with salt,
pepper or butter after steaming.
Steaming Charts Continued...

13
Seafood
Steaming guidelines in the chart
below are for fresh and fully thawed
seafood.
Frozen seafood should be completely
thawed before steaming.
Always clean fresh seafood or fish
and add lemon wedges, herbs and
seasoning as desired before steaming.
Most seafood cooks very quickly.
Steam in small portions or in amounts
as specified below in chart.
SEAFOOD TYPE QUANTITY APPROX TIME
IN MINUTES NOTES
Clams 500g 7 Clams will open when
cooked
Crab 500g, cleaned and cut into
quarters 8Crab will turn reddish
orange when cooked
Fish, fillet 500g 8
Fish, steak 2cm thick 8
Fish, whole 500-750g 12
Lobster 750g, whole 15 Lobster will turn red when
cooked
Mussels 500g, fresh in the shell 6 Mussels will open when
cooked
Octopus 500g
Oysters 6, in the shell 6
Prawns, shelled 300g 5 Prawns will turn pink
when cooked
Prawns, in the shell 500g 6 Prawns will turn pink
when cooked
Scallops, shelled 500g 5
Scallops, in the shell 12 6
Vongole, pippies 500g 6 Pippies will open when
cooked
Fish fillets can be steamed in steaming
baskets. However, if you want to
retain juices, or even poach, use the
rice cooking bowl. Cooking time will
then be longer.
Adjust steaming times according to
various textures and sizes.
Fish is cooked when it flakes easily with
a fork and is opaque in colour.

14
MEAT AND POULTRY QUANTITY APPROX TIME
IN MINUTES
Beef, hamburger 500g 15
Beef, meatballs 500g 15
Chicken breast fillet 500g 20
Chicken drumsticks 500g (approx 4) 35
Chicken thighs on bone 500g (approx 4) 25
Chicken, whole 1.3kg 70
Duck, breast 500g (4-6 pieces) 8
Hot dog 500g 7
Quail 500g, whole (approx 6) 20
Sausages 500g 7
Meat And Poultry
Steaming guidelines in the chart
below are for fresh and fully thawed
meat and poultry.
Frozen meat and poultry should be
completely thawed before steaming.
Always clean and prepare fresh
meat and poultry before steaming. It
is recommended to remove any fat
and skin from the poultry and fat and
gristle from meat before steaming.
Whole chickens and roasts can be
steamed but for smaller cuts choose
even sized pieces for more even
cooking.
Arrange the smaller pieces of meat or
poultry in a single layer.
Steam until the meat or poultry is
well done. Pierce the thickest part
of the poultry or roast with a meat
thermometer, knife, or skewer to
check that the centre is cooked and
juices run clear.
Steaming Charts Continued...

15
Eggs
The food steamer is ideal for boiling,
poaching or scrambling eggs.
Eggs may be cooked in the shell or
cracked into individual size heatproof
dishes.
Scrambled eggs may be prepared in
the rice cooking bowl.
Large eggs will require slightly longer
cooking times.
CAUTION: Do not
boil eggs in the water
reservoir.
NOTE: Large 60g eggs have
been used for this table
EGGS QUANTITY APPROX TIME
IN MINUTES
Soft boiled 1-8 8
Hard boiled 1-8 15
Poached
1-6 / Lay a 40cm sheet of plastic film over a cup, push down
to line the cup. Crack egg into the cup, pull all the sides into
the centre and twist several times to seal it off. Repeat for
each egg, and place them all in the steaming basket.
7
Scrambled Beat together 6 eggs and 1/3 cup milk or cream and
seasoning in rice bowl. Stir eggs 2-3 times during cooking. 10
OTHER FOODS QUANTITY APPROX TIME
IN MINUTES
Dumplings, gow gees,
frozen 250-500g 20
Pork buns, frozen 4 20
Dim Sim, frozen 250g 20
Scrambled
Beat together 6 eggs and 1/3 cup milk or cream
and seasoning in rice bowl. Stir eggs 2-3 times
during cooking.
10
Other foods

16
Care, Cleaning and Storage
Care and Cleaning
1. Always switch the power off at
the power outlet, unplug the
power cord of the food steamer,
and allow the steamer base
and juice collection tray to cool
down before disassembling and
cleaning.
2. Wash the lid, steaming baskets,
rice cooking bowl, juice collection
tray and element protection
cover in warm soapy water, rinse
and dry thoroughly.
3. Discard the remaining water in
the water reservoir and wipe
the interior and exterior of the
steamer base with a damp cloth,
and dry thoroughly.
Do not place any part of the steamer,
including steaming baskets, lid and
rice cooking bowl, in a dishwasher.
Do not use abrasive cleaners, steel
wool or scouring pads as these can
damage the surface of the steamer
and the element.
The steamer body can be wiped over
with a damp cloth and dried.
Descaling or Odour Removal
Mineral deposits may accumulate
on the heating element. It is
recommended to descale the
steamer regularly to prolong the life of
your appliance.
Prepare a de-scaling solution
by mixing 2 cups of water and 1
tablespoon of lemon juice or white
vinegar.
Pour the de-scaling solution into
the water reservoir; insert the juice
collection tray then a steaming
basket with lid on top. Turn the timer
dial to approximately 15 minutes and
allow steam to circulate. Allow the
steamer and liquid to cool before
dismantling for cleaning. If excess
scale build-up still remains, repeat the
process.
NOTE: If food with strong odour,
such as fish, has been steamed,
the above procedure can be
followed with steaming baskets
and rice cooking bowl in
position to ensure the odour is
not transferred when next used
for steaming.
CAUTION: Do not
immerse steamer base,
power cord or power
plug in water or any other
liquid as this may cause
electrocution.
WARNING: Do not use
chemicals, steel wool,
metal scouring pad or
abrasive cleaners to
clean the outside of the
food steamer housing
or steamer basket as
these can damaged the
housing or the steamer
basket.

17
Storage
Place the rice cooking bowl inside
the large steaming basket and the
large steaming basket inside the small
steaming basket. Place the lid on top
and insert on the food steamer base.
This is a compact way to store your
food steamer away in a cupboard.
Cooking mode Storage mode

18
Recipes
Eggs Benedict
Serves 2
4 eggs
4 sheets of plastic film (40cm long)
2 English muffins cut in half
4 slices of leg ham
1cup baby spinach
Hollandaise sauce
250g unsalted butter, melted
4 egg yolks
1 tbsp white wine vinegar
1 tsp tarragon leaves
1 tbsp hot water
Pinch salt & pepper
1. Lay a sheet of plastic film over a cup,
push down to line the cup. Crack egg
into the cup, pull all the sides into the
centre and twist several times to seal
it off. Repeat for each egg, and place
them all in the steaming basket.
2. Fill water reservoir to ‘HI FILL’ level,
insert the juice collection tray, and
place the steaming basket on top.
Cover with lid.
3. Turn the timer dial to 7 minutes.
4. Remove the plastic and place the
eggs over the English muffins topped
with ham and baby spinach. Pour the
hollandaise sauce over.
Hollandaise sauce
1. Melt the butter in the microwave for 1
minute 40 seconds. This will separate
the butter perfectly. Only use the
yellow part.
2. Crack eggs in a glass or metal bowl,
add the vinegar and tarragon leaves
and place it over a pot of boiling
water; this is called a double boiler.
Don’t allow the bottom of the bowl to
touch the water.
3. Whisk the egg yolks and vinegar
together over the pot of boiling water;
make sure the bowl fits tightly. The
steam will heat up the bottom of the
bowl, cooking the eggs. Continually
whisk the egg mixture so it doesn’t
scramble. Once it nearly doubles in
size and is pale and fluffy you can
slowly add the yellow part of the
butter whisking all the while. Once
all the yellow part of the butter has
been incorporated, add 1 tablespoon
of hot water, this will stabilise the
hollandaise. Season with salt and
pepper.

19
Pumpkin Scones
Makes 9 scones
370g pumpkin, peeled and diced
2 cups self-rising flour
50g cold unsalted butter
1/3 cup icing sugar
1 egg
¼ cup milk to glaze the top and if needed
in the mix
1. Place the prepared pumpkin into the
steaming basket.
2. Fill water reservoir to ‘HI FILL’ level,
insert the juice collection tray, and
place the steaming basket on top.
Cover with lid.
3. Turn the timer dial to 15 minutes. Once
cooked, allow to cool.
4. Preheat oven to 200°C.
5. Place flour and butter in a mixing
bowl and crumble with the tips of your
fingers until the mixture resembles
breadcrumbs.
6. Add the pumpkin, sugar, and egg,
and gently mix together all the
ingredients either by hand or with a
wooden spoon. Continue until it is all
combined into a soft dough. Add a
tablespoon of milk if the mixture is not
coming together.
7. Flour well a clean bench surface and
add the dough mixture, bringing it
together with your hands into a large
ball. Then pat down or roll the dough
to a 2cm-thickness.
8. Rest the dough for 10 minutes
before cutting into it with a round
scone cutter (5cm diameter). Press
remaining dough together and repeat
step 4 and 5.
9. Brush the top of the scones with the
milk. Place scones on a pre-prepared
lined baking tray. Either place scones
close together for a pull-apart finish or
leave 2cm distance between them.
10. Place the tray in the preheated oven
and cook for 15-20 minutes until
the scones are golden and well-
risen.
11. Once cooked, transfer to a wire rack.
Allow to cool and serve as is or with a
dollop of cream.
TIP: This dough is very wet and
sticky so you need to flour the
bench. Also flour the top of the
dough as this will make it easier
to handle. Even flour your hands
lightly while working the dough.
In saying that, don’t over flour it
either, this will make the dough
tough and the scones dry.
Table of contents
Other Kambrook Electric Steamer manuals