manuals.online logo
Brands
  1. Home
  2. •
  3. Brands
  4. •
  5. K&K Sound
  6. •
  7. Accessories For Musical Instruments
  8. •
  9. K&K Sound POWERMIX PURE XT User manual

K&K Sound POWERMIX PURE XT User manual

92798 Cape Arago Hwy, Coos Bay, OR 97420 | 541-888-3517 | Toll Free 1-800-867-6863 | kksound.com
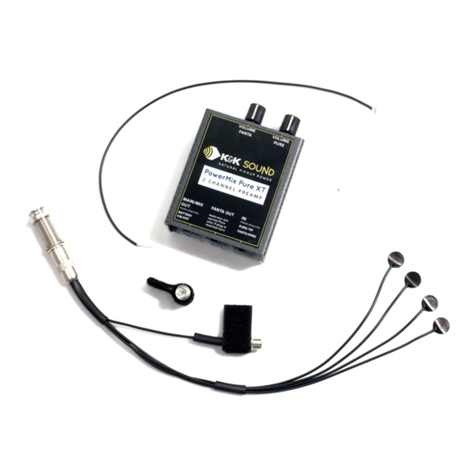
POWERMIX PURE XT
PREPARATION AND PICKUP
INSTALLATION
Please familiarize yourself with the included
installation manuals for the FanTaStick undersaddle
transducer and the Pure bridge plate pickup.
1. Install the FanTaStick according to its manual.
2. After you’ve completed the installation of the
FanTaStick in the saddle slot, solder the supplied
RCA plug to the FanTaStick’s cable end: the inner
wire to the tip and outer shield to the ground
terminal.
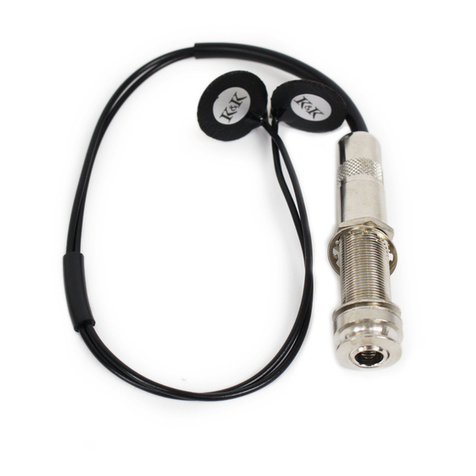
3. Next, install the Pure pickup according to its
manual.
SOLDERING THE FANTASTICK PICKUP
You will have to solder the FanTaStick Undersaddle
Pickup to the endpin jack yourself when you’re ready
to install it. Please follow the installation instructions
but you must solder the inner conductor of the
FanTaStick wire to the ring terminal of your existing
endpin jack. The pure pickup is already soldered to
the tip terminal.
The ring terminal is the medium-length center
terminal, next to the short terminal where the three
white center conductors of the pure are attached.
The long terminal remains empty – it is the battery
switch. The ground (silver shield) terminal is
soldered to the same ground connection as the pure,
which is the strain relief of the jack.
This is a delicate solder job! Please make sure it is
done precisely, using proper electronic solder
equipment. If you have any questions, please contact
us at (541) 888-3517 or [email protected]
CONNECTING AND SECURING THE
SYSTEM INSIDE YOUR GUITAR
Plug the FanTaStick’s male RCA connector into its
female counterpart on the wire from the endpin jack.
Secure the connectors to a brace using the attached
dual-lock fastener. Secure the cables inside the
guitar with duct tape or similar.
POWERMIX PURE XT PREAMP
First, please install a new 9-volt battery. Open the
access screw on the side of the preamp and remove
the lid to access the battery compartment and the EQ
trimmers.
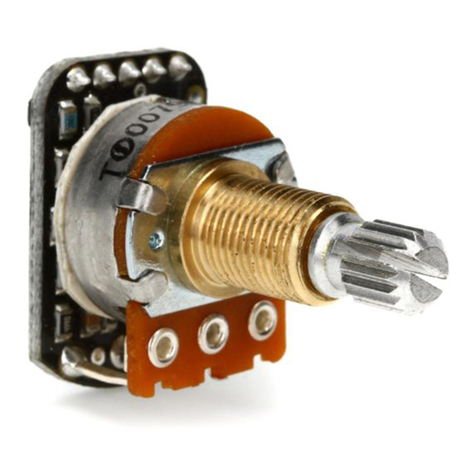
This preamp features 3-band EQ plus a gain control
for each individual channel. These controls are called
“trim pots.” The trimmers can be turned with the
small screwdriver located inside the preamp box. A
diagram of the trim pots is located on the inside of
the lid. Channel 1 is the Pure pickup, channel 2 is the
FanTaStick.
The EQ trim pots are in linear position (no cut or
boost) when the white arrow points to a center
position. Please keep in mind that the midrange
trimmers, as opposed to the bass and treble
trimmers, are oriented 90 degrees clockwise
The gain trimmers set the degree of pre-
amplification on the input of the circuit. They act like
volume controls but if they are set too high,
distortion may occur. (Note: The lowest
(counterclockwise) setting does not shut the channel
off. It is the lowest available gain setting.) We
recommend you use the gain trimmers to balance
the two channels so that when you turn both
thumbwheel volume controls to full, you have each

2
channel at your maximum desired volume. From
there you can blend the two channels in any way you
desire.
We factory preset these trimmers, but this setting
will likely not perfect for your guitar. Feel free to
adjust the trimmers in any way you like. (Tip: Keep
written records of the settings you like.) The
preamp’s EQ and gain should be set to fit your guitar
and style. Once you found your settings, you may
never have to touch the controls again. Use the EQ
on your amp or PA to compensate for different room
acoustics.
Please follow the Input/Output options printed on the
label of the preamp.
Note: If you use the individual outputs you have to
plug a cable into the Main/Mix Out in order power
up the preamp.
Please unplug the output cable to switch OFF the
battery whenever you do not use the preamp.
Battery life is about 50-60 hours.
Channel 1 is the Pure pickup
Channel 2 is the FanTaStick
INSTRUCTIONS FOR ADDING BELT CLIP TO
PREAMP
You have the option to add either the belt clip or 4
small rubber pads to your preamp. We recommend
attaching the rubber pads to protect the preamp if
you do not want to use a belt clip.
Both options use self-adhesive attachment, no
additional adhesive or modification to the preamp is
necessary. We use 3M VHB (very high bond) tape for
the belt clip, which provides durable, reliable and
secure hold.
1. Position the belt clip near the top of the preamp
(knob side) making sure to not cover the screw
head.
2. Clean the area on the preamp with rubbing
alcohol and wipe dry.
3. Peel the release-paper off the belt clip, press clip
firmly in place.
4. Make sure the position is correct because it is
difficult to remove the clip once the adhesive
bonds.
5. Pay particular attention to pressing
firmly
in the
center
of the belt clip (the lower hole, use a
suitable tool if necessary) to assure complete
bond.
6. Let the adhesive rest for 24 hours before putting
full strain on the belt clip.

Other K&K Sound Accessories For Musical Instruments manuals

K&K Sound VIOLINISSIMO User manual

K&K Sound

K&K Sound VIOLINISSIMO User manual

K&K Sound PURE RESONATOR SB User manual

K&K Sound

K&K Sound PURE RESONATOR SB User manual

K&K Sound SILVER BULLET MICROPHONE SYSTEM User manual

K&K Sound

K&K Sound SILVER BULLET MICROPHONE SYSTEM User manual

K&K Sound VIOLINISSIMO User manual

K&K Sound

K&K Sound VIOLINISSIMO User manual

K&K Sound Pure Mini User manual

K&K Sound

K&K Sound Pure Mini User manual

K&K Sound MANDOLIN TWIN INTERNAL User manual

K&K Sound

K&K Sound MANDOLIN TWIN INTERNAL User manual

K&K Sound Powermix Pure User manual

K&K Sound

K&K Sound Powermix Pure User manual

K&K Sound Bass Master Pro User manual

K&K Sound

K&K Sound Bass Master Pro User manual

K&K Sound PURE PIANO User manual

K&K Sound

K&K Sound PURE PIANO User manual

K&K Sound MANDOLIN TWIN FUSION User manual

K&K Sound

K&K Sound MANDOLIN TWIN FUSION User manual

K&K Sound PURE 12-STRING User manual

K&K Sound

K&K Sound PURE 12-STRING User manual

K&K Sound Pure Archtop User manual

K&K Sound

K&K Sound Pure Archtop User manual

K&K Sound Pure Resonator BB User manual

K&K Sound

K&K Sound Pure Resonator BB User manual

K&K Sound Bass Master Rockabilly User manual

K&K Sound

K&K Sound Bass Master Rockabilly User manual

K&K Sound PURE FLOATING BRIDGE User manual

K&K Sound

K&K Sound PURE FLOATING BRIDGE User manual

Popular Accessories For Musical Instruments manuals by other brands

Fishman RARE EARTH - installation guide

Fishman

Fishman RARE EARTH - installation guide

PedalPCB Pineapple quick start guide

PedalPCB

PedalPCB Pineapple quick start guide

EMG SPC manual

EMG

EMG SPC manual

FuzzDog ToxicMinx V2 manual

FuzzDog

FuzzDog ToxicMinx V2 manual

Solo Music Gear FVK-15 Assembly manual

Solo Music Gear

Solo Music Gear FVK-15 Assembly manual

Eikon J&J user manual

Eikon

Eikon J&J user manual

Tubbutec OrganDonor installation manual

Tubbutec

Tubbutec OrganDonor installation manual

Nechville WARP DRIVE quick start guide

Nechville

Nechville WARP DRIVE quick start guide

EMG F-H1 Installation information

EMG

EMG F-H1 Installation information

Behringer V-Tone Guitar GDI21 manual

Behringer

Behringer V-Tone Guitar GDI21 manual

EMG Pi2 manual

EMG

EMG Pi2 manual

Konig & Meyer 12170 manual

Konig & Meyer

Konig & Meyer 12170 manual

Fishman FLUENCE SIGNATURE RICHARD Z Series installation guide

Fishman

Fishman FLUENCE SIGNATURE RICHARD Z Series installation guide

Adam Hall SLED1ULTRAUSB manual

Adam Hall

Adam Hall SLED1ULTRAUSB manual

Obsidian Wire Strat Install manual

Obsidian Wire

Obsidian Wire Strat Install manual

Barcus-Berry DISQIS quick start guide

Barcus-Berry

Barcus-Berry DISQIS quick start guide

Adam Hall SLED2ULTRA quick start guide

Adam Hall

Adam Hall SLED2ULTRA quick start guide

Yamaha DT50S owner's manual

Yamaha

Yamaha DT50S owner's manual

manuals.online logo
manuals.online logoBrands
  • About & Mission
  • Contact us
  • Privacy Policy
  • Terms and Conditions

Copyright 2025 Manuals.Online. All Rights Reserved.