manuals.online logo
Brands
  1. Home
  2. •
  3. Brands
  4. •
  5. K&K Sound
  6. •
  7. Accessories For Musical Instruments
  8. •
  9. K&K Sound Pure Archtop User manual

K&K Sound Pure Archtop User manual

92798 Cape Arago Hwy, Coos Bay, OR 97420 | 541-888-3517 | Toll Free 1-800-867-6863 | kksound.com
PURE ARCHTOP
Thank you for choosing the Pure Archtop for your
guitar! This manual is quite long and detailed to help
you install the Pure Archtop for best possible
performance. Installing the system is quite easy so
please take the time to read and follow this manual
as precisely as possible.
Tools Needed
•Electric drill (for endpin jack mount)
•Drill bits 3/8" (10mm) to pre-drill and 1/2" (12mm)
for final endpin jack mount.
•Pliers or wrench for endpin jack installation
•Superglue gel (for permanent installation)
This Pure Archtop Includes
•Two transducers with cable-harness and endpin
jack
•Double side adhesive film (if superglue
installation is not desired)
•2 ft feeder wire
Preparation
Place the guitar on a table with a soft blanket for
protection, with the guitar top facing up. The 2
pickups are supposed to be installed as shown in the
picture (last page). Make sure that the wood surface
on these spots inside your guitar is smooth and clear
of any bumps.
You have 2 installation options:
•Removable with double-sided adhesive tape
•Permanent with superglue gel
Note: A permanent pickup installation with
superglue gel will result in a 30-40% higher output
volume and better frequency response due to the
molecular bonding capacities of the superglue.
Drilling the Endpin Hole
You have to drill or widen the endpin hole to 1/2". If
you feel insecure in doing this, please get help from
a luthier or from the guitar tech. These guys have the
right tools to properly do the job.
If you’d rather do it yourself, it is a good idea to
slowly work your way up with several drill bits,
starting with a small size and work up in small
increments.
Stick some duct tape over the endpin hole area. This
helps to prevent chips and scratches.
You should use at least a 3/8” (10mm) drill bit first
and then widen the hole to the required ½” (12.5mm)
drill bit.
Practice Installation (with Double-Sided Tape)
Cut a piece of the double-sided tape, a little larger
than one pickup. Remove the white protection paper
and stick the tape to the golden side of one
transducer. Trim the tape around the edges of the
pickup with a small pair of scissors.
Practice the installation of one pickup without
removing the brown protective paper. Make sure you
feel confident that you can reach the required
position before you actually stick the pickup into
your guitar.
Practice Installation (with Superglue Gel)
Practice installing one pickup without applying
superglue. Make sure you feel confident that you can
reach the required position before you actually glue
the pickup into your guitar. Also make sure that
you’ll be able to press and hold the pickup there for
about 30 seconds.
Installation
When you're ready, cover your guitar around the F
holes with some paper or tape the surrounding area
with masking tape. This protects your instrument in
case you accidentally drop a little bit of the
superglue on it. WEAR LATEX GLOVES when you
2
superglue! This will protect your fingers during
installation.
Remove the strap-knob, the nut, and 2 washers off
the endpin. Set the inner nut (this one is tight against
the terminal cap) to the required distance according
to the thickness of your end block. Finding the right
position may require some trial and error. Tighten
the terminal cap against the nut by screwing it in
clockwise.
Stick the 2 ft feeder wire into the endpin hole and
pull the other end out of one F hole. Make sure that
you leave a few inches of wire hanging out of the
endpin hole.
Tape Installation: Peel of the brown tape off one
pickup and install it as practiced.
Superglue Installation:Apply a generous amount of
superglue gel to one pickup. Spread the gel with the
tip of the tube over the entire golden surface.
Important: If you use too little glue, it tends to
partially dry before you are able to bring the pickup
in its proper position! A generous amount of glue
will prevent premature drying.
Install the pickup as practiced and hold it tight in
position for about 30 seconds.
Tie the copper wire to the endpin jack at one of the
small 1/8” holes on its end. Pull the endpin jack out
of the endpin hole with the feeder wire. If the
distance of the inner nut was not set right, you have
to push the jack back through the F hole and do it
again. Carefully remove the feeder wire without
sliding the endpin jack back into the hole. Install the
endpin jack’s outer washers, nut, and strap knob.
Insert the feeder wire into the next F hole and pull it
out of the other one. Carefully tighten the second
pickup to the feeder wire and pull it out through the
other F hole. Install the second pickup the same way
as the first one.
Removing the Pickups
You can remove the pickups if they were installed
with the double-sided tape. Lift off an edge of the
pickup with a fingernail or a suitable tool and break
the bond. Once the pickups are pulled off, you can
rub off the glue residue with your thumb or use a
solvent like Naphtha to clean it (available in
hardware stores).
If the pickups were super-glued, removal is not
recommended. However, experienced luthiers
should be able to remove the pickups by cutting
them out with a special tool. Be aware that this will
most likely damage the pickups. It also is dangerous
to work with a cutting tool inside your guitar where
you can’t see what you are doing.
Please make sure you read and understand the
disclaimer below before you proceed with a
superglue installation or removal. Please call our
help line if you have any questions: (541) 888-3517
Disclaimer regarding the installation or removal of
the Pure Pickup:
Installation or removal is at your own risk. In no
event will K&K Sound Systems Inc. be liable to you
for any damages arising from your use of, or, the
inability to use this product. This includes any
possible health hazards, injuries, any lost profits, or
other incidental or consequential damages, even if
K&K Sound Systems Inc. has been advised of the
possibility of such damages, or for any claim by
another party. Exact following of mounting
instructions and handling instructions for supplied
superglue is mandatory.
3

Other K&K Sound Accessories For Musical Instruments manuals

K&K Sound PURE FLOATING BRIDGE User manual

K&K Sound

K&K Sound PURE FLOATING BRIDGE User manual

K&K Sound Bass Master Rockabilly User manual

K&K Sound

K&K Sound Bass Master Rockabilly User manual

K&K Sound Pure Resonator BB User manual

K&K Sound

K&K Sound Pure Resonator BB User manual

K&K Sound PURE RESONATOR SB User manual

K&K Sound

K&K Sound PURE RESONATOR SB User manual

K&K Sound PURE PIANO User manual

K&K Sound

K&K Sound PURE PIANO User manual

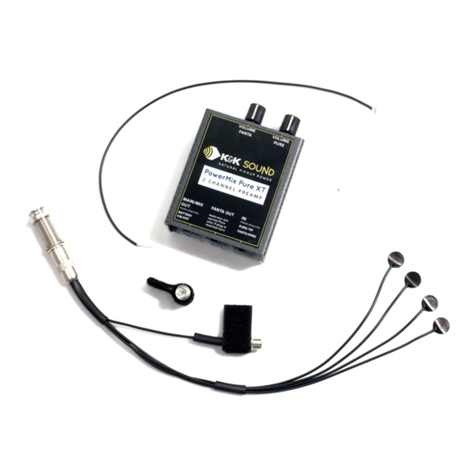
K&K Sound POWERMIX PURE XT User manual

K&K Sound

K&K Sound POWERMIX PURE XT User manual

K&K Sound VIOLINISSIMO User manual

K&K Sound

K&K Sound VIOLINISSIMO User manual

K&K Sound MANDOLIN TWIN INTERNAL User manual

K&K Sound

K&K Sound MANDOLIN TWIN INTERNAL User manual

K&K Sound Powermix Pure User manual

K&K Sound

K&K Sound Powermix Pure User manual

K&K Sound Bass Master Pro User manual

K&K Sound

K&K Sound Bass Master Pro User manual

K&K Sound PURE 12-STRING User manual

K&K Sound

K&K Sound PURE 12-STRING User manual

K&K Sound MANDOLIN TWIN FUSION User manual

K&K Sound

K&K Sound MANDOLIN TWIN FUSION User manual

K&K Sound Pure Mini User manual

K&K Sound

K&K Sound Pure Mini User manual

K&K Sound SILVER BULLET MICROPHONE SYSTEM User manual

K&K Sound

K&K Sound SILVER BULLET MICROPHONE SYSTEM User manual

K&K Sound VIOLINISSIMO User manual

K&K Sound

K&K Sound VIOLINISSIMO User manual

Popular Accessories For Musical Instruments manuals by other brands

Auralex GeoFusor-22 Installation & user guide

Auralex

Auralex GeoFusor-22 Installation & user guide

Roland TDM-3 owner's manual

Roland

Roland TDM-3 owner's manual

HyCell HCPS-JUMPER manual

HyCell

HyCell HCPS-JUMPER manual

EMG P-X manual

EMG

EMG P-X manual

Wenger V-Ready Assembly instructions

Wenger

Wenger V-Ready Assembly instructions

Adam Hall SGS403 user manual

Adam Hall

Adam Hall SGS403 user manual

EES M3 Oktaver operating instructions

EES

EES M3 Oktaver operating instructions

EMG ACTIVE Installation information

EMG

EMG ACTIVE Installation information

EMG 45-TW Installation information

EMG

EMG 45-TW Installation information

Schertler MAGNETICO AG6 quick start

Schertler

Schertler MAGNETICO AG6 quick start

KETRON MIDJAY PLUS owner's manual

KETRON

KETRON MIDJAY PLUS owner's manual

Konig & Meyer 18944 manual

Konig & Meyer

Konig & Meyer 18944 manual

Kaman Gibraltar 6600 Series Setup instructions

Kaman

Kaman Gibraltar 6600 Series Setup instructions

EnSoul Idiopan Lunabell Advanced Magnet 11-Pack owner's guide

EnSoul

EnSoul Idiopan Lunabell Advanced Magnet 11-Pack owner's guide

Schertler STAT PRE quick start

Schertler

Schertler STAT PRE quick start

L.R. Baggs Anthem System installation manual

L.R. Baggs

L.R. Baggs Anthem System installation manual

Subzero SZ-WGS-1 user manual

Subzero

Subzero SZ-WGS-1 user manual

Schatten Design RG-03 Neo instructions

Schatten Design

Schatten Design RG-03 Neo instructions

manuals.online logo
manuals.online logoBrands
  • About & Mission
  • Contact us
  • Privacy Policy
  • Terms and Conditions

Copyright 2025 Manuals.Online. All Rights Reserved.