manuals.online logo
Brands
  1. Home
  2. •
  3. Brands
  4. •
  5. K&K Sound
  6. •
  7. Accessories For Musical Instruments
  8. •
  9. K&K Sound Pure Resonator BB User manual

K&K Sound Pure Resonator BB User manual

92798 Cape Arago Hwy, Coos Bay, OR 97420 | 541-888-3517 | Toll Free 1-800-867-6863 | kksound.com
PURE RESONATOR BB
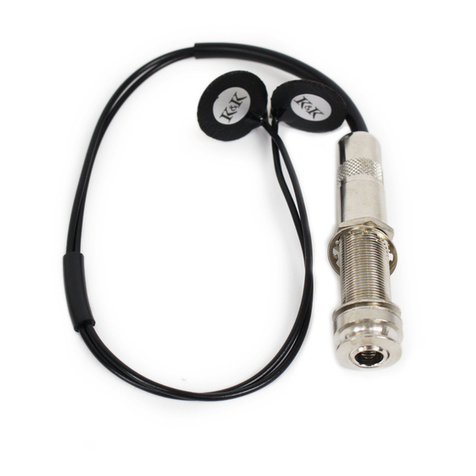
The Pure Resonator BB is a pickup especially
designed for biscuit bridge resonator guitars. We
updated the design in 2017 to further optimize
string-to-string balance.
The pickup features a screw-mounted installation on
the biscuit for maximum feedback resistance and
best possible sound transmission and comes pre-
wired with an endpin jack including an external
mount fastening system called “dual-lock” (made by
3M).
This manual describes the installation with external
jack mount only.
Tools needed:
•Screwdrivers for the different screw sizes on
your guitar and pickup
•5/64” (1.9mm) drill bit
•Drill
•Duct tape
•Clear scotch tape
An internal jack mount could be done by a skilled
luthier/guitar tech. Please note that the pickup
installation procedure and location is the exact
same for both, external or internal jack-mount. With
an internal jack, the pickup wire will be routed
underneath the resonator cover and via a small
hole in the sidewall of the resonator well to the
internally mounted jack. It is a somewhat delicate
procedure that requires soldering. We include a
small bag with the required washers, nut and strap
button for the internal jack mount. Please note that
this procedure will void the warranty if not done by
a K&K approved luthier, please email
theman@kksound.com for installation tips.
PICKUP INSTALLATION
1. Loosen the strings and install a capo on the 10th
fret (or remove the strings and skip #2).
2. Stick a piece of duct-tape over the ball-end-holes
in the tail piece (string holder) to prevent the
ball-ends to snap out of the holes.
3. Remove the tail piece by unscrewing the strap
knob (and additional screws if necessary).
4. Unscrew the small screws around the perimeter
of the resonator cover and lift it off along with
the strings and tail piece as shown in photo.
2
5. Take out the resonator cone with the biscuit
bridge.
6. Unscrew the biscuit-bridge-holding-screw on the
back of the resonator and remove the biscuit.
7. Mark the hole location for the pickup mounting
hole in the biscuit. Make sure the pickup is as far
as possible on the low string side, just without
the pickup edge extending over the outer edge
of the biscuit. It should slightly overhang the
bevel of the biscuit to maximize its location
towards the low string side, as shown in photo.
8. Drill a 5/64” (1.9 mm) hole through the biscuit
on the marked spot.
9. Mount the pickup like shown in photo with the
supplied black Phillips head screw and the small
washer that comes with it. Please note that you
should tighten this screw as hard as you can
with a screwdriver that nicely fits the screw.
10. Reinstall the biscuit to the resonator.
11. Place the resonator back in the resonator well in
the guitar.
3
12. Remove the rectangular dual-lock piece (black,
on output jack).
13. Stick the endpin jack through the bridge (center)
opening in the resonator cover it will most likely
need some force to get the dual-lock part
though.
14. Reinstall the resonator cover.
15. Reinstall the tail piece and remove the duct tape
on it.
16. Install the rectangular “dual-lock” jack fastener
on a fitting spot on the guitar (see photo) make
sure to establish the perfect spot first. We
recommend to stick a piece of duct-tape on the
guitar first and stick the dual-lock onto the duct-
tape as the adhesive on the dual-lock is leaves a
residue that is difficult to remove.
17. Secure the pickup cable with piece of clear
scotch tape as shown in photo. This is important
as the cable tends to vibrate a little on the
resonator cover and this vibration will otherwise
be picked up by the transducer. It may be
difficult to get the tape underneath the strings;
we pushed it through from the top between 2
strings and pressed it down using a q-tip.
4
18. Also secure the pickup cable with clear scotch
tape as shown in photo.
19. Shown here is an optional method of cable
routing that works well if you do not use a guitar
strap.
20. Tune up the guitar and make sure the angle of
the bridge is correct for proper intonation.
IMPORTANT NOTES
•When using this pickup, you need to roll off
treble quite dramatically. This is normal
because of the metallic overtones of the
aluminum resonator. Once you did that the
sound will have good balance of bass, mids and
treble.
•If you notice strange noises when playing
(amplified or even acoustic) it is possible that
the pickup cable is vibrating against something.
You may have to further secure it with clear
scotch tape.
•Tightening the pickup adjustment screw as much
as possible is very important for a warm tone.
The more you tighten it, the stronger and
warmer the bass response will be. We
recommend using a screwdriver; the largest
possible size that still grips the small black
screw securely. If the screw is looser, it will
sound less bassy and more treble oriented.
Since we cut treble on the EQ even with tight
screw pressure, we think a tight screw pressure
is the way to go.
•We recommend using a K&K Pure XLR preamp
with this pickup because it has a phase switch
and your guitar will sound warmer with the
correct phase setting. It also has the proper EQ
to dial in a balanced tone.

Other K&K Sound Accessories For Musical Instruments manuals

K&K Sound Pure Archtop User manual

K&K Sound

K&K Sound Pure Archtop User manual

K&K Sound MANDOLIN TWIN INTERNAL User manual

K&K Sound

K&K Sound MANDOLIN TWIN INTERNAL User manual

K&K Sound PURE RESONATOR SB User manual

K&K Sound

K&K Sound PURE RESONATOR SB User manual

K&K Sound POWERMIX PURE XT User manual

K&K Sound

K&K Sound POWERMIX PURE XT User manual

K&K Sound SILVER BULLET MICROPHONE SYSTEM User manual

K&K Sound

K&K Sound SILVER BULLET MICROPHONE SYSTEM User manual

K&K Sound Bass Master Rockabilly User manual

K&K Sound

K&K Sound Bass Master Rockabilly User manual

K&K Sound Pure Mini User manual

K&K Sound

K&K Sound Pure Mini User manual

K&K Sound PURE PIANO User manual

K&K Sound

K&K Sound PURE PIANO User manual

K&K Sound Bass Master Pro User manual

K&K Sound

K&K Sound Bass Master Pro User manual

K&K Sound PURE 12-STRING User manual

K&K Sound

K&K Sound PURE 12-STRING User manual

K&K Sound VIOLINISSIMO User manual

K&K Sound

K&K Sound VIOLINISSIMO User manual

K&K Sound Powermix Pure User manual

K&K Sound

K&K Sound Powermix Pure User manual

K&K Sound VIOLINISSIMO User manual

K&K Sound

K&K Sound VIOLINISSIMO User manual

K&K Sound PURE FLOATING BRIDGE User manual

K&K Sound

K&K Sound PURE FLOATING BRIDGE User manual

K&K Sound MANDOLIN TWIN FUSION User manual

K&K Sound

K&K Sound MANDOLIN TWIN FUSION User manual

Popular Accessories For Musical Instruments manuals by other brands

Wenger Gearboss Center Soft Divider Series owner's manual

Wenger

Wenger Gearboss Center Soft Divider Series owner's manual

EKO FastLOK Series manual

EKO

EKO FastLOK Series manual

EMG ACTIVE Installation information

EMG

EMG ACTIVE Installation information

Fishman TriplePlay manual

Fishman

Fishman TriplePlay manual

Yamaha DT50S owner's manual

Yamaha

Yamaha DT50S owner's manual

AXESS ELECTRONICS AXSGTR OTS1 user manual

AXESS ELECTRONICS

AXESS ELECTRONICS AXSGTR OTS1 user manual

aion ZVEX MEGALITH manual

aion

aion ZVEX MEGALITH manual

JJB Electronics Artist Series installation instructions

JJB Electronics

JJB Electronics Artist Series installation instructions

Fishman NASHVILLE Series installation guide

Fishman

Fishman NASHVILLE Series installation guide

Galaxy Audio GALAXY Trek GT-Q user manual

Galaxy Audio

Galaxy Audio GALAXY Trek GT-Q user manual

PedalPCB Son of Ben Preamp quick start guide

PedalPCB

PedalPCB Son of Ben Preamp quick start guide

ILITCH ELECTRONICS PGNCS Jazz Bass User manual and installation instructions

ILITCH ELECTRONICS

ILITCH ELECTRONICS PGNCS Jazz Bass User manual and installation instructions

Palmer Y-Box manual

Palmer

Palmer Y-Box manual

Solo Music Gear ESK-75 Assembly manual

Solo Music Gear

Solo Music Gear ESK-75 Assembly manual

EMG MM-CS Installation information

EMG

EMG MM-CS Installation information

Kogan Royale RYWRLSSGTRA user guide

Kogan

Kogan Royale RYWRLSSGTRA user guide

FuzzDog MUFF GUN quick start guide

FuzzDog

FuzzDog MUFF GUN quick start guide

K&M 18949 Assembly instructions

K&M

K&M 18949 Assembly instructions

manuals.online logo
manuals.online logoBrands
  • About & Mission
  • Contact us
  • Privacy Policy
  • Terms and Conditions

Copyright 2025 Manuals.Online. All Rights Reserved.