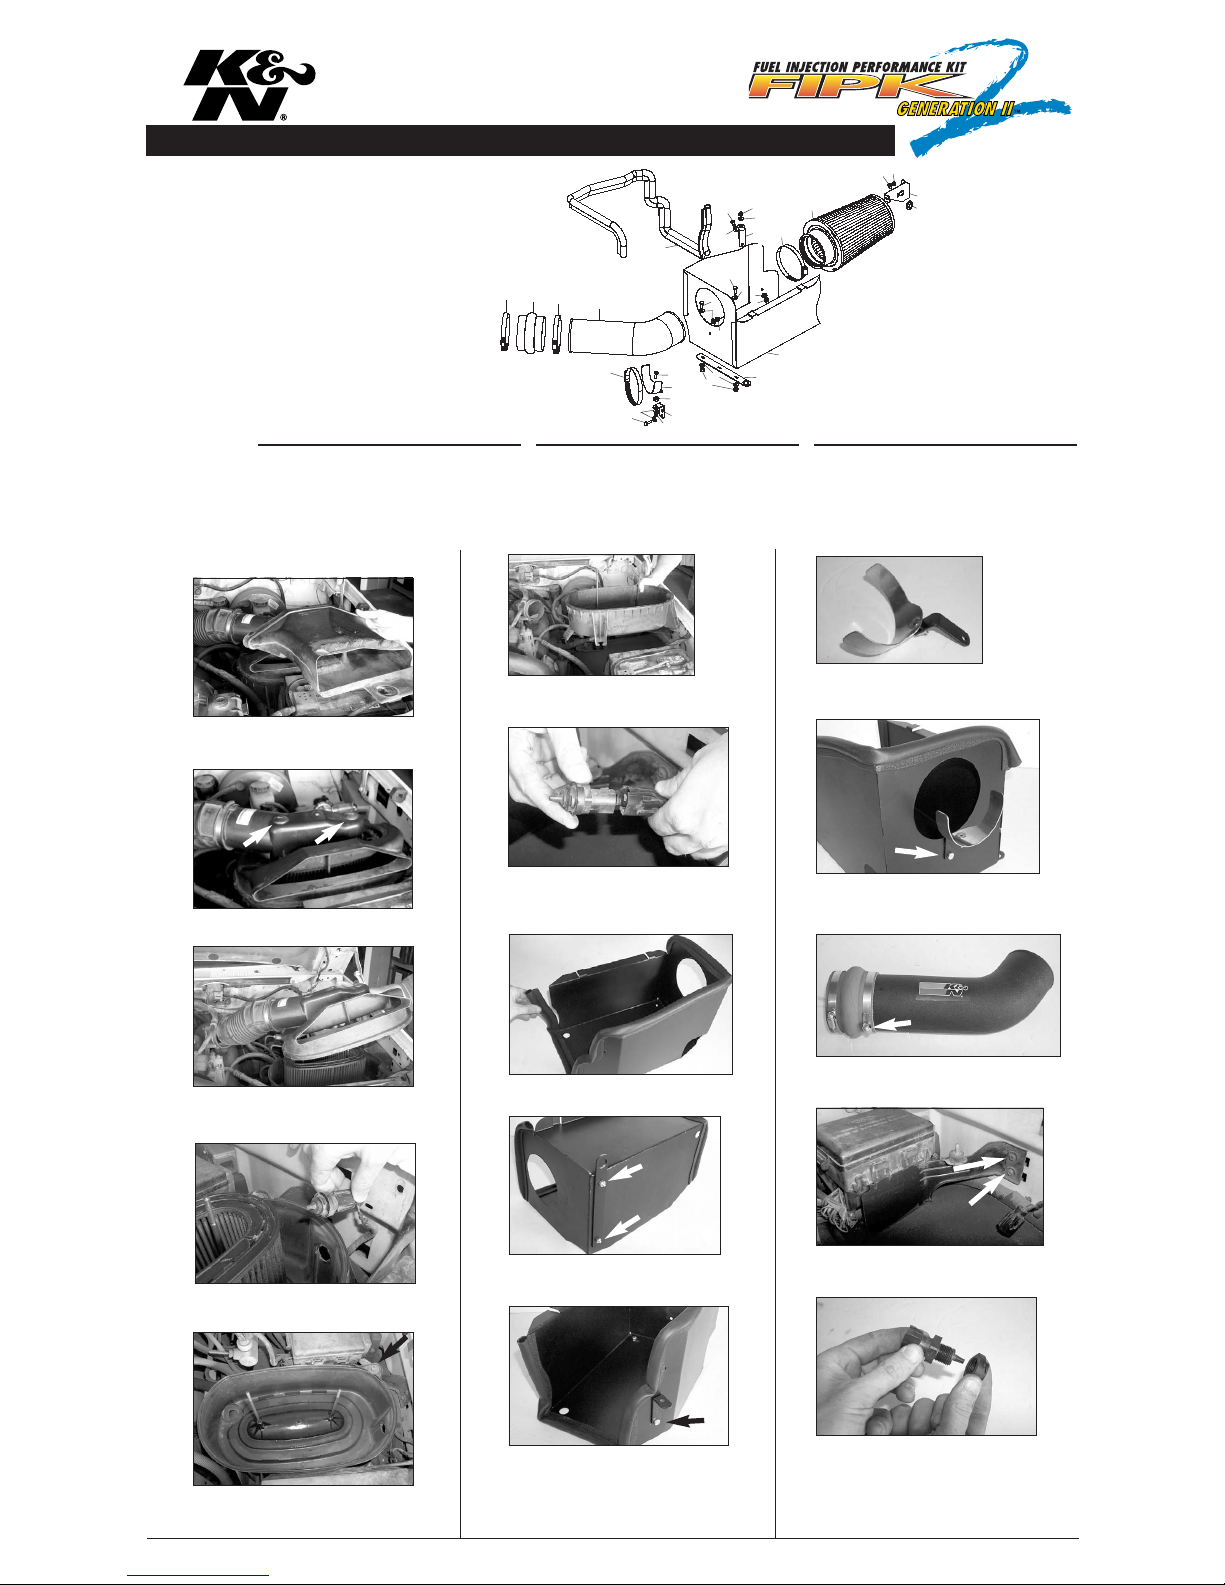
INSTALLATION INSTRUCTIONS
Continued
ROAD TESTING:
1. Start the engine with the transmission in
neutral or park, and the parking brake
engaged. Listen for air leaks or odd noises.
For air leaks secure hoses and connections.
For odd noises, find cause and repair before
proceeding. This kit will function identically
to the factory system except for being loud-
er and much more responsive.
2. Test drive the vehicle. Listen for odd nois-
es or rattles and fix as necessary.
3. If road test is fine, you can now enjoy the
added power and performance from your kit.
IMPORTANT:
Service air filter according to the
K&N cleaning instructions (99-5050)
when the indicator on the restriction
gauge is in the 50 to 65% range. Do
not run the vehicle with the indicator
above the 65% range, as damage to
the air filter and or the engine could
result.
P
.O.
BOX
1329,
RIVERSIDE,
CA,
92502
USA
(909)
684-9762
F
AX
(909)
684-0716
TECH:
(800)
858-3333
http://www
.KNFilters.com
e-mai
l: T[email protected] 17137c10/11/04
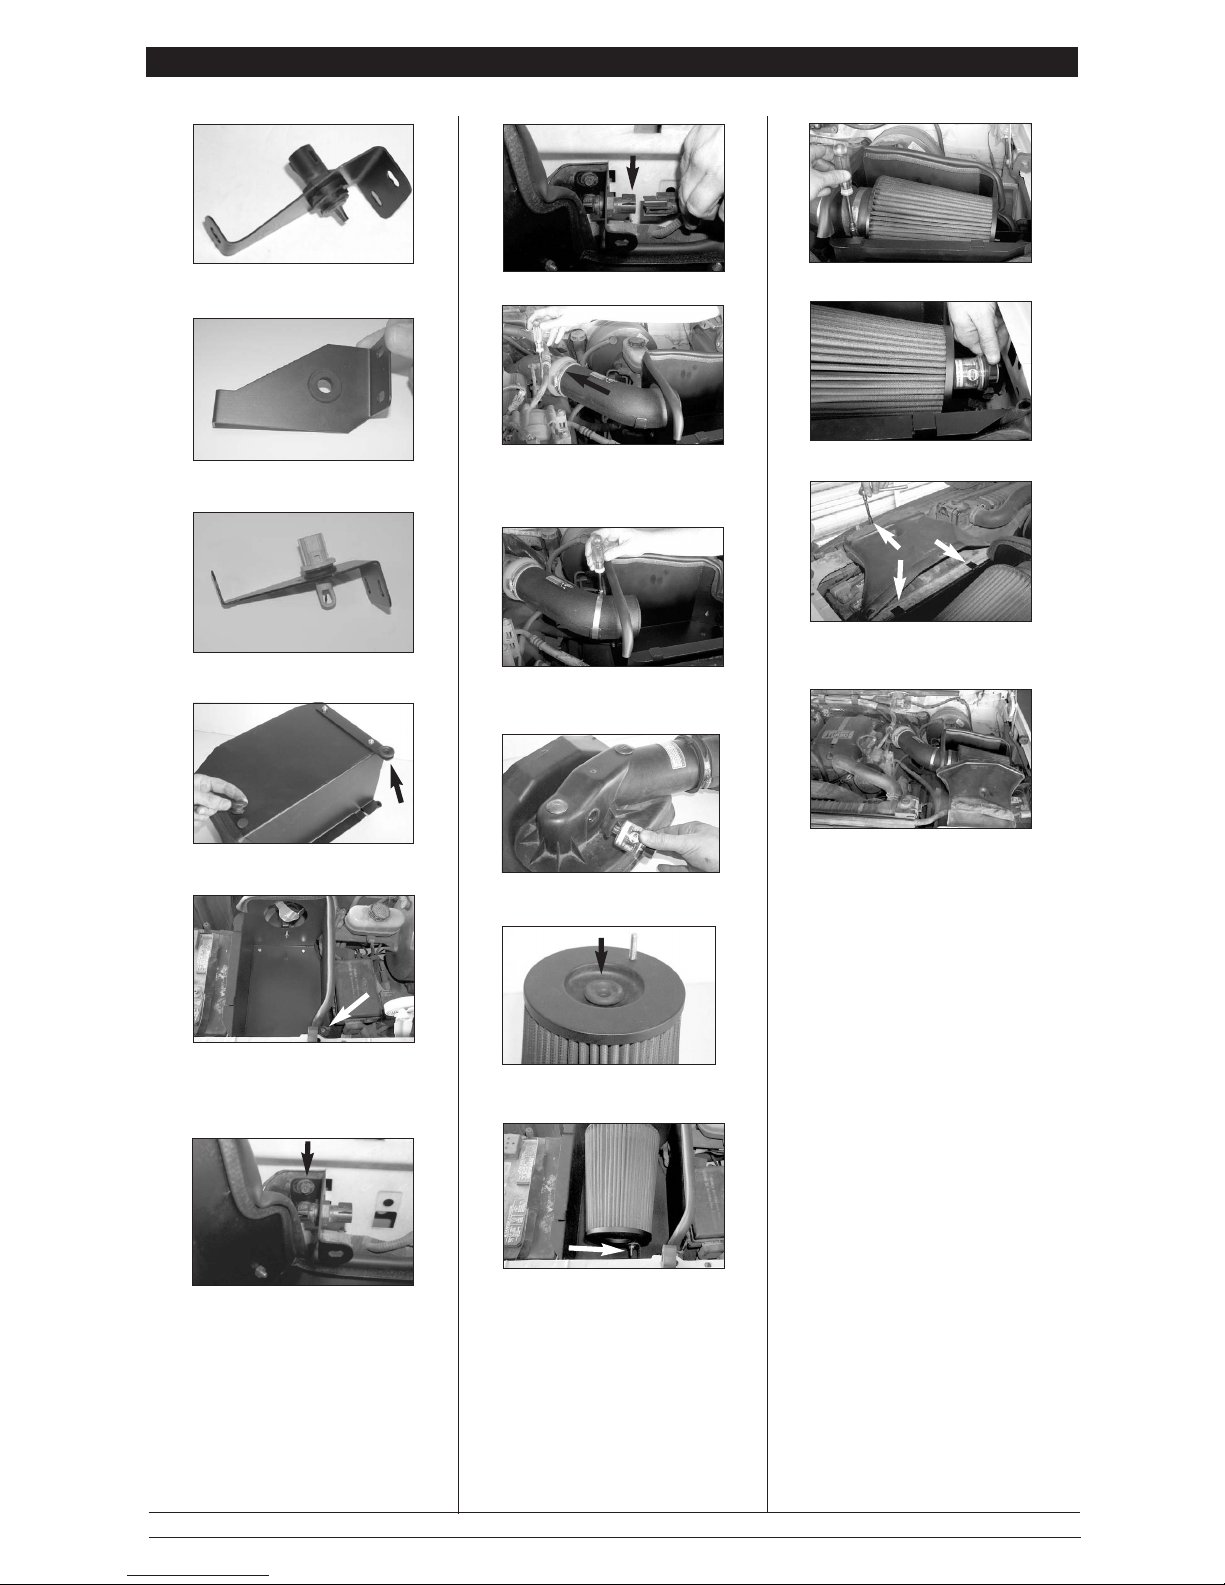
23. Secure the K&N intake tube to the saddle
bracket with the provided hose clamp as
shown. Note: Do not tighten completely as
some adjustment may be necessary.
24. Remove the stock filter minder and the
stock grommet from the stock air cleaner top
as shown.
25. Install the grommet that was removed in
step 24 into the hole on the top of the K&N
Filtercharger as shown.
26. Install the K&N Filtercharger onto the
K&N intake tube, then, line up the stud on
the filter with the air filter support bracket and
secure with the provided hardware.
32. It will be necessary for all F.I.P.K.’s to be
checked periodically for realignment, clearance
and tightening of all connections. Failure to follow
the above instructions or proper maintenance may
void warranty.
31. The C.A.R.B. exemption sticker, (attached),
must be visible under the hood, so that an
emissions inspector can see it when the vehi-
cle is required to be tested for emissions.
California requires testing every two years,
other states may vary.
19. Install the K&N heat shield assembly
and push the rubber grommets onto the
stock locating pins, then, secure the "L"
bracket to the original air cleaner rubber
mounting stud using the provided washer
and nylock nut.
20. Install the air filter support bracket
onto the fuse box support bracket using
the bolts removed in step 15.
21. Reconnect the air temperature sensor
electrical connection as shown.
22. Install the K&N intake tube onto the
turbo inlet tube and secure the hump
hose with the provided hose clamp.
Note: Do not tighten completely as
some adjustment may be necessary.
27. Tighten the hose clamp on the K&N
Filtercharger as shown.
28. Install the Filter minder into the grommet
on the end of the filter as shown.
29. Slide the air inlet duct into the tabs on the
K&N intake tube as shown, then, secure the
air inlet duct to the original mounting point
with the original hex bolt removed in step 2.
30. Reconnect the vehicles negative battery
cable. Double check to make sure everything
is tight and properly positioned before starting
the vehicle.
17. Using the stock retaining nut removed in
step 16, secure the air temperature sensor to
the air filter support bracket as shown.
18. Install the stock rubber grommets from
the lower air cleaner assembly into the K&N
heat shield assembly as shown.
17a. Vehicles that come with twist in air
temp sensor, install grommet (08167) into
air filter support bracket as shown.
17b. Vehicles that come with twist in air
temp sensor, install sensor into air filter
support bracket as shown.
*FREE K&N DECAL To register your warranty, please see us online at knfilters.com/register. FREE K&N DECAL*