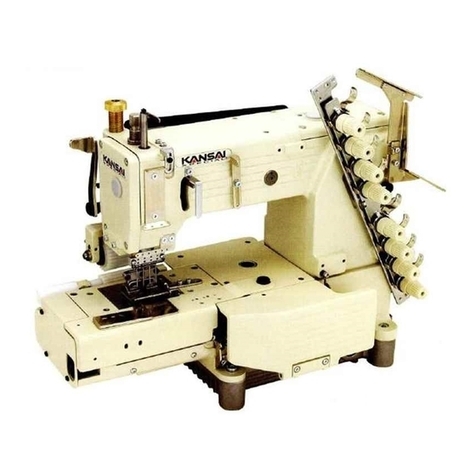
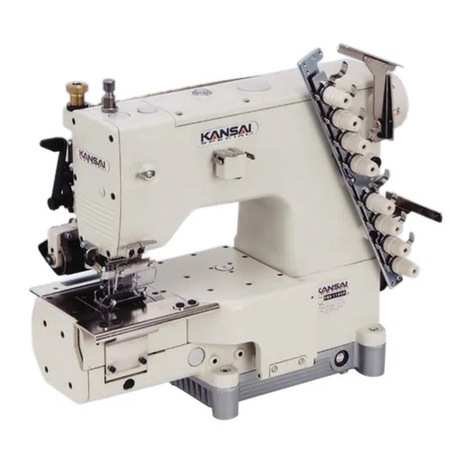
kansai DWR-1900 Series User manual

Industrial
Sewing
Machines
lllansaillpecial
INSTRUCTION
MANUAL
[MR-1900
senes
•-
=
""
=-^a=~.-.
•r
-
••
- . •-
m
1902-2U
1902U
19003U
19004U
1902-2U/UTC
1902U/UTC
19003U/UTC
19004U/UTC
From the library of: Superior Sewing Machine & Supply LLC

INSTRUCTION
MANUAL
DWR-1900-3U/UrC
DWR-1900-4U/UTC
DWR-1902-2U/UTC
EWR-1902U/UTC DWR-1903U/UTC
INDEX
page
no.
1)
Features
1
2) Motor
pulley
diameter
1
3) Supplying /
Draining
oil
1
4)
Threading
2
5) Needle
bar
alignment
and
setting
needle
••• 3
6) Synchronizing
needle
and
looper
3
7)
Clearance
of
looper
and
needle
3
8)
=ditto=
4
9)
Distance
from
needle
to
looper
4
10) Feed dog
height
5
11) Change
of
stitch
length
5
12)
Setting
needle
guard 5
13) Adjustment
of
looper thread take-up 6
14) Adjustment
of
rear
puller
7
15) Under
thread
clipper
mechanism 8
16)
Counter
blade
8
17) Alignment
of
clipping
spring
counter
blade
and
stationary
blade
9
18) Alignment
of
looper
and
counter
blade
9
19)
Change
of
counter
blade
stroke
10
20) Change
of
drawing
thread
10
21) Needle
positioning
11
22)
Setting
air
systems 11
23)
Setting
table
stand
11
g
1.
tt
m 12
2.
is
3.
14
4.
immmm
16
5.
17
6 .
^7.'
18
7.
19
8.
20
9.
^ V
>0)1
Is
21
10.
)^Ufi0iigi5
24
11.
25
From the library of: Superior Sewing Machine & Supply LLC

1)
Features
This type
of
machine
is
equipped
with
UNDER
THREAD
CLIPPER
mechanism
which
facilitates
to
insert/attach
tubular
elast
ic
onto
preclosed
garrfient^such as sweat
pants,
truck
shorts
mens
under wear and
fasionable
sporting
pants.
numbers
of
needle
numbers
of
thread
! numbers
of
looper
CWR-1900-4U/UTC
EWR-1900-3U/UTC
DWR-1902-2U/UrC
IMI-1902U/UTC
CWR-1903U/UTC
Table
1
type
of
needle
in
use
UY
x
128GAS
No.
80-100
cylinder
circumference
380
m/m
1900-3U/UTC 1900-4U/UTC
440
m/m 1902-2U/UTC 1902U/UTC
1903U/UTC
feed
mechanism.
2) Motor
pulley
diameter
R.P.M.
4000
4500
plain
feed
with
rear
puller
push
button
system
to
change
feed
length.
5
85
m/m
70
m/m
95
m/m
80
m/m
Table
3) Supplying /Draining
oil
(Fig. 1)
a) Remove
oil
viewer
A and
supply
oil
until
oil
is
being
filled
up
to
the
line
B
of
oil
gauge C.
The
oil
level
should
be
checked
and
kept
between
line
B
and
D
while
machine
is
in
use.
b)
Draining
oil
can
be
done
with
removing
screw
E.
1
•
From the library of: Superior Sewing Machine & Supply LLC

4)
Threading
Lil
Fig.
2
B
For
easier
threading
to
looper.
Looper
can
be
at
THROW-OUT
position
toward
operator
when
button
B
is
pushed
inwardly.
(Fig.
4)
Push
looper
holder
inwardly
to
operating
position
before
start,
From the library of: Superior Sewing Machine & Supply LLC

Needle
bar
alignment
and
setting
needle
1
fcecZIE)
1 f i !
r~r.
Fig»
5
0
V
(0)
©
6)
Synchronizing
needle
and
looper
Turn
the
handwheel
in
operating
direction
until
the
point
of
looper,
nioving
to
the
left
(on
the
back
side
of
needle),
is
even
with
the
left
side
of
the
right
needle.
Now
turn
handwheel
in
the
reverse
dire
ccion
so
that
meeting
point
is
the
same
as
preceding
location.
To
adjust,
loosen screw E Fig. 7
SLIGHTLY
just
enough
to
retain
its
position
turn
handwheel
while
eccen
tric
F
is
being
held
its
position,
to
attain
proper
synchronization.
Retighten
screw E
securely.
7)
Clearance
of
looper
and
needle
Set
the
looper and
turn
handwheel
in
opera
ting
direction
until
the
point
of
the
loo
per,
moving
to
the
left(on
the
back
side
of
the
needle),
its
clearance
is
0-0.1
m/m
(as
close
as possible without contacting)
To
adjust,
loosen screw D Fig.7
move
looper
holder to
attain
the
proper
clearance.
Retighten screw D securely.
Align
the
point
of
needles
to
the
center
of
needle
plate
hole.
To
adjust
loosen
screw
A
Fig.
5.
Set
the
needle
so
that
strait
groove
is
located
perfectly
toward
operator,
shown
as
Fig.
6
1
For
Proper
SYNCHRONIZATION
of
Looper
^
Needle
these
two
Dimensions
will
be
the
same
Looper
BEHIND
Needle
in
OPERATING
Direction
Looper
in
FRONT
of
Needle
in
reverse
Direc
tier
flR-
7
From the library of: Superior Sewing Machine & Supply LLC

8) Clearance of needle
and
looper
RIGHT
Needle
and
Looper
as
seen
from
the
LEFT
END
of the
machine
\ \
SCARF
\
Jit
9) Distance
from
needle to looper
Set
the
looper
so
that
the
distance
between
the
point
of
looper
to
the
right
side
of
the
needle
is
4.5
m/m
when
the
looper
is
at
its
farthest
right
end.
To
adjust
loosen
Left
hand
nut
A
and
Right
hand
nut
B
then
turn
Connecting
Rod C
Retighten
Nut A and B
securely.
Fig.
8
RIGHT
Needle
and
Loope
as
seen
from
the
FRONT
of
the
machine
Center
Line
4.5
m/m
Looper
at
its
farthest
position
to
RIGHT
Right
Hand
Nut
B
Connecting
Rod
C
Left
Hand
Nut
A
Fig.
9
From the library of: Superior Sewing Machine & Supply LLC

10) Feed dog
height
..L
"f—
When
the needle bar
is
at
the top
of
its
stroke, the height of
peak
of
teeth
from
the
surface
of
the
nee
dle
plate
should be
1.0-1.2
m/m.
To
adjust,
loosen
screw
A move
feed
dog
vertically
to
attain
its
proper
height.
Recighten screw A
securely.
1-1.2m/m
11)
Change
of
stitch
length
=CAUTION=
Readjust
needle guard whenever
stitch
length
is
changed.
Fig.
10
Fig.
11
Push
button
A
and
hold
its
position
and
turn
handwheel
slowly
until
button
is
fur
ther
in
and
locking
main
shaft.
Turn
handwheel
counterclock
to
increase
stitch
length,
Turn
clockwise
acts
the
the
reverse.
Release
button
A as
it
spring
back
for
operational
position.
12) Setting needle guard
Set the needle guard horizontally
so
that
it
barely
contacts
the
nee
dle
when
at
its
extreme
forward
pos
ition.
It
should be
set
vertically
as
low
as
possible, yet
have
its
top
of
guarding
surface
is 1.0
m/m
higher
than
the
poi
nt of the needle,
when
the point of loo-
per
meets
needle
on
its
wav
nf
IpftT^arH /per meets needle on
its
way
of
leftward
motion.
To
adjust,
loosen
screw A
to
attain
proper
position.
Retighten screw A securely.
Fig-
12
1 m/m
From the library of: Superior Sewing Machine & Supply LLC

13)
Adjustment
of
looper
thread
take-up
a) Set the looper thread retainer E so that the distance
from
its
underside
to
the
surface
of
needle
plate
is
6-7
m/m.
To
adjust, loosen
screw
G
move
thread retainer E
vertically
to
attain
its
height.
Retighten
screw G.
b) Setting looper thread take-up eyelet
Proper location of thread take-
up
eyelet
D should be
vertica
lly
in
line
with the center of
main
shaft.
Loosen
set
screw
A move
eyelet
to
at
tain
its
position.
Retighten
set
screw A securely.
c) Adjsutment
of
take-up
cam
The
looper
thread
should
begin
to
be
released
when
the blade of looper
and
the point of
the
needle
are
at
horizontally
the
same
hei
ght, in
its
motion
toward
right.
To
adjust, loosen
screw
C
SLIGHTLY
but rigid
enough
to retain
its
position,
move
take-
up
cam
B to
attain
proper position.
Retighten screw C securely.
13
Fig.
14
6
From the library of: Superior Sewing Machine & Supply LLC

14) Adjustment
of
rear
puller
a)
Synchronization
to
needle
bar
In
upward motion
of
needle
bar
and
the
point
of
needle
is
located
within
the
thickness
of
presser
foot(1.5
m/m
higher
than
surface
of
needle
plate.),
puller
should
start
to
be
effective,
Loosen
screw
A
and
secure
the
location
of
eccentric.
Tighten
screw A
after
adjustment
is
done.
b) Tlie amount
of
travel
of
the
puller
Feed
length
and
the
amount
of
travel
of
the
puller
normally
be
maintained
the
same.
To
adjust
this,
loosen
nut
C, move
ball
joint
assembly
inwardly(toward
upper
shaft)
in
connecting
lever
A
to
acquire
more
feed
action,
outwardly
acts
the
reverse.
Retighten
nut
C.
c) Fine adjustment
of
travel
of
the
puller
To
adjust
this,
loosen
screw C
move
puller
driving
lever
Btoward
operator
to
acquire
more
feeding
action,
outwardly
acts
reverse.
Retighten
screw
C.
Fis»
15
Fig.
16
-
Fig.
17
From the library of: Superior Sewing Machine & Supply LLC

15)
UNDER
THREAD
CLIPPER
MECHANISM
2
34
Fig.
18
16)
Counter
blade
Check
every
corner
of
blade.
Carefully
remove
burr
as
sharp
point
cuts
thread
before
looper
thread
is
being
clipped.
^ X
Fig.
19
8
12
11
From the library of: Superior Sewing Machine & Supply LLC

17)
Alignment
of clipping spring/counter blade/stationary blade
clipping
spring
counter
blade
Fig.
20
counter
blade
stationary
blade
a) Clipping
spring
and counter blade
21
Strait part of
spring
and
counter
blade
should
line
up
in order not to
clip
needle thread, (point
A).
The
point A
hooks
looper thread which secures thread
being clipped
by
spring.(Fig.
20)
b)
Stationary
blade
and
counter
blade
strait
side of counter blade should pass the corner
D.
The
width
of
counter blade should be within the width
of blade E. (Fig.
21)
18) Alignment
of
looper and counter blade
Fig.
22
When
the
needle
bar
is at
the
highest
of its
stroke,
the
point
of
counter
blade
should
pass
right
end
of
looper
as^
shown
Fig.
22.
The
point of
counter
blade
should
.pass
1
m/m
away
from
the
back
of looper A (a
view
from
top) Fig.
22)
At
this
time,
adjust
the
stroke
of
counter
blade
so
that
the
distance
from
needle
to
angle
of
blade
B
Fig.
22
is
1-1.5
m/m,
when
counter
blade
is
at
its
extreme
LEFT
end.
From the library of: Superior Sewing Machine & Supply LLC

19)
Change
of
counter
blade
stroke
a) Counter
blade
stroke
can be
adjusted
by
loosening
nut
A
Fig.
23 and
turn
cylinder
shaft
B.
Tighten
nut
A
securely
after
proper
stroke
is
atained.
b)
Fine
adjustment
of
counter
blade
stroke
can
be
obtained
by
loosening
nut
B
Fig.
24 and
turn
eccentric
screw
A
Fig.
24
as
location
of
blade
at
stationary
position
is
being
changed.
Securely
tighten
nut
B.
20) Change
of
drawing
thread
In
order
to
get
needle
thread
released
so
that
proper
tail
of
thread
can
be
maintained
for
restarting
stitches,
also
looper
thread
requires
to
be
released
enough
so
that
it
is
being
clipped
by
blade
spring
after
trimmed.
To
adjust
loosen
screw
A
Fig.
25 move
hook B
Fig.
25 downwardly
as
volume
of
drawing
thread
is
increased(
tail
of
needle
thread
becomes
longer.)
Moving hook B
upwardly
acts
the
reverse.
10
Fig.
23
n
II
FiR» 24
Fig.
25
From the library of: Superior Sewing Machine & Supply LLC

21) Needle
positioning
^without
air
supplying=
Place synchronizer
to
adapter on handwheel.
check
direction
of
handwheel
which
should
turn
counter
clockwise
at
operational
rotation.
Adjust
with
screw
A
so
that
the
needle
bar
is
at
its
lowest
position
when
foot
pedal
is
at
neutral
position.
The
needle
bar
should
be
at
the
highest
of
its
stroke
when
pedal
is
applied
Heel
Back.
To
adjust
loosen
screw
A
maintain
the
location
of
screw
and
turn
hand
wheel
to
atain
proper needle
position.
Tighten
screw
A.
Fig.
26
22)
Setting
air
systems
All
air
supply tubes and
joints
are
marked
to
facilitate
coupling
each
other.
Make
sure the
counter
blade
is at the stationary position
when
main
switch
is
ON
as
well
as air pressure is
being
applied.
23)
Setting
table/stand
FiS-
27
From the library of: Superior Sewing Machine & Supply LLC

1.
ft
m
19004U
19003U
1902-2U
1902U
1903U
UTC
UTC
UTC
UTC
UTC
ii
Sc 4342 3
JU —
/\°
—4331 1
86734
® ffl
it
UY128GAS
#80~#100
it#;^
hP-'2(±T)
34nim
lOnim
JH
*)
« 1
its
tj 3
mm
(|l!??rB#)
380mm
Ofettii)
440mm
UttB#)
3600rpm
12
From the library of: Superior Sewing Machine & Supply LLC

2.
s.
[yx.
taT®ssis(«i)sa(7)j.^-y
•m
s
en & m ^
SIJ
^ @ & S 4$ ^
s
III
EPS3E-
KTH
ENC3E-
KTH
ENAM-DS
ENS2-11
KTHI
KTHI
4S
EPSIE-
KTH
ENC3E-
KTH
ENAP-DS
KTHI
KTHI
fflu,
kthkjtji
u
AiajityirtfTS,
(1) m ^ E N C 3 E -
KTH
KTHI
(2)
^3-1
{lets
^3
- 1
CJ:5
(3)
vby-r
KiBiii^E
DC32V
DC32V
(4) m
o-w»j
-•
"fe
L/
g»)StT:£f5S:sm
oo
Sli)S+±S:f4Sf?iit
oo
7.n-x^-
hoo
oo
oo
— —
——
oo
oo
\——
——
——
mm<7yy^=E-^-i±m
atm)
(1) m ^
ENAM-DS
ENAP-DS
(2) Hi
i]
400W
400W
(3)
m^ms.
()^>&s
3.
$.y><D
(1)
28-920
1902-ig02-2UWffi
From the library of: Superior Sewing Machine & Supply LLC

1902-2U/UTC
19003U/UTC
19004U/UTC
15
From the library of: Superior Sewing Machine & Supply LLC

4.
ti-
m
(1)
LTTSUo
(2)
iE)Se€?tigtti+#it&a€i@sutto
60-217
5E^T'ffih-r3J:9lC--
K7i"-K->'->3:^-oeBn!i«tT-:)TT#i.^<.
(3)
(2)(Ditefi)*«)SliSf^,
$)Ili!S€o4uT-T$i^o
$mEa,
Skg/cirf
(y-vE)
(4)
ia±S-«llCiiiigA^'JgU
*
L16LTTSi.V
31,
lilK^Tfi$»S'e!)5B5caA>46>-f,
MiBfllSaS^T-^i^,^TTSi.\
16
From the library of: Superior Sewing Machine & Supply LLC

5.
•01
• IS 2
JS
17
5J!6!)>
;^flii^ia{SiSSI
(P=l
.25)
VU>^rn.;/M>|s^;^.y|s
©l:^-fe
>igSfiMAX.
2n)!n
©vU>^f-:^-y
hiJ|SSfi0.9rani/l(i]g
From the library of: Superior Sewing Machine & Supply LLC

NO. 2
6.
1'~1.bmm
St
m
Na1
> h _hl21(7)j£>J
No2 -f > h
Jb[l]0^
U
pIUi ^ X
ifm
h
:feCCtiSUycB#
±Ill(DliSC<
§^lC>tMUT-tz-y
hLTT^t^<
~1.5mnl(7)^4®C4a^B#.
:^7
K
(112.
No.8)
Bji!)^;^!!!
x=^-fe>
([12.
No.9)
^SiUTlilBUTT^i^o
18
From the library of: Superior Sewing Machine & Supply LLC
This manual suits for next models
8
Table of contents
Other kansai Sewing Machine manuals

kansai
kansai RX Series User manual

kansai
kansai R9000 User manual

kansai
kansai MAC100 User manual
kansai
kansai dlr 1500 series User manual
kansai
kansai DVK-1700 series User manual

kansai
kansai A-1001 Operating and maintenance manual

kansai
kansai wx-8800 series User manual

kansai
kansai FBX Series User manual

kansai
kansai DFB 1400 series User manual

kansai
kansai FX SERIES User manual