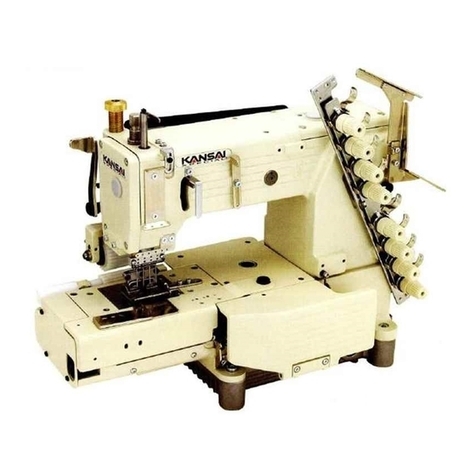
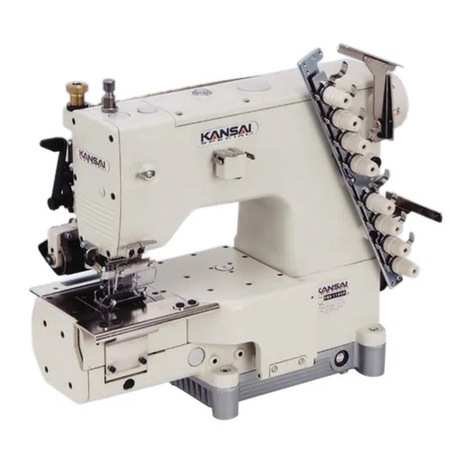
kansai wx-8800 series Owner's manual

Industrial
Sewing
Machines
WX-8800
SERIES
TECHNICAL
INSTRUCTION
MANUAL
fj)
MORIMOTO
MFG.
CO.,
LTD.
From the library of: Superior Sewing Machine & Supply LLC

Tables
of
Contents
1.
Looper
Needle
Timing
Page
1
1-1
The
looper
and
the
looper
carrier
1-2
Looper-Needle
synchronization
1-3
Looper-Needle
distance
1-4
Needle
height
1-5
Looper-Needle
clearance
1-6
Adjustment
of
the
looper
avoid
angle
1.7
Needle
deflection
2.
The
Needle
Guards
2-1
Position
of
the
rear
needle
guard
2-2
Position
of
the
front
needle
guard
3.
The
Top
Cover
Looper
8
3-1
Position
of
the
top
cover
looper
3-2
Position
of
the
top
cover
thread
guide
3-3
Top
cover
looper
timing
4.
Feed
Dogs
and
Stitch
Length
12
4-1
Feed
dog
height
and
level
4-2
Adjustment
of
the
stitch
length
4-3
Adjustment
of
the
differential
feeding
5.
Presser
Foot
Adjustments
15
5-1
Position
of
the
foot
5-2
Presser
foot
lift
height
From the library of: Superior Sewing Machine & Supply LLC

6.
Stitching
Adjustments
6-1
Position
of
the
silicone
tank
eyelet
6-2
Adjustment
of
the
needle
thread
take
up
16
6-3
Needle
thread
take
up control
17
6-4
Needle
thread
take
up
wire
6-5
Thread
nipper
location
18
6-6
Cover
thread
take
up
and
take
up
eyelet
19
6-7
Position of
the
looper
thread
take
up
eyelets
6-8
Looper
thread
take
up
cam
21
6-9
Height
of
the
guide
plate
7.
The
Timing
Belt
22
7-1
Timing
belt
markings
7-2
Changing
the
timing
belt
8.
Lubrication
System
25
8-1
Placing
the
oil in
the
machine
8-2
Oil
flow
rate
9.
The
Tabletop
26
9-1
Tabletop
cutout
design
specification
26
9-2
Mounting
the
machine
From the library of: Superior Sewing Machine & Supply LLC

Thank
you for
purchasing
a
KANSAI
SPECIAL WX SERIES MACHINE.
This instruction manual is a technical service manual featuring specific information regarding the
adjustments
and
settings
of
the
machine.
1.
LooperfNeedle
Timing
he
Looper
And
The
Looper
Carrier
The
shaft
of
the
looper
is
set
into
the
top
of
the
looper
carrier
("A",
Fig
1)
and
fastened
in
place
with
the
set
screw
("B",
Fig
1).
The
height
and
the
position
of
the
looper
are
automatically
set
as
long
as
the
looper
is
set
fully
into
the
looper
carrier
and
the
set
screw
is
tightened
squarely
onto
the
flat
on
the
looper
shaft.
By
design,
the
inner
surface
of
the
looper
is
offset
three
degrees
away
from
the
horizontal
plane
(see
Fig
2).
From the library of: Superior Sewing Machine & Supply LLC

Looper-Needle
Synchronization
The
timing
(synchronization)
of
the
looper
and
needles
are
equal
for
the
leftwards
movement
as
for
the
return
movement.
As
the
looper
moves
to
the
left,
behind
the
needles:
As
the
tip
of
the
looper
reaches
the
center
of
left
needle,
the
dimension
from
the
tip
of
the
looper
to
the
top
of
the
eye
of
the
left
needle
must
be
1 to
1.5mm
(see
Fig
3A).
As
the
looper
returns
to
the
right,
in
front
of
the
needles:
As
the
tip
of
the
looper
reaches
the
center
of
the
left
needle,
the
dimension
from
the
tip
of
the
looper
to
the
top
of
the
eye
of
the
left
needle
must
be
1 to
1.5mm
(Fig
3B).
Adjustment
of
the
looper-needle
timing
is
done
by
removing
the
top
housing
cover,
loosening
the
set
screwsCA")
on
the
top
timing
pulley,
and
moving
the
position
of
the
timing
pulley
on
the
top
shaft
accordingly
(see
Fig
4).
Looper-Needle
Distance
At
the
time
the
needles
are
in
their
lowest position,
the
looper is in its rightmost position. At this time,
the
distance
from
the
tip
of
the
looper
to
the
center
of
the
middle
needle
(needle
bar
center)
must
be
6.5mm
(Fig 5).
This
dimension is
standard
for all gauge sizes.
Because
it is
common
practice
to
measure
the
looper-
needle
distance
from
the
tip
of
the
looper
to
the
center
of
the
right
needle
(Fig
6),
corresponding
looper-needle
distances
for
various
gauge
sizes
are
shown
on
chart
1.
Fig
3A
Fig
3B
From the library of: Superior Sewing Machine & Supply LLC

Chart
1
Gauge
width
"A"
1/8"
(3.2mm)
4.9mm
5/32"(4.0mm)
4.5mm
3/16"(4.8mm)
4.1mm
7/32"(5.6mm)
3.7mm
1/4"
(6.4mm)
3.3mm
Needle
Height
As
the
looper
moves
to
the
left,
behind
the
needles,
the
tip
of
the
looper
reaches
the
center
of
the
left
needle.
At
this
time,
the
distance
from
the
tip
of
the
looper
to
the
top
of
the
eye
of
the
needle
must
be
1
to
1.5mm
(Fig
7).
If
the
needle
height
needs
adjusting,
remove
the
face
plate
to
gain
access
to
the
clamp
screw
("A",
Fig
8).
Loosen
the
clamp
screw
by
using
A
3mm
hex
key
wrench.
Adjust
the
height
up
or
down
as
needed.
Retighten
the
clamp
screw.
Note
1. Do
not
overtighten
the
screw
more
than
3
to
4 ft.
lbs.
(30 to 35
kgcm)
torque.
2.
When
tightening
the
clamp
screw,
be
sure
the
needles
are
in
alignment
with
the
needle
holes
in
the
needle
plate
(Fig
9).
From the library of: Superior Sewing Machine & Supply LLC

(^^^^Looper-Needle
Clearance
As
the
looper
moves
to
the
left,
behind
the
needles,
the
tip
of
the
looper
will
lightly
brush
against
the
right
needle
(zero
clearance).
As
it
continues
across
and
passes
behind
the
left
needle,
the
clearance
will
be
0.1
to
0.15mm.
The
same
conditions
apply
to
both
two
and
three
needle
models
(see
Fig
10
and
11).
To
make
an
adjustment,
first
check
to
see
that
the
needles
are
in
proper
alignment
with
the
needle
holes
in
the
needle
plate
(Fig
9).
Next,
check
to
be
sure
the
looper
is
set
so
that
the
set
screw
is
positioned
squarely
on
the
flat
of
the
looper
shaft
(see
Fig
1).
Next,
check
to
be
sure
that
the
looper
avoid
angle
is
appropriate
(see
section
1-6).
Three
Needle
Gauge
Two
Needle
Gauge
From the library of: Superior Sewing Machine & Supply LLC

Adjustment
Of
Looper
Avoid
Angle
The
looper
avoid
motion,
or
path,
has
a
standard
offset
angle
such
that
the
tip
of
the
looper
just
brushes
the
back
surface
of
the
right
needle
and
has
a
clearance
of
0.1
to
0.15mm
as
it
passes
behind
the
left
needle,
(see
Fig
12).
In
the
WX
series
of
machines,
the
looper
avoid
angle
is
adjustable
for
obtaining
improved
results
under
various
sewing
conditions.
To
adjust,
loosen
the
set
screw
("B",
Fig
13)
on
the
avoid
eccentric
("A",
Fig
13),
and
move
the
eccentric
forward
or
backward
on
the
shaft
as
needed.
Moving
the
timing
mark
forward
(in
the
"X"
direction.
Fig
14)
decreases
the
avoid
angle.
Moving
the
timing
mark
backward
(in
the
"Y"
direction.
Fig
14)
increases
the
avoid
angle.
Standard
looper
avoid
angle
is
achieved
when
the
timing
marks
are
aligned.
Caution
The
adjustment
of
the
looper
avoid
angle
is
intended
for
slight
variations
only.
Large
variations
in
looper
avoid
angles
in
either
direction
may
result
in
skip
stitching.
©
Q,
From the library of: Superior Sewing Machine & Supply LLC

Needle
Deflection
As
the
needles
move
downward
and
the
looper
moves
to
the
right,
the
left
needle
must
contact
the
back
of
the
looper
3
to
S.Snim
behind
the
eye
of
the
needle
(see
Fig
15).
The
left
needle
must
deflect
off
the
back
1/3
of
the
looper,
appro
ximately
0.3
to
0.6mm
(see
Fig
16).
If
heavier
needles
are
used,
the
looper
position
may
need
to
be
adjusted.
Loosen
the
nut
on
the
stop
pin
for
the
looper
avoid
rod
(Fig 17).
Reposition
the
looper
by
turning
the
screw
("A",
Fig
17).
By
turning
the
screw
clockwise,
the
assembly
will
move
in
the
"X"
direction
(see
Fig
18).
This
will
decrease
the
looper
avoid
motion.
By
turning
the
screw
counterclockwise,
the
assembly
will
move
in
the
"Y"
direction.
This
will
increase
the
looper
avoid
motion.
The
standard
amount
of
looper
avoid
motion
should
be
2.3
to
3.1mm.
By
decreasing
the
looper
avoid
motion,
needle
breakage
may
occur
because
of
too
much
contact
between
the
looper
and
needles
and
increased
friction.
By
increasing
the
looper
avoid
motion,
skip
stitching
may
occur.
3~3.5mm
0.3'^0.6mm
From the library of: Superior Sewing Machine & Supply LLC

2.
The
Niedle
Guards
Imposition
Of
The
Rear
Needle
Guard
At
the
time
the
needles
are
in
the
lowest
position,
the
height
of
the
rear
needle
guard
must
be
arranged
so
that
the
contacting
edge
("a",
Fig
19)
lines
up
with
the
eye
of
the
right
needle
(see
Fig
19).
Also
at
that
time,
the
clearance
and
orientation
to
the
needles
must
be
such
that
there
is
a
0.3
to
0.4mm
clearance
to
the
right
needle
and
a
0.6
to
0.7mm
clearance
to
the
left
needle
(see
Fig
19).
Adjust
by
loosening
screws
"B"
and
"C"
(Fig
22)
and
position
as
needed.
Retighten
all
screws.
As
the
looper
moves
to
the
left
and
the
tip
of
the
looper
reaches
the
center
of
the
right
needle
(see
Fig
20),
the
needle
guard
must
be
contacting
the
right
needle
to
make
a
"zero
clearance"
(0
to
0.
05mm)
between
the
looper
tip
and
the
scarf
of
the
right
needle
(see
Fig
20).
As
the
looper
continues
across
and
the
tip
of
the
looper
reaches
the
center
of
the
left
needle,
there
should
be
a
clearance
of
0.15
to
0.2mm
between
the
left
needle
and
the
rear
needle
guard
(see
Fig
21).
At
this
time,
the
rear
needle
guard
does
not
contact
the
needles.
All
adjustments
to
height
and
position
orien
tation
are
done
with
screws
"B"
and
"C"
shown
in
figure
22.
Fig
20
Fig
22
0—0.05mm
0.1~0.15mm
0.15—02mm
From the library of: Superior Sewing Machine & Supply LLC

Position
Of
The
Front
Needle
Guard
As
the
looper
moves
to
the
left
behind
the
needles,
and
the
tip
of
the
looper
reaches
the
center
of
the
left
needle,
the
clearance
between
the
front
of
the
needles
and
the
front
needle
guard
must
be
0 to
0.5mm
(see fig 23).
Adjust
by
loosening
screw
"B"
and
repositioning
the
front
needle
guard
appropriately.
Retighten
the
screw
"B".
3.
The
Tdp Coyer Looper
Position
Of
The
Top
Cover
Looper
The
height
of
the
top
cover
looper
should
be
9.0 to
11.0mm
above
the
top
surface
of
the
needle
plate
(see
Fig
24).
Recommended
height
for
the
top
cover
looper
for
gauge
sizes 1/8", 5/32",
and
3/16"
is
9.0mm,
Recommended
height
for
gauge
sizes
7/32"
and
1/4" is 11.0mm (see
chart
2).
To
adjust
the
height
of
the
top
cover
looper,
loosen
the
clamp
screw
("B".
Fig
25)
and
position
up
or
down
as
needed.
Retighten
the
screw
securely.
Chart
2
Gauge
Looper Height
Gauge
Looper Height
11.0mm
11.0mm
11.0mm
9.0mm
9.0mm
Fig
24
SMImm
From the library of: Superior Sewing Machine & Supply LLC

Top
Cover
Looper
Cont'd
As
the
top
cover
looper
moves
across
the
front
of
the
needles,
the
clearance
between
the
front
of
the
left
needle
and
the
tip
of
the
thread
hook
must
be
0.3 to 0.8mm (see
Fig
26).
To
adjust,
loosen
the
set
screw
("B",
Fig
25),
reposition
as
necessary,
and
retighten
the
set
screw
securely.
As
the
top
cover
looper
is
in
its
leftmost
position,
the
tip
of
the
thread
hook
should
be
4.5
to
5.5mm
to
the
left
of
the
center
of
the
left
needle
(see
Fig
27).
To
adjust
the
leftmost
position, loosen
the
set
screw
("C",
Fig
25),
move
left
or
right
appropriately,
and
retighten
the
set
screw
securely.
To
adjust
the
stroke
of
the
top
cover
looper,
loosen
the
nut
("D",
Fig
28)
and
move
the
connecting
pin
up
or
down
the
slot
of
the
lever.
Moving
the
pin
in
the
"b"direction
increases
the
stroke.
Moving
the
pin
in
the
"a"
direction
decreases
the
stroke
(see
Fig
28).
Retighten
the
nut.
4.5~5.5mm
Fig
28
From the library of: Superior Sewing Machine & Supply LLC

Position
Of
The
Top
Cover
Thread
Guide
The
distance
from
the
top
of
the
top
cover
looper
("A",
Fig
29)
to
the
bottom
of
the
top
cover
thread
guide
("D",
Fig
29)
should
be
0.5
to
0.8mm.
Also,
at
the
time
the
top
cover
looper
is
in
its
rightmost
position,
the
tip
of
the
thread
hook
should
be
visible
in
the
center
of
the
slot
of
the
top
cover
thread
guide
(see
Fig
30).
To
adjust
the
position
of
the
top
cover
thread
guide,
loosen
the
screws
CA" & "B",
Fig
31)
and
position
the
thread
guide
as
needed.
Screws
"A"
are
used
to
adjust
up
or
down
and
screws
"B"
are
used
to
adjust
right
or
left.
Retighten
the
screws.
At
the
time
the
needle
bar
is
in
its
lowest
position,
the
distance
from
the
top
of
the
top
cover
thread
guide("D",
Fig
29)
to
the
bottom
of
the
top
cover
thread
eyelet
("B",
Fig
29)
should
be
1.0mm
(see
Fig
29).
Also,
at
that
time,
the
center
of
the
hole
in
the
top
cover
thread
eyelet
("B",
Fig
32)
and
the
tip
of
the
slot
in
the
top
cover
thread
guide
("D",
Fig
32)
must
be in
alignment
(as
in
Fig
32).
To
adjust
the
height
and
the
alignment
of
the
top
cover
thread
eyelet,
loosen
the
set
screw
("G",
Fig
32)
and
position
accordingly.
Retighten
the
screw.
Fig
29
Fig
30
Fig
32
O.Smm
From the library of: Superior Sewing Machine & Supply LLC

Top
Cover
Looper
Timing
The
timing
of
the
top
cover
looper
may
be
adjusted
to
accommodate
various
sewing
conditions
according
to
the
type
of
thread
used.
To
adjust,
remove
the
top
cover
of
the
machine,
loosen
the
set
screws
("A",
Fig
33)
on
the
top
cover
eccentric,
and
move
forward
or
backward
as
nesessary.
Moving
the
timing
mark
in
the
direction
of
"E"
(see
Fig
34) will
increase
the
speed
of
the
timing.
Moving
the
timing
mark
in
the
direction
of
"F"
will
decrease
the
speed
of
the
timing
of
the
top
cover
looper.
Retighten
the
set
screws.
Fig
33
Fig
34
From the library of: Superior Sewing Machine & Supply LLC

4.
Front
And
Rear
Feed
Dogs
And
Stich
Length
Adjustments
^
Feed
Dog
Height
And
Level
At
the
time
the
needle
bar
is
in
its
highest
position,
the
feed
dogs
should
be
in
their
highest
position.
At
this
time,
the
distance
from
the
top
of
the
needle
plate
surface
to
the
tip
of
the
feed
dog
tooth
must
be
1.0
to
1.2mm
(see
Fig
35).
The
front
("A")
and
the
rear
("B")
feeder
heights
must
be
the
same,
but
because
they
are
moved
by
different
mechanisms,
they
are
adjusted
separately.
To
adjust
the
height
of
the
front
and
rear
feeders,
loosen
the
screw
at
the
base
of
each
feeder
(see
Fig
36)
and
move
up
or
down
to
the
proper
height.
Retighten
the
screws.
The
feeders
must
also
be
level
to
the
surface
of
the
needle
plate.
To
adjust
the
level
of
the
feeders,
remove
the
back
cover
on
the
bed
of
the
machine.
Loosen
the
set
screw
("D",
Fig
37)
with
a
2.5mm
hex
key
wrench
(access
to
the
screw
is
through
hole
"C"
in
the
bed
as
seen
in
Fig
37).
After
the
set
screw
is
loosened,
turn
the
leveling
eccentric
("F"
Fig
37)
with
a
screwdriver
as
shown
until
the
level
is
found.
Retighten
screw
D.
1.0—1.2mm
From the library of: Superior Sewing Machine & Supply LLC

Adjustment
Of
The
Stitch
Length
The
stitch
length
may
be
adjusted
from
1.4
to
3.6
mm
(stitch
density
of
7
to
18
stitches/inch).
See
chart
3
for
conversions
from
stitch
length
(mm)
to
stitch
density
(stitches/inch).
Note
Before
making
any
adjustments
to
the
stitch
length,
be
sure
the
motor
is
switched
off
!
To
change
the
stitch
length,
push
the
button
("A"
Fig
38)
with
the
left
hand
until
it
contacts
the
inner
machanism.
While
maintaining
pressure
on
the
button,
slowly
turn
the
handwheel
clockwise
with
the
right
hand.
At
a
certain
position
the
button
will
drop
down
further.
(The
pin
on
the
end
of
the
button
has
dropped
into
the
notch
on
the
stitch
length
eccentric).
While
holding
the
button
down,
turn
the
handwheel
to
adjust
the
stitch
length.
Turning
the
handwheel
clockwise (in
the
direction
of
the
"S"
marked
on
the
handwheel)
will
make
the
stitch
shorter.
Turning
the
handwheel
counter-clockwise
(in
the
"L"
direction)
will
make
the
stitch
longer.
The
brass
stud
("B"
Fig
39) is
for
reference
when
adjusting
and
setting
the
stitch
length.
Occasionally
release
the
stitch
length
adjustment
button
and
check
to
determine
if
the
desired
stitch
length
has
been
attained.
Note
Be
sure
the
pushbutton,
"A",
has
been
fully
released
before
resuming
sewing.
Chart
3
Stitch
Length
Stitch
Density
3.6mm
7.0
ST/IN
2.4mm
10.5
ST/IN
1.4mm
18.0
ST/IN
1)1
13
From the library of: Superior Sewing Machine & Supply LLC

Adjustment
Of
The
Differential
Feeding
To
obtain
the
required
differential
feeding,
loosen
the
hand
nut
("A",
Figs
40
and
41)
and
move
the
lever
("B",
Fig
40)
up
or
down
as
necessary.
If
the
mark
on
lever
"B"
is
lined
up
with
the
"1"
mark
("C"
Figs
40
and
41)
on
the
gauge
plate,
the
feeding
will
be
the
standard
1:1
ratio.
By
moving
the
lever
up
above
the
"1"
mark,
the
differential
feed
ratio
can
be
increased
to
a
maximum
of
1:
2.
By
moving
the
lever
down
below
the
"1"
mark,
the
differential
feed
ratio
can
be
decreased
to
a
minimum
of
1:0.7.
Retighten
the
hand
nut
"A".
It
is
possible
to
vary
the
differential
feed
ratio
during
the
sewing
operation.
To
do
this,
connect
a
chain,
fastened
to
a
foot
pedal,
to
the
front
of
the
lever
(point
"E",
Fig
40).
Next,
loosen
the
hand
nut,
"A".
Then
set
the
differential
range
(maximum
up
and
down
positions
of
the
lever)
with
the
stoppers
("D",
Fig 41).
For
this
type of operation, do
not
retighten
the
hand
nut
"A".
Chart
4
Fig
40
mBi
The
maximum
range
of
dif
ferential
feed
ratio
is
limited
to
the
stitch
length
used.
Refer
to
chart
4.
Stitch
Length
Max.
Ratio
Min.
Ratio
3.6mm
1:1.2
1:0.7
2.5mm
1:1.6 1:0.7
2.0mm
1:1.8
1:0.7
1.4mm
1:2.0
1:0.7
From the library of: Superior Sewing Machine & Supply LLC

5.
Presser
/Foot
Adjustments
-f
Position
Of
The
Foot
The
presser
foot
must
be
set
on
the
presser
bar
such
that
the
needles
pass
through
the
holes
in
the
presser
foot
with
equal
clearance
on
both
sides
(see
Fig
42).
To
adjust,
loosen
the
clamp
screw
("A",
Fig
42)
and
move
right
or
left
to
attain
the
correct
position.
Retighten
the
clamp
screw.
Presser
Foot
Lift
Height
In
the
case
of
machines
equipped
with
a
top
cover
looper,
the
presser
should
lift
no
higher
than
7mm,
measured
from
the
top
surface
of
the
needle
plate
to
the
bottom
of
the
presser
foot.
When
the
presser
is
at
full
lift
height,
it
should
never
exert
any
pressure
against
the
top
looper
that
may
distort
its
shape.
Machines
without
a
top
cover
looper
may
have
a
presser
foot
lift
height
of
up
to
8mm.
To
limit
the
presser
lift
height,
there
is a
stop
screw ("B",
Fig
44)
positioned
below
the
lifter
lever
on
the
back
of
the
machine.
Loosen
the
lock
nut
("C", Fig 44)
and
position
the
head
of
the
screw
up
or
down
to
change
the
lift
range.
Turning
the
screw clockwise allows
the
foot to
lift
higher.
Turning
the
screw
counter
clockwise
decreases
the
amount
of
foot
lift.
Retighten the lock
nut
after
the
proper
foot lift
height
has
been
attained.
Fig
42
From the library of: Superior Sewing Machine & Supply LLC

6.
Stitching
Adjustments
Position
Of
The
Silicone
Tank
Eyelet
The
standard
position
for
the
silicone
tank
eyelet
is
such
that
the
distance
from
the
center
of
the
screw
to
the
center
of
the
thread
holes
should
be
15 to
20mm
(see
Fig
45).
To
adjust,
loosen
the
screw
("A",
Fig
45)
and
move
up
or
down
as
needed.
Retighten
the
screw
securely.
Fig
45
6^
Adjustment
Of
The
Needle
Thread
Take
Up
At
the
time
the
needle
bar
is
at
its
lowest
position,
the
take
up
should
be
horizontal.
To
adjust,
place
the
needle
bar
at
its
lowest
position, loosen
the
clamp
screw
("D",
Fig
46)
and
position
appropriately
to level. Retighten
the
clamp
screw.
The
distance
from
the
eyelets
to
the
first
screw
("B", Fig
46)
should be 55mm, as shown in Fig
46.
To
adjust
the
distance,
loosen
screws
"B"
and
"C"
and
move
the
take
up
eyelet to
the
right
or
left as necessary. By increasing the
distance (moving the eyelet to the left), less
needle
thread
will be fed
into
the
stitch. By
decreasing
the
distance
(moving
the
eyelet
to
the
right),
more
needle
thread
will
be
fed
into
the
stitch.
Retighten
screws
"B"
and
"C".
From the library of: Superior Sewing Machine & Supply LLC

Needle
Thread
Take
Up
Control
The
stroke
of
the
needle
thread
take
up
is
adjustable.
This
is
done
by
repositioning
the
drive
lever
located
under
the
top
cover
of
the
machine.
The
standard
position
is
5.5mm
from
the
face
of
the
collar
as
shown
in
figure
47.
To
adjust,
remove
the
top
cover.
Loosen
the
clamp
screw
("A",
Fig
47).
Moving
the
drive
lever
closer
to
the
collar
will
increase
the
stroke,
resulting
in
larger
needle
loops.
Moving
the
drive
lever
farther
away
from
the
collar
will
decrease
the
stroke,
resulting
in
smaller
needle
loops.
Retighten
the
clamp
screw
securely.
The
needle
Thread
Take
Up
Wire
The
standard
position
of
the
needle
thread
take
up
wire("B",
Fig
48) is
such
that
the
top
surface
of
the
wire
is
in-line
with
the
center
of
the
holes
in
the
needle
bar
eyelet
("A",
Fig
48)
when
the
needle
bar
is
at
its
lowest
position.
Height
adjustments
to
the
take
up
wire
may
be
made
to
accommodate
the
different
characteristics
of
the
various
threads
used.
If
a
slick,
stretchy
type
of
thread
such
as
texturized
polyester
or
nylon
is
used,
the
position
of
the
take
up
wire
may
be
raised
to
take
out
more
thread
and
improve
the
needle
thread
loop
formation.
If
a
stiff,
non-stretchy
type
of
thread
such
as
100%
cotton
is
used,
the
height
of
the
thread
take
up
wire
should
be
lowered
to
prevent
the
formation
of
needle
thread
loops
that
are
too
large.
To
adjust
the
height
of
the
take
up
wire,
loosen
the
screw
("C",
Fig
48)
and
move
the
wire
up
or
down
as
needed.
Retighten
the
screw.
5.5mm
17
From the library of: Superior Sewing Machine & Supply LLC
Other manuals for wx-8800 series
1
Table of contents
Other kansai Sewing Machine manuals

kansai
kansai FX SERIES User manual

kansai
kansai wx-8800 series User manual

kansai
kansai R9000 User manual

kansai
kansai dlr 1500 series User manual

kansai
kansai DWR-1900 Series User manual

kansai
kansai MAC100 User manual
kansai
kansai SPX Series Datasheet
kansai
kansai FBX Series User manual

kansai
kansai DFB 1400 series User manual

kansai
kansai DVK-1700 series User manual