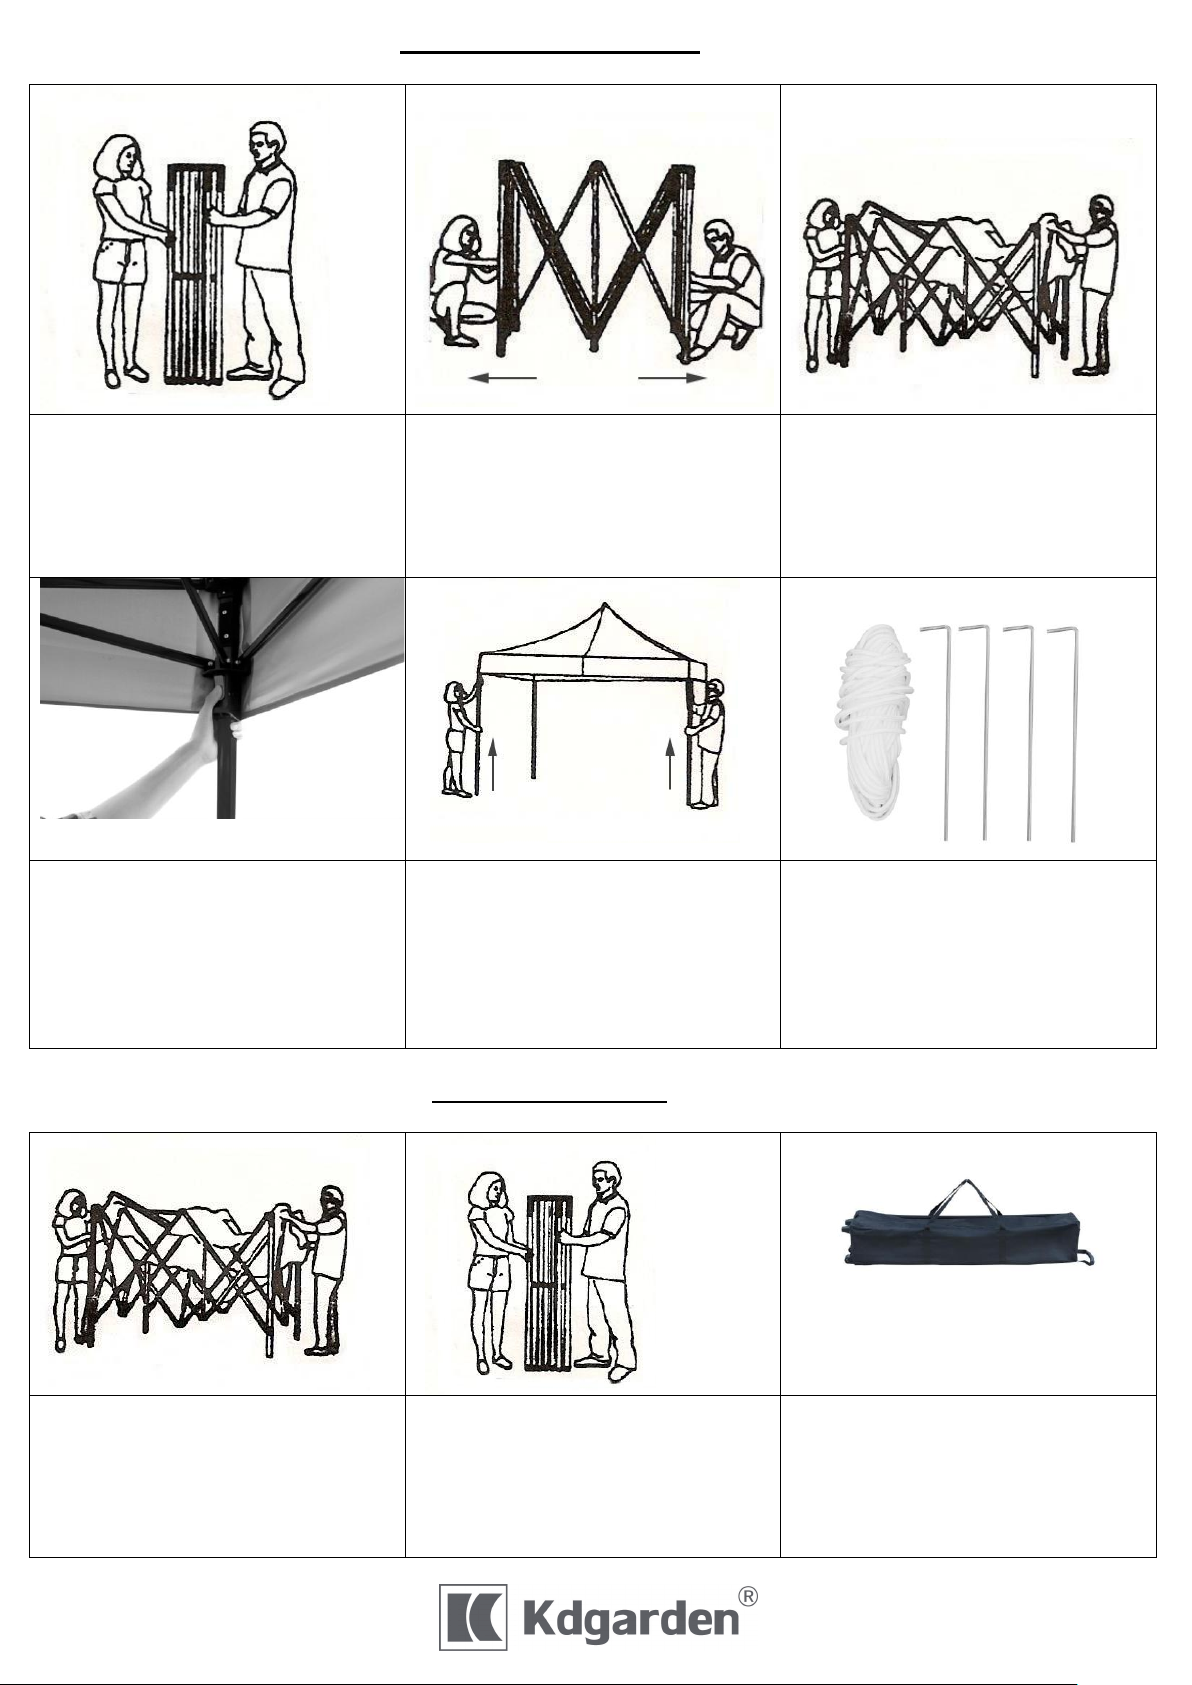
INSTALLATION INSTRUCTIONS
1. Place the steel frame in the center of
the set-up area. With a partner on the
opposite side of the frame.
2. Grasp outer legs, lift off the ground,
and step backwards - stopping at full
arm’s length.
3. Gently unfold the fabric top and
place it over the open frame. Attach
the fabric top to the steel frame by
matching hook & loop strips on the top
with the hook & loop strips on the
frame. Pull the corners down fully.
4. Make the frame completely
extended. Make sure the legs are
straight. Push on the corners until they
lock into place. Take care not to pinch
your hands or fingers.
5. The adjustable legs offer multiple
height levels. Starting on one side of
the tent move the slider/thumb lever
and lift a legs. The telescopic inner leg
pin will pop into the desired height
releasing the slider/thumb lever.
Repeat on opposite side of the tent.
6. Use the anchors stakes & ropes (for
soil) or weights (for hard surfaces) to
secure the canopy frame to the
ground. Tie the rope to the tab located
on each corner of the canopy top then
attached the rope to the stake. Repeat
on all 4 corners.
Take Down Instructions
1.It is recommended to remove the top
for storage. First push in the locking
button on all four corners of the frame
and slide the bracket down.
2.Each person goes to the center of
opposing sides. Grasps the top trusses
of the middle section, lift and walk
towards each other until the canopy is
at arms length. Each person then grabs
two legs and close completely.
3.The canopy should be easily
disassembled and can be returned to
the bag for storage. Always remember
that your pop up canopy should be
completely dry for storage to avoid
mildew.