Kegel8 Go-Tone User manual

1
User Guide
of the MD Kegel8 Go-Tone

2

Contents
Welcome to Your Kegel8® Go-Tone 4........................................................
Getting to Know Your Kegel8® Go-Tone 5...............................................
What Comes with Your Kegel8® Go-Tone 6..........................................
Customer Services. 6................................................................................................
How Your Kegel8® Go-Tone Works 7..........................................................
What to Expect From Your Kegel8® Go-Tone 8..................................
The Kegel8® Pelvic Floor Smile 10...............................................................
Starting Your Kegel8® Go-Tone Exercises 11.........................................
Kegel8® Exercise Tips 16......................................................................................
Choosing a Kegel8® Go-Tone Programme 17......................................
On-Screen Symbols 23...........................................................................................
Glossary 24.......................................................................................................................
Taking Care of Your Kegel8® Go-Tone 25................................................
Frequently Asked Questions 28........................................................................
Technical Specifications 31...................................................................................
Contraindications, Warnings and Precautions 33................................
Electromagnetic Compatibility 38..................................................................
Product Labelling and Symbols 42................................................................
Warranty 43......................................................................................................................
3
Please read this user guide before use and use only as
described. If in doubt, consult a healthcare professional.
Carefully read the chapter Contraindications, Warnings and
Precautions on page 33 before use. Keep unit out of reach of
children.

Welcome to Your Kegel8®Go-Tone
Thank you for choosing the Kegel8®Go-Tone. You are now one step
closer to having a stronger, healthier pelvic floor. By following the
instructions in this user guide, you will quickly experience the
extensive benefits of the Kegel8®Go-Tone.
This user guide is an integral part of the medical device; store it in a
safe and protected place, ideally together with the device, to ensure
availability and readability.
Created especially for you, the Kegel8®Go-Tone is an effective
neuromuscular electrical stimulator (NMES). By harnessing the
body’s natural electrical signals, your Kegel8®Go-Tone stimulates
the muscles and nerve fibres in your pelvic area in order to
strengthen them. Kegel8®Go-Tone includes clinically proven
programmes that are a safe and effective way of exercising your
pelvic floor. Recommended by healthcare professionals.
The Kegel8®Go-Tone can help prevent and treat the following
conditions:
•Weak pelvic floor
•Pelvic pain
•Sexual dysfunction/lack of sensation
•Stress incontinence
•Urge and frequency incontinence, including mixed
incontinence
•Overactive bladder/nocturia
In addition, the Kegel8®Go-Tone helps improve pelvic sensitivity,
strength and endurance. Improving local blood circulation to
maintain the optimum health and condition for these all-important
muscles nerves.
4

Getting to Know Your Kegel8®Go-Tone
Turn on the unit by pressing, and holding, the +Control button for at
least 2 seconds. The screen will then turn on.
Turn offthe unit by pressing, and holding, the -Control button for at
least 2 seconds. The screen will then turn off.
5
Screen
-Control button
+Control button ( )
Channel
Channel
Battery
compartment
Channel
Removable cover
Front
Bottom
Back

What Comes with Your Kegel8®Go-Tone
When you open your Kegel8®Go-Tone box, you will find:
•1 x Kegel8®Go-Tone Electronic Pelvic Toner (B13416)
•1 x Kegel8®Glide Gold Vaginal Probe (11207)
•1 x pack of 4 50x50mm Reusable Electrode Pads (81752)
•1 x Kegel8®Lead Wire (13445)
•3 x LR03 (AAA) Alkaline Batteries (8169)
•1 x Kegel8®Carry Case (13450)
•1 x Kegel8®Go-Tone User Guide (IFU13416)
•1 x Kegel8®Go-Tone Quick Start Guide (QSG13416)
•1 x Kegel8®Gel Exercise Lubricant sample 10 ml (11220)
In the unlikely event that any of the items above are missing, please
contact Kegel8®Customer Services.
Customer Services.
6

How Your Kegel8®Go-Tone Works
The Kegel8®Go-Tone is one of a new breed of modern
neuromuscular stimulators developed with the aim of achieving
optimum pelvic floor health for women.
Kegel8®Go-Tone works by
producing electrical pulses
that stimulate the perineal
muscles and surrounding
nerves, particularly the pubo-
coccygeal and pubo-rectal
muscles. This strengthens
these muscles and improves
blood circulation to give
greater control.
The programmes on the Kegel8®Go-Tone are designed to treat
specific pelvic floor conditions in 15-50 minute sessions – with a
perfect balance of working and resting the muscles so you get the
optimum results in the quickest time.
Your pelvic floor muscles do a lot for you; they support all
of your pelvic organs, they help stabilise and support your spine,
they help guide your baby during childbirth, they even contribute to
your relationship by being responsible for intimate sensation for
women and erectile function for men. Strengthen and maintain
these all-important muscles by making the Kegel8®Go-Tone part of
your routine.
7
Pelvic Floor

What to Expect From Your Kegel8®Go-Tone
If you haven’t used a neuromuscular stimulator before, the idea of
applying electric pulses to your body may seem strange, but your
body already uses electrical signals all the time. If you want to tense
the bicep muscle in your arm, your brain sends an electrical signal to
the muscle via your nervous system. When the signal reaches your
bicep, it causes the muscle to contract, and when the signal is not
present, your muscle relaxes again.
Kegel8®Go-Tone works in the same way – sending electric pulses
to the weakened muscles in your pelvic area, causing them to
contract and relax. Over time, this exercise strengthens them, giving
you greater muscle control.
To deliver the stimulation to your pelvic floor you can use
a Kegel8®vaginal probe (with programmes P1-P8) or skin electrodes
(with programme P9). Both are designed to comfortably deliver the
stimulation and, while you will be able to feel the effects of the
electric pulses exercising your pelvic floor muscles, they should not
cause any discomfort.
The Kegel8®probes are designed to suit your body. Their small
dimensions, smooth outer casing and curved edges mean it is easy
to insert and comfortable to use.
The Kegel8®Glide Gold Vaginal Probe is the
most powerful vaginal probe on the
market. It is ergonomically shaped for
use for all women – even those with a
low cervix or moderate pelvic organ
prolapse. It can even be used
comfortably when sitting down.
8

Programme P9 Overactive Bladder
(OAB) works differently to the other
programmes on your Kegel8®Go-
Tone. Stimulating the posterior tibial
nerve (PTNS); through two skin
electrode pads placed on the skin on
the inside of your ankle, above and
below the ankle bone.
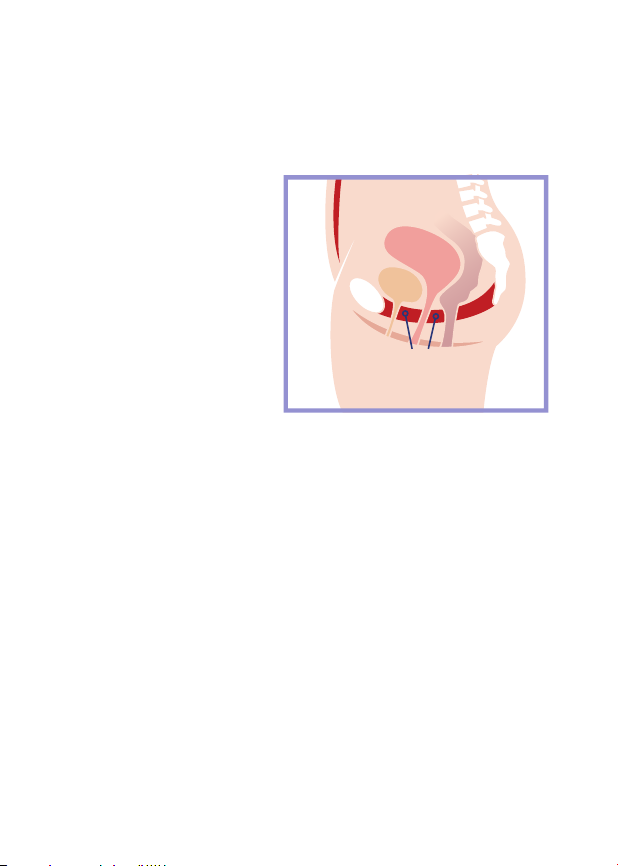
The tibial nerve runs down your leg from your pelvis, ending at your
ankle. It’s responsible for a lot of your body’s motor functions,
including those of your bladder, bowel and pelvic floor. This means
that by using tibial nerve stimulation we can ‘wake up’ these areas,
returning proper function and treating an overactive bladder.
The electrical stimulation is measured in mA (milliampere). At the
start of every programme, your Kegel8®Go-Tone begins with no
electrical current at 0 mA. You have full control over the level of
stimulation by using the ⊕and ⊖control buttons. For all
programmes (except P5 Urge Incontinence and P8 Pelvic Pain
Relief) when the electrical current reaches a certain level, you will
begin to feel a tapping, tingling or gentle pulling sensation in your
pelvic muscles (depending on the programme and your sensitivity).
When you get to this level, slowly increase the mA’s to a level that is
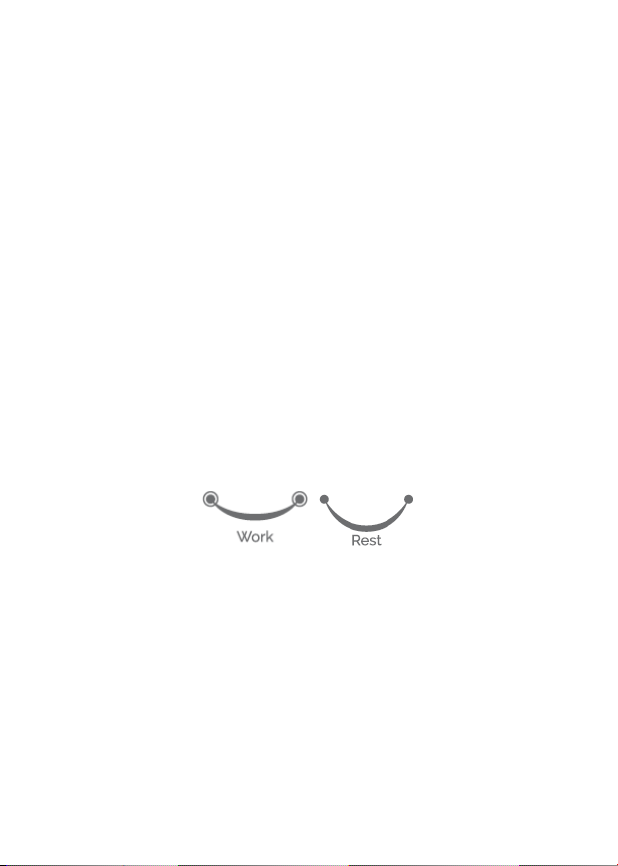
comfortable and you feel is working your muscles. Throughout each
programme you will feel your muscles pull up, tighten, and then
relax again as they are exercised in relation to work and rest periods
incorporated into the programme.
The stronger the sensation you feel, the more work your pelvic
muscles are doing. But don’t push yourself too hard. If you feel
discomfort, press the ⊖control button to reduce the current. Some
days you may need a lower mA to get the same workout.
9
Inside ankle

Now, let’s get started!
The Kegel8®Pelvic Floor Smile
The Kegel8®Pelvic Floor Smile has been designed to help you
understand what the neuromuscular electrical stimulation (NMES) is
doing to your pelvic floor muscles during certain programmes.
On programmes which use the Kegel8®Glide Gold Vaginal Probe,
P1-P8, you will see the smile move up and down on your Kegel8®
Go-Tone - raising to match the contraction of your muscles and
lowering to reflect the relaxation you will be feeling.
The ends of the smile pulse, to show the stimulation is running
through your muscles.
!
You may not feel any prominent contraction or relaxation during the
following programmes, as they use continuous current:
•P2 Rejuvenation
•P5 Urge Incontinence
•P8 Pelvic Pain Relief
10
There have been numerous research papers and clinical studies
confirming the safety and efficacy of neuromuscular electrical
stimulation. If you are interested in finding out more, contact our
Customer Service team (see page 6).

Starting Your Kegel8®Go-Tone Exercises
Ready to start your pelvic floor exercises? Then let’s get to it!
1. On the back of your Kegel8®Go-Tone, lift offthe main battery
cover and remove the battery compartment cover. Insert the
three AAA batteries supplied, taking care to observe the
polarities, and close the battery cover. Do not use the unit
when the battery cover is removed.
2. If using a probe (for programmes P1-P8):
a) Make sure the probe is clean by rinsing it in lukewarm water
or using the Kegel8®Cleaning Spray (see Taking Care of
Your Kegel8®Go-Tone on page 25 for more advice).
b) Connect the double end of
the lead wire to the wires of
your Kegel8®Glide Gold
Vaginal Probe. (If you are
using a different Kegel8®
probe, follow their
instructions).
c) Connect the single end of the lead wires to the channel at
the bottom of your Kegel8®Go-Tone.
d) To ease insertion and enhance the conductivity of the probe,
apply a small tear-sized amount of good quality water-
based lubricant (such as the Kegel8®KE GEL Kegel Exercise
Lubricant) directly onto each of the gold electrodes.
e) Get into a comfortable position. Inserting a probe is similar to
inserting a tampon, so you may already know which position
suits you best.
11

f) Hold the base of the probe (the plastic part at the end with
the wires).
g) Position the probe so that it
is pointing towards your head with the
wires pointing away. The gold
electrodes should be on the left and
right sides, facing towards each of
your thighs. The scooped side should
be against your back as you position it.
h) Gently insert the probe about 2 inches (5 cm) into your
vagina. This is less than you would insert a tampon - the
base part of the probe should always be outside of your
body.
3. If using skin electrodes (for programme P9):
a) Connect the double end of the lead wire to the wires of two
of your skin electrodes.
b) Connect the single end of the lead wires to the channel at
the bottom of your Kegel8®Go-Tone.
c) Clean and dry the area where you will attach the two skin
electrode pads. Remove any oils or lotions as these could
damage the pads.
d) Remove the plastic backing on the skin electrodes and
place them into position on the skin, sticky side down, a
minimum of one pad length apart either side of your ankle
bone.
12
If you have any issues inserting your Kegel8®probe or getting a
strong connection with your pelvic floor it is likely to be due to
lack of lubrication or incorrect positioning. Contact our
Customer Service team for support, page 6.

4. Turn on your Kegel8®Go-Tone by holding the ⊕button for at
least two seconds.
Sound is automatically enabled. To turn the sound off, select
⊖whilst the Kegel8®Go-Tone logo appears, then push ⊖to
disable sound, or ⊕to re-enable sound.
5. The last programme you were using will appear on screen, or
P1 if this is the first time you are using your Kegel8®Go-Tone.
6. Press ⊖to choose from one of the nine pre-set programmes.
See page 17 for advice on Choosing a Kegel8®Go-Tone
Programme.
7. Select your chosen programme by pressing the ⊕button.
8. If you are ready to go, press the ⊕button to set up the
stimulation level.
9. You can adjust the electrical stimulation level to suit you:
a) Press the ⊕button to increase the intensity in 1 mA steps.
b) Press the ⊖button to decrease the intensity in 1 mA
steps.
c) Hold the ⊖button for 2 seconds or more to switch-off
the unit.
d) The programme will continue 3 seconds after any change
in mA.
13
For more advice on using skin electrodes visit
www.kegel8.co.uk

10. During each programme the level of electrical stimulation
(mA’s) will automatically adjust for the WORK and REST
phases. The screen will show you which phase is active so
you can recognise what a strong muscle contraction and full
relaxation feels like. During some programmes, there is a very
low frequency felt during the REST phase which improves
the effectiveness of the treatment, without tiring the muscle.
The electrical stimulation will not go above the electrical
stimulation level (mA) you have set.
To change the stimulation level during a session, push the ⊕
or ⊖button for the set intensity screen to appear:
a) Press the ⊕button to increase the intensity in 1 mA steps.
b) Press the ⊖button to decrease the intensity in 1 mA
steps.
c) The programme will automatically resume 3 seconds
after any change in mA.
11. To pause the programme, simultaneously press the ⊕and ⊖
buttons. To resume, push the ⊕button. The stimulation will
be progressively restored to the level it was at before, and
the programme will continue.
12. When the programme is complete press and hold the ⊖
button to turn offyour Kegel8®Go-Tone. However, after a few
minutes of inactivity, it will automatically switch off.
14
See the symbol to see the time remaining.

13. If using a Kegel8®probe (for programmes P1-P8) pull gently
at its base to remove it. Do not pull on the wires as this could
damage your probe.
14. If using skin electrodes (for programme P9) gently peel them
away from your skin and replace the plastic backing.
15. Gently disconnect the lead wire from the Kegel8®Go-Tone
and Kegel8®Glide Gold Vaginal Probe or skin electrodes.
16. Keep all parts in a clean, dry place. We recommend that you
use the original packaging. See page 25 for more advice on
taking care of your Kegel8®Go-Tone.
See Kegel8®Exercise Tips on page 16 to learn how to get
the most out of your Kegel8®Go-Tone.
15

Kegel8®Exercise Tips
Use an Appropriate Amount of Power
The amount of electrical stimulation (mA level) needed to stimulate
pelvic floor muscles varies from person to person. You should
gradually increase it to a level where you can feel your muscles
reacting comfortably. Only you can tell what is comfortable for you.
As your pelvic floor muscles begin to strengthen, you may find that
you can increase the power output.
Exercise Once a Day for 3 Weeks
We recommend that you use your Kegel8®Go-Tone once a day for
a minimum of 3 weeks. but you can use as long as is needed.
Alternate between your choice of programme and P1 Pelvic Floor
Exercise (for more information on P1 see Choosing a Kegel8®Go-
Tone Programme on page 17). For example: Monday P1, Tuesday P8,
Wednesday P1, Thursday P8, Friday P1, and so on.
Aim to do just one Kegel8®programme a day, even if you do not
feel the stimulation as strongly as you did before. If you decide to
exercise twice a day, it is important that you do not do back-to-back
sessions. This is because your pelvic floor muscles need time to
recover between sessions. We suggest that you use your Kegel8®
Go-Tone once in the morning and once at night. Leaving at least 8
hours between uses.
Be Patient - Kegel8®WILL Improve Your Pelvic Floor
If you use your Kegel8®Go-Tone regularly, you should notice
improvements in your pelvic health in just a few weeks. However,
some women take longer to respond.
16

Everybody is different. Some people respond to Kegel8®exercises
very quickly, whereas with others, it can take a number of weeks to
feel real improvements.
But rest assured, if you use your Kegel8®Go-Tone regularly and
follow our instructions carefully, you will experience the benefits.
Choosing a Kegel8®Go-Tone Programme
Your Kegel8®Go-Tone includes nine exercise programmes. Each
designed to treat a specific pelvic floor problem. If you are suffering
with more than one pelvic floor problem, contact our expert
Customer Service team (see page 6 for details). Or speak to a
Women’s Health Physiotherapist for advice.
Programmes P1-P8 have been designed to be used with a Kegel8®
probe. P9 is designed to be used with skin electrodes.
•P1 Pelvic Floor Exercise – 16 minutes (see page 18)
•P2 Rejuvenation – 30 minutes (see page 19)
•P3 Intimate Sensation – 18 minutes (see page 19)
•P4 Stress Incontinence – 30 minutes (see page 20)
•P5 Urge Incontinence – 30 minutes (see page 20)
•P6 Mixed Incontinence – 28 minutes (see page 21)
•P7 Prolapse Management – 20 minutes (see page 22)
•P8 Pelvic Pain Relief – 50 minutes (see page 22)
•P9 Overactive Bladder (OAB) and Nocturia – 27 minutes
(see page 22)
17

See page 24 for our glossary of keywords.
P1 Pelvic Floor Exercise
If your pelvic floor muscles are already strong and healthy, you’ll
want to keep them that way. Use P1 Pelvic Floor Exercise to maintain
your muscle tone.
Alternate between your choice of programme and P1 to maintain a
consistent strength whilst undergoing treatment.
P2 Rejuvenation
Rejuvenate and nourish your vaginal walls with P2 Rejuvenation.
Improving blood circulation with the added benefit of greater
intimate sensation.
Screen Will show: P1 (Session Time 16 mins)
Phase
Type of Exercise
1
Work 12 sec. (Ramp 10–50 Hz, 300μs)
Rest 3 sec. (5 Hz, 200μs)
Screen Will Show: P2 (Session Time 30 mins)
Phase
Type of Exercise
1
2
3
4
5
6
Work 4 sec. (50 Hz, 300μs), Rest 1sec.
Continuous (18 Hz, 200 μs)
Work 6 sec. (40 Hz, 250 μs), Rest 1 sec. Continuous
(15 Hz, 200 μs)
Work 7 sec. (30 Hz, 250 μs), Rest 1 sec. Continuous
(15 Hz, 200 μs)
18

P3 Intimate Sensation
Improve your muscles on a fine scale with P3 Intimate Sensation.
During this programme, both your motor and sensory nerve fibres
are exercised. Your motor nerves tell your muscles to contract, and
your sensory nerves gather information from the surrounding area
and send it to your brain. A perfect programme to improve your
intimate sensation.
P4 Stress Incontinence
The P4 Stress Incontinence programme has been designed to
reduce urine losses by improving the ability of your muscles to react
to sudden pressure. Protecting you from those little leaks when you
sit down, run, cough, sneeze and much more.
Screen Will Show: P3 (Session Time 18 mins)
Phase
Type of Exercise
1
2
3
Work 10 sec. (Ramp 50--100 Hz, 300μs),
Rest 20 sec. (5 Hz, 200μs)
Work 20 sec. (Ramp 15--30 Hz, 250μs),
Rest 10 sec. (5 Hz, 200μs)
Work 59 sec. (Ramp 3--10 Hz, 200μs),
Rest 10 sec.
Screen Will Show: P4(Session Time 30 mins)
Phase
Type of Exercise
1
Work 3 sec. (Ramp 30--50 Hz, 250μs),
Rest 6 sec. (3 Hz, 200μs)
19

P5 Urge Incontinence
Urge incontinence is when you have the sudden urge to urinate and
you may have little control in delaying it. P5 Urge Incontinence has
been designed to inhibit the action of the muscles surrounding the
bladder to prevent those sudden and unexpected leaks.
P6 Mixed Incontinence
Many women suffer from both stress and urge incontinence. But
don’t worry, this doesn’t mean that you’ll have to do programme
after programme – you can simply use P6 Mixed Incontinence and
benefit from a programme designed to treat both. Combining the
effects of P4 Stress Incontinence and P5 Urge Incontinence.
Screen Will Show: P5 (Session Time 30 mins)
Phase
Type of Exercise
1
Continuous (Ramp 5--15 Hz, 200μs)
Screen Will Show: P6 (Session Time 28 mins)
Phase
Type of Exercise
1
Work 4 sec. (Ramp 30--40 Hz, 250μs),
Rest 7 sec. (10 Hz. 200μs)
20
Table of contents
Other Kegel8 Fitness Equipment manuals
Popular Fitness Equipment manuals by other brands

CONTROL SOLUTIONS
CONTROL SOLUTIONS CS6101-3 Patient Instruction Manual

Kettler
Kettler Cycle R Assembly instructions

Skandika Fitness
Skandika Fitness VIBRATION PLATE 1400 Assembly instructions and user guide

Ironman Fitness
Ironman Fitness 6950 owner's manual

BH FITNESS
BH FITNESS SK Line H800 Instructions for assembly and use

Jumpking
Jumpking JKXT14 user manual