manuals.online logo
Brands
  1. Home
  2. •
  3. Brands
  4. •
  5. KELD
  6. •
  7. Controllers
  8. •
  9. KELD KLTIMER Operating instructions

KELD KLTIMER Operating instructions

Specification and Operating Instructions
Wiring Diagram
ETDT1510I_090320
KLTIMER
SUPPLY
POWER OUTPUT
Description
The timer controller acts on a relay connecting it for a
programmable time interval.
Timer features include soundwarning when the countdown expires,
count units in seconds or minutes
, abort by the keyboard, remote
countdown input, manual control to switch ON/OFF the output,
and maximum interval limit.
Installation
(seconds are allways indicated by
a blinking led) countdown
programmable
Model references
NOTE: Unit must be mounted away from vibration, impacts,
water and corrosive gases.
Cut hole in panel 71 x 29 mm (2.80 x 1.14 inches)
Apply silicone (or rubber gasket) around the perimeter of the hole
to prevent leakage.
Insert unit into hole of panel.
Slide removable fitting clips onto unit from the back until secure to
panel.
Wiring diagram is displayed on the top of the unit
Maintenance, cleaning and repair
After final installation of the unit, no routine maintenance is
required.
The model reference is given by: KLT11TIM - WY.
Where each sufix can take the following values:
W Display Color R=Red, G=Green, B=Blue
Y Supply Voltage 230=230Vac, 110=115Vac
24=24Vac/dc, 12=12Vac/dc
•
•
•
•
•
Clean the surface of the display controller with a soft and damp
cloth. Never use abrasive detergents, petrol, alcohol or solvents.
All repairs must be made by authorised personnel.
Technical Data
Storage temperature
-20ºC to 80ºC (-4 to 176ºF)
Operating temperature
0ºC to 70ºC (32 to 158ºF)
Time resolution
Supply voltages
115Vac±10%, 230Vac±10%, 24Vac/dc±10%, 12Vac/dc±10%
Supply powers
4VA (230V)
1 sec
Displays
3-digit
Output
SPST Relay Resistive load 16A
1HP 240Vac -- 10FLA, 60LRA 240Vac
Dimensions
Front 77 x 36 mm (3.03 x 1.42 inch)
Depth 62 mm ( 2.44 inch)
Front Protection
IP64
Back Protection
IP20
KLTIMER Timer Controller
3 4 5 6 7
OUT
1 2
REMOTE
COUNTDOWN INPUT
ELECTRÓNICA KELD, S.L.
Polígono Empresarium. C/Lentisco, 15.
50720 La Cartuja Baja. Zaragoza. (Spain)
Tel: +34 976 429 099 · Fax: +34 976 593532
E-mail: keld@keld.es · web: www.keld.es
List of p
/Sec
1 to 999
Bc Buzzer On/Off
Manual On/Off
Bc = Sound warning when the countdown expires or it is stopped by
the user.
Man = Manual control to switch On/Off the relay output by means of
the SET key.
Functional description
While the timer is stand by the relay output is open and OFF is
shown on the display.
Setting the Man parameter to On value, we have manual control to
switch On/Off the relay output by means of the SET key. In this
case ON/OFF is show in the le display according to the relay state
and a point in the led display is illuminated continuously to indicate
the manual mode. The manual mode and the relay state is
memorized internally, in this way if the instrument is turning Off and
then turning On the manual mode and the relay state are again
applied.
arameters
Label Description Unit Range
Ut Time unit Option Min
Top Maximun time interval
Parameter description
Time unit
Option
Man Option
Ut =Time unit. Minutes (Min) or Seconds(Sec).
Top = Maximum limit for the time interval.
To start the countdown by pressing a key:
•Press SET. “0” will be shown on the display.
•Press UP to DOWN to set the time interval.
•Press SET to enter the value and start the countdown.
To start the countdown by remote countdown input:
Switching on a free voltage contact in the remote countdown input,
a countdown with the interval programmed in Top parameter is
started. If the remote countdown input is switched on when a
countdown is already running , a new countdown is started with the
interval programmed in Top parameter.
When the countdown starts the relay output is closed and the
message “run” is displayed. When the countdown expires, or it is
stopped by the user by pressing the SET key for one second, the
relay is open again and the message End is shown (if Bc parameter
is set to On a double beep sounds as well).
Parameter programming
•Press SET for 8 seconds. The first parameter label Ut will be
shown.
•Move to the desired parameter with the UP and DOWN Keys.
•Press SET to display the parameter value.
• The value can be modified with the UP and DOWN arrows.
Pressing UP and DOWN keys at the same time the parameter value
is reset to its minimal value.
•Press SET to enter the value.
• Repeat until all necessary parameters are modified.
•To quit programming mode press SET and DOWN at the same
time (otherwise it will exit automatically after one minute).
The parameters can be set to their default values by turning Off
the controller and turning it On again while keeping the SET key
pressed. The default values are the following:
Ut = Minutes
Top = 15
bc = Yes
Man = OFF
ETDT1510I_090320

Other KELD Controllers manuals

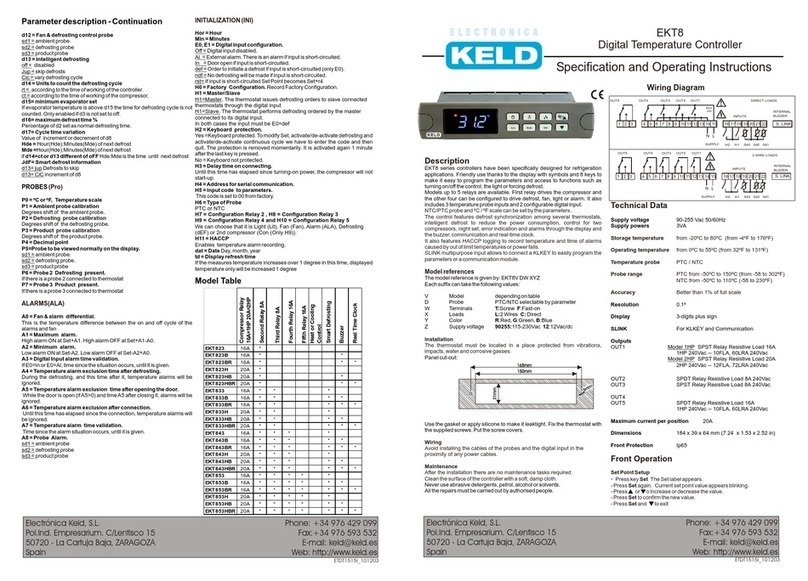
KELD EKT8 Series User manual

KELD

KELD EKT8 Series User manual

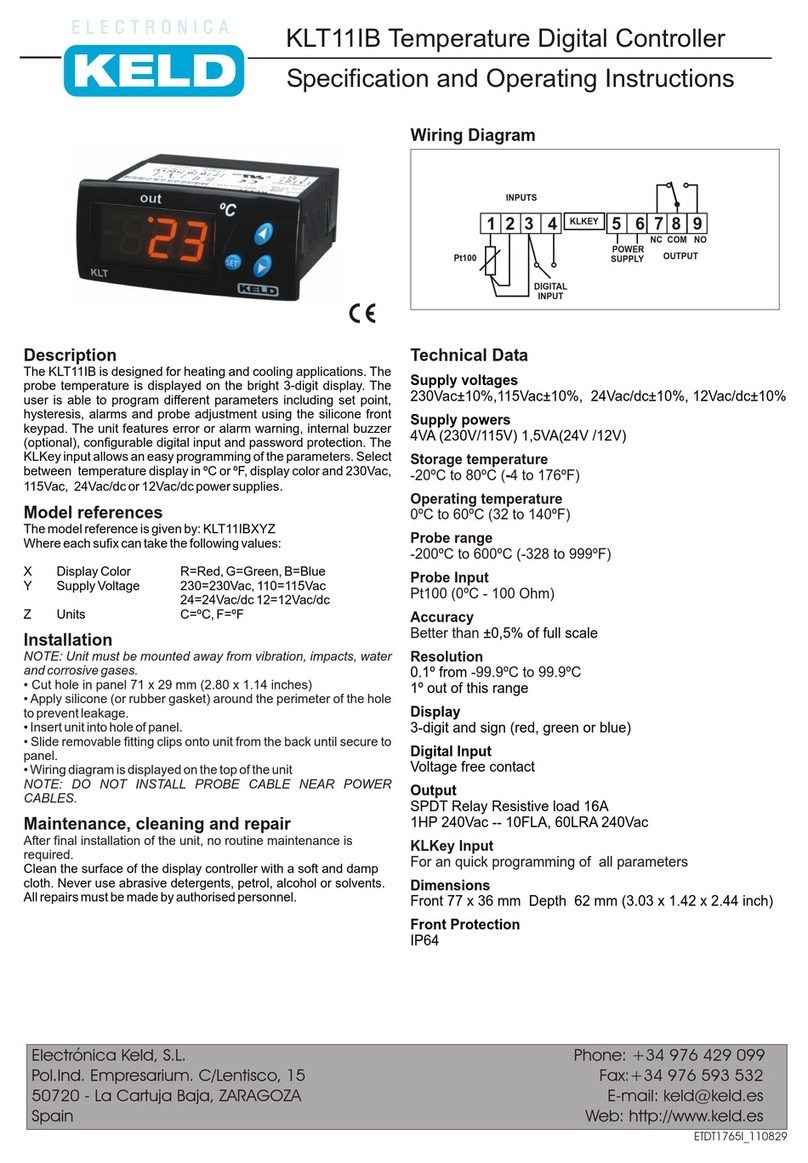
KELD KLT11IB Operating instructions

KELD

KELD KLT11IB Operating instructions

Popular Controllers manuals by other brands

CoCo ACM-LV10 Quick installation guide

CoCo

CoCo ACM-LV10 Quick installation guide

RS Automation X8 Series instruction manual

RS Automation

RS Automation X8 Series instruction manual

ISYGLT CC-03-SL-USB instruction manual

ISYGLT

ISYGLT CC-03-SL-USB instruction manual

Bartec Ex p Control Unit APEX manual

Bartec

Bartec Ex p Control Unit APEX manual

Gemu 1435 ePos quick guide

Gemu

Gemu 1435 ePos quick guide

Woodward 723PLUS Applications manual

Woodward

Woodward 723PLUS Applications manual

CD Automation REVO S 2PH user manual

CD Automation

CD Automation REVO S 2PH user manual

Cirrus Logic Crystal LAN CS8900A Product data sheet

Cirrus Logic

Cirrus Logic Crystal LAN CS8900A Product data sheet

Analog Devices EVAL-LT8355-1-AZ manual

Analog Devices

Analog Devices EVAL-LT8355-1-AZ manual

Siemens SIPART DR20 Project planning manual

Siemens

Siemens SIPART DR20 Project planning manual

Hobby Model Technology DS600 quick start guide

Hobby Model Technology

Hobby Model Technology DS600 quick start guide

SCHUNK SRU Series ASSEMBLY AND Operating information

SCHUNK

SCHUNK SRU Series ASSEMBLY AND Operating information

Jacuzzi J-C100 quick start guide

Jacuzzi

Jacuzzi J-C100 quick start guide

SolarV Epever Tracer 2606 BP user manual

SolarV

SolarV Epever Tracer 2606 BP user manual

Kuka KR C4 compact manual

Kuka

Kuka KR C4 compact manual

Solar Stik DSE 3110 instruction manual

Solar Stik

Solar Stik DSE 3110 instruction manual

Eurotherm epack user guide

Eurotherm

Eurotherm epack user guide

FASAR ELETTRONICA FE1054 manual

FASAR ELETTRONICA

FASAR ELETTRONICA FE1054 manual

manuals.online logo
manuals.online logoBrands
  • About & Mission
  • Contact us
  • Privacy Policy
  • Terms and Conditions

Copyright 2025 Manuals.Online. All Rights Reserved.