KELTY’S LIFETIME WARRANTY
Kelty takes pride in its workmanship and undertakes to manufacture the best
possible products. Therefore, we warranty all Kelty products against defects in
materials or workmanship during your lifetime. Since no Kelty product is
indestructible, it does not cover defects attributable to or resulting from normal
wear and tear, natural hazard damage (i.e.: weather, animals), abuse or
alteration (i.e.: ultra violet [u.v.] damage on tents, exhausted zippers).
Service under our warranty is available to the original purchaser by returning
the product to any authorized Kelty dealer or by contacting our customer
service department at 1-866-349-7225 (1-866-FIX-PACK) for return
authorization. Charges for shipping and insuring your package to Kelty are
your responsibility. Please be sure to insure any shipment, as Kelty cannot be
responsible for uninsured packages. We require that all products returned for
warranty and repair be properly cleaned. If, after inspection, we determine
that the product is defective, we will repair or replace it free of charge. If your
Kelty product needs service or repair that is not covered under warranty, we
will provide the necessary service at a reasonable charge. This warranty gives
you, the original purchaser, specific legal rights. You may also have other
rights, which vary from state to state.
6235 Lookout Road, Boulder Colorado 80301
phone 800.423.2320 • fax 800.504.2745 • www.kelty.com
2/05
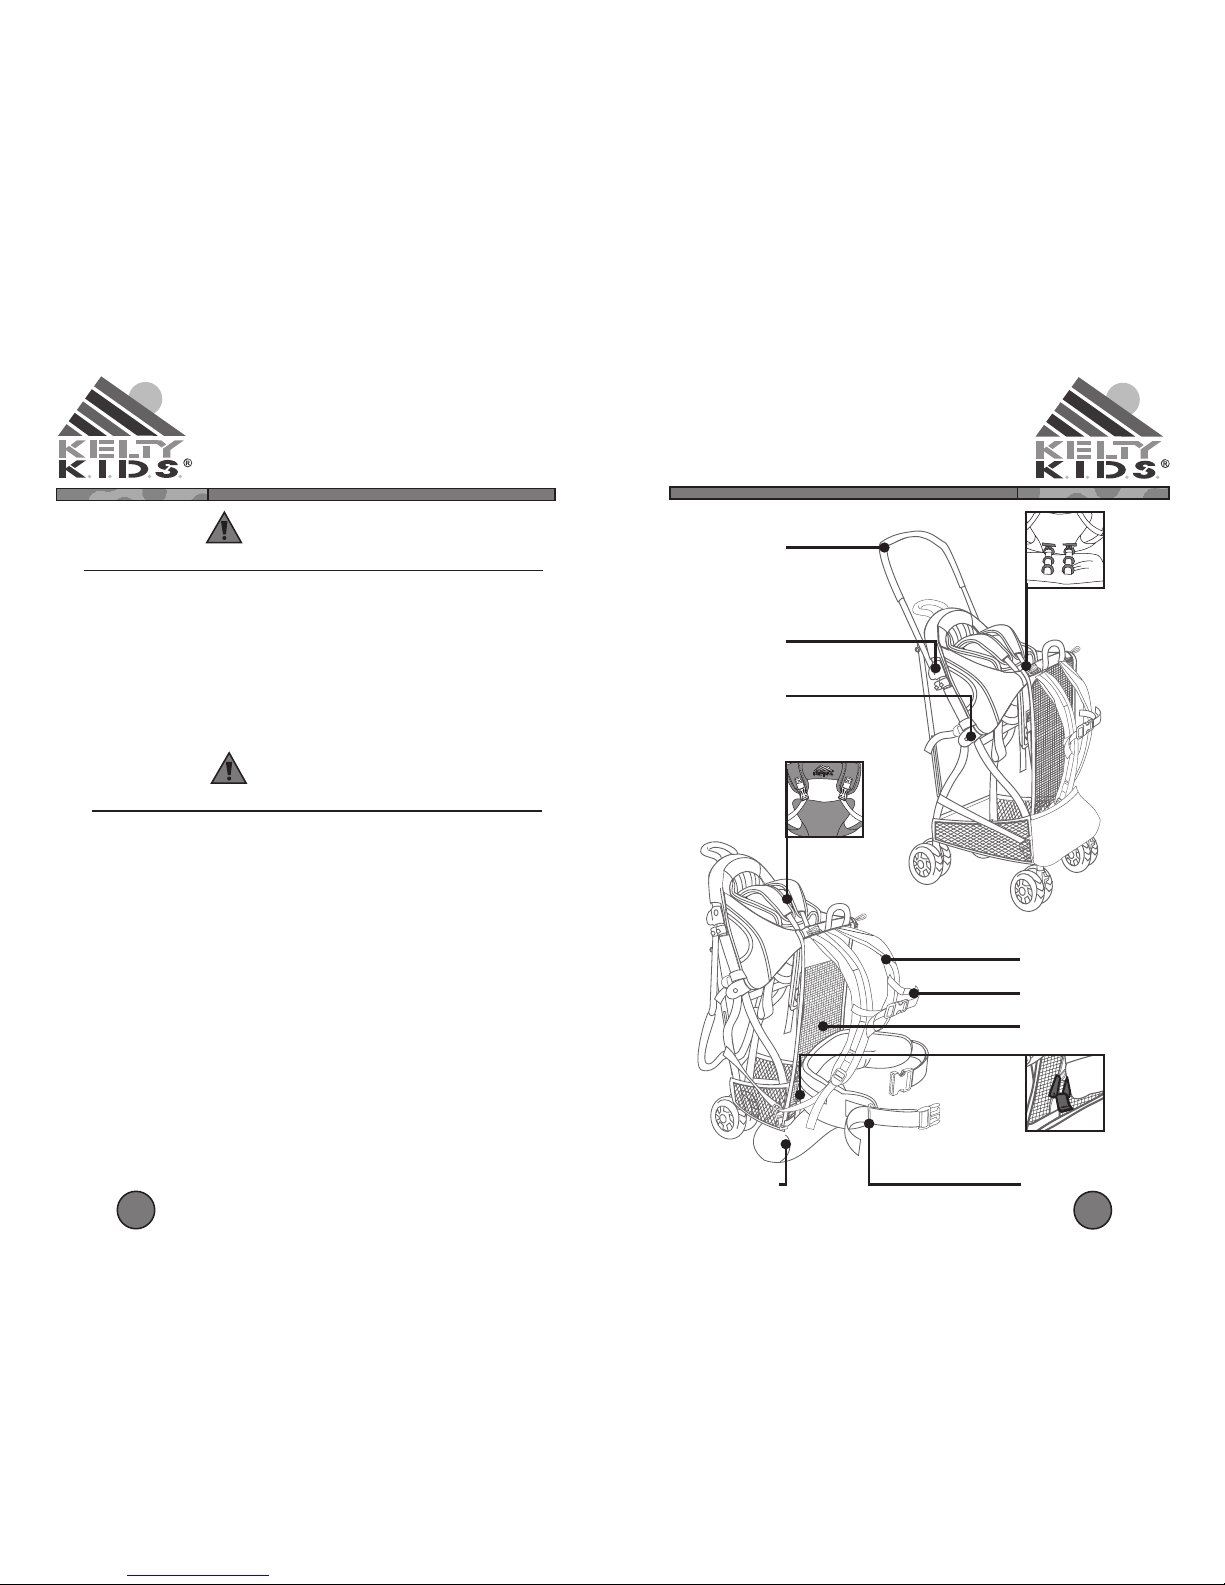
PUTTING THE CARRIER ON &
TAKING THE CARRIER OFF
TIPS
15
6. PUTTING THE CARRIER ON
Before putting carrier on, make sure the
cockpit has been adjusted correctly and that
both buckles on the child’s shoulder harness
are properly fastened.
Look around you to be sure there is no
obstacle nearby that the child could strike or
the carrier could catch on. DO NOT shake or
jar the child unnecessarily. DO lift and lower
the carrier gently.
Make sure the adult backpack shoulder straps are loose
and the waistbelt and sternum strap are unbuckled. Lock
and cover the front wheels.
A. With feet approximately shoulder-width apart and
knees bent, grasp both red handles (located at the
front and rear of the cockpit) firmly and lift the
carrier to your knee, resting the front of the lower
frame on your thigh.
B. While still grasping the front red handle with one
hand, slip your other arm under and through the
shoulder strap. Lift the carrier off your knee and
onto your shoulder.
C. Carefully release the front red handle and slip
carrier onto the other shoulder.
D. Buckle waistbelt and tighten.
E. Tighten shoulder straps and buckle sternum strap.
7. TAKING THE CARRIER OFF
A. Loosen shoulder straps.
B. Unbuckle waistbelt and sternum strap.
C. With feet approximately shoulder-width apart and
knees bent, remove one arm from shoulder strap
and grasp front red handle (behind head).
D. While still grasping front red handle, rotate your
body toward the carrier, allowing the front of the
lower frame to rest on your thigh.
E. Remove other arm from shoulder strap and grasp
rear red handle.
F. Carefully lower carrier to the floor or to firm, level
ground.
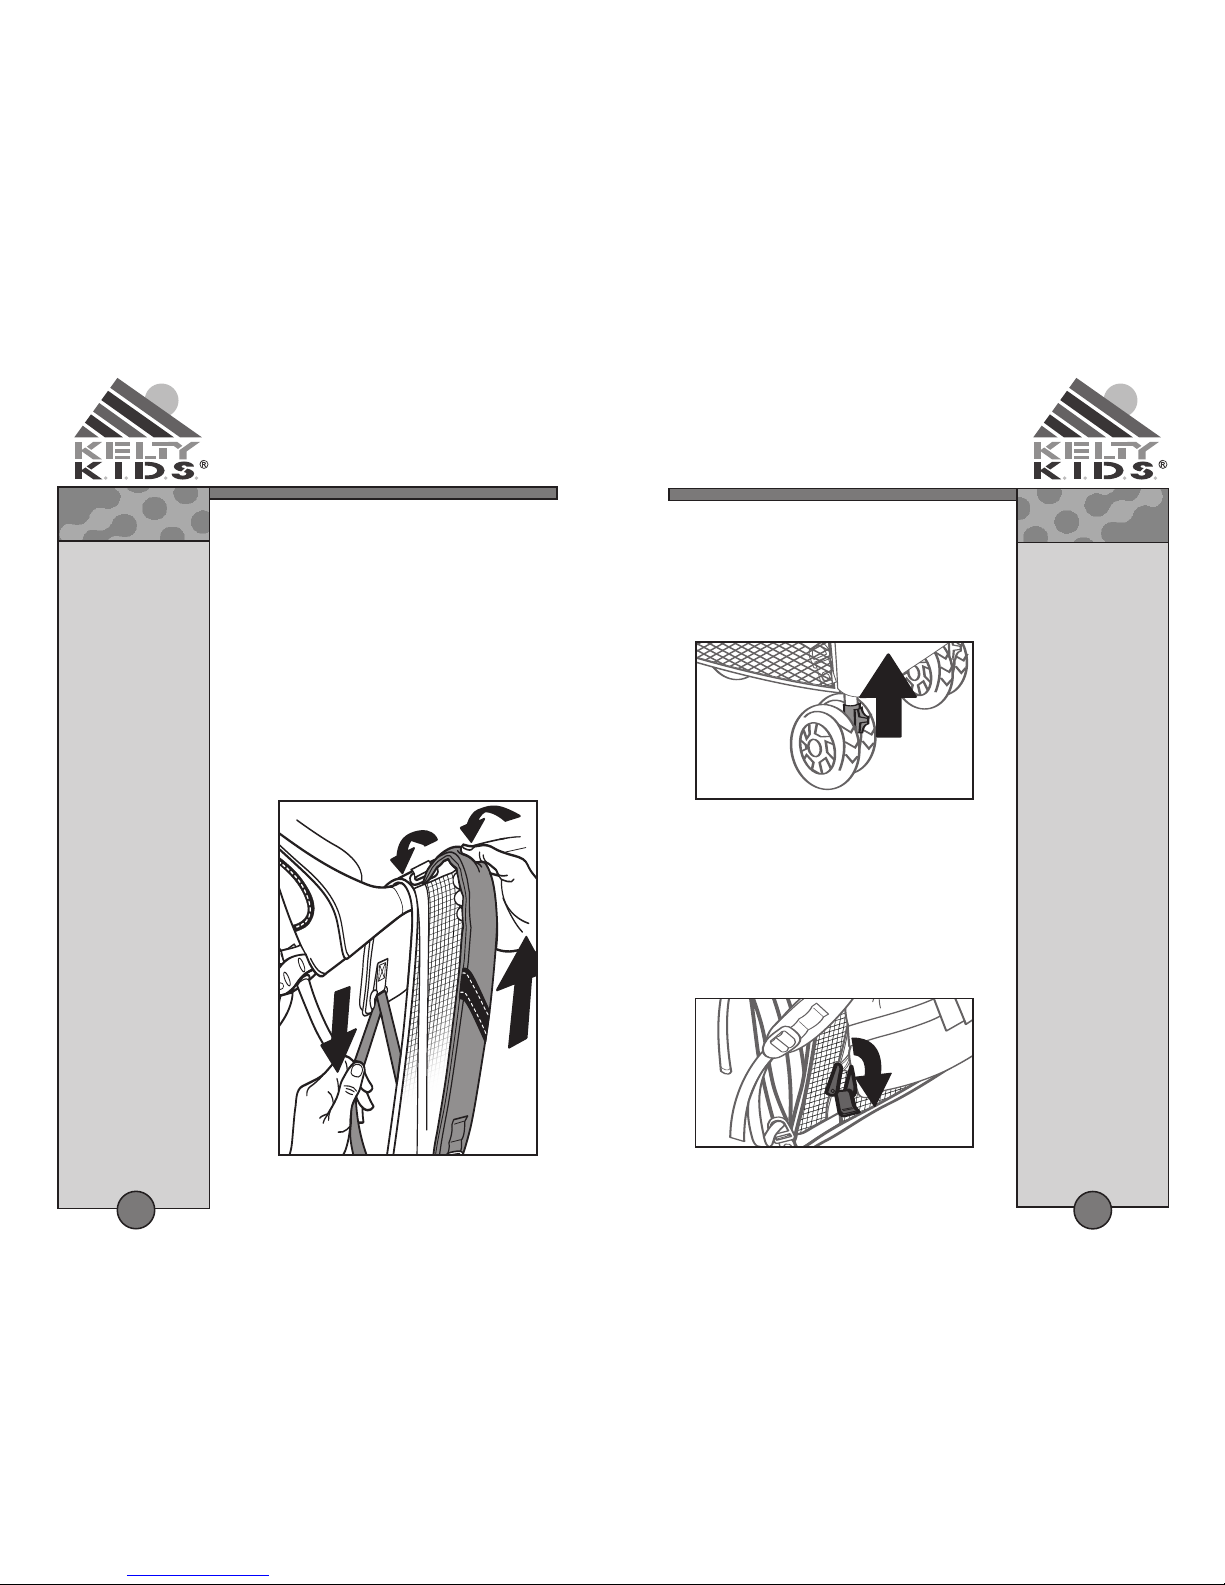
G. Move stroller rear wheels out, away from the front
of the carrier.
WARNING
CONVERTIBLE
TO BE USED
BY ADULTS
ONLY
• DO NOT use
the stroller while
skating, biking or
engaging in
any activity
that will affect
your balance.
• DO NOT use
stroller if you feel
faint, dizzy,
nauseated or
experience
muscle pain.
Failure to follow
this warning could
cause death,
serious injury or
permanent
disability to you
or your child.