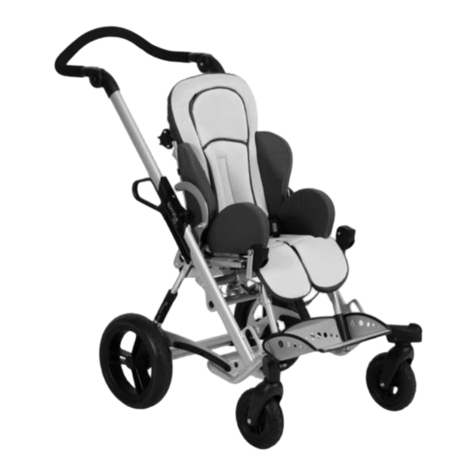
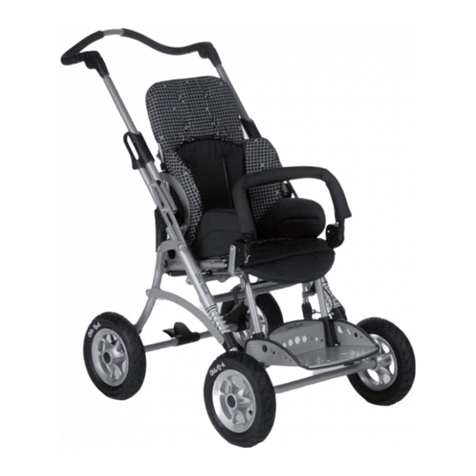
Otto Bock Kimba neo User manual

Instructions for Use (Qualified Personnel) ................................................................. 3
Kimba neo

2 | Ottobock Kimba neo

Foreword1 5..............................................................................................................................................................
Application2 5...........................................................................................................................................................
Intended Use2.1 5.......................................................................................................................................
Indications2.2 5...........................................................................................................................................
Contraindications2.3 5.................................................................................................................................
Necessary qualifications2.4 5........................................................................................................................
Service life2.5 5...........................................................................................................................................
Safety3 6....................................................................................................................................................................
Explanation of Warning Symbols3.1 6.............................................................................................................
General safety instructions3.2 6.....................................................................................................................
Safety instructions for assembly3.3 6..............................................................................................................
Rating plate and warning labels3.4 7..............................................................................................................
Rating plate3.4.1 7..........................................................................................................................................
Warning Labels3.4.2 7....................................................................................................................................
Delivery4 8.................................................................................................................................................................
Scope of Delivery4.1 8..................................................................................................................................
Options4.2 8...............................................................................................................................................
Storage4.3 8...............................................................................................................................................
Preparation for Use5 8............................................................................................................................................
Assembly5.1 8.............................................................................................................................................
Installing options/accessories5.2 9.................................................................................................................
Headrest supports (multifunctional seating unit)5.2.1 9.......................................................................................
Headrest supports5.2.1.1 9................................................................................................................................
Integrated headrests5.2.1.2 10...........................................................................................................................
Safety belts5.2.2 10........................................................................................................................................
Strap guide5.2.2.1 10........................................................................................................................................
Lap belt5.2.2.2 11.............................................................................................................................................
Four-point belt5.2.2.3 13....................................................................................................................................
Five-point belt5.2.2.4 14.....................................................................................................................................
Positioning aids5.2.3 16..................................................................................................................................
Thoracic supports5.2.3.1 16...............................................................................................................................
Abductor5.2.3.2 16............................................................................................................................................
Chest and shoulder support5.2.3.3 17.................................................................................................................
Fixation vest5.2.3.4 18.......................................................................................................................................
Groin strap5.2.3.5 19.........................................................................................................................................
Pelvic band5.2.3.6 20........................................................................................................................................
Hook & loop foot straps5.2.3.7 20.......................................................................................................................
Armrests5.2.4 20............................................................................................................................................
Tray5.2.5 20...................................................................................................................................................
Canopy adapter5.2.6 20..................................................................................................................................
Rain cover5.2.7 21..........................................................................................................................................
Summer/winter slip sack5.2.8 21......................................................................................................................
Frame padding5.2.9 21...................................................................................................................................
Storage basket5.2.10 21...................................................................................................................................
Adjustments6 22.......................................................................................................................................................
Prerequisites6.1 22......................................................................................................................................
Multifunctional seating unit (standard seat)6.2 22.............................................................................................
Adjusting the Seat Depth6.2.1 23.....................................................................................................................
Adjusting the seat width6.2.2 23.......................................................................................................................
Adjusting the backrest height6.2.3 23...............................................................................................................
Further settings6.2.4 24..................................................................................................................................
Table of contents
Ottobock | 3Kimba neo
Table of contents
Headrest supports (multifunctional seating unit)6.3 24......................................................................................
Adjusting the headrest support6.3.1 24.............................................................................................................
Fitting the integrated headrests6.3.2 24.............................................................................................................
Positioning aids6.4 25..................................................................................................................................
Adjusting the thoracic supports6.4.1 25.............................................................................................................
Adjusting the abductor6.4.2 25.........................................................................................................................
Adjusting the chest and shoulder support6.4.3 25..............................................................................................
Adjusting the fixation vest6.4.4 25.....................................................................................................................
Adjusting the groin strap6.4.5 25......................................................................................................................
Adjusting the pelvic band6.4.6 26.....................................................................................................................
Adjusting the hook & loop foot straps6.4.7 26.....................................................................................................
Footplate6.5 26...........................................................................................................................................
Adjusting the footplate height (lower leg length)6.5.1 26......................................................................................
Adjusting the footplate angle (option)6.5.2 26.....................................................................................................
Further settings6.5.3 26..................................................................................................................................
Safety belts6.6 27........................................................................................................................................
Spring tension6.7 27....................................................................................................................................
Pushbar6.8 27.............................................................................................................................................
Handover7 27............................................................................................................................................................
Final inspection7.1 27..................................................................................................................................
Transport to the customer7.2 27....................................................................................................................
Delivery7.3 27.............................................................................................................................................
Maintenance/Repair8 27.........................................................................................................................................
Disposal9 27.............................................................................................................................................................
Disposal information9.1 27............................................................................................................................
Information on re-use9.2 28...........................................................................................................................
Legal Information10 28..............................................................................................................................................
Liability10.1 28..............................................................................................................................................
CE Conformity10.2 28....................................................................................................................................
Warranty Terms and Conditions10.3 28............................................................................................................
Appendices11 28........................................................................................................................................................
Technical Data11.1 28....................................................................................................................................
4 | Ottobock Kimba neo
Table of contents

1 Foreword
INFORMATION
Date of the last update: 2012-03-21
►Please read this document carefully.
►Follow the safety instructions.
INFORMATION
Missing instructions for use can be downloaded from the homepage at www.ottobock.com or ordered directly
from the manufacturer's service (see back cover or inside back cover for addresses).
The product was delivered as specified on the order form. Settings must be adjusted and the product must be fine-
tuned according to the medical indications or the needs of the user; this must be done in the presence of the user.
These instructions for use provide the information necessary for adjusting the settings. Adjustments should be
made in close cooperation with the user or attendant.
Please note the following:
• The Instructions for Use (Qualified Personnel) are intended only for qualified personnel and remain with them.
• The operation of the product is described in the Instructions for Use (User). These instructions must be given
to the user or attendant.
• We recommend checking the product settings regularly in order to assure optimal fit over the long term. A fit
ting is required every six months for children and youth in particular.
• The installation of all optional components is generally described in the service manual.
• The manufacturer assumes no liability for combinations with seating systems that have not been approved by
the manufacturer (see Page28).
2 Application
2.1 Intended Use
The rehab buggy is intended solely for transporting children with walking disabilities or who are unable to walk.
The rehab buggy has been approved for transporting only one child aged 1 to 10 years (depending on the size and
weight of the child). It is operated by an attendant (conveyance by another person).
The rehab buggy can be used indoors and outdoors. It is fully adjustable to provide an optimised, individual fitting.
The product may be used only with the options listed on the product order form.
The Otto Bock warranty applies only when the product is used according to the specified conditions and for the
intended purposes.
2.2 Indications
The broad range of settings allow it to be used for a disability or walking impairment, for example due to:
• Paralysis (paraplegia/tetraplegia)
• Loss of limbs (leg amputation)
• Limb defect/deformity
• Joint contractures/defects
• Neurological and muscular diseases
2.3 Contraindications
None
2.4 Necessary qualifications
The installation and adjustments described below may only be carried out by qualified personnel.
2.5 Service life
Based on market observations and the current state of technology, the manufacturer has calculated that the
product can be used for a period of 4 years, provided that it is used properly and that the service and maintenance
instructions are observed. Storage times at the dealer or with paying parties are not included in this period.
However, we would like to emphasise that the product is reliable far beyond this defined period of time, provided
that it is cared for and maintained properly.
Ottobock | 5Kimba neo
Foreword

If the service life is reached, the user or a responsible attendant should contact the qualified personnel who fitted
the product or the manufacturer's service (see inside or outside of rear cover for address).
3 Safety
3.1 Explanation of Warning Symbols
WARNING Warnings regarding possible risks of severe accident or injury.
CAUTION Warnings regarding possible risks of accident or injury.
NOTICE Warnings regarding possible technical damage.
3.2 General safety instructions
WARNING
Lack of instruction
Risk of falling, tipping over
►Instruct the user in the proper use of the product when handing it over.
►We recommend the preparation of an acceptance protocol.
CAUTION
Use of unsuitable tools
Pinching, crushing or damaging the product
►When working, use only tools that are suitable for the conditions at the workplace and whose proper use
ensures safety and health protection.
NOTICE
Tipping or falling of the product
Damage to the product
►When you work on the product, secure it so that it cannot tip over or fall over.
►Use a clamping device to secure the product for all work at a workbench.
NOTICE
Use of unsuitable packaging
Damage caused by transport in the wrong packaging
►Use only the original packaging for delivery of the product.
3.3 Safety instructions for assembly
CAUTION
Unsecured screw connections
Risk of pinching, crushing, tipping over, falling of user
►After all adjusting/readjusting work, retighten the mounting screws/nuts firmly. Observe any torque settings
which may be specified.
►Any time you loosen a screw connection with thread lock, replace it with a new screw connection or secure
the old screw connection with medium strength thread locker (e.g. Loctite 241®).
CAUTION
Improper use of self-locking nuts
Risk of the user falling or tipping over
►Always replace self-locking nuts with new self-locking nuts after disassembly.
6 | Ottobock
Safety
Kimba neo

3.4 Rating plate and warning labels
3.4.1 Rating plate
Label Meaning
AType designation
BManufacturer article number
CMaximum load capacity (see the chapter "Technical Data")
DManufacturer information/address/country of origin
ESerial number
FEuropean Article Number/Global Trade Item Number
GRead the instructions for use before using the product.
The type label "Outdoor mobility base" is
located on the back connecting tube of the
base frame.
The type label "Seating unit" is located on
the bottom back plate.
HCE marking – product safety according to EU guidelines
3.4.2 Warning Labels
Label Meaning
Attention: Please observe the maximum load capacity of the
mobility base!
(See the section "Technical Data")
Fixation point for fastening the product in wheelchair access
ible vehicles
WARNUNG/WARNING
ACHTUNG! Lassen Sie Ihr Kind nicht unbeaufsichtigt!
ATTENTION! Never leave your child unattended!
ACHTUNG! Dieser Sitz ist für Kinder unter 6 Monaten nicht
geeignet!
ATTENTION! This seating unit is unsuitable for children aged
below 6 months!
Ottobock | 7Kimba neo
Safety

4 Delivery
4.1 Scope of Delivery
The product is delivered pre-assembled, with the rear wheels and seating unit removed, and packed in a crate.
The scope of delivery includes:
• Outdoor mobility base, folded
• Multifunctional seating unit with padding (standard option) or an alternative seating system
• Further options, depending on the order
• Tools required
• Instructions for Use (Qualified Personnel), Instructions for Use (User)
INFORMATION
Only provide the Instructions for Use (User) to the user.
4.2 Options
The functionality and operation of the options are described in more detail in the instructions for use (user).
All of the available options/accessories are listed on the order form.
4.3 Storage
The product must be stored in a dry place.
For transportation and storage, an ambient temperature between 10 °C and +40 °C must be maintained.
Note regarding the tyres
• Tires contain chemical substances that can react with other chemical substances (such as cleaning agents,
acids, etc.).
• Direct exposure to sunlight or UV radiation causes the tyres to age more quickly. As a result, the tread surface
hardens and corner pieces break out of the tread.
• Avoid unnecessary parking outdoors. The tyres should be replaced every 2 years regardless of wear and tear.
5 Preparation for Use
5.1 Assembly
CAUTION
Exposed pinch points
Risk of crushing or pinching the fingers
►Do not reach into the folding mechanism when folding/unfolding.
CAUTION
Improper assembly
Risk of the user falling or tipping over
►After each assembly, verify the proper fit of the removable wheels. The quick-release axles must be firmly
locked in the wheel attachment.
►Before using the product, the folding mechanism must be firmly locked in place.
►When attaching the seating unit, make sure it clicks audibly onto the mobility base.
►Secure the seating unit using the seat lock.
The following steps are needed to make the rehab buggy ready for use:
Attaching the wheels (if wheels are detached)
1) Press the lock on the rear wheels.
2) Push the rear wheels onto the axle until lock clicks into place audibly.
Unfolding the rehab buggy (when the seating unit is detached)
1) Unfold the pushbar (see Fig.1, Pos.1).
2) Unfold the rehab buggy by pulling the pushbar (see Fig.1, Pos.2).
→The release handles of the folding mechanism click into place automatically after unfolding (see Fig.1, Pos.3).
8 | Ottobock
Delivery
Kimba neo

Attaching the seat (multifunctional seating unit)
INFORMATION
The product can also be equipped with alternative seating systems. In this case, please observe the information in
the separate instructions for use for the seating system.
1) Set the seat onto the rear tube of the seat adapter at an angle of approximately 45°.
2) Press the front edge of the seat onto the mobility base until the clutch audibly snaps into the front tube of the
seat adapter.
3) Slide the seat lock to the left to close it (see Fig.2).
1 2
Attaching the padding (multifunctional seating unit)
INFORMATION
►Mount the pads before installing the standard padding.
►Prior to the assembly of the padding, adjust the seating unit (see chapter "Adjustments").
1) Open the zipper on the backrest padding.
2) Pull the back padding with its cap over the back insert and close the zipper (see Fig.3).
3) Pull the excess back padding down between the lower edge of the back and the seat and attach it to the twist
locks on the outside of the back.
4) Place the seat cushion on the seat in such a way that the corresponding velcro/fleece surfaces can be connec
ted (see Fig.4).
3 4
5.2 Installing options/accessories
5.2.1 Headrest supports (multifunctional seating unit)
5.2.1.1 Headrest supports
1) Pull the proper sides of the headrest supports through the padding (see Fig.5).
2) Open the zipper of the padding cap (see Fig.3) and push the padding behind the seat to the side.
Ottobock | 9Kimba neo
Preparation for Use

3) Put the mounting screws through the slotted hole in the headrest support and through the hole in the back
plate (see Fig.6).
INFORMATION: If the headrest supports are to be mounted to the top holes (= mounting points of the
back plate), the longer mounting screws, which come with the device, will have to be used instead of
the regular mounting screws.
4) Fasten the headrest supports on the back of the back plate using the knurled nuts.
5) If necessary, adjust the width. Hand-tighten the knurled nuts.
6) Close the padding again.
5 6
5.2.1.2 Integrated headrests
Assembly is done at the factory following receipt of an order.
To change the distance of the headrests:see Page24.
5.2.2 Safety belts
5.2.2.1 Strap guide
For improved belt guidance in the pelvic area, strap guides must be installed in the following cases:
• Lap belt; lap-belt part of the four/five-point belt: installation position see Fig.7, Pos. 1
• Bottom mounting strap of the chest and shoulder support: installation position see Fig.7, Pos. 2
1) Put on the strap guide from the inside, connecting the flat side to the fastening point of the seating unit (see
Fig.8, Pos. 1).
2) Put the mounting screw through the fastening point from the outside (see Fig.8, Pos. 2) and screw it into the
strap guide.
3) Pre-mount the strap guide with the washer/cap nut.
4) Twist the strap guide in the direction of use and finish assembly (see Fig.7).
7 8
10 | Ottobock
Preparation for Use
Kimba neo

5.2.2.2 Lap belt
9
1 Strap guide 4 Adjustment buckle
2 Attachment fitting 5 Belt pads
3 Belt restraint 6 Release button/belt buckle
Mounting the lap belt
1) Mount the strap guide according to the chapter "Strap guide" (see Page10).
2) Pull the belt out of the belt restraint (3) (see Fig.10, Pos. 1).
3) Press the adjustment buckle (4) together and pull out the belt (see Fig.10, Pos. 2).
INFORMATION: Make sure not to push the plastic part beyond the guidance in the metal part.
4) Pull out a belt pad (5).
5) Push the belt between the seat and the backrest through the half-moon-shaped connecting piece to the back
and through the first strap guide (see Fig.12, Pos. 1).
6) Put the belt behind the backrest and through the second strap guide (see Fig.13, Pos. 1).
INFORMATION: If necessary, you can run the belt inside the seat cushion (no illustration).
7) Run the belt between the backrest and seat to the front (see Fig.13, Pos. 2).
8) String up the belt pad (5).
9) Run the end of the belt through the adjustment buckle (4) and, to complete, through the belt restraint (3) (see
Fig.10, Pos. 1/2).
→If the belt buckle (6) can be closed while being in the centre of the seat, the lap belt has been installed prop
erly.
Ottobock | 11Kimba neo
Preparation for Use

10 11
12 13
12 | Ottobock
Preparation for Use
Kimba neo

5.2.2.3 Four-point belt
14
1 Clip with rivet 5 Lap-belt part
2 Shoulder belt, left/right 6 Belt restraint
3 Belt pads 7 Adjustment buckle
4 Strap guide with attachment fitting 8 Belt buckle with release button
Installing the four-point belt
1) Mount the strap guide (4) according to the chapter "Strap guide" (see Page10, see Fig.15, Pos. 1).
2) Rivet 2 clips (1) to the holes of the bottom back plate (see Fig.15, Pos. 2).
3) Run the shoulder belts (2) through the padding/back plate (see Fig.16) and secure them in the clips (see
Fig.15, Pos. 3).
4) If necessary, cut off protruding belt ends of the shoulder belts and melt the free ends by applying heat (such as
from a lighter).
5) Mount the lap-belt part (5) according to the chapter "Lap belt" (see Page11).
→The four-point belt is installed properly if the latches can be clipped into the buckle (8).
Ottobock | 13Kimba neo
Preparation for Use

15 16
5.2.2.4 Five-point belt
17
1 Clip with rivet 6 Strap guide, fixed
2 Shoulder belt, left/right 7 Belt restraint
3 Belt pads 8 Adjustment buckle
4 Strap guide with attachment fitting 9 Crotch belt with buckle and adjustment buckle
5 Lap-belt part, left/right 10 Stop plate
Installation start
1) Mount the loose strap guide on the right (4) according to the chapter "Strap guide" (see Page10).
2) Rivet 2 clips (1) to the holes of the bottom back plate (see Fig.15, Pos. 2).
3) Run the shoulder belts (2) through the padding/back plate (see Fig.16) and secure them in the clips (see
Fig.15, Pos. 3).
14 | Ottobock
Preparation for Use
Kimba neo

Mounting the lap-belt part (5)
1) Run the lap belt on the right (5) between the seat and the backrest through the half-moon-shaped connecting
piece to the back, through the strap guide and let it hang (see Fig.18).
2) Mount the fixed strap guide (6) according to the chapter "Strap guide" (see Page10).
3) Run the lap belt on the left (5) between the seat and the backrest through the half-moon-shaped connecting
piece to the back (see Fig.12).
4) String up the belt restraint (7).
5) Run the lap belt on the right (5) behind the seat through the adjustment buckle (8) and, to complete, through
the belt restraint (7) (see Fig.19 - see Fig.21).
For pressing together/threading through the adjustment buckle: see Page11.
18 19
20 21
Mounting the crotch belt (9)
1) Thread the crotch belt, with the proper side, through the front slot of the seat plate (see Fig.22, Pos. 1).
2) Thread the crotch belt twice through the stop plate (10) and back up through the seat plate (see Fig.22, Pos.
2).
3) Thread the crotch belt a second time below the crossbar of the adjustment buckle (see Fig.23, Pos. 1).
22 23
Ottobock | 15Kimba neo
Preparation for Use

Completing the installation
►If necessary, cut off protruding belt ends of the shoulder belts and melt the free ends by applying heat (such as
from a lighter).
→The five-point belt is installed properly if the latches can be clipped into the buckle (9).
5.2.3 Positioning aids
5.2.3.1 Thoracic supports
1) Run the proper sides of the thoracic supports through the padding.
2) Put the mounting screws through the slotted hole in the thoracic support and the back insert (see Fig.24, Pos.
1).
3) Fasten the thoracic supports on the back of the back insert using knurled nuts.
4) If necessary, adjust the width/height. Hand-tighten the knurled nuts.
24
5.2.3.2 Abductor
1) Place the abductor in the desired position on the seat plate (see Fig.25, Pos. 1) and fasten it with screws from
below loosely (see Fig.26, Pos. 1).
INFORMATION: When using a slip sack, make a cut in it in the specified spot, insert the slip sack and
fasten the abductor with screws loosely.
2) Adjust the depth of the abductor in the slotted hole if necessary.
3) Now fasten the abductor with screws tightly.
25 26
16 | Ottobock
Preparation for Use
Kimba neo

5.2.3.3 Chest and shoulder support
27
1 Pair of clips with attachment fitting 4 Belt end of bottom attachment strap
2 Shoulder belt 5 Sewn-on clip
3 Bottom attachment strap 6 Pad
Mounting the chest and shoulder support
1) Mount the strap guide according to the chapter "Strap guide" (see Page10).
2) Mount the pairs of clips (1) using mounting screws/knurled nuts in the slotted holes of the bottom back plate
(see Fig.28, Pos. 1/see Fig.29, Pos. 1).
3) Place the chest and shoulder support on the seat bottom – the sewn-on clips (5) must point towards the seat
bottom.
4) Run the shoulder belt (2) through the padding/back plate (see Fig.16) and secure them in the top clips (see
Fig.29, Pos. 2).
5) Run the bottom attachment straps (4) between the seat bottom and backrest to the back through the strap
guide and secure them in the bottom clips (see Fig.29, Pos. 3).
INFORMATION: The bottom padded ends of the chest and shoulder support are to rest subsequently
on the user's spinae.
6) If necessary, cut off protruding belt ends of the attachment straps and melt the free ends by applying heat
(such as from a lighter).
Ottobock | 17Kimba neo
Preparation for Use

28 29
5.2.3.4 Fixation vest
30
1 Clip with rivet 4 Bottom attachment strap
2 Shoulder belt 5 Buckle
3 Middle attachment strap 6 Pad
Mounting the fixation vest
1) Rivet 6 clips (1) to the holes of the bottom back plate (see Fig.31, Pos. 1/see Fig.32, Pos. 1).
2) Place the fixation vest on the seat bottom - the buckles (5) must point towards the seat bottom.
3) Run the shoulder belts (2) through the padding/back plate (see Fig.16) and secure them in the clips (see
Fig.32, Pos. 2).
4) Run the middle/bottom attachment straps (3/4) around the backrest tubes to the back and secure them in the
clips (1) (see Fig.32, Pos. 3).
INFORMATION: For improved guidance of the middle/bottom attachment straps (3/4), you can addi
tionally install strap guides.
5) If necessary, cut off protruding belt ends of the attachment straps and melt the free ends by applying heat
(such as from a lighter).
18 | Ottobock
Preparation for Use
Kimba neo

31 32
5.2.3.5 Groin strap
33
1 Underside groin strap 4 Long attachment strap
2 Attachment strap with loop 5 Strap adjustment/plug connection
3 Free belt end for length adjustment 6 Leg strap
Mounting the groin strap
1) Place the groin strap, underside (1) down, on the seat cushion; the attachment strap with the loop (2) must
face backwards.
2) Run the attachment strap with the loop (2) between the back support and seat bottom and secure it under the
seat bottom (see Fig.35). Use the screws/knurled nuts to adjust the depth/width of the seat (see Fig.35, Pos.
1).
3) Rivet the clips to the holes of the bottom back plate (see Fig.34, Pos. 1; see Fig.35, Pos. 2).
4) Run the belt ends of the long attachment strap (4) around the back support and secure them in the clips (see
Fig.35, Pos. 3).
5) If necessary, cut off protruding belt ends of the long attachment strap (4) and melt the free ends by applying
heat (such as from a lighter).
Ottobock | 19Kimba neo
Preparation for Use

34 35
5.2.3.6 Pelvic band
For installation information, consult the instructions that come with the product.
5.2.3.7 Hook & loop foot straps
Attach the hook-and-loop foot straps to the heel part of the footplate with two rivets or screws positioned beside
one another. The holes must be inserted in the footplate accordingly.
In addition, hook-and-loop foot straps can also be used for the forefoot area.
36
5.2.4 Armrests
For mounting information, see the Instructions for Use (User) - reference number 647G770.
5.2.5 Tray
For mounting information, see the Instructions for Use (User) - reference number 647G770.
5.2.6 Canopy adapter
INFORMATION
The canopy adapter is used for the subsequent installation of the canopy to a multifunctional seating unit. For
information on this, see the Instructions for Use (User) - reference number 647G770.
1) Loosen the set screws at the back tube (see Fig.37, Pos. 1) and pull the back insert up.
2) Slide the canopy adapter with the proper side onto the backrest bar (see Fig.38).
3) Pre-position the canopy adapter in a level manner (see Fig.38).
4) Tighten the set screws of the canopy adapter again.
5) Put on the back insert and tighten again the set screws at the back tube.
20 | Ottobock
Preparation for Use
Kimba neo
Other manuals for Kimba neo
8
This manual suits for next models
1
Table of contents
Other Otto Bock Stroller manuals

Otto Bock
Otto Bock Kimba neo User manual

Otto Bock
Otto Bock ECO BUGGY User manual

Otto Bock
Otto Bock ECO BUGGY User manual

Otto Bock
Otto Bock Kimba neo User manual

Otto Bock
Otto Bock ECO BUGGY User manual

Otto Bock
Otto Bock Kimba Operating instructions

Otto Bock
Otto Bock ECO BUGGY User manual

Otto Bock
Otto Bock Lisa User manual

Otto Bock
Otto Bock Kimba Spring User manual

Otto Bock
Otto Bock Kimba Spring User manual