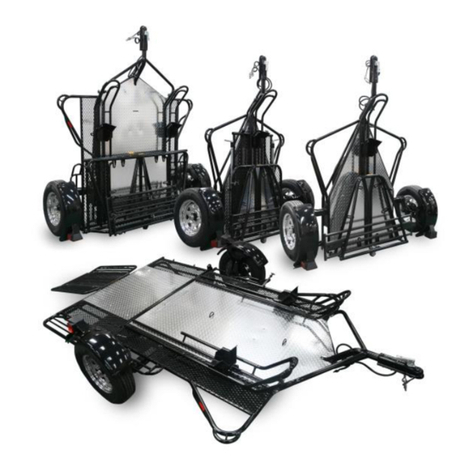
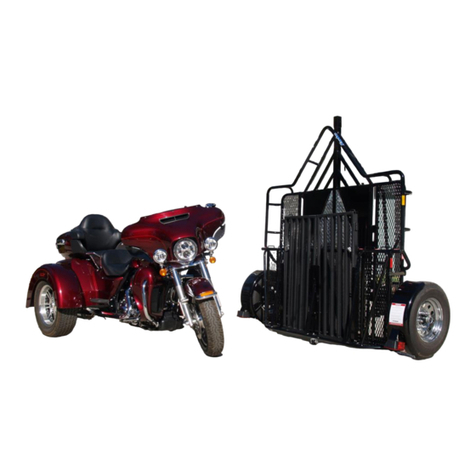
Kendon Stand-Up SINGLE RIDE-UP Go Series User manual

GO! SERIES™
SINGLE RIDE-UP STAND-UP™
TRAILER INSTRUCTIONS
KENDON INDUSTRIES, LLC
2990 E. Miraloma Ave.
Anaheim, CA 92806 USA
Tel 714-630-7144 • Fax 714-630-7132
www.KendonUSA.com
Rev. 112619


714-630-7144
www.KendonUSA.com
- 1 -
WARNING: Serious injury, death and/or property damage could result
through improper use of this product, including crushing
or severing type injuries.
WARNING: Thoroughly read and understand all instructions and
owner’s manual(s) before using the trailer.
WARNING: For Adult Use Only. Keep children away from trailer at
all times.
WARNING: You must check to ensure that the front wheel chock on
the trailer will not contact the bottom rear of your front
fender, fairing or other parts of your motorcycle BEFORE
loading.
WARNING: Trailer should only be loaded and unloaded on a stable
flat surface with the trailer properly connected to the tow
vehicle.
WARNING: Properly attach the loading ramps as per this
manual’s instructions.
WARNING: The motorcycle must be loaded on the center loading
ramp.
WARNING: Obey trailer cargo capacity limits.
WARNING: There is an inherent risk in the loading and unloading
process. Failure to load your vehicle properly could result

714-630-7144
www.KendonUSA.com
- 2 -
in serious injury and or property damage. Load and unload
at your own risk.
WARNING: Ramps cannot be interchanged. Ramps are clearly marked.
Right and Left ramps are not constructed to hold the weight
of a vehicle and should never be used as a loading ramp for
any vehicle. Right and Left ramps are for rider footing
during the loading and unloading process.
WARNING: Never use ramps without both ramp pins fully engaged
as instructed as this will cause the ramp platform to
become unstable.
WARNING: Ramps must be properly secured to trailer prior to towing.
Trailer owner is responsible for complying with all the recommended
procedures in this instruction manual. Use at your own risk. Kendon
is not responsible for injury, liability, property damage and/or any
consequential damage(s) caused by the misuse of this product.

714-630-7144
www.KendonUSA.com
- 3 -
LOADING
Properly attach the loading ramps as per this manual’s instructions.
The motorcycle must be loaded only on the center loading ramp.
Ensure the wheel chock on the rail is in the open position (pg. 10).
LOADING RAMPS
How to use the ramps on your Kendon Go! Series Ride-Up Single Trailer:
Insert the ramp hook as shown below between the tubular rails on the
rear folding section of the trailer.
This example might make it easier to understand: if the ramp hook was a
spoon, it should be positioned as if you were using it to eat soup, rather than
to pour soup out.
Please contact us directly at 714-630-7144 or info@KendonUSA.com if you
have any questions about ramp use or attachment.

714-630-7144
www.KendonUSA.com
- 4 -
Kendon Go! Series Single Ride-Up Trailer Instructions
Congratulations on your purchase of a Kendon Go! Series™ Stand-Up™ Single
Rail Ride-Up Motorcycle Trailer. Safety is our number one concern. Before
using this product, please take the time to completely read these specific Go!
Single Ride-Up trailer instructions and familiarize yourself thoroughly with the
parts on your new Kendon Go! Single Ride-Up Trailer. In addition to these
instructions, be sure to read and follow the Go! Series™ Trailer Owner’s
Manual for all Kendon Go! Series Stand-Up™ Trailers.
Read and understand all warnings and warning labels on the trailer before use.
Do not remove any warning labels or warning tags except for the warning label
on the coupler that must be removed before use.
Towing any trailer, proper loading, unloading and securing of the load is
serious business with inherent risks. Serious Injury, Death and/or
property damage can result to operator and/or others through improper
use of this product.
If you have any questions or need additional help or instructions, please contact
us directly at 714-630-7144 or info@KendonUSA.com.
If you lost or need additional copies of any of the instructions manuals
referenced here, please visit our web site at www.KendonUSA.com or contact
us at 714-630-7144 or info@KendonUSA.com.
Visit us at www.KendonUSA.com for product updates, new products, and
support.
Risk of injury and/or property damage: There is an inherent risk in the loading
and unloading process. Failure to load your vehicle properly could result in
serious injury and/or property damage.

714-630-7144
www.KendonUSA.com
- 5 -
Most Common
Hazards
•
Failure to read instructions.
•
Loss of balance while loading.
•
Slippery surfaces (wet, snow and/or icy surfaces are dangerous to
load and unload on).
•
Trailer not properly connected to tow vehicle. This is a common
and expensive error causing the trailer to tip up and run into the
back of your tow vehicle and also causing a possible fall in the
loading process. This can also cause expensive damage to tow
vehicle.
•
Loading a vehicle when under the influence; load and unload with
the same mental capacity needed for riding or driving.
•
Rider Error.
This is not a complete list of all risks. Physical strength, weight of vehicle and
riding skills all vary widely. Only you can determine your comfort level
through safe practice. Kendon wants you safe!
Loading and Unloading
Process
Loading and unloading a motorcycle onto any vehicle, either a trailer or a pick-
up truck requires certain skills and techniques. Kendon recommends using two
spotters while practicing the loading and unloading technique with your bike
with your abilities. Most incidents occur from first time users with no experience
in loading and unloading a motorcycle. Practicing the process with two spotters
is highly recommended. For your added protection, Kendon recommends
wearing your safety riding gear during the loading/unloading process.
LOAD, UNLOAD AND TOW AT YOUR OWN RISK. KENDON INDUSTRIES,
LLC IS NOT RESPONSIBLE FOR ANY INJURY, LIABILITY, PROPERTY
DAMAGE AND/OR CONSEQUENTIAL DAMAGE(S) CAUSED BY LOADING
AND UNLOADING A VEHICLE.
If you have any questions or need additional help or instructions, please contact
us directly at 714-630-7144 or info@KendonUSA.com.

714-630-7144
www.KendonUSA.com
- 6 -
Usage Instructions for Kendon Go! Series Ride-Up Single
Trailer
Thoroughly read and understand these instructions and the separate attached
Owner’s Manual for Kendon Go! Series™ Stand-Up™ Trailers.
Attach the Trailer to Tow Vehicle making sure the coupler completely engages
the ball and that the coupler latch is locked down. Refer to the diagram below
for an illustration of the coupler latch in the closed position.
Coupler Latch in Properly Closed Position
Proper Ramp Attachment for Loading & Unloading
Remove the three (3) ramps from the trailer (be careful to not lose the mounting
hardware). The Two (2) outer ramps are stored on top of the bed of the trailer
and the one (1) center loading ramp is stored underneath the rear folding
section of the trailer.
There are three (3) different ramp sections; Left Side Ramp, Center Loading
Ramp and Right Side Ramp. Please refer to the following diagram for an
illustration of the ramps.
Ramps are clearly marked, Right, Center and Left. They cannot be
interchanged. The following illustration shows the correct ramp configuration.
Right and Left Ramps are not constructed to hold the weight of the
motorcycle and should never be used as a loading ramp for any vehicle.
Right and Left ramps are for the riders footing during the loading and
unloading process.

714-630-7144
www.KendonUSA.com
- 7 -
Left (Driver’s Side), Center and Right (Passenger’s Side) Ramp Configuration
Diagram

714-630-7144
www.KendonUSA.com
- 8 -
There are two (2) Ramp Pins and they are both the same. One (1) ramp pin
unites the ramps at the top and one (1) unites the ramps at the bottom
creating one connected loading platform.
Hook each ramp to the rear folding section of the trailer going in the
following order: Left, Center and Right ramp.
Each Ramp Hook needs to face up like a spoon and the expanded metal
deck needs to be on the top of the ramp (pointing up towards the sky).
Once the ramps are attached, slide a ramp pin through each of the three (3)
ramps making sure the pin goes all of the way through so that the lock button
is popped out on the opposite end of insertion point. Note: The Ramp Pins
can be installed from either side. Align ramps with pins by hand as you thread
the pins through all three (3) ramp sections.

714-630-7144
www.KendonUSA.com
- 9 -
Properly Installed Top Ramp Pin
Slide the second ramp pin through the ramps following the same process.
Properly Installed Bottom Ramp Pin
NEVER USE RAMPS WITHOUT BOTH RAMP PINS FULLY ENGAGED AS
INSTRUCTED AS THIS WILL CAUSE THE RAMP PLATFORM TO BE
UNSTABLE.
The center ramp will support the weight of a heavy weight motorcycle with an
average weight adult rider if you choose to ride the bike up or down.

714-630-7144
www.KendonUSA.com
- 10 -
Proper Loading & Securing of Vehicle
Front Wheel Chock Position must be flipped into the “open” or “load” position
with the rear section of the wheel chock flat on the trailer rail. Failure to have
the front wheel chock in the correct position will cause the front wheel to hit
an obstacle during the loading process resulting in a possible loss of balance
and or fall.
Ensure the wheel chock is in the open position before the motorcycle is
loaded up on the trailer platform. The wheel chock is in the open position
when the wheel chock is rotated towards the rear of the trailer and the rear
section of the wheel chock channel lays flat on the trailer rail. Please refer to
the following illustration for proper wheel chock positions.
Load your motorcycle by either riding or walking it up onto the trailer. Once
loaded, make sure to tie down the motorcycle in four (4) places as outlined
in the Go! Series Trailer Owner’s Manual.
KENDON USES A FOUR (4) POINT TIE DOWN SYSTEM. IT IS NOT
SAFE TO TOW YOUR MOTORCYCLE WITHOUT TYING IT DOWN OR BY
ONLY USING THE FRONT OR REAR TIE DOWNS.
The following illustration shows four (4) most common points for tying down
a motorcycle.

714-630-7144
www.KendonUSA.com
- 11 -
Proper Ramp
Storage
Before the ramp pins can be slid out, you will need to depress the lock button
at one end of each pin. Once the lock button is pressed, you can slide the
ramp pins out. Repeat this procedure for both top and bottom ramp pins.
Detach the ramps from the rear section of the trailer. Attach ramps back on the
trailer in their original positions being careful that side ramps do not overlap the
rear folding section of the trailer. Ramps must be forward of the rear hinge
section to be able to fold up and stand up the trailer.

714-630-7144
www.KendonUSA.com
- 12 -
One (1) ramp pin can be stored on the side of either one of the side ramps.
Make sure to slide the ramp pins all the way through so that the lock button
is popped out on the opposite end of insertion point.
Position the open diamond shape of the expanded metal on the ramp with the
attachment points on the trailer. Attach T-Bolts through the ramp and tighten.
Ramps must be properly mounted on the trailer with supplied mounting
hardware firmly tightened down. Loose mounting hardware can cause a ramp
to come off of the trailer causing serious damage or injury to following traffic.
Owner assumes responsibility for properly securing ramps.

714-630-7144
www.KendonUSA.com
- 13 -
Unloading
Attach ramps as instructed on pg. 6.
Remove all four (4) tie-downs from vehicle.
The motorcycle will not easily roll back to unload due to the design
and function of the front wheel chock.
Tips and Technique
When the trailer is loaded, the front wheel chock captures the front wheel of
the motorcycle. To unload, you have to get the wheel chock over its center
point and then it will release.
With the motorcycle Off and in Neutral, straddle the bike with both feet firmly
on the trailer. Aggressively pull up and back while keeping your hand on the
front brake lever (brake not applied), your motorcycle will ride up the wheel
chock. At the peak grab your front brake so the bike does not roll back forward
into the locked position. Now take one more pull rearwards while releasing the
front brake and your front wheel will easily roll out of the wheel chock. Don’t
worry if you don’t accomplish this on the first try. The bike will simply come
back to rest in the wheel chock. It may take a few attempts until you learn this
technique. It is also perfectly acceptable to get help and have someone help
push the bike backwards to get out of the front wheel chock.
Once out of the front wheel chock, continue to use the front brake to carefully
and slowly back your motorcycle down off of your trailer. Use at least one
spotter to avoid the risk of losing your balance and dropping your bike.

714-630-7144
www.KendonUSA.com
- 14 -
Care and Maintenance of Ride-Up Single SRL Trailer
Keep ramp pins and ramp pin locating tubes clean. A light lubricant (silicone
spray, WD 40 or equivalent) on the ramp pins will keep them working smoothly.
Ramp Pins are plated to prevent oxidation but an extra step of care will prevent
pins from becoming hard to insert or remove due to any dirt and/or oxidation.
Please refer to the Kendon Go! Series Trailer Owner’s Manual for additional
care and maintenance instructions for your Stand-Up™ Trailer.
Thank you again for purchasing our Kendon Product. If you have any questions
on the proper use of this trailer please contact Kendon directly at 714-630-7144
or info@KendonUSA.com.
Ride safe
Trailer safe
Kendon Industries, LLC
2990 E Miraloma Ave.
Anaheim, CA 92806
714-630-7144 Telephone
714-630-7132 Facsimile
info@KendonUSA.com
www.KendonUSA.com
facebook.com/kendonusa

714-630-7144
www.KendonUSA.com
- 15 -
NOTES

714-630-7144
www.KendonUSA.com
- 16 -
WARNING: Serious injury, death and/or property damage could result
through improper use of this product, including crushing
or severing type injuries.
WARNING: Thoroughly read and understand all instructions and
owner’s manual(s) before using the trailer.
WARNING: For Adult Use Only. Keep children away from trailer at
all times.
WARNING: You must check to ensure that the front wheel chock on
the trailer will not contact the bottom rear of your front
fender, fairing or other parts of your motorcycle BEFORE
loading.
WARNING: Trailer should only be loaded and unloaded on a stable
flat surface with the trailer properly connected to the tow
vehicle.
WARNING: Properly attach the loading ramps as per this
manual’s instructions.
WARNING: The motorcycle must be loaded on the center loading
ramp.
WARNING: Obey trailer cargo capacity limits.
WARNING: There is an inherent risk in the loading and unloading
process. Failure to load your vehicle properly could result

714-630-7144
www.KendonUSA.com
- 17 -
in serious injury and or property damage. Load and unload
at your own risk.
WARNING: Ramps cannot be interchanged. Ramps are clearly marked.
Right and Left ramps are not constructed to hold the weight
of a vehicle and should never be used as a loading ramp for
any vehicle. Right and Left ramps are for rider footing
during the loading and unloading process.
WARNING: Never use ramps without both ramp pins fully engaged
as instructed as this will cause the ramp platform to
become unstable.
WARNING: Ramps must be properly secured to trailer prior to towing.
Trailer owner is responsible for complying with all the recommended
procedures in this instruction manual. Use at your own risk. Kendon
is not responsible for injury, liability, property damage and/or any
consequential damage(s) caused by the misuse of this product.

714-630-7144
www.KendonUSA.com
- 18 -
Stand-Up™ Trailer Parts & Accessories
Dowco Trailer Cover
DOWCO107
LED Tail Light Kit
LEDTLK
Crank Down Swivel Jack
Stand
TSJS
Aluminum Wheel and
Radial Tire Kits
HPRTWK13
13” Spare Tire
BB206NR
Accessory Tie-Downs
TDK107
Low Profile Rail and
Wheel Chock Kits
Swing Out License Plate
Holder
SOLPH
Full Range of
Replacement Parts
Visit us at www.KendonUSA.com for product updates, new products, and
support.
NO PART OF THESE INSTRUCTIONS MAY BE COPIED AND/OR REPRODUCED WITHOUT
THE WRITTEN PERMISSION OF KENDON INDUSTRIES, LLC ALL PART NUMBERS,
DIMENSIONS AND SPECIFICATIONS IN THESE INSTRUCTIONS ARE SUBJECT TO CHANGE
WITHOUT PRIOR NOTICE.
COPYRIGHT © KENDON INDUSTRIES, LLC ALL RIGHTS RESERVED.
This manual suits for next models
1
Table of contents
Other Kendon Utility Vehicle manuals
Popular Utility Vehicle manuals by other brands

PLAYTIVE JUNIOR
PLAYTIVE JUNIOR MERO Instructions for use

Ditch Witch
Ditch Witch JT2720 Mach 1 manual

Tuff stuff
Tuff stuff EXPEDITION owner's manual

Avantco
Avantco A2949 Operator's manual for Attachment

woodmizer
woodmizer LT15 AL-KO Safety, Operation, Maintenance & Parts Manual

Ezgo
Ezgo EXPRESS L6 2012 Technician's repair and service manual