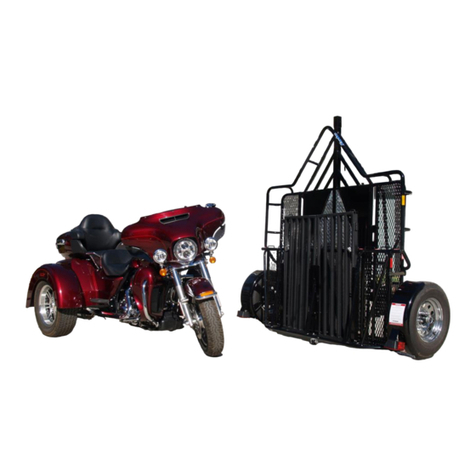
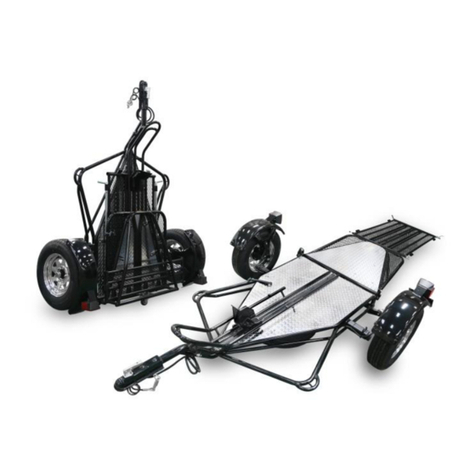
Kendon Stand-Up GO! Series User manual

KENDON GO! SERIES™STAND-UP™
TRAILER OWNER’S MANUAL
KENDON INDUSTRIES, LLC
2990 E. Miraloma Ave.
Anaheim, CA 92806 USA
Tel 714-630-7144 • Fax 714-630-7132
www.KendonUSA.com
Rev. 112619


714-630-7144
www.KendonUSA.com
- 1 -
WARNING: Serious injury, death and/or property damage could result
through improper use of this product, including crushing
or severing type injuries.
WARNING: Thoroughly read and understand all instructions and
owner’s manual(s) before using the trailer.
WARNING: For Adult Use Only. Keep children away from trailer at
all times.
WARNING: You must check to ensure that the front wheel chock on
the trailer will not contact the bottom rear of your front
fender, fairing or other parts of your motorcycle BEFORE
loading.
WARNING: Trailer should only be loaded and unloaded on a stable
flat surface with the trailer properly connected to the tow
vehicle.
WARNING: Properly attach the loading ramps as per this
manual’s instructions.
WARNING: Obey trailer cargo capacity limits.
WARNING: There is an inherent risk in the loading and unloading
process. Failure to load your vehicle properly could result
in serious injury and or property damage. Load and unload
at your own risk.

714-630-7144
www.KendonUSA.com
- 2 -
Trailer owner is responsible for complying with all the recommended
procedures in this instruction manual. Use at your own risk. Kendon
is not responsible for injury, liability, property damage and/or any
consequential damage(s) caused by the misuse of this product.

714-630-7144
www.KendonUSA.com
- 3 -
LOADING
Properly attach the loading ramps as per this manual’s instructions.
Ensure motorcycle clears trailer fender and license plate holder when loading
and unloading.
Ensure the wheel chock on the rail is in the open position (pg. 16).
LOADING RAMPS
How to use the ramps on your Kendon Go! Series Trailer:
Insert the ramp hook as shown below between the tubular rails on the
rear folding section of the trailer.
This example might make it easier to understand: if the ramp hook was a
spoon, it should be positioned as if you were using it to eat soup, rather than
to pour soup out.
Please contact us directly at 714-630-7144 or info@KendonUSA.com if you
have any questions about ramp use or attachment.

714-630-7144
www.KendonUSA.com
- 4 -
Kendon Go! Series Trailer Owner’s Manual
Congratulations on your purchase of a Kendon Go! Series™ Stand-Up™
Motorcycle Trailer. Safety is our number one concern. Before using this
product, please take the time to completely read this Go! Series trailer Owner’s
Manual and familiarize yourself thoroughly with the parts on your new Kendon
Go! Trailer. In addition to this manual, be sure to read and follow the separate
usage instructions for your specific model Go! Series Stand-Up™ Trailer (if
applicable).
Read and understand all warnings and warning labels on the trailer before
use. Do not remove any warning labels or warning tags except for the
warning label on the coupler that must be removed before use.
Towing any trailer, proper loading, unloading and securing of the load
is serious business with inherent risks. Serious injury, death and/or
property damage can result to operator and/or others through improper
use of this product.
If you have any questions or need additional help or instructions, please
contact us directly at 714-630-7144 or info@KendonUSA.com.
Visit us at www.KendonUSA.com for product updates, new products,
and support.
Risk of injury and/or property damage: There is an inherent risk in the loading
and unloading process. Failure to load your vehicle properly could result in
serious injury and/or property damage.

714-630-7144
www.KendonUSA.com
- 5 -
Most Common
Hazards
•
Failure to read instructions.
•
Loss of balance while loading.
•
Slippery surfaces (wet, snow and/or icy surfaces are dangerous to
load and unload on).
•
Trailer not properly connected to tow vehicle. This is a common
and expensive error causing the trailer to tip up and run into the
back of your tow vehicle and also causing a possible fall in the
loading process. This can also cause expensive damage to tow
vehicle.
•
Loading a vehicle when under the influence; load and unload with
the same mental capacity needed for riding or driving.
•
Rider Error.
This is not a complete list of all risks. Physical strength, weight of vehicle and
riding skills all vary widely. Only you can determine your comfort level
through safe practice. Kendon wants you safe!
Loading and Unloading
Process
Loading and unloading a motorcycle onto any vehicle, either a trailer or a pick-
up truck requires certain skills and techniques. Kendon recommends using two
spotters while practicing the loading and unloading technique with your bike
with your abilities. Most incidents occur from first time users with no experience
in loading and unloading a motorcycle. Practicing the process with two spotters
is highly recommended. For your added protection, Kendon recommends
wearing your safety riding gear during the loading/unloading process.
LOAD, UNLOAD AND TOW AT YOUR OWN RISK. KENDON INDUSTRIES,
LLC IS NOT RESPONSIBLE FOR ANY INJURY, LIABILITY, PROPERTY
DAMAGE AND/OR CONSEQUENTIAL DAMAGE(S) CAUSED BY LOADING
AND UNLOADING A VEHICLE.
If you have any questions or need additional help or instructions, please contact
us directly at 714-630-7144 or info@KendonUSA.com.

714-630-7144
www.KendonUSA.com
- 6 -
Usage Instructions for Kendon Go!Series
Trailers
HIGHLIGHTS
1. Your tow vehicle must have an approved ball height to carry the maximum
approved weight for your loaded trailer (Pg. 10).
2. For the single, dual and 3-Rail Combo Stand-Up™ transports, the top of
the ball hitch must be approximately 21 inches above the ground surface
when the vehicle is loaded (Pg. 10). For the ATV-Utility transport, the
correct ball height is approximately 15” from the ground. All Kendon
Stand-Up™ trailers must be LEVEL when being towed.
3. Use a Class 2 or greater trailer hitch (Pg. 10).
4. Repack wheel bearings after the first 500 miles, and every 6 months or
2000 miles thereafter. We recommend removing the hubs to grease the
wheel bearings. Use the easy access dust cap cover on each wheel (Pg.
9).
5. Either one or two Cruiser type motorcycles can be transported on the two-
rail trailers. The independent trailer suspension is designed to tow and
track perfectly with one or two motorcycles on board. A single motorcycle
can be transported on either the left or right side of the trailer (Pg. 9).
6. Tie-Downs: We recommend using only Kendon high quality locking-ratchet
tie down straps for safety (Pg. 14).
7. Front Tie Down procedure: Use two ratchet tie-down straps on the front
fork, compressing suspension to 75% of travel (see Pg. 14 & tie down
diagram). DO NOT OVERTIGHTEN straps. Correct tie tension will allow
room for the motorcycle suspension to function ensuring that the
motorcycle will not bounce as the trailer goes over bumps.
8. Rear Tie-Down Procedure: Use two ratchet tie-down-straps on the rear of
the motorcycle connecting the frame of the motorcycle to the tie-down
points IN-FRONT of the hinge on the trailer axle (Pg. 14).
9. Unless you have a Ride-Up model trailer, NEVER RIDE the motorcycle
onto the trailer! ALWAYS walk the motorcycle onto the trailer when
loading (Pg. 15).
10. Hook up the trailer lights prior to operation (Pg. 8).
11. Always use the safety-cables/harnesses when towing the trailer (Pg. 11).

714-630-7144
www.KendonUSA.com
- 7 -
12. Obey trailer cargo capacity limits. Go! Series Single Rail Transport limit -
1,000 pounds. Go! Series Dual Rail Transport limit - 2,000 pounds. Three
Rail/Dirt Bike Combo Trailer limit - 1,500 pounds. ATV / Utility Trailer limit
–2,000 pounds (Pg. 13).
13. When towing the trailer empty, secure the rear section in folded position
using the rubber latch. Always stow trailer folded and secured when
empty (Pg. 19).
14. Trailer Limited Warranty (Pg. 29). Axle Limited Warranty (Pg. 30).
Thoroughly read and understand these instructions and the Owner’s Manual
for your specific model Go! Series™ Stand-Up™ Trailer, where applicable.
Un-Crating and Assembly Instructions
To ensure your satisfaction with our trailer, the removal of the trailer from the
crate and the installation of wheels and tail lights must be performed according
with the detailed instructions noted below. The assembly and installation
requires the basic knowledge and use of hand tools listed in the
“Recommended Tools” section. If you don’t feel you have the capacity to
perform this type of installation, or if you have any questions, please contact us
via phone at 714-630-7144, 800-847-8618 or via email at
info@kendonusa.com.
Recommended Tools:
1. Pry Bar or Hammer
2. 13/16” or 21 mm Lug Wrench (for ½” Lug Nuts – Wheels & Spare Tire)
3. 7/16” or 11 mm Combination Wrench
4. Torque Wrench with 13/16”or 21 mm Socket
5. Wire Cutters
6. Pliers
7. Box cutter or similar
Removal from Crate:
1. Carefully remove packaging, which may include shrink wrap, cardboard
packaging and bubble wrap, using a box cutter or similar tool. BE
SURE to not cut on edges or near powder coated areas as to not
scratch the trailer framework.
2. Cut the metal retaining straps secured to axle and crate on each side of
the trailer.
3. Remove the tires, any additional boxes, parts and accessories from the
crate.

714-630-7144
www.KendonUSA.com
- 8 -
4. Knock apart the wood sides of the crate to allow for fender and wheel
installation (where applicable. If steel crate skip to next step).
5. Tilt the trailer backwards slightly so that the tires can slip onto the hubs
(If applicable, the left over wooden crate sides can be used to keep the
trailer tilted while wheels are attached).
6. Attach the wheels/tires to the hubs and hand-tighten lug nuts to hold
wheels on the hubs.
7. Tilt the Trailer forward so that Trailer weight is on the wheels.
8. Roll Trailer out of crate and stand up onto the “casters.”
9. Follow the wheel installation instructions to securely tighten the wheels.
Wheel Installation:
1. Remove wheels from hub and place center wheel caps onto hub (if
equipped, otherwise skip to next step).
2. Carefully install wheel onto hub and tighten lug nuts with torque wrench
to 60 foot pounds of torque. Be sure to use the “star” pattern to securely
tighten the wheels.
3. Make certain that both hubs and hubcaps are tight and wheels rotate
freely.
4. RE-TIGHTEN lug nuts after the first 50 miles.
Note: Trailer wheels may have to be balanced before first use. Please
visit your local wheel/tire shop to make sure both wheels and any spare
tires are balanced prior to use.
Tail Light Installation:
Note: If your trailer is equipped with tail lights or LED lights which are pre-
installed you can skip this installation step.
1. Using wire cutters, cut the remaining slack of tail light wiring harness to
length so that the wiring can easily slip through the tail light bracket and
attach to the tail light.
2. Split the three wires into individual wires and strip the ends.
3. Twist end of each wire tightly with pliers (Note: The ground wire will have
a 5/16” Wire Ring Connector already attached).
4. Push the three wires through the middle top hole of the tail light bracket.
5. Gently push wire into the color coded hole that is stamped on housing on
the back of the taillight.
6. Gently pull on each wire to make sure that it is seated properly.
7. Place light onto mounting bracket on each fender.
8. Install taillight housing on brackets using nuts and lock washers
provided. Be sure to attach the ground wire with wire ring connector to

714-630-7144
www.KendonUSA.com
- 9 -
one of the tail light bolts. Note: The white ground wire can be placed on
either post.
Congratulations! The trailer assembly is now complete and ready for towing.
About your Trailer Axle
Kendon Go! Trailers utilize torsion suspension, which is completely self-
contained within the axle tube. It attaches directly to the trailer frame using
brackets, which are an integral part of the axle assembly. Compared to a leaf
spring system, the torsion-style suspension axle provides superior
suspension characteristics through the unique arrangement of a steel bar
surrounded by four natural rubber cords encased in the main structural
member of the axle beam. The wheel hub spindle is attached to a lever,
called the torsion arm, which is fastened to the rubber-encased bar. As a
load is applied, the bar rotates causing a rolling/compressive resistance in the
rubber cords. This action provides the same functions as a conventional leaf
spring axle with several operation advantages including independent
suspension.
Dual Rail Transport - Carrying One or Two Large Motorcycles:
Yes, you can safely and easily haul one or two motorcycles on the Dual Rail
trailer because of the independent suspension offered by the torsion axle.
Even if you are transporting only one motorcycle the independent suspension
guarantees safe comfortable operation. When transporting a single bike on
one of the outer rails, we recommend loading the bike on the side which you
can see the bike best from your rearview mirror. Note: If you do not feel
comfortable transporting one bike on either side of the trailer, we offer an
optional center rail accessory to transport one bike in the middle of the trailer.
Repacking Bearings:
CHECK AND REPACK BEARINGS AFTER FIRST 500 MILES AND EVERY
6 MONTHS OR 2000 MILES THEREAFTER. HIGHER MILEAGE USE MAY
REQUIRE MORE FREQUENT INSPECTIONS.
1. Remove aluminum dust cap cover from hub end. It is recommended to
remove the entire hub to fully repack bearings as described later in
this manual.
2. Remove cotter pin and castle nut from spindle.
3. Remove outer bearing.

714-630-7144
www.KendonUSA.com
- 10 -
4. Pump lube grease into fitting until overflow appears. Do not overfill
excessively, inside bearing seal may push out causing grease to
escape and spill onto inner wheel.
5. Stop pumping and clean off excess.
6. Replace castle nut, cotter pin and aluminum dust cap.
7. For detailed instructions please refer to the “Care and Maintenance”
section.
Hitch Information
Kendon Go! Series trailers are built to receive a 2" ball in the coupler. Some
newer vehicles are sold with 1-¼" receivers. Please ensure that your vehicle
will accommodate a hitch and ball to tow a trailer with a 2" ball in the coupler.
Hitch Height and Attaching Trailer to Vehicle
You must use a Class 2 or greater hitch on your towing vehicle. Please
consult a trailer hitch expert to ensure that you have purchased the correct
class of hitch. Please purchase a hitch for your towing vehicle that makes the
bed of your Kendon trailer level when in tow. Generally, for Go! Series
trailers the distance from the ground to the top of the ball on the hitch will be
approximately 20” to 21". But, this may vary depending upon the load carried
in the towing vehicle and the weight of the motorcycles(s) being towed.
When the trailer is level in tow, the tongue weight will be approximately 10%
to 15% of the total load weight.
Hitching the trailer to your vehicle is usually a one-person job, but it is easier
and safer if someone helps.
1. Back your tow vehicle as close as possible to the trailer. It's easier and
safer to do this than to pull your trailer to your car or truck.
2. Release the coupler-locking device on the trailer.
3. Raise the front end of the trailer coupler directly over the hitch ball, and
then lower it until it is seated on the hitch ball, covering it completely.
Check under the coupler to ensure the ball clamp is BELOW the ball, and
not riding on top.
4. Latch the coupler to the hitch ball. Make sure it is locked in place by
lifting the trailer tongue. If the coupler comes loose from the ball, unlatch
it and repeat from step #2. If secure, we recommend locking the coupler
using Kendon's coupler lock (Part # KL064). Refer to the diagram below
for an illustration of the coupler latch in the closed position.

714-630-7144
www.KendonUSA.com
- 11 -
Coupler Latch in Properly Closed Position
5. Attach both safety cables to an appropriate place on your hitch. If the
coupler were to detach from the ball, proper application of the safety
cables would keep the coupler from hitting the ground. The best method
of attachment would be to cross the two cables underneath the coupler.
Replacement safety cables are available through Kendon.
6. Connect the 4-pin flat trailer wiring harness connector to the lighting
system of your tow vehicle. Check to determine that turn signals, brake
lights and running lamps are operational. Never use the trailer if the
wiring connections for lighting are not properly working. Refer to the
enclosed wiring diagram for additional wiring information. The electrical
connector is a flat four-prong connector.
7. When towing it is important that the trailer bed is perfectly level (parallel
to the road surface) for correct tracking. The ball height is measured
from the ground, on a level surface, to the top of the trailer hitch ball.
Failure to follow the above may result in an accident while towing. The
top of the ball hitch must rise to approximately 20” to 21" above the
ground with the vehicle loaded for the Go! Series Single, Dual and 3-Rail
transports.
8. Inspect tires for excessive wear, tears, or any damage before any use. In
addition, the tire should be properly inflated to the manufacturer's
specifications when cold (we recommend approximately 45 to 50 psi).
Improper tire inflation will affect safe usage of this and all trailers. Do not
over-inflate the tire or exceed the maximum capacity of the wheel. Wheel
nuts and bolts should be torqued before first road use and after each
wheel removal. Check and re-torque after the first 10-25 miles and again
at 50 miles. Check periodically thereafter. Proper wheel torque
specifications should be 60 foot-pounds using a proper torque sequence.
Higher mileage use requires more frequent inspections.

714-630-7144
www.KendonUSA.com
- 12 -
Proper Ramp Attachment and
Loading/Unloading
After your trailer has been properly attached to the tow vehicle, as previously
described, you must fold out the back half of the trailer to load motorcycle(s).
Make sure the area you are working in is level and both the surface area and
trailer are dry to avoid slipping.
Each trailer is equipped with one or multiple loading ramps. On standard
Single, Dual and Combo push-up operation models you will find the ramp
secured to the underside of the rear section. On Ride-Up models you will find it
attached to the underside of the rear section and/or the deck of the trailer. On
the ATV/Utility Trailer/Smart Car trailers you'll find two ramps secured next to
the front guardrails. Refer to the separate Go! Series model specific
instructions for ramp location(s) and use (if applicable).
Make sure the ramp is properly secured to the trailer prior to loading the
motorcycle(s). Never attempt to ride your motorcycle(s) up or down the loading
ramp unless you have a Ride-Up specific trailer.
Attach ramp to rear of trailer. Look directly at the rear section of your trailer,
you will see open slots that line up with the ramp hook(s). These slots are also
marked with red warning decals. The ramp hook(s) must go into these slots
only.
•Hold ramp at approximately 45 degree angle (ramp hook(s) down, rear
of ramp is up at approximately 45 degrees)
•Line up ramp hook with slots on the rear section of the trailer

714-630-7144
www.KendonUSA.com
- 13 -
•Insert ramp hook into slots (hook should look like a spoon facing up)
•Lower the back of the ramp to the ground surface
•Ramp should pivot to the ground with no resistance
NOTE: If ramp does not freely fall to the ground and “hangs up,” you do
not have the ramp hooks properly inserted into your trailer.
Because of the many designs and weight of motorcycles, it is the owner's
responsibility to determine if assistance is needed to load or unload your
particular equipment. However, we believe that in the interest of safety, help
of at least one spotter should be acquired prior to any attempt to load or
unload motorcycles.
The Gross Vehicle Weight Rating (GVWR) of your trailer should never be
exceeded. Gross Vehicle Weight Rating is the total weight of the trailer and all
equipment carried by the trailer. All Kendon trailers have a true trailer load
capacity; which means you do not have to factor in the weight of the trailer into
the maximum load you can carry. The maximum load you may place on a
specific Kendon trailer is as follows:
•Go! Series Single/Single Ride-Up: 1,000 pounds U.S.
•Go! Series Dual/Dual Ride-Up: 2,000 pounds U.S.
•Go! Series 3-Rail/Combo Trailer: 1,500 pounds U.S.
If you have any questions concerning your particular application please call
Kendon for advice.
Motorcycle(s) should be properly secured to the trailer with Kendon locking
ratchet tie-down straps. Motorcycle(s) being transported must have at least
four tie-down locations as to triangulate the system to ensure stability during
transportation. It is MANDATORY that the following four locations be used:

714-630-7144
www.KendonUSA.com
- 14 -
A. Front Tie-Down Procedure - In the triple tree or fork area of your bike
attach two ratchet tie-downs to the most forward tie-down area on the
trailer (outer-ear/outrigger). If you are unable to reach the area on your
bike with the tie-down hook, you can wrap a soft-tie around; which can
also prevent scratching and/or damage. Tighten the ratchet tie-downs
so that the front suspension of the motorcycle is compressed to at least
75% of total travel. This is critical to ensuring the motorcycle remains
stable on the trailer. The Compression of the front suspension of your
motorcycle should result in very little additional compression being
possible. As the trailer is towed, the motorcycle should not further
compress its suspension on account of its own weight. Otherwise tie-
down hooks could become disengaged, resulting in the motorcycle
becoming unattached.
B. Rear Tie-Down Procedure - From a solid frame attachment point on the
motorcycle (e.g., the rear swing-arm or suspension area) attach two tie-
downs forward to mid-tie-down area (forward of the trailer axle location)
in the center of the trailer (on Dual/3-Rail/Combo trailers) and on the
axle hoops on the outside. If you are unable to reach a solid frame
area of your bike with the tie-down hook, you can wrap a soft-tie
around; which can also prevent scratching and/or damage. These
locations provide the stabilization and triangulation needed to secure
the bike. The critical factor in securing the rear section of the
motorcycle to the trailer is that the rear tire on the motorcycle locks the
rear section of the trailer in place. This is due to the rear motorcycle
tire pressing down on the rear folding section of the trailer, but the tie-
down straps are secured to the trailer IN FRONT of the trailer axle so
the weight is pulled forward and down. If improperly tied down, the rear
section can also bounce and break at the hinges.
Please refer to the diagrams below for recommended tie down locations.

714-630-7144
www.KendonUSA.com
- 15 -
Failure to properly tie down motorcycle(s) could result in serious injury,
property damage and/or death. If you have any hesitation and/or questions
about safely securing your vehicles to the trailer, please stop and contact
Kendon immediately.
It is the user’s responsibility to ensure that the motorcycle(s) are properly
secured to the trailer for transport. Because of the variety of terrain and
variable factors involved, the user must use common sense when securing
the load. Again, if you have ANY doubts, please call Kendon for advice.
We recommend always using Kendon locking ratchet tie-down straps. They
are of exceptional quality and are designed for our trailers. There are many
other tie-down strap manufacturers in the marketplace, but we do not believe
you should compromise the integrity of your bike tie-down security system.
These items can be acquired directly from Kendon by phoning our order desk
at 800-847-8618 or on our website www.KendonUSA.com.
NEVER ride your motorcycle(s) onto the trailer under power unless you have a
Ride-Up specific trailer. We recommend staying on the ground while loading
the bikes. If this cannot be accomplished safely alone, we suggest you seek
help from another individual. Walk your motorcycle onto the trailer.
Our Kendon “wheel chocks” can enable a single person to load a bike easily.
All 2003 and newer motorcycle trailer models come equipped with Wheel
Chocks. If you have an older model trailer, our wheel chocks can be purchased
from us for easier loading.

714-630-7144
www.KendonUSA.com
- 16 -
The Wheel Chock is the device that flip-flops back and forth into the "Open" or
"Closed" position on the motorcycle rail. It is open when the rear section of the
Wheel Chock is down so that the motorcycle can be wheeled into place on the
motorcycle rail. It is closed when the motorcycle front wheel is fully engaged in
the wheel chock and the front of the Wheel Chock is lying down flat against the
motorcycle rail. The Wheel Chock must be in the open position before the
motorcycle is wheeled onto to the trailer platform. After walking or riding (Ride-
Up models only) your motorcycle up the ramp and onto the trailer platform,
allow the front wheel of your motorcycle to lock securely into the Wheel Chock
system on the motorcycle rail assembly. When the motorcycle is correctly
secured in the Wheel Chock it will stand by itself; there will be no need to hold
the motorcycle upright, but be sure to test this with a spotter as there are many
different sizes of front wheels. Now, you can securely tie down your motorcycle
using Kendon heavy-duty ratchet-style tie down straps.
Front Wheel Chock Position must be flipped into the “open” or “load” position
with the rear section of the wheel chock flat on the trailer rail. Failure to have
the front wheel chock in the correct position will cause the front wheel to hit
an obstacle during the loading process resulting in a possible loss of balance
and/or fall.
DO NOT transport bike using the wheel chocks ONLY. Secure the bike to
the trailer with locking ratchet tie-downs, as per this owner's manual.
Ensure the wheel chock is in the open position before the motorcycle is loaded
up on the trailer platform. The wheel chock is in the open position when the
wheel chock is rotated towards the rear of the trailer and the rear section of the
wheel chock channel lays flat on the trailer rail. Please refer to the following
illustration for proper wheel chock positions.

714-630-7144
www.KendonUSA.com
- 17 -
To load your bike onto a trailer with wheel chocks:
A. Set the chock to the open position.
B. Push or Ride (Ride-Up models only) bike onto the trailer and into the
chock.
C. Keep pushing bike forward until the bike chock teeters over into the
closed position.
D. The weight of the bike moving forward activates the closing of the chock.
E. The front wheel is captured between the chock & the front of the
motorcycle rail on the trailer bed.
F. Detach the ramp(s) from the rear section of the trailer. Attach ramp(s)
back on the trailer in the original position(s).
Ramps must be properly mounted on the trailer with supplied mounting
hardware firmly tightened down. Loose mounting hardware can cause a ramp
to come off of the trailer causing serious damage or injury to following traffic.
Owner assumes responsibility for properly securing ramps.
Remember; when it is time to unload your motorcycle(s) BE CAREFUL to
stand back and release the tie-down straps slowly to avoid the motorcycle
"jumping" since the suspension components are compressed. Sudden
movement can cause the load to fall, which may cause injury, death and/or
property damage.
To unload your bike from a trailer with wheel chocks:
A. Attach ramps as instructed on pg. 12.
B. Remove all four (4) tie-downs from vehicle.
The motorcycle will not easily roll back to unload due to the design
and function of the front wheel chock.
When the trailer is loaded, the front wheel chock captures the front wheel of
the motorcycle. To unload, you have to get the wheel chock over its center
point and then it will release.
C. With the motorcycle Off and in Neutral, straddle the bike with both feet
firmly on the trailer. Aggressively pull up and back while keeping your
hand on the front brake lever (brake not applied), your motorcycle will
ride up the wheel chock. At the peak grab your front brake so the bike
does not roll back forward into the locked position. Now take one more

714-630-7144
www.KendonUSA.com
- 18 -
pull rearwards while releasing the front brake and your front wheel will
easily roll out of the wheel chock. Don’t worry if you don’t accomplish
this on the first try. The bike will simply come back to rest in the wheel
chock. It may take a few attempts until you learn this technique. It is
also perfectly acceptable to get help and have someone help push the
bike backwards to get out of the front wheel chock.
D. Once out of the front wheel chock, continue to use the front brake to
carefully and slowly back your motorcycle down off of your trailer. Use
at least one spotter to avoid the risk of losing your balance and
dropping your bike.
Trailering Tactics
With a trailer in tow you are operating a vehicle that is longer, heavier, and
sometimes wider and taller than you may be used to so, you may have to
make some compensating adjustments to your normal driving practices.
•Take a "Shakedown" Drive - Make at least one short trial run before
your trip. It will help familiarize you with your trailer's operating
characteristics. It will also let you know that the lights, brakes, etc. are
working properly.
•Slow down - Moderate to slow speeds put less strain on your car and
trailer. Never drive faster than is safe for conditions, and never exceed
the posted speed limit.
Note: Kendon supplied “ST” Rated Trailer Tires have a speed rating of
65 MPH (Miles Per Hour). Please be sure to set the appropriate tire
pressure as recommended by the tire manufacturer (Kendon
recommends 45 to 50psi for all trailers). Never exceed the posted
speed limit for cars/trailers.
•Always allow extra time and space when both passing and stopping,
especially since Kendon trailers are not equipped with brakes.
•Check your Rearview Mirrors - Doing this frequently will let you know
that your trailer is riding properly. We recommend outside rearview
mirrors on both sides of your tow vehicle.
•Swing Wide - You need to make wider turns and wider corners
because you are towing a trailer.
Table of contents
Other Kendon Utility Vehicle manuals
Popular Utility Vehicle manuals by other brands

Polaris
Polaris RANGER 800 EFI Midsize owner's manual

Etnyre
Etnyre M-752-02R1 manual

RYKOV
RYKOV VS 300 T Operating instruction

Toro
Toro Workman 3100 Operator's manual

NC ENGINEERING
NC ENGINEERING MKII 600 Series Operating, maintenance and safety instructions

Woodland Mills
Woodland Mills BUSHLANDER Operator's manual