Kensington KM5005B-SA User manual
5L STAND MIXER
INSTRUCTION MANUAL
MODEL: KM5005B-SA

1
CONTENTS
Page
IMPORTANT SAFETY INSTRUCTIONS
2-3
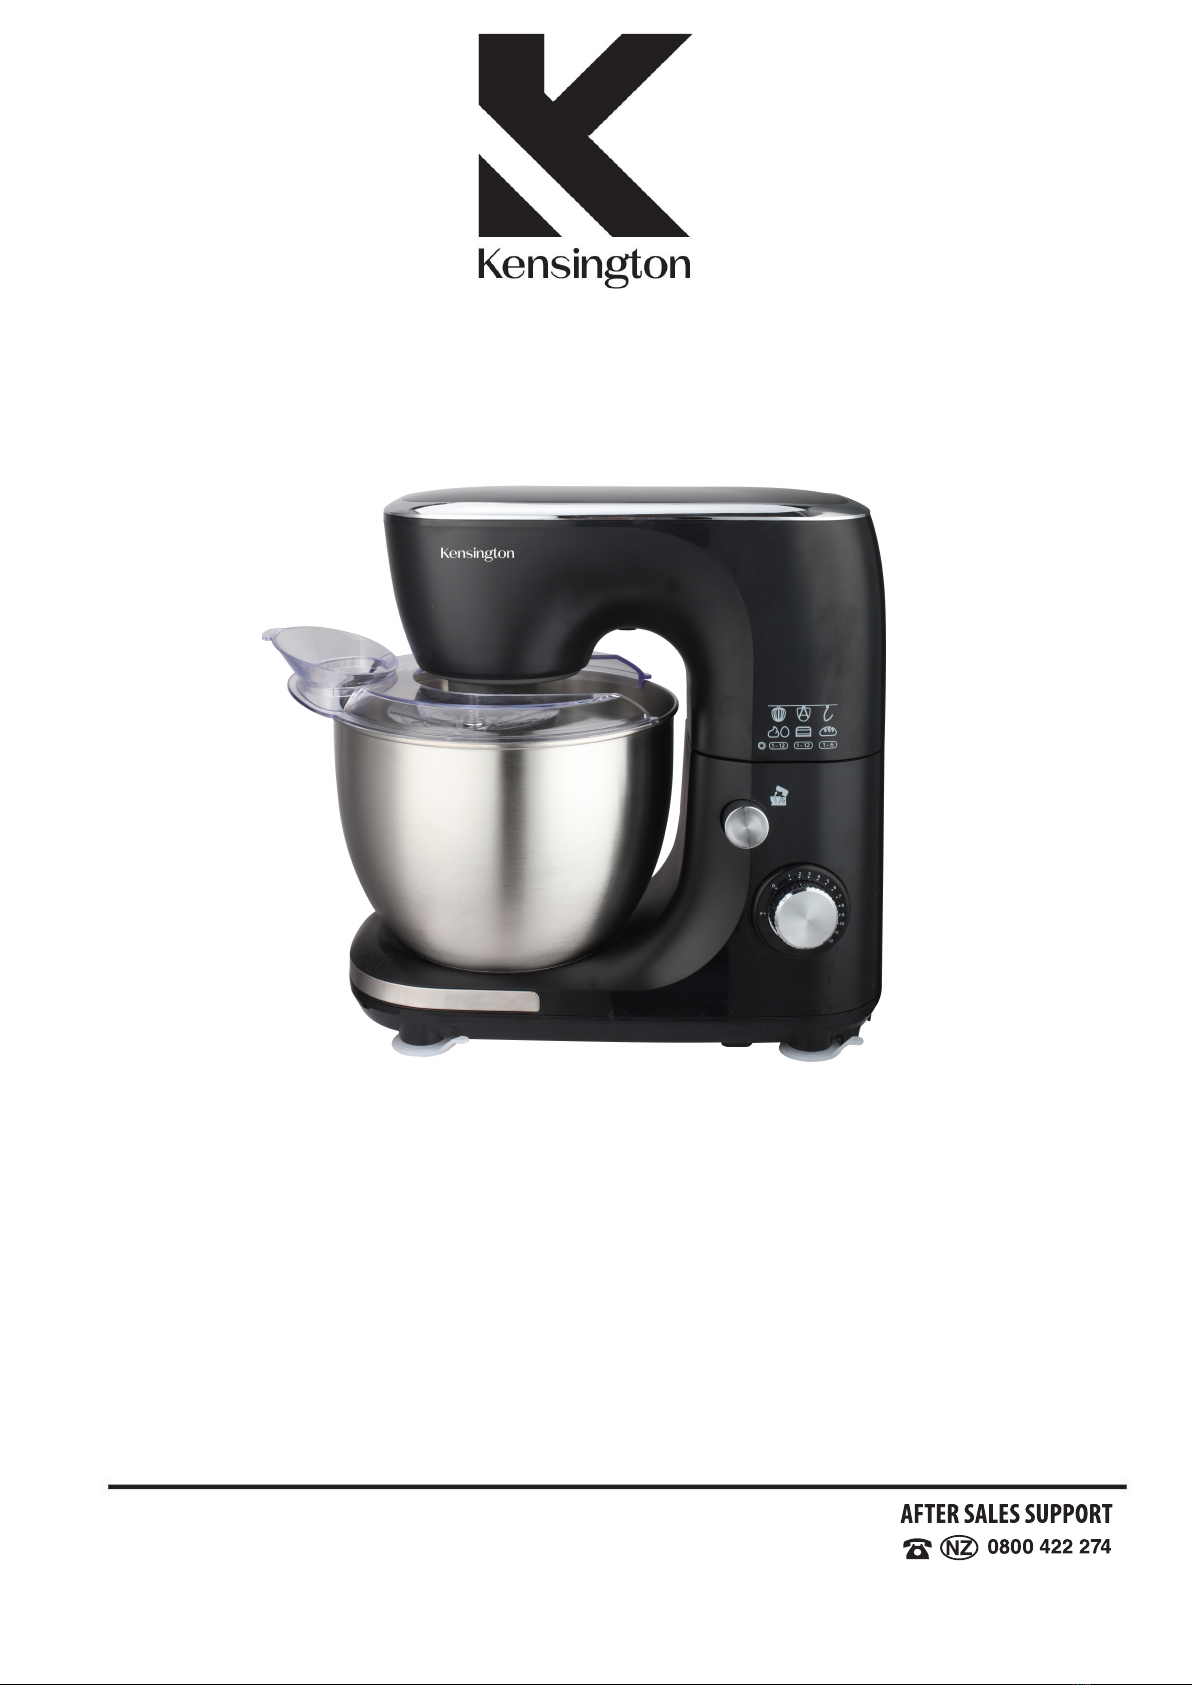
PRODUCT OVERVIEW
4
HOW TO USE
5-7
CLEANING
7
COOKERY TIPS
8

Before using the electrical appliance, the following basic precautions should
always be followed including the following:
•Read all instructions.
•Do not operate the appliance with a damaged cord or after malfunction or
has been damaged in any manner.
•Do not let cord hang over edge of table or counter or hot surface.
•Do not immerse cord or the body of mixer into water as this could give rise
to electric shock.
•If the supply cord is damaged, it must be replaced by the manufacturer or its
service agent or a similarly qualified person in order to avoid a hazard.
•This appliance is not intended for use by persons (including children) with
reduced physical sensory or mental capabilities or lack of experience and
knowledge, unless they have been given supervision or instruction
concerning the use of the appliance by a person responsible for their safety.
•Do not place an appliance on or near a hot gas or on a heated oven.
•Never eject mixing attachments when the appliance is in operation.
•Do not leave mixer unattended while it is operating.
•Unplug from outlet while not in use, before putting on or taking off parts, and
before cleaning.
•The use of attachments not recommended or sold by the manufacturer may
cause fire, electric shock or injury.
•Remove mixing attachments from the mixer before washing.
•Always check that the control switch is OFF before plugging cord into the
socket outlet. To disconnect, turn the control to the OFF position, then remove
plug from wall outlet.
•Avoid contact with moving parts.
•Keep hands, clothing, as well as spatulas and other utensils away from
beaters during operation to reduce the risk of injury and/or damage to the
mixer.
•Always disconnect the appliance from the supply if it is left unattended and
before assembling, disassembling or cleaning.

3
This appliance shall not be used by children. Keep the appliance and its
cord out of reach of children.
Switch off the appliance before changing accessories or approaching parts
which move in use.
This appliance is intended to be used in household and similar applications
such as:
–Staff kitchen areas in shops, offices and other working environments;
–Farm houses;
–By clients in hotels, motels and other residential type environments;
–Bed and breakfast type environments.
Save these instructions.
To avoid personal injury and damage to the beater, do not attempt to scrape
bowl while mixer is operating, turn mixer off. Should scraper or other
object drop into the bowl, turn the unit OFF before attempting to remove.
HOUSEHOLD USE ONLY

4
PLANETARY ROTATION
During operation, the attachment rotates around the
stationary bowl, at the same time turning in the opposite
direction on its own axis. This action helps to ensure
maximum mixture is collected from the sides,
bottom and centre of the bowl.
The diagram shows the complete coverage of the bowl
made by the path of the beater.
Bowl Cover
Beater Whisk Dough Hook
Suction cup feet with quick release pull tabs
Base
Speed Selector
Release Button
Mixing Head
Bowl Cover
Mixing Bowl

5
BEFORE USING THE MIXER
Before assembling the mixer, be sure the power cord is unplugged from the
socket outlet and that the speed selector is in the 0 position.
1. Press the Release button, the head of mixer will automatically release and lock
into the tilted position.
2. Select the desired attachment, depending on the mixing task to be performed:
For example, the Beater attachment for mixing and beating eggs, Dough Hook for
kneading, the Whisk for beating and frothing egg white.
3. Attach the Beater/ Dough Hook/ Whisk directly, until it locks into position (push
and rotate slightly).
Note: Ensure the attachment is fully inserted and locked in position, otherwise
your mixing performance will be affected.
4. Place bowl in position. First place the bowl on the base, then turn the bowl in
the clockwise orientation until it locks into place (see fig.1).
5. To lower the head and place Beater / Dough Hook / Whisk into the bowl, hold
the head with the one hand and gently press down. A click sound will be heard
when the head has reached the correct position.
6. If desired, place the Bowl Cover over the top of the bowl edge (see fig.1).
Fig.1
Fig.2

6
USING YOUR MIXER
1. Ensure that the speed selector is at the 0 position, then insert the plug into the
mains supply and switch on.
2. Turn the speed selector to your desired setting.
Warning: Do not insert spoons, forks or any utensils into the bowl when
operating.
3. The maximum operation time per cycle shall not exceed 6 minutes and a
minimum of 20 minutes rest time must be maintained between two consecutive
cycles. When kneading yeast dough, it is recommended that the speed selector is
first set to low speed and then increased to high speed to achieve the best results.
Note: The bowl and attachments are designed to provide thorough mixing without
frequent scraping. Scraping the bowl once or twice during mixing is usually
sufficient. If necessary, you can switch the mixer off, remove the bowl cover and
scrape the flour on the inside bowl wall with a spatula before switching back on.
4. When mixing is completed, turn the speed selector to 0 position, unplug the
cord from the power outlet.
5. Hold down the tilt button, the head of the mixer will automatically lift and lock
into the tilt position.
Caution: Before pressing down the Release button (and before lifting the head of
mixer), make sure the attachment (Beater / Whisk or Dough Hook) have come to
rest on the sides or back of the head of the mixer – Not at the front, otherwise
when lifting the head of the mixer, the attachment will conflict with the mixing bowl.
If this occurs (attachment hits or jams onto the bowl) then push the head back
down until it locks, switch on again at low speed and allow the mixer to rotate for a
few seconds once it has relocated to the side or back.

7
USING YOUR MIXER (CONTINUED)
6. If necessary, you can scrape the excess food residue from the beater or dough
hook with a plastic spatula, but do not attempt this while the unit is operating as
this may result in personal injury or damage to the mixer.
7. Remove the attachments (Beater / Dough Hook or Whisk), by using a pull force
and rotating slightly anti-clockwise.
Caution: The speed selector must be at 0 position and the power outlet must be
unplugged before pulling out the beater/dough hook/whisk.
1. Unplug the appliance and wait for it to completely cool down before cleaning.
Caution: the mixer cannot be immersed in water or other liquid.
2. Wipe over the outside surface of the head and base with a dampened cloth and
use a soft cloth to dry.
3. Wipe any excess food residue from the power cord.
4. Immerse the bowl, beater, dough hook and whisk in warm soapy water for
thorough cleaning. Then rinse under running water and wipe dry. The attachments
can also be placed in the dishwasher if preferred.
7

Mixtures containing large amounts of liquid ingredients should be mixed at
lower speeds to avoid splashing. Increase speed only after mixture has
thickened.
Refrigerated ingredients, such as butter and eggs, should be at room
temperature before mixing begins. Allow these ingredients to reach room
temperature by taking out ahead of time.
To eliminate the possibility of shells or deteriorated off eggs in your recipe,
break eggs into separate container first, then add to the mixture.
Do not over-beat. Be careful that you only mix/blend mixtures for the
recommended time stated in your recipe. Fold into dry ingredients only until
just combined. Always use the low speed.
Climatic conditions. Seasonal temperature changes, temperature of
ingredients and their texture variation from area to area all play a part in the
required mixing time and the results achieved.
ATTACHMENT TYPE
EXAMPLES OF COMMON USES
BEATER
Cakes, cookies, pie pastry, biscuits, mashed potatoes
WHISK
Eggs, egg whites, cream, mayonnaise, sponge cakes
DOUGH HOOK
Breads, rolls, buns, cakes
8
USE OF ATTACHMENTS


9
Warranty
We pride ourselves on producing a range
of quality home appliances that are both packed with features,
and completely reliable. We are so confident in our products,
we pack them up with a 3 year warranty.
Now you too can relax knowing that you are covered.
Customer Helpline NZ: 0800 422 274
This product is covered by a 3 year warranty when
Accompanied by proof of purchase.
IM Version 1.0 – February, 2021
Table of contents


