manuals.online logo
Brands
  1. Home
  2. •
  3. Brands
  4. •
  5. Kenwood
  6. •
  7. CD Player
  8. •
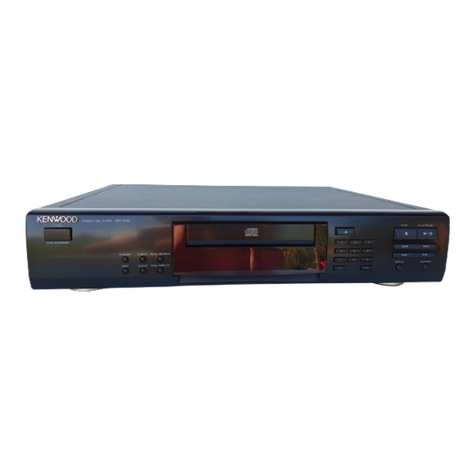
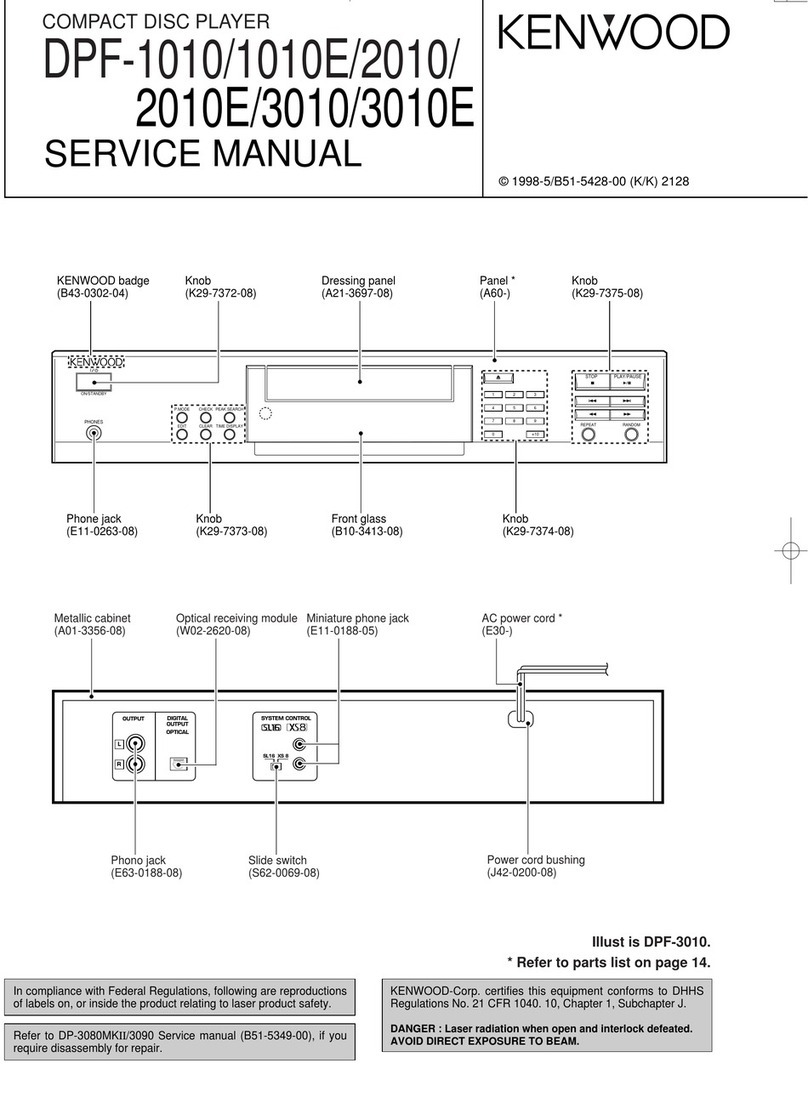
  9. Kenwood 1050CD User manual

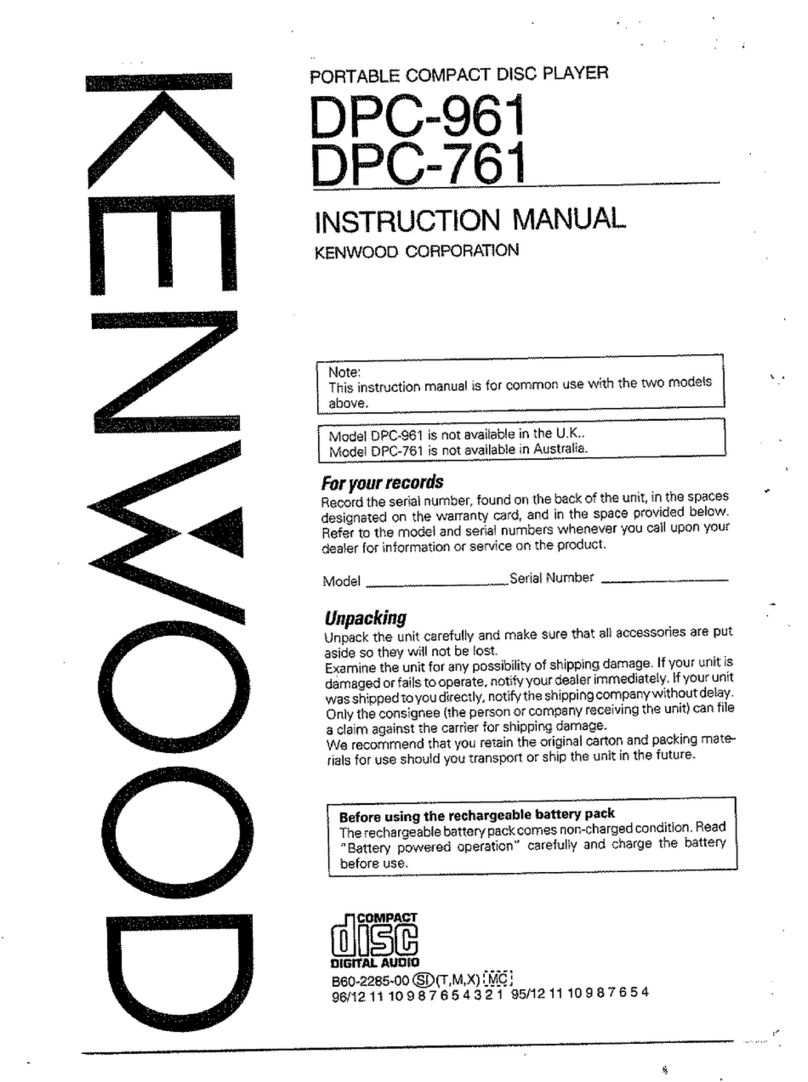
Kenwood 1050CD User manual

Other manuals for 1050CD

1

This manual suits for next models

2

Other Kenwood CD Player manuals

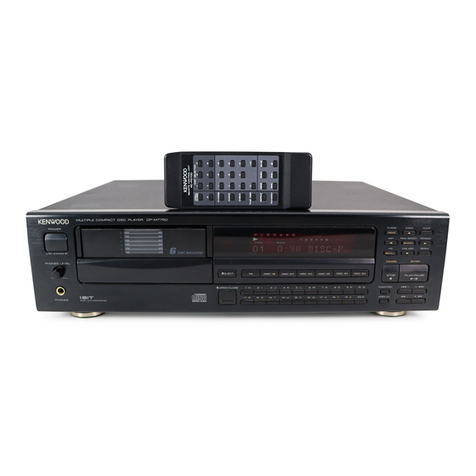
Kenwood DP-M7750 User manual

Kenwood

Kenwood DP-M7750 User manual

Kenwood CD-223M User manual

Kenwood

Kenwood CD-223M User manual

Kenwood DP-SE7 User manual

Kenwood

Kenwood DP-SE7 User manual

Kenwood DPC-441 User manual

Kenwood

Kenwood DPC-441 User manual

Kenwood MS-A5 User manual

Kenwood

Kenwood MS-A5 User manual

Kenwood KDC-C604 User manual

Kenwood

Kenwood KDC-C604 User manual

Kenwood DPC-X301 User manual

Kenwood

Kenwood DPC-X301 User manual

Kenwood CD-2260M User manual

Kenwood

Kenwood CD-2260M User manual

Kenwood DP-8010 User manual

Kenwood

Kenwood DP-8010 User manual

Kenwood KDC-80 User manual

Kenwood

Kenwood KDC-80 User manual

Kenwood DVF-R4050 User manual

Kenwood

Kenwood DVF-R4050 User manual

Kenwood DP-460 User manual

Kenwood

Kenwood DP-460 User manual

Kenwood KDC-C719MP User manual

Kenwood

Kenwood KDC-C719MP User manual

Kenwood DPF-1030 User manual

Kenwood

Kenwood DPF-1030 User manual

Kenwood DPC-183 User manual

Kenwood

Kenwood DPC-183 User manual

Kenwood DP-M6650 User manual

Kenwood

Kenwood DP-M6650 User manual

Kenwood DPC-472 User manual

Kenwood

Kenwood DPC-472 User manual

Kenwood DVF-3070 User manual

Kenwood

Kenwood DVF-3070 User manual

Kenwood DPC-77 User manual

Kenwood

Kenwood DPC-77 User manual

Kenwood DPC-151 User manual

Kenwood

Kenwood DPC-151 User manual

Kenwood LVD-300 User manual

Kenwood

Kenwood LVD-300 User manual

Kenwood DPC-141 User manual

Kenwood

Kenwood DPC-141 User manual

Kenwood DP-1060 User manual

Kenwood

Kenwood DP-1060 User manual

Kenwood DPC-X527 User manual

Kenwood

Kenwood DPC-X527 User manual

Popular CD Player manuals by other brands

Arcam CD23 Handbook

Arcam

Arcam CD23 Handbook

Sanyo MCD-Z1F Service manual

Sanyo

Sanyo MCD-Z1F Service manual

JVC RC-ST3SL instructions

JVC

JVC RC-ST3SL instructions

Technics SL-P9066 operating instructions

Technics

Technics SL-P9066 operating instructions

Marantz HD-CD1 quick start guide

Marantz

Marantz HD-CD1 quick start guide

Sony DVP-FX850 Service manual

Sony

Sony DVP-FX850 Service manual

Philips AZ1140 Instrukcja obs?ugi

Philips

Philips AZ1140 Instrukcja obs?ugi

Alpine 7909 owner's manual

Alpine

Alpine 7909 owner's manual

JVC CH-X350 instructions

JVC

JVC CH-X350 instructions

RCA RP-7923 instruction manual

RCA

RCA RP-7923 instruction manual

Pioneer DEH-P3550MP XM Operation manual

Pioneer

Pioneer DEH-P3550MP XM Operation manual

Philips Shockproof AX2102 brochure

Philips

Philips Shockproof AX2102 brochure

Philips CD582 user manual

Philips

Philips CD582 user manual

Philips AZ 6821 operating manual

Philips

Philips AZ 6821 operating manual

Lasonic MSU-2020 user manual

Lasonic

Lasonic MSU-2020 user manual

Denon DCD-1420 Service manual

Denon

Denon DCD-1420 Service manual

Panasonic SJ-MR100 operating instructions

Panasonic

Panasonic SJ-MR100 operating instructions

Onkyo DX-7210 instruction manual

Onkyo

Onkyo DX-7210 instruction manual

manuals.online logo
manuals.online logoBrands
  • About & Mission
  • Contact us
  • Privacy Policy
  • Terms and Conditions

Copyright 2025 Manuals.Online. All Rights Reserved.

KENWOOD
CD
PLAYER
1050CD
104CD
103CD
INSTRUCTION
MANUAL
KENWOOD
CORPORATION
This
instruction
manual
is
used
for
three
models.
|
Model
availability
and
features
(functions)
may
differ
depending
onthe
country
and
|
sales
area.
|
)
|
iSt
DIGITAL
AUDIO
98/12
111098765432197/1211
10987654321
96/12
Introduction
-
Unpacking
Unpack
the
unit
carefully
and
make
sure
that
all
accessories
are
put
aside
so
they
will
not
be
lost.
Examine
the
unit
for
any
possibility
of
shipping
damage.
If
your
unit
is
damaged
or
fails
to
operate,
notify
your
dealer
immediately.
If
your
unit
was
shipped
to
you
directly,
notify
the
shipping
company
without
delay.
Only
the
consignee
(the
person
or
company
receiving
the
unit)
can
file
a
claim
against
the
carrier
for
shipping
damage.
We
recommend
that
you
retain
the
original
carton
and
packing
materials
for
use
should
you
transport
or
ship
the
unit
tn
the
future.
For
the
U.S.A.
CAUTION:
Use
of
controls
adjustment
or
performance
of
procedures
other
than
those
specified
herein
may
resuit
in
hazardous
radiation
exposure.
In
compliance
with
Federal
Regulations,
following
are
reproductions
of
labels
on,
or
inside
the
product
relating
to
laser
product
safety.
KENWOOD
CORPORATION
2967-3,
ISHIKAWA-CHO,
HACHIOJI-SHI,
TOKYO,
JAPAN
KENWOOD
CORP.
CERTIFIES
THIS
EQUIPMENT
CONFORMS
TO
DHHS
REGULATIONS
NO.
21
CFR
1040.10,
CHAPTER
|,
SUBCHAPTER
J.
Location:
Back
Panel
REQUIREMENT
BY
NEDERLAND
GAZETTE
Batteries
are
supplied
with
this
product.
When
they
empty,
you
should
not
throw
away.
Instead,
hand
them
in
as
small
chemical
waste.
Contents
2
=
1050CD/10aCD/103CD
{En}
Caution
;
Read
the
pages
marked
AN
carefully
to
ensure
safe
—————————
Accessories
Remote
control
unit...(1}
(Except
for
103CD)
Audio
cord
....00..00.....2.......
(1)
Battenes(R6/AA)...{2)
ee
(Except
for
103CD)
Accessory
only
for
regions
where
use
IS
necessary
The
marking
of
products
using
lasers
(Except
for
some
areas)
CLASS
1
LASER
PRODUCT
The
marking
ts
located
on
the
rear
panel
and
says
that
the
component
uses
laser
beams
that
have
been
classified
as
Class
1.
It
means
that
the
unit
is
utilizing
laser
bearns
that
are
of
a
weaker
class.
There
is
no
danger
of
hazardous
radiation
outside
the
unit.
operation.
PUACE
COLTON
I
os
se
osc
coecces
asc
acetate
eine
ees
2
Programmed
play
(PGM
mode)
.................ccc:sccesseressenensenes
14
5,
POCA
FOBTULOS
issscieiateuivecsnsaescsseucestesosarnepnasnesecisanedeanesd
3
Repeated
play
............::ccccscccccsssecerecsesnesesesesesseseussersnesneasanens
16
;
AY
Before
applying
POWER
...........::c:csseesereteesereseseressnensavenees
SO
PROMO
DAY.
icissssicsscrnscncctesccisiscncccceriesiuitiaunuacadacatospaesctastiocee
17
AX,
Safety
precautions
.........cccccssscssssssesssenseseneecerersessnenessenes
B-
Beditinkg
(EDIT
cise
deesaetendchccieaecctes
ecient
anioeendtas
owen
18
System
CONnections
...................ccsecrereereeeseeeeeneeeeeesneneneans
4
Normal.
EDIT
oiccicisesscsscccsisesccevassacnadossesacavsscncvasentesarstasiee
18
Before
operation
..........0...ccccesssscsseneeseresesseneeeeeesereeseneeeens
6
PMCID
IUD
scscces
ci
saecec
iecncestiseteg
souceneceuinssidevatbdaasavaseandecak
20
Controls
and
indicators
...............ecceesseeeeeeeeeeeeseenennens
DS
SHAME
CPO
ON
sigs
ie
snizsccnecedevesasdciadacecenisvansdsiesvinidivenesteatanssoid
21
Operation
of
remote
control
unit
Wh
Gaee
Of
CTICUNEY
wisissicasssnsssdvsciscsicasasacsécecasseiaidesesapexssennsaie
22
(Except
for
103CD)
..............ccccceesecessssssesssssneneneneonen
10
=
Specifications
............csscressesssessenonesscsnconsosacansasnserssaacnsnsanasens
23
Loading/unloading
discs
.............cccecccsseneesesensesenetserens
17
Listening
from
the
first
track
...................::ccccceceneeeeeeeee
Special
features
'
Adoption
of
mechanism
that
enables
disc
changing
even
during
Playback
oo...
eee,
4
other
discs
can
be
changed
not
only
when
the
unit
is
stopped,
but
also
during
playback.
=~
ih
Featuring
the
convenient
function
to
record
ED
tracks
ON10:8
taPO
nex.
2cccescceeeincdeqazeadsdconsenssetocgeznidesteaseesedess
NORMAL
EDIT:
The
edit
function
changes
the
order
of
CD
tracks
according
to
the
tape
tength
so
that
no
tune
is
interrupted.
~
38
MULTI
EDIT:
Several
CDs
can
be
edited
and
recorded
on
1
tape.
~
22
B
ef
ore
app
/
y
i
ng
p
owe
r
‘\\
Caution
:
Read
this
section
carefully
to
ensure
safe
operation.
a
Units
are
designed
for
operation
as
follows.
*AC
voltage
selection
USA.
corned
C
earn
en
hah
ois
nis
canscoscssiscentons
icsonssnevesasanssinosarounconece
AC
120
V
only
Pietra
iO
esate
sek
ott
ce
eee
sees
ee
ceases
AC
240
V
only
The
AC
voltage
selector
switch
on
the
rear
panel
is
set
to
the
voltage
Europe
amd
U.K.
.......scssccssscsscssscssecsssssscsssessecerssssussesssersecssssuuenss
AC
230
V
only
that
prevails
in
the
area
to
which
the
unit
is
shipped.
Setore
China
and
Russia
.........ccssssssscssssccssssscossssssssssesescescceccserveseressess
AC
220
V
only
connecting
the
power
cord
to
your
AC
outlet,
make
sure
that
the
*Other
COUNTTIOS
.......cccccsscessesceeseseee
AC
110-120
/
220-240
V
switchable
Setting:
position:
of
this:
switch
matches
‘your
ine:
valtage.
It
not,
st
4
must
be
set
to
your
vaitage
In
accordance
with
the
following
direction.
For
the
United
Kingdom
AC
voltage
selector
switch
|
Factory
fitted
moulded
mains
plug
.
Fhe
mains
plug
contains
a
fuse.
For
replacement,
use
only
a
13-
Amp
ASTA-approved
{BS1362)
fuse.
2.
The
fuse
cover
must
be
refitted
when
replacing
the
fuse
in
the
moulded
plug.
3.
Do
not
cut
off
the
mains
plug
from
this
equipment.
If
the
plug
fitted
is
not
suitable
for
the
power
points
in
your
home
or
the
cable
is
too
short
to
reach
a
power
point,
then
obtain
an
appropriate
safety
approved
extension
lead
or
adapter,
or
consult
your
dealer.
If
nonetheless
the
mains
plug
is
cut
off,
remove
the
fuse
and
dispose
of
the
plug
immediately,
to
avoid
a
possible
shock
hazard
by
inadvertent
connection
to
the
mains
supply.
sy
AC
11G6-120V~
~ ©
AC
220-240V~
Move
switch
lever
to
match
your
line
valtage
with
a
small
screwdriver
or
other
pointed
tool.
;
Note:
AS
ee
eas
beste
inert
eolounge
10
Our
warranty
does
not
cover
damage
caused
by
excessive
line
voltage!
ys
One
due
to
improper
setting
of
the
AC
voltage
selector
switch.
|
Blue
:
Neutral
Brown
:
Live
Do
not
connect
those
leads
to
the
earth
terminal
of
a
three
-
pin
plug.
S
a
f
ety
p
récaul
ti
on
S
.
JN
Caution
:
Read
this
section
carefully
to
ensure
safe
operation.
De
ne]
WARNING
:TO
PREVENT
FIRE
OR
ELECTRIC
SHOCK,
DO
NOT
EXPOSE
THIS
APPLIANCE
TO
RAIN
OR
MOISTURE.
CAUTION
CAUTION:
TO
REDUCE
THE
RISK
OF
ELECTRIC
SHOCK,
DO
NOT
REMOVE
COVER
(OR
pike
GE
RURCTING
EHOEE
BACK).
NO
USER-SERVICEABLE
PARTS
INSIDE,
REFER
SERVICING
TO
QUALIFIED
SERVICE
DO
NOT
OPEN
PERSONNEL.
THE
LIGHTNING
FLASH
WITH
ARROWHEAD
SYMBOL,
WITHIN
AN
EQUILATERAL
TRIANGLE,
IS
INTENDED
TO
ALERT
THE
USER
TO
THE
PRESENCE
OF
UNINSULATED
"DANGEROUS
VOLTAGE”
WITHIN
THE
PRODUCT'S
ENCLOSURE
THAT
MAY
BE
OF
SUFFICIENT
MAGNITUDE
TO
CONSTITUTE
A
RISK
OF
ELECTRIC
SHOCK
TO
PERSONS.
THE
EXCLAMATION
POINT
WITHIN
AN
EQUILATERAL
TRIANGLE
IS
INTENDED
TO
ALERT
THE
USER
TO
THE
PRESENCE
OF
IMPORTANT
OPERATING
AND
MAINTENANCE
(SERVICING)
INSTRUCTIONS
IN
THE
LITERATURE
ACCOMPANYING
THE
APPLIANCE.
JOSOCD/104CD/103CD
(En)
3
oystem
connections
a
Make
connections
as
shown
below.
When
connecting
the
related
system
components,
refer
also
to
the
instruction
manu-
als
of
the
related
components.
Caution:
Do
not
plug
in
the
power
lead
until
all
connections
are
completed.
Malfunction
of
microcomputer
If
operation
is
not
possible
or
erroneous
display
appears
even
though
all
connections
have
been
made
prop-
erly,
reset
the
microcomputer
referring
to
‘In
case
of
difficulty’.
~
22,
Cassette
deck
System
control
cord
(optional)
|
To
AC
outlet
SL16/XS8
switch
=33
The
iilustration
of
the
common
System
control
cord
parts
is
of
104CD.
Amplifier
or
receiver
1.
Connect
all
cords
firmly.
If
connections
are
loose,
there
could
be
loss
of
sound
or
noise
pro-
duced.
2.
When
plugging
and
unplugging
connection
cords,
be
sure
to
first
remove
the
power
cord
from
the
AC
outlet.
Piugging/unpiugging
connection
cords
without
removal
of
the
power
cord
can
cause
maifunc-
;
tions
or
damage
to
the
unit.
4
j050cD/104CD/103CD
tEn)
ABOUT
THE
SYSTEM
CONTROL
CONNECTIONS
Connecting
system
control
cords
after
connecting
a
KENWOOD
audio
component
system
lets
you
take
advantage
of
convenient
system
control
operations.
There
are
two
KENWOOD
system
control
modes.
Make
connections
according
to
the
groups
of
terminal
symbols
shown
below.
[XS8]
Mode:
lets
you
combine
(XU,
XS)
and
(X88)
terminals
[SL16]
Mode:
for
(SLIB)
terminals
only
This
untt
is
compatible
with
both
(XS8]
and
{SL16]
modes.
Select
the
mode
according
to
the
connected
components.
~
4
SLi6
XS
8
—
iO
|
-
@Do
this
operation
after
completing
all
connections.
{Ensure
that
the
power
is
OFF}
Notes:
.
If
your
amplifier
or
receiver
does
not
have
a
system
control
terminal,
do
not
connect
any
system
control
cords
to
the
system
contro!
terminals
on
the
other
components.
2.
Do
not
connect
system
control
cords
to
any
components
other
than
those
specified
by
KENWOOD.
It
may
cause
a
maifunction
and
damage
your
equipment.
3.
Be
sure
the
system
control
plugs
are
inserted
all
the
way
in
to
the
system
control
terminals.
—
ABOUT
THE
SYSTEM
CONTROL
OPERATIONS
Remote
Control
Lets
you
operate
this
unit
with
the
system
remote
supplied
with
the
amplifier
or
receiver.
Automatic
Operation
(except
[XR]
equipment)
Automatically
switches
the
input
selector
on
the
amplifier
or
recerver
when
you
start
playback
from
this
untt.
Synchronized
Recording
(except
[XR]
equipment}
Lets
you
synchronize
recording
with
the
start
of
playback
when
recording
from
CD.
Also
the
simple
CCRS
operation
lets
you
make
great
recordings
from
CD.
See
the
instruction
manual
supplied
with
your
cassette
deck
for
details.
1050CD/104CD/103CD
(En)
betore
operation
Disc
handling
precautions
Handling
Hold
compact
dises
so
that
you
do
not
touch
the
playing
surface.
Label
side
Playing
sid@_
@Do
not
attach
paper
or
tape
to
either
the
playing
side
or
the
label
side
of
compact
discs.
@
The
paste
left
onthe
label
surface
after
a
sticker
has
been
peeled
off
is
a
factor
which
may
cause
malfunction.
If
the
surface
is
sticky
due
to
remaining
paste,
be
sure
to
clean
it
with
alcohol
before
use.
Sticker
Sticky
paste
Caution
on
disc
used
Cleaning
If
fingerprints
or
foreign
matter
become
at-
tached
to
the
disc,
lightly
wipe
the
disc
with
a
soft
cotton
cloth
(or
similar)
from
the
center
of
the
disc
outwards
in
a
radial
man-
ner.
I
Storage
|
When
a
disc
is
not
to
be
played
for
a
long
}
period
of
time,
remove
it
from
the
CD
player
and
store
it
in
its
case.
Never
play
a
cracked
or
warped
disc.
During
playback,
the
disc
rotates
at
high
speed
in
the
player.
Therefore,
to
avoid
danger,
never
use
a
cracked
or
deformed
disc
or
a
disc
repaired
with
tape
or
adhesive
agent.
Do
not
use
cleaning
discs.
Please
do
not
use
commerciaily
available
cleaning
discs.
they
may
damage
the
internal
mechanism.
Discs
which
can
be
played
with
this
unit
CD
(12
cm,
8
cm},
CDV
(only
the
audio
part)
e
With
CD-G
(CD
Graphics)
discs,
this
unit
can
play
onty
the
audio.
Cleaning
Do
not
use
volatile
solvents
such
as
alcohol,
paint
thinner,
gasolline,
or
benzine,
etc.
to
clean
the
cabinet.
Use
a
clean
dry
cloth.
Do
not
use
contact
cleaners
because
it
could
cause
a
malfunction.
Be
specially
careful
against
contact
cleaners
containing
oil,
for
they
may
deform
the
plastic
components.
Note
related
to
transportation
and
movement
Before
transporting
or
moving
this
unit,
carry
out
the
following
opera-
tions.
.
Turn
the
power
ON
but
do
not
load
a
disc.
.
Wait
a
few
seconds
and
verify
that
the
display
shown
appears.
.
Press
the
&
OPEN/CLOSE
key
to
open
the
disc
tray
completely.
.
Press
the
&
OPEN/CLOSE
key
again
to
close
the
disc
tray.
.
Wait
a
few
seconds
and
turn
the
power
OFF.
Beware
of
condensation
When
water
vapor
comes
into
contact
with
the
surface
of
cold
mate-
tial,
water
drops
are
produced.
If
condensation
occurs,
correct
operation
may
not
be
possible,
or
the
unit
may
not
function
correctly.
This
is
not
a
malfunction,
however,
the
unit
should
be
dried.
(To
do
this,
turn
the
POWER
switch
ON
and
leave
the
unit
as
it
is
for
several
hours.)
6
=
10S50CD/104CD/103CD
{En}
8
?
.
a
Ww
140
42
1490
1448
18
617
18
4
20
70a
d
SE
Be
specially
careful
in
the
following
conditions.
@
When
the
unit
is
brought
from
a
cold
place
to
a
warm
place,
and
there
is
a
large
temperature
difference.
@
When
a
heater
starts
operating
e
When
the
unit
is
brought
from
an
air-conditioned
place
to
a
place
of
high
temperature
with
high
humidity.
@
When
there
is
a
large
difference
between
the
internal
temperature
of
the
unit
and
ambient
temperature,
or
in
conditions
where
conden-
sation
occurs
easily.
Controls
and
indicators
(1050CD)
EDIT
indicator
PC.
indicator
RANDOM
indicator
ALL
indicator
REPEAT
indicator
Program
mode
indicator
Music
calendar
(1
~
20)
Play
indicator
Pause
indicator
Disc
No.
indicators
TRACK
NO.
indicator
Time
counter,
Program
No.
(SINGLE,
TOTAL)
.
ed
ny
er
_
e
The
keys
with
the
same
name
as
those
on
the
remote
control
unit
operate
the
same
way
as
the
remote
control
unit.
©
POWER
switch
-“i)
@
RANDOM
key
=~
Press
to
turn
on/off
the
power.
Press
to
play
the
tracks
tn
a
random
order.
@
P.MODE
key
~G)-fé)
©
REPEAT
key
~Ge
©
CHECK
key
~(44)
-
[12]
Press
to
play
the
tracks
repeatedly.
@
CLEAR
key
~95)
©
TIME
DISP.
key
-a
©
Remote
contral
light
sensor
—(30)
Press
to
switch
the
time
indication
mode.
@
Search
keys
(<4,
me}
~(ia)
=
®
Disc
tray
-Hn
@
Skip
keys
(e<@,
ppe4)
~(3)
The
discs
to
be
played
are
loaded.
Press
to
find
the
beginning
of
the
track.
®
EDIT
mode
key
~i8)
©
Disc
selector
keys
(DISC?
~
DISCS)
~2iz)
Press
to
select
the
edit
mode.
Press
to
select
the
disc
to
be
played.
@
Stop
key
(@)
-O
©
DISC
SKIP
key
-GQ~-G2]
©
PHONES
jacks
-G)
Press
to
rotate
the
disc
tray
or
to
select
the
disc.
®
Play/Pause
key
(»/01)
Li)
®
Open/Close
key
(4)
-Lid)
Each
time
the
key
is
pressed,
playback
and
pause
switch
Press
to
open
or
close
the
disc
tray.
each
other.
About
the
STANDBY
mode
of
the
POWER
switch
When
the
power
cord
of
this
unit
is
plugged
into
an
AC
outlet,
a
small
amount
of
current
is
being
supplied
to
the
unit
even
when
the
power
is
turned
off.
This
is
calied
the
STANDBY
mode.
en
1O50CD/104CD/103CD
(En)
7
Controls
and
indicators
(104CD)
EDIT
indicator
PC.
indicator
RANDOM
indicator
ALL
indicator
REPEAT
indicator
Program
mode
indicator
Music
calendar
(1
~
20}
Play
indicator
Pause
indicator
Disc
No.
indicators
TRACK
NO.
indicator
Time
counter,
Program
No.
(SINGLE,
TOTAL)
0
®
'
oooon
=
0
cec
eel
=
e
The
keys
with
the
same
name
as
those
on
the
remote
control
unit
operate
the
same
way
as
the
remote
control
unit.
@
POWER
switch
-)
@
RANDOM
key
~
ih
Press
to
turn
on/off
the
power.
Press
to
play
the
tracks
in
a
random
order.
@
PMODE
key
-.1)-Lig;}
©
REPEAT
key
~(ig;
©
CHECK
key
—
(94)
239)
Press
to
play
the
tracks
repeatedly.
@
CLEAR
key
~733)
@
TIME
DISP
key
az
©
Remote
contro!
light
sensor
-Lit,
Press
to
switch
the
time
indication
mode.
@
Search
keys
(<4,
me)
~(i3}
@®
Disc
tray
iT
@
Skip
keys
(aa,
mp)
~
13)
The
discs
to
be
played
are
loaded.
Press
to
find
the
beginning
of
the
track.
@
EDIT
mode
key
1g:
@
Disc
selector
keys
(DISC1
~
DISCS)
~Liz)
Press
to
select
the
edit
mode.
Press
to
select
the
disc
to
be
played.
@
Stop
key
(m)
~
(93)
©
DISC
SKIP
key
-(ii-32)
+
@
PHONES
jacks
a5)
Press
to
rotate
the
disc
tray
or
to
select
the
disc.
@
Play/Pause
key
(>/10)
~
iz,
@
Open/Close
key
(4)
-
Each
time
the
key
Is
pressed,
playback
and
pause
switch
Press
to
open
or
close
the
disc
tray.
each
other.
About
the
STANDBY
mode
of
the
POWER
switch
When
the
power
card
of
this
unit
is
plugged
into
an
AC
outlet,
a
small
amount
of
current
1s
being
supplied
to
the
unit
even
when
the
power
is
turned
off.
This
is
called
the
STANDBY
mode.
8
=
1050CD/104CD/103CD
{En}
Controls
and
indicators
(103CD)
EDIT
indicator
PC.
indicator
RANDOM
indicator
ALL
indicator
REPEAT
indicator
Program
mode
indicator
Music
calendar
(1
~
20)
Play
indicator
Pause
indicator
Disc
No.
indicators
TRACK
NO.
indicator
Time
counter,
Program
No.
(SINGLE,
TOTAL)
“
oD
sp
7
3
9
OQ
BIS
wen,
VOTT
com
o/s
ever
@
POWER
switch
~(t)
©
RANDOM
key
~
iz)
Press
to
turn
on/off
the
power.
Press
to
play
the
tracks
in
a
random
order.
©
PMODE
key
2-36)
©
REPEAT
key
ik
©
CHECK
key
-445-
Press
to
play
the
tracks
repeatedly.
@
CLEAR
key
~
@
TIME
DISP.
key
~
Th)
©
Search
keys
(~,
me)
(i
Press
to
switch
the
time
indication
mode.
©
Skip
keys
(Ha,
D4)
=O
®
Disc
tray
~
il)
Press
to
find
the
beginning
of
the
track.
The
discs
to
be
played
are
loaded.
@
Disc
selector
keys
(DISC1
~
DISCS}
~(2])
@
EDIT
mode
key
~
18)
Press
to
select
the
disc
to
be
played.
Press
to
select
the
edit
mode.
@
DISC
SKIP
key
-(i)-12]
«=
@
Stop
key
(am)
-(
Press
to
rotate
the
disc
tray
or
to
select
the
disc.
@
Play/Pause
key
(»/41)
—(i2)
©
Open/Close
key
(4)
~y)
Each
time
the
key
is
pressed,
playback
and
pause
switch
Press
to
open
or
close
the
disc
tray.
each
other.
About
the
STANDBY
mode
of
the
POWER
switch
When
the
power
cord
of
this unit
is
plugged
into
an
AC
outlet,
a
small
amount
of
current
is
being
supplied
to
the
unit
even
when
the
power
is
turned
off.
This
is
called
the
STANDBY
mode.
1O50CD/104CD/103CD
(En)
8
vperauul
ul
remote
Control
unit
(Except
tor
1U3UD)
KENWOOD
DISC
SELECTOR
keys
([1]|
~
)
RANDOM
key
|
|
|
is)
REPEAT
key
l
2+—,——
DISC
SKIP
key
P.
MODE
key
|
TIME
DISPLAY
ke
|
y
>
LE
=e
pguhietic
kaya
ts
haa)
Stop
key
(mp)
Co
on
Play/Pause
key
(>:
11)
el]
[
Skip keys
(a4,
mp1)
*
OUTPUT
level
keys
(DOWN,
UP)
REMOTE
CONTROL
4
AC-POSO4
—==——b—
Search
keys
(<4,
p>e)
Model:
RC-P0504
Infrared
ray
system
The
keys
with
the
same
name
as
those
on
the
main
unit
operate
the
same
way
as
the
main
unit.
@
Loading
batteries
The
*-marked
keys
are
only
on
the
remote
control
unit.
1
Remove
the
cover.
Remote
control
ight
sensor
2
Insert
batteries.
Insert
two
AA-size
(R6/SUM-3}
batteries
as
indicated
by
the
polarity
marking.
Approx.
operating
range
3
Close
the
cover.
@When
two
operation
keys
on
the
remote
control
unit
are
pressed
successively,
press
each
key
securely
reserving
an
interval
of
more
than
1
second
for
each
press.
Notes:
1.
The
supplied
batteries
are
intended
for
use
in
operation
checks.
Therefore,
their
lives
may
be
shorter than
ordinary
batteries,
2.
When
the
remote-controllable
distance
gets
shorter
than
before,
replace
both
batteries
with
new
ones.
3.
Malfunction
may
occur
if
direct
Sunlight
or
the
light
of
a
high-frequency
lighting
fluorescent
lam
Pp
enters
the
remote
contro!
light
sensor.
In
such
a
case,
change
the
system
installation
position
to
prevent
the
malfunction.
10
ios0cps10acps103cD
(En)