manuals.online logo
Brands
  1. Home
  2. •
  3. Brands
  4. •
  5. Kenwood
  6. •
  7. Transceiver
  8. •
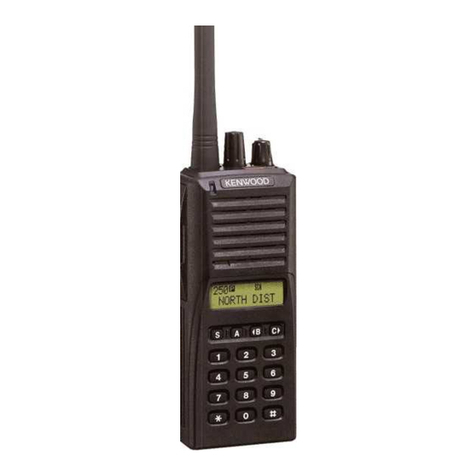
  9. Kenwood TK-3000 User manual

Kenwood TK-3000 User manual

Other manuals for TK-3000

4

This manual suits for next models

5

Other Kenwood Transceiver manuals

Kenwood TK-840 User manual

Kenwood

Kenwood TK-840 User manual

Kenwood TS-770 User manual

Kenwood

Kenwood TS-770 User manual

Kenwood TH-K2AT User manual

Kenwood

Kenwood TH-K2AT User manual

Kenwood TM-2550A User manual

Kenwood

Kenwood TM-2550A User manual

Kenwood TK-5210 User manual

Kenwood

Kenwood TK-5210 User manual

Kenwood TS-590SG User manual

Kenwood

Kenwood TS-590SG User manual

Kenwood TK-3360 User manual

Kenwood

Kenwood TK-3360 User manual

Kenwood TS-850S User manual

Kenwood

Kenwood TS-850S User manual

Kenwood TK-3601D-E User manual

Kenwood

Kenwood TK-3601D-E User manual

Kenwood TS-990SE Owner's manual

Kenwood

Kenwood TS-990SE Owner's manual

Kenwood TK-863G User manual

Kenwood

Kenwood TK-863G User manual

Kenwood TM-201A User manual

Kenwood

Kenwood TM-201A User manual

Kenwood TS-130S User manual

Kenwood

Kenwood TS-130S User manual

Kenwood TK-P721 User manual

Kenwood

Kenwood TK-P721 User manual

Kenwood TS-480HX User manual

Kenwood

Kenwood TS-480HX User manual

Kenwood TK-8102 User manual

Kenwood

Kenwood TK-8102 User manual

Kenwood TK-5810-K2 User manual

Kenwood

Kenwood TK-5810-K2 User manual

Kenwood TK-3402 User manual

Kenwood

Kenwood TK-3402 User manual

Kenwood TK-90 User manual

Kenwood

Kenwood TK-90 User manual

Kenwood TM-241A User manual

Kenwood

Kenwood TM-241A User manual

Kenwood TS-890S User manual

Kenwood

Kenwood TS-890S User manual

Kenwood TR-7625 User manual

Kenwood

Kenwood TR-7625 User manual

Kenwood TK-3180 User manual

Kenwood

Kenwood TK-3180 User manual

Kenwood ProTalk TK-3401D User manual

Kenwood

Kenwood ProTalk TK-3401D User manual

Popular Transceiver manuals by other brands

City Theatrical SHoW DMX SHoW Baby user manual

City Theatrical

City Theatrical SHoW DMX SHoW Baby user manual

Standart Horizont HX407 owner's manual

Standart Horizont

Standart Horizont HX407 owner's manual

B&G V90S quick start guide

B&G

B&G V90S quick start guide

VictelGlobal ALK300 series Operation manual

VictelGlobal

VictelGlobal ALK300 series Operation manual

Cactus Wireless Flash Transceiver V6 user manual

Cactus

Cactus Wireless Flash Transceiver V6 user manual

Yaesu FT-11R user guide

Yaesu

Yaesu FT-11R user guide

Skanti TRP 5000 instruction manual

Skanti

Skanti TRP 5000 instruction manual

ELECRAFT KX3 Installation and operation guide

ELECRAFT

ELECRAFT KX3 Installation and operation guide

American Lighting DMX512 quick start guide

American Lighting

American Lighting DMX512 quick start guide

Furuno FM-77 Operator's handbook

Furuno

Furuno FM-77 Operator's handbook

Yaesu FT-7B manual

Yaesu

Yaesu FT-7B manual

Mizuho MX-2 Operating & assembly instruction

Mizuho

Mizuho MX-2 Operating & assembly instruction

Blitz MJ-398U instruction manual

Blitz

Blitz MJ-398U instruction manual

Utilicom LongRanger 2050 Operator's manual

Utilicom

Utilicom LongRanger 2050 Operator's manual

Standart HX290UKA Service manual

Standart

Standart HX290UKA Service manual

Altronix Pace1PTM installation guide

Altronix

Altronix Pace1PTM installation guide

Kirisun PT2208 instruction manual

Kirisun

Kirisun PT2208 instruction manual

ELECRAFT KX2 manual

ELECRAFT

ELECRAFT KX2 manual

manuals.online logo
manuals.online logoBrands
  • About & Mission
  • Contact us
  • Privacy Policy
  • Terms and Conditions

Copyright 2025 Manuals.Online. All Rights Reserved.

INSTRUCTION MANUAL
B62‑2418‑30 (E, T)
Thank You
We are grateful you have chosen KENWOOD for your land mobile radio applications.
noTices To The user
◆Government law prohibits the operation of unlicensed radio transmitters within the territories under
government control.
◆Illegal operation is punishable by fine and/or imprisonment.
◆Refer service to qualified technicians only.
Safety: It is important that the operator is aware of, and understands, hazards common to the
operation of any transceiver.
PrecauTions
• Donotchargethetransceiverandbatterypackwhentheyarewet.
• Ensurethattherearenometallicitemslocatedbetweenthetransceiverandthebatterypack.
• DonotuseoptionsnotspeciedbyKENWOOD.
• Ifthedie-castchassisorothertransceiverpartisdamaged,donottouchthedamagedparts.
• Ifaheadsetorheadphoneisconnectedtothetransceiver,reducethetransceivervolume.Pay
attention to the volume level when turning the squelch off.
• Donotplacethemicrophonecablearoundyourneckwhilenearmachinerythatmaycatchthe
cable.
• Donotplacethetransceiveronunstablesurfaces.
• Ensurethattheendoftheantennadoesnottouchyoureyes.
• Whenthetransceiverisusedfortransmissionformanyhours,theradiatorandchassiswillbecome
hot.Donottouchtheselocationswhenreplacingthebatterypack.
• Donotimmersethetransceiverinwater.
• Alwaysswitchthetransceiverpoweroffbeforeinstallingoptionalaccessories.
• Forsafetyreasons,werecommendthattheACadapter(forthebatterycharger)shouldbe
connectedtoaneasilyaccessibleACsocket.
Turn the transceiver power off in the following locations:
• Inexplosiveatmospheres(inammablegas,dustparticles,metallicpowders,grainpowders,etc.).
• Whiletakingonfuelorwhileparkedatgasolineservicestations.
• Nearexplosivesorblastingsites.
• Inaircrafts.(Anyuseofthetransceivermustfollowtheinstructionsandregulationsprovidedbythe
airline crew.)
• Whererestrictionsorwarningsarepostedregardingtheuseofradiodevices,includingbutnot
limited to medical facilities.
• Nearpersonsusingpacemakers.
• Donotdisassembleormodifythetransceiverforanyreason.
• Donotplacethetransceiveronornearairbagequipmentwhilethevehicleisrunning.Whenthe
airbaginates,thetransceivermaybeejectedandstrikethedriverorpassengers.
• Donottransmitwhiletouchingtheantennaterminalorifanymetallicpartsareexposedfromthe
antenna covering. Transmitting at such a time may result in a high‑frequency burn.
• Ifanabnormalodororsmokeisdetectedcomingfromthetransceiver,switchthetransceiverpower
offimmediately,removethebatterypackfromthetransceiver,andcontactyourKENWOOD dealer.
• Useofthetransceiverwhileyouaredrivingmaybeagainsttrafclaws.Pleasecheckandobserve
the vehicle regulations in your area.
• Donotexposethetransceivertoextremelyhotorcoldconditions.
• Donotcarrythebatterypackwithmetalobjects,astheymayshortthebatteryterminals.
• Dangerofexplosionifthebatteryisincorrectlyreplaced;replaceonlywiththesametype.
• Whenoperatingthetransceiverinareaswheretheairisdry,itiseasytobuildupanelectriccharge
(static electricity). When using a earphone accessory in such conditions, it is possible for the
transceivertosendanelectricshockthroughtheearphoneandtoyourear.Werecommendyou
useonlyaspeaker/microphoneintheseconditions,toavoidelectricshocks.
Information concerning the battery pack:
Thebatterypackincludesammableobjectssuchasorganicsolvent.Mishandlingmaycause
thebatterytoruptureproducingamesorextremeheat,deteriorate,orcauseotherformsof
damagetothebattery.Pleaseobservethefollowingprohibitivematters.
• Do not disassemble or reconstruct battery!
 Thebatterypackhasasafetyfunctionandprotectioncircuittoavoiddanger.Iftheysufferserious
damage,thebatterymaygenerateheatorsmoke,rupture,orburstintoame.
• Do not short-circuit the battery!
 Donotjointhe+and–terminalsusinganyformofmetal(suchasapapercliporwire).Donotcarryor
storethebatterypackincontainersholdingmetalobjects(suchaswires,chain-necklaceorhairpins).
Ifthebatterypackisshort-circuited,excessivecurrentwillowandthebatterymaygenerateheator
smoke,rupture,orburstintoame.Itwillalsocausemetalobjectstoheatup.
• Do not incinerate or apply heat to the battery!
If the insulator is melted, the gas release vent or safety function is damaged, or the electrolyte is
ignited,thebatterymaygenerateheatorsmoke,rupture,orburstintoame.
• Do not leave the battery near fire, stoves, or other heat generators (areas reaching over
80°C)!
If the polymer separator is melted due to high temperature, an internal short‑circuit may occur in the
individualcellsandthebatterymaygenerateheatorsmoke,rupture,orburstintoame.
• Do not immerse the battery in water or get it wet by other means!
 Ifthebattery’sprotectioncircuitisdamaged,thebatterymaychargeatextremecurrent(orvoltage)
andanabnormalchemicalreactionmayoccur.Thebatterymaygenerateheatorsmoke,rupture,or
burstintoame.
• Do not charge the battery near fire or under direct sunlight!
 Ifthebattery’sprotectioncircuitisdamaged,thebatterymaychargeatextremecurrent(orvoltage)
andanabnormalchemicalreactionmayoccur.Thebatterymaygenerateheatorsmoke,rupture,or
burstintoame.
• Use only the specified charger and observe charging requirements!
If the battery is charged in unspecified conditions (under high temperature over the regulated
value,excessivehighvoltageorcurrentoverregulatedvalue,orwitharemodeledcharger),itmay
overchargeoranabnormalchemicalreactionmayoccur.Thebatterymaygenerateheatorsmoke,
rupture,orburstintoame.
• Do not pierce the battery with any object, strike it with an instrument, or step on it!
 Thismaybreakordeformthebattery,causingashort-circuit.Thebatterymaygenerateheator
smoke,rupture,orburstintoame.
• Do not jar or throw the battery!
 Animpactmaycausethebatterytoleak,generateheatorsmoke,rupture,and/orburstintoame.
If the battery’s protection circuit is damaged, the battery may charge at an abnormal current (or
voltage),andanabnormalchemicalreactionmayoccur.Thebatterymaygenerateheatorsmoke,
rupture,orburstintoame.
• Do not use the battery pack if it is damaged in any way!
 Thebatterymaygenerateheatorsmoke,rupture,orburstintoame.
• Do not solder directly onto the battery!
If the insulator is melted or the gas release vent or safety function is damaged, the battery may
generateheatorsmoke,rupture,orburstintoame.
• Do not reverse the battery polarity (and terminals)!
When charging a reversed battery, an abnormal chemical reaction may occur. In some cases, an
unexpectedlargeamountofcurrentmayowupondischarging.Thebatterymaygenerateheator
smoke,rupture,orburstintoame.
• Do not reverse-charge or reverse-connect the battery!
 Thebatterypackhaspositiveandnegativepoles.Ifthebatterypackdoesnotsmoothlyconnect
withachargeroroperatingequipment,donotforceit;checkthepolarityofthebattery.Ifthebattery
packisreverse-connectedtothecharger,itwillbereverse-chargedandanabnormalchemical
reactionmayoccur.Thebatterymaygenerateheatorsmoke,rupture,orburstintoame.
• Do not touch a ruptured and leaking battery!
If the electrolyte liquid from the battery gets into your eyes, wash your eyes with fresh water as soon
as possible, without rubbing your eyes. Go to the hospital immediately. If left untreated, it may cause
eye‑problems.
• Do not charge the battery for longer than the specified time!
 Ifthebatterypackhasnotnishedchargingevenaftertheregulatedtimehaspassed,stopit.The
batterymaygenerateheatorsmoke,rupture,orburstintoame.
• Do not place the battery pack into a microwave or high pressure container!
 Thebatterymaygenerateheatorsmoke,rupture,orburstintoame.
• Keep ruptured and leaking battery packs away from fire!
 Ifthebatterypackisleaking(orthebatteryemitsabadodor),immediatelyremoveitfromammable
areas.Electrolyteleakingfrombatterycaneasilycatchonreandmaycausethebatteryto
generatesmokeorburstintoame.
• Do not use an abnormal battery!
 Ifthebatterypackemitsabadodor,appearstohavedifferentcoloring,isdeformed,orseems
abnormal for any other reason, remove it from the charger or operating equipment and do not use it.
Thebatterymaygenerateheatorsmoke,rupture,orburstintoame.
Firmware Copyrights
ThetitletoandownershipofcopyrightsforrmwareembeddedinKENWOODproductmemoriesare
reservedforJVCKENWOODCorporation.
Information on Disposal of Old Electrical and Electronic Equipment and Batteries (applicable for countries
that have adopted separate waste collection systems)
Products and batteries with the symbol (crossed-out wheeled bin) cannot be disposed as household
waste.
Old electrical and electronic equipment and batteries should be recycled at a facility capable of
handling these items and their waste byproducts.
Contact your local authority for details in locating a recycle facility nearest to you.
Proper recycling and waste disposal will help conserve resources whilst preventing detrimental effects
on our health and the environment.
Notice: The sign “Pb” below the symbol for batteries indicates that this battery contains lead.
NOTIFICATION
ThisequipmentcomplieswiththeessentialrequirementsofDirective2014/53/EU.
Restrictions
This equipment requires a licence and is intended for use in the countries as below.
AT BE DK FI FR DE GR IS IE IT LI
LU NL NO PT ES SE CH GB CY CZ EE
HU LV LT MT PL SK SI BG RO HR TR
ISO3166
VHFFMTRANSCEIVER
TK‑2000
UHFFMTRANSCEIVER
TK‑3000
© 2019
Model Frequency range Max. output power
TK-2000-E TX/RX 136.000 - 174.000 MHz 5 W
TK-2000-T TX/RX 136.000 - 174.000 MHz 5 W
TK-3000-E TX/RX 440.000 - 470.000 MHz 4 W
TK-3000-T TX/RX 440.000 - 470.000 MHz 4 W
unPackinG anD checkinG eQuiPMenT
Carefullyunpackthetransceiver.Ifanyoftheitemslisted
below are missing or damaged, file a claim with the carrier
immediately.
suPPlieD accessories
• Antenna ..................................................................................1
• Batterycharger/ACadapter(KSC-35S) ................................1
• Li-ionBatterypack(KNB-63L)................................................1
• Speaker/microphonejackcover ............................................1
• Beltclip(KBH-18)...................................................................1
• Screw(M3x6mm) ..................................................................... 1
• Instructionmanual ..................................................................1
PreParaTion
insTallinG/ reMovinG The BaTTerY Pack
◆ Donotshortthebatteryterminalsordisposeofthebatteryby
fire.
◆ Neverattempttoremovethecasingfromthebatterypack.
Locklever
1 Toinstallthebatterypack,align
thebaseofthebatterypack
with the transceiver, then press
thebatterypackintoplaceuntil
thelockleverissecure.
Locklever
2 Toremovethebatterypack,
pushthelockleverup,thenpull
thebatterypackawayfromthe
transceiver.
insTallinG The anTenna
Antenna Screw the antenna into the connector
on the top of the transceiver by holding
the antenna at its base and turning it
clockwiseuntilsecure.
Note: The antenna is neither a handle,
akeyringretainer,noraspeaker/
microphone attachment point. Using the
antenna in these ways may damage the
antenna and degrade your transceiver’s
performance.
insTallinG The BelT cliP
Belt clip
1 Removethebatterypack,as
described above.
2T
o install the belt clip, align the
guides of the belt clip with the
grooves on the rear of the battery
pack,thenslidethebeltclipinto
placeuntilthelockleverissecure.
Locklever 3To remove the belt clip, push the
locklevertowardsthetransceiver
while sliding the belt clip up.
insTallinG The cover over The sPeaker/
MicroPhone Jacks
Speaker/microphone
jackcover
Ifyouarenotusingaspeaker/
microphone, install the cover over the
speaker/microphonejacksusingthe
suppliedM3x6mmscrew.
Note:Tokeepthetransceiverwater
resistant,youmustcoverthespeaker/
microphonejackswiththesupplied
cover.
charGinG The BaTTerY Pack
Thebatterypackisnotchargedatthefactory;chargeitbefore
use.
ATTENTION: AlwaysswitchOFFatransceiverequippedwitha
batterypackbeforeinsertingthetransceiverintothecharger.
1 PlugtheACadaptercableinto
thejacklocatedontherearofthe
charger.
2 PlugtheACadapterintoanAC
outlet.
• Ittakesapproximately3hourstochargethebatterypack.
• Whenthechargerwillnotbeusedforalongtime,unplug
the AC adapter from the AC outlet.
Note:
◆When an abnormality occurs during charging, the indicator
performs as follows:
Blinks red: Thebatterypackiseitherdefectiveorthebattery
packcontactsarenotproperlymatedwiththoseofthecharger.
Alternates flashing green and orange: Thebatterypack
has not satisfied the charging start temperature. Remove the
batterypackfromthechargerandwaituntilitreachesanormal
temperature before charging it again.
◆ Theambienttemperatureshouldbebetween5°Cand40°C
while charging is in progress. Charging outside this range may
not fully charge the battery.
◆ Thebatterypacklifeisoverwhenitsoperatingtimedecreases
even though it is fully and correctly charged. Replace the battery
pack.
◆ WhileoperatingthetransceiverusingaLi-ionbatterypack
inareaswithanambienttemperatureof–10°Candlower,
operating time may be shortened.
◆Attention should be drawn to the environmental aspects of
batterypackdisposal.
orienTaTion
Antenna
Microphone
Speaker
BatteryPack
Channel selector
Rotate to change the operating channel.
• Ifyourdealerhassetthe[S-Selector] function,
rotate the Channel selector and select the “S”
position to begin scanning.
LED indicator
 RefertotheLEDIndicatorStatustable.
Power switch/ Volume control
 TurnclockwisetoswitchthetransceiverON.Toswitchthe
transceiverOFF,turncounterclockwiseuntilaclicksounds.
Rotatetoadjustthevolumelevel.
PTT (Push to Talk) switch
 Pressandhold,thenspeakintothemicrophonetotransmit.
Side key
 Presstoactivateitsprogrammablefunction.
Speaker/ microphone jacks
 Insertthespeaker/microphoneorheadsetplugintothis
jack.
ProGraMMaBle auXiliarY FuncTions
Your dealer can program the Side keyeachwithoneofthe
following functions.
■None
No function has been programmed.
■Autodial
DTMFAutodialallowsyoutomakeaprivatecalltoanother
party.
■Monitor
MomentarilypressthiskeytodeactivateQTorDQT
signaling.Pressthekeyagaintoreturntonormaloperation.
■Monitor Momentary
PressandholdthiskeytodeactivateQTorDQTsignaling.
Releasethekeytoreturntonormaloperation.
■Scan
Pressthiskeytostartscanningthetransceiverchannels.
■Squelch Off
Momentarilypressthiskeytohearbackgroundnoise.Press
thekeyagaintoreturntonormaloperation.
■Squelch Off Momentary
Pressandholdthiskeytohearbackgroundnoise.Release
thekeytoreturntonormaloperation.
Basic oPeraTions
1Turn the Power switch/ Volume controlclockwisetoswitch
the transceiver power ON.
• Abeepsoundsifenabledbyyourdealer.
2 Pressthekeyprogrammedwiththe[Monitor] or [Squelch
Off] functiontohearbackgroundnoise,thenrotatethe
Power switch/ Volumecontroltoadjustthevolume.
3Rotate the Channel selector to select your desired channel.
• Whenyoureceiveanappropriatesignal,youwillhearaudio
fromthespeaker.
4 Tomakeacall,pressandholdthePTT switch,thenspeak
intothemicrophoneusingyournormalspeakingvoice.
• Holdthemicrophoneapproximately3to4cm(1.5inches)
from your lips.
Charging slot
Indicator
5Release the PTT switch to receive.
Note: Whenthebatterypackvoltagebecomestoolow,transmission
will stop and an alert tone will sound.
LED Indicator Status
Indicator Color Meaning
Lights red Transmitting
Lights green Receiving a call
Alternates red and
green VOXgainleveladjustmentmode
Blinksred Battery power is low while transmitting
Blinksgreen Scanning
sQuelch level seTTinG
ToadjusttheSquelchLevel,performthefollowingsteps:
1 TurnthetransceiverpowerOFF.
2Rotate the Channel selector to select the “S” position.
3 PressandholdtheSidekeywhileturningthetransceiver
power ON.
4Continue to hold the Sidekeyuntilabeepsounds.
• TheLEDindicatoralternatesbetweenredandgreen.
5Release the Sidekey.
6Rotate the Channelselectorclockwisetoincreasethe
Squelchlevelandcounterclockwisetodecreasethe
Squelch level.
• TheSquelchlevelcanbeadjustedfromlevels1to9.The
higher the level, the stronger the signals must be to receive.
• Anerrorwilloccurwhenselectingthe“10”~“S”positions.
7 PressandholdtheSidekeyfor2secondstosavethe
setting.
• Abeepwillsound.
8 TurnthetransceiverpowerOFFandthenONagainto
activate the new settings.
voice oPeraTeD TransMission (voX)
VOX operation allows you to transmit hands‑free. This feature
can be activated or deactivated by your dealer.
To activate VOX and set the VOX Gain level, perform the
following steps:
1Connect the headset to the transceiver .
• TheVOXfunctiondoesnotactivatewhenaheadsetisnot
connected to the accessory terminal of the transceiver.
2Rotate the Channel selector to select any position other
than “S”.
3 WiththetransceiverpowerOFF,pressandholdtheSide
keywhileturningthetransceiverpowerON.
4Continue to hold the Sidekeyuntilabeepsounds.
• TheLEDindicatoralternatesbetweenredandgreen.
5Release the Sidekey.
6Rotate the ChannelselectorclockwisetoincreasetheVOX
gainlevelandcounterclockwisetodecreasetheVOXgain
level.
• TheVOXGaincanbeadjustedfromlevels1to10andOFF
(selectthe“11”~“S”position).
• Whilespeakingintothetransceiver,theLEDwilllight
orange when you reach a VOX gain level that recognizes
your voice.
7 PressandholdtheSidekeyfor2secondstosavethe
setting.
• Abeepwillsound.
8 TurnthetransceiverpowerOFFandthenONagainto
activate VOX.
Note: If a headset is connected to the transceiver while the VOX
function is switched ON and the VOX Gain level is configured to a
higher, more sensitive level, louder received signals may cause the
transceiver to start transmission.
BackGrounD oPeraTions
TiMe-ouT TiMer (ToT)
The Time‑out Timer prevents callers from using a channel for an
extendedduration.Ifyoucontinuouslytransmitfortheduration
programmed by your dealer (default is 1 minute), transmission
will stop and an alert tone will sound. To stop the tone, release
the PTT switch.
BaTTerY saver
When activated by your dealer, the Battery Saver function
decreases the amount of power used after no signal is present
andnooperationsarebeingperformedfor5seconds.Whena
signal is received or an operation is performed, Battery Saver
turns off.
Note: WhiletheBatterySaverisoperating,theLEDmayash
greenwhenreceivingaQT/DQTsignalwhichdoesnotmatchthe
QT/DQTtone/codesetupinyourtransceiver.
low BaTTerY warninG
While operating the transceiver, the Low Battery Warning
soundsanalerttoneevery30secondsandtheLEDindicator
blinksredwhenthebatteryneedsrechargedorreplaced.
BusY channel lockouT (Bcl)
When activated, BCL prevents you from interfering on a
channelthatisalreadyinuse.PressingthePTT switch will
cause an alert tone to sound and the transceiver will not
transmit. Release the PTT switch to stop the tone.
Note: AskyourdealerforanexplanationonhowBCLfunctions
whenusingQTorDQTsignaling.
QT/ DQT siGnalinG
QT/DQTisusedtosegregatetalkgroups,sousersonlyhear
calls from their own group.
3 Slideabatterypackora
transceiver equipped with a
batterypackintothecharging
slot of the charger.
• Makesurethemetal
contactsofthebatterypack
mate securely with the
charger terminals.
• Theindicatorlightsredand
charging begins.
4When charging is completed,
theindicatorashinggreen.
Removethebatterypack
or the transceiver from the
charging slot of the charger.