4 YKI-01-BA-e-2111
3 Connecting the adapter
After unpacking the adapter, you should decide how the adapter is to be mounted. If you
wish to lay the adapter flat on a table, please attach the adhesive feet to the underside of
the adapter.
The enclosed “Quick Installation Guide” contains descriptions of other assembly options.
The adapter can then be connected to the measuring device and the network. Please
proceed as follows:
⇒Connect the mains adapter to the mains power (plug socket) and to the adapter.
Make sure the “Ready” LED is illuminated.
⇒Connect the adapter to a network using a standard Ethernet network cable. When
connecting to a network-enabled device (such as a computer) a so-called cross-
over cable must be used. During network activity, the “Link” LED should flash
green.
⇒Connect the RS-232 port of the device (scales, dynamometer...) to the
RS-232 port of the adapter using an appropriate interface cable.
After connecting the hardware, the device must now be configured appropriately.
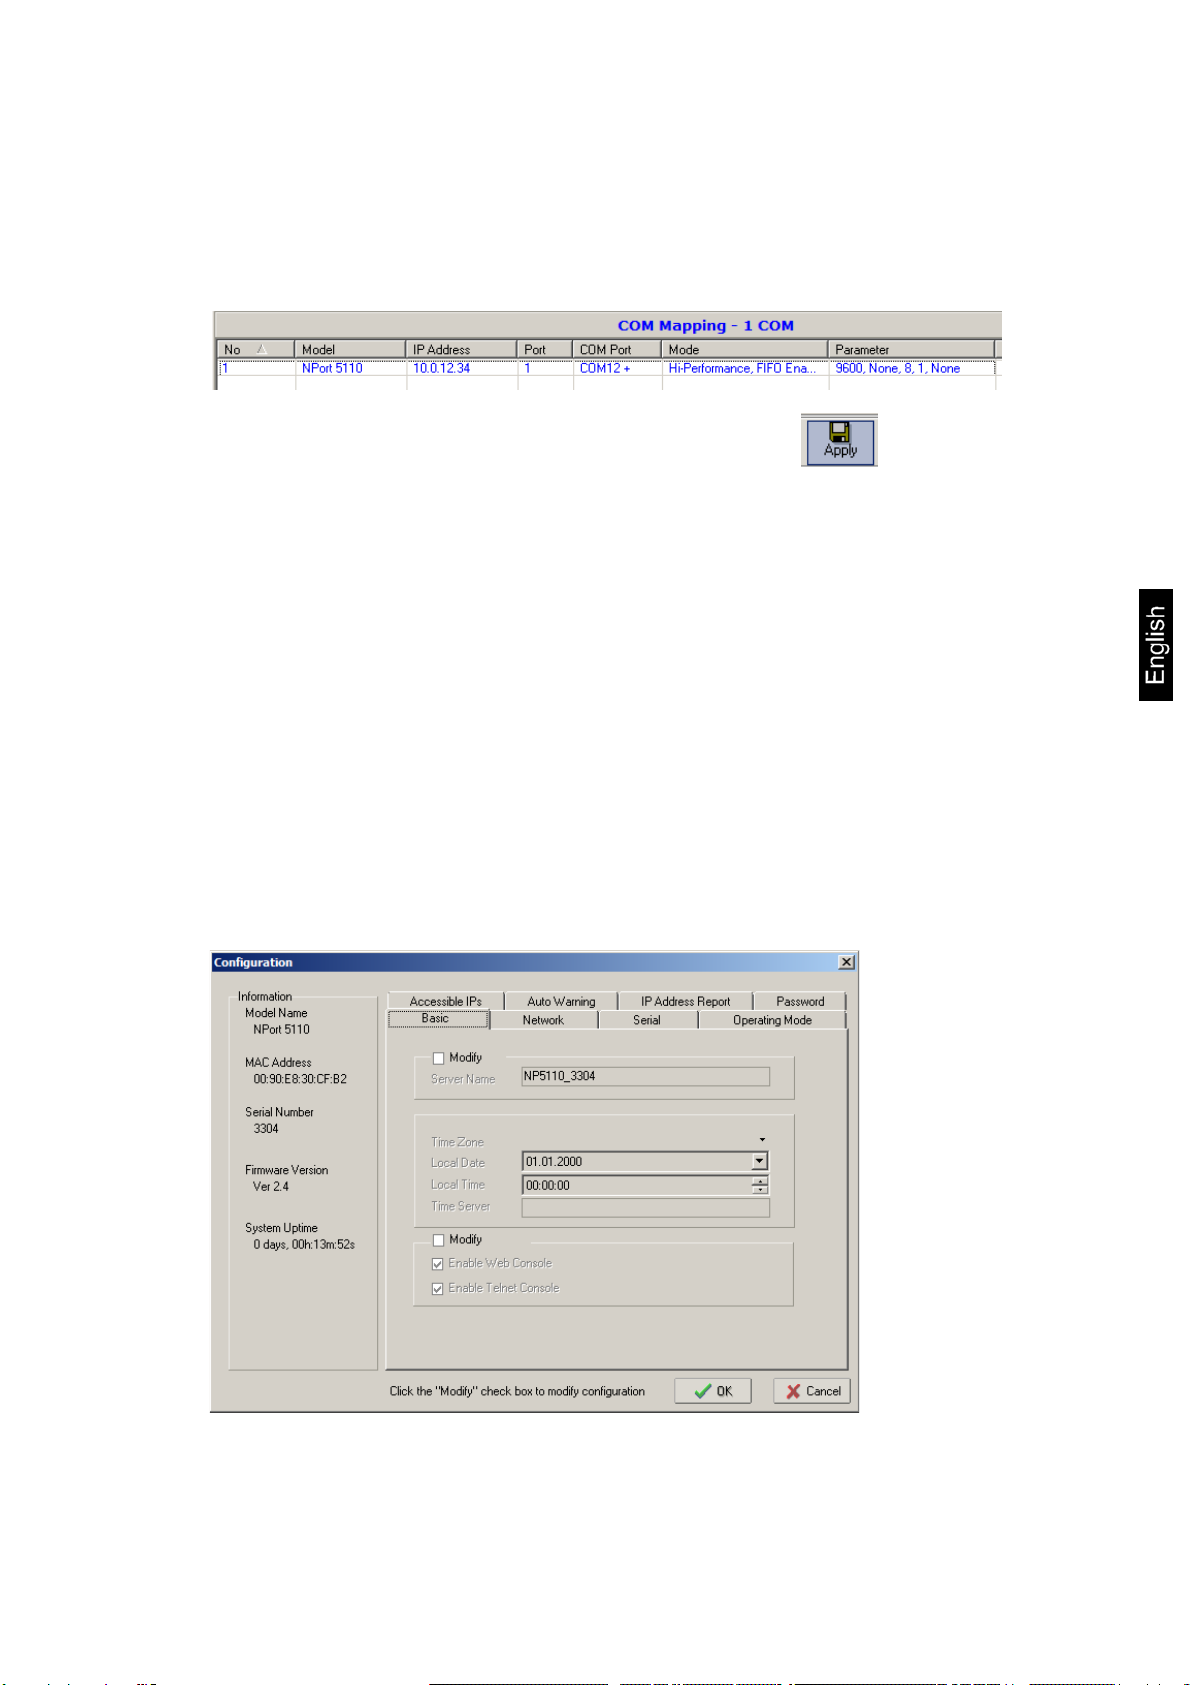
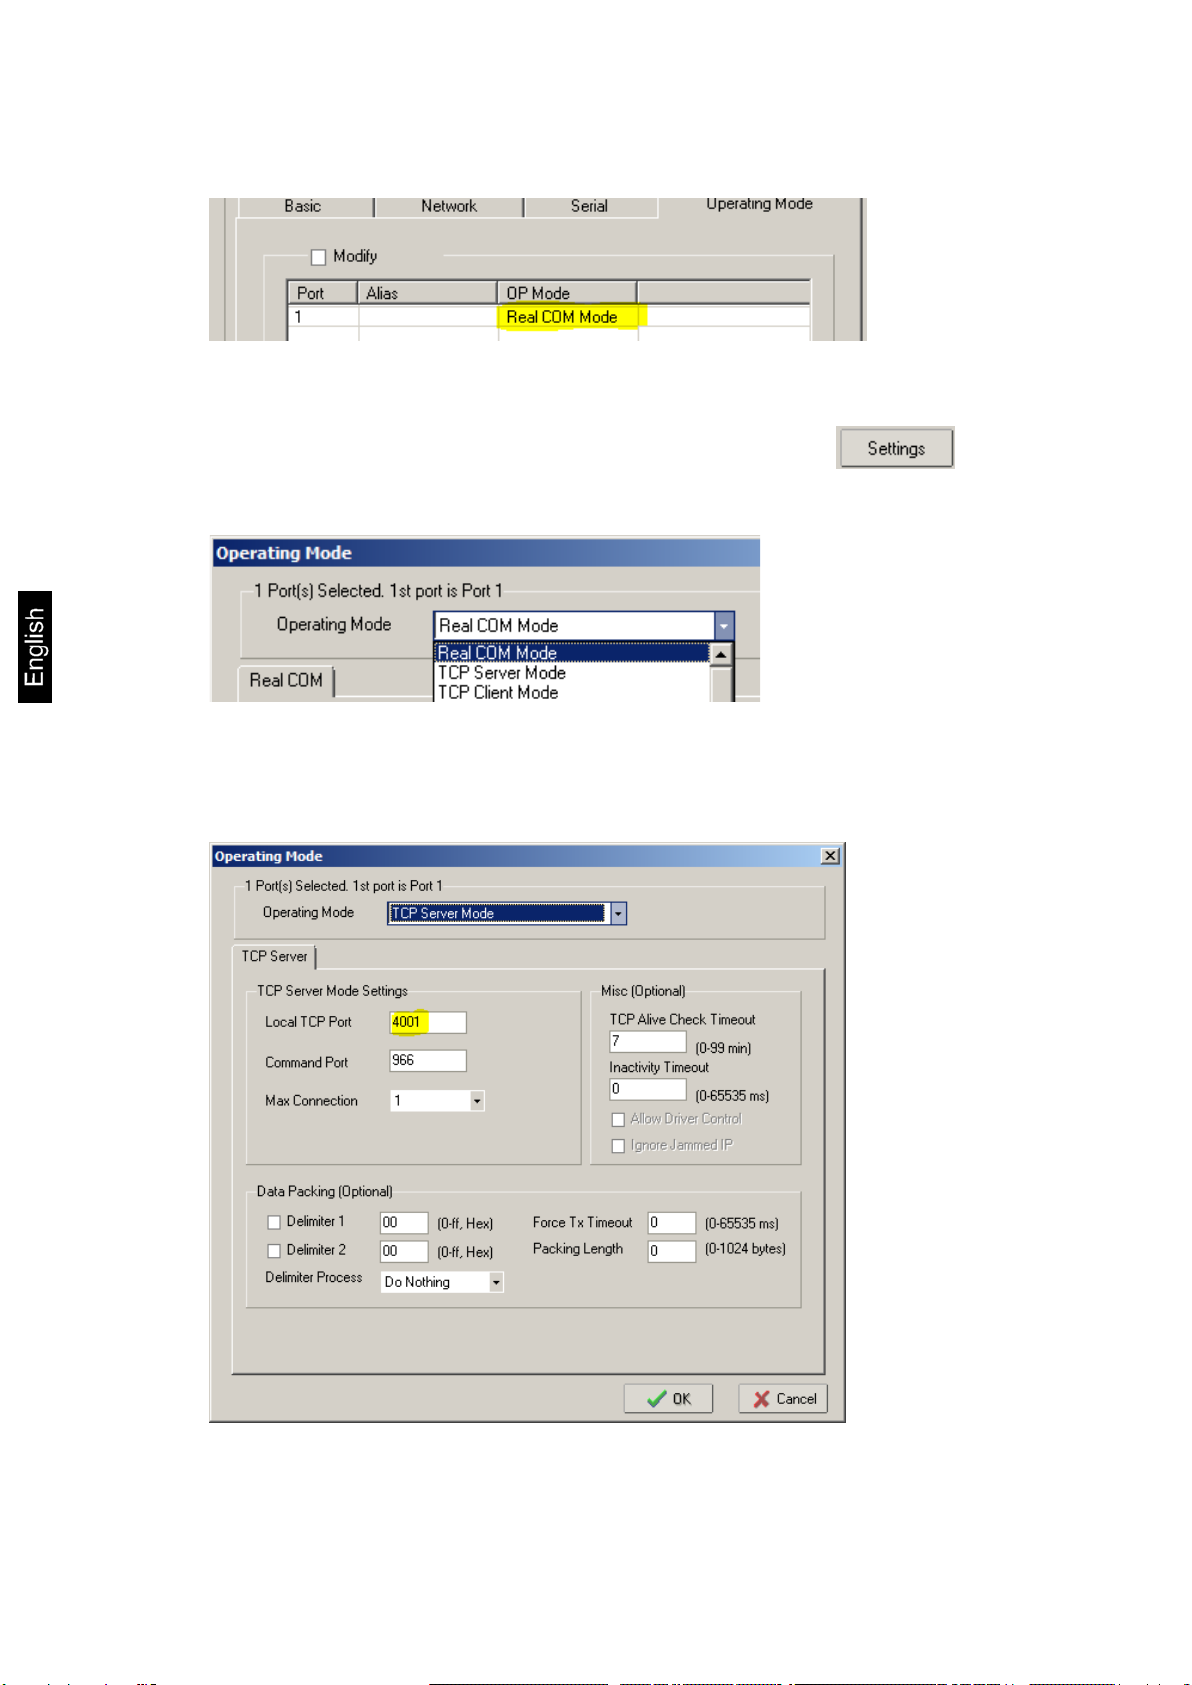
4 Configuration
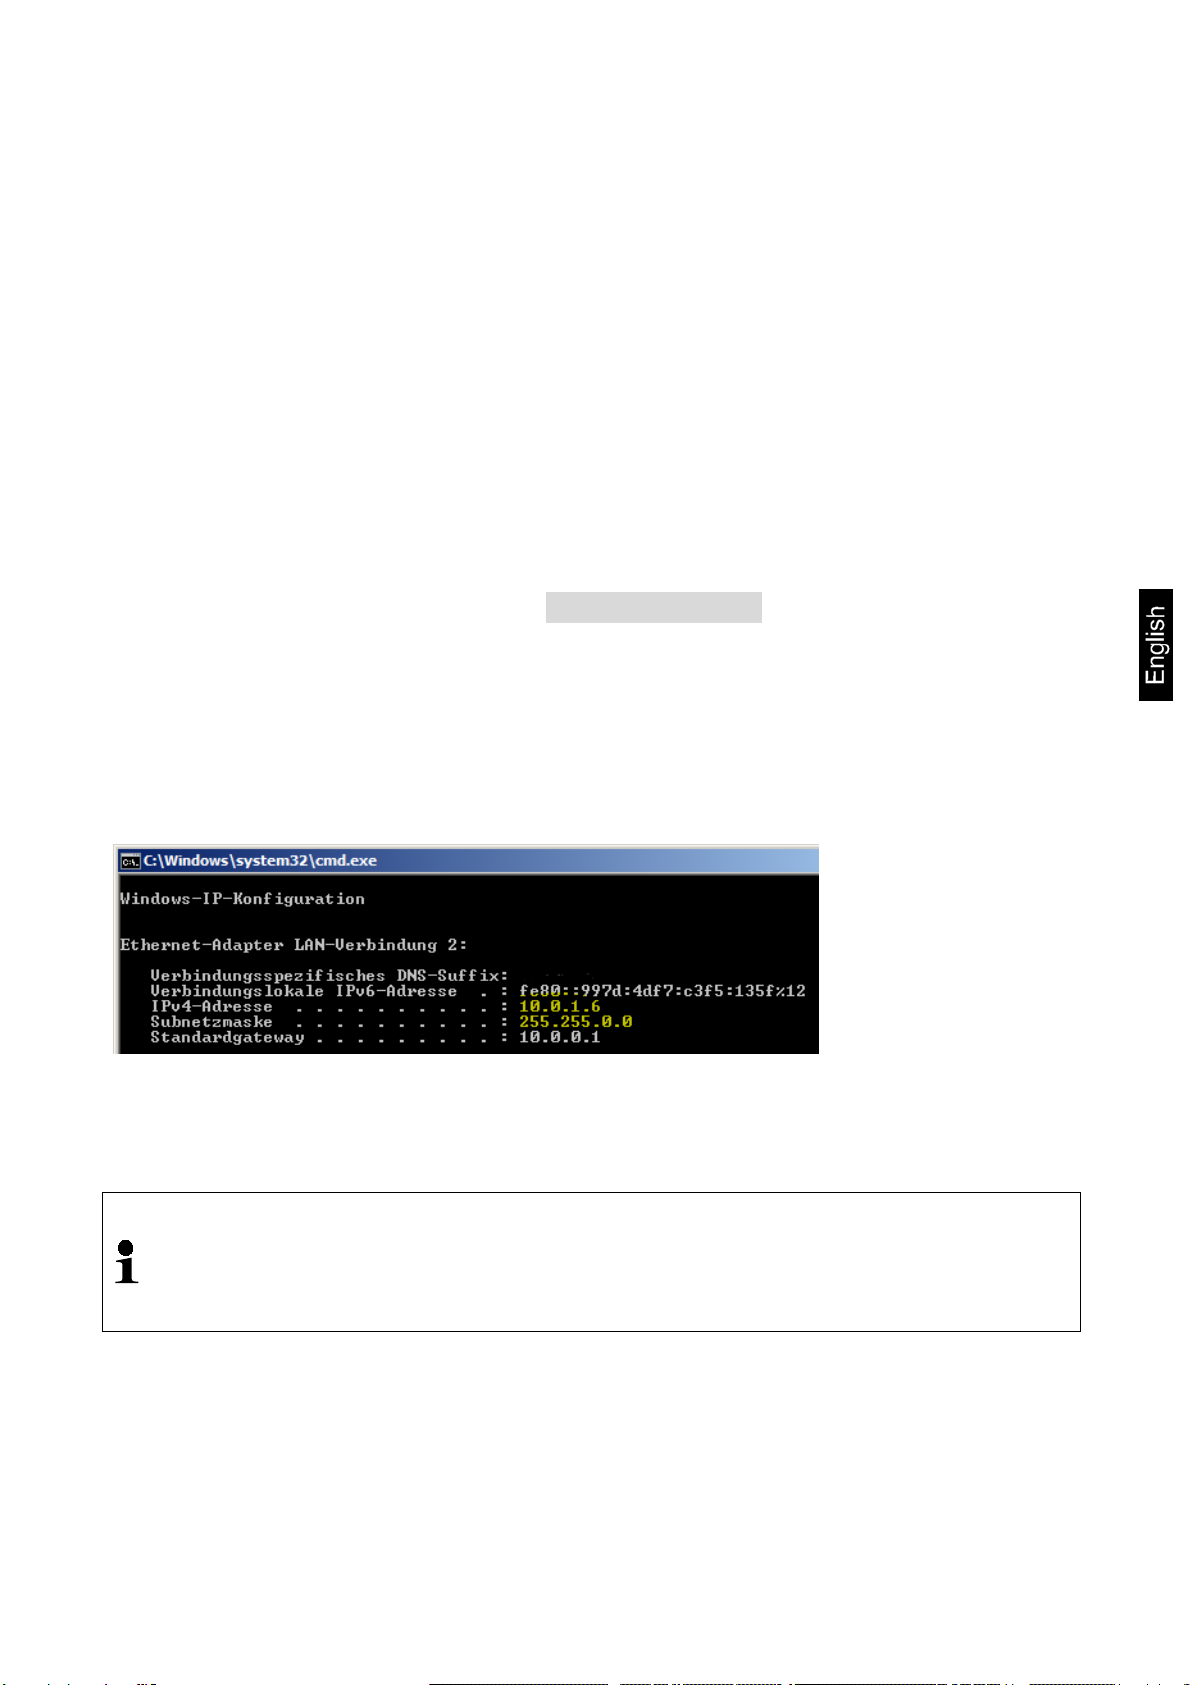
Configuration of the adapter can be carried out in several ways. The following description
explains the steps for configuration over a network for Microsoft Windows with the help of
the web interface integrated into the adapter. A static IP address is assigned.
Other methods (Telnet, RS-232, ARP) are to be found in the complete instructions,
download from website:
https://www.moxa.com/support/support_home.aspx?isSearchShow=1
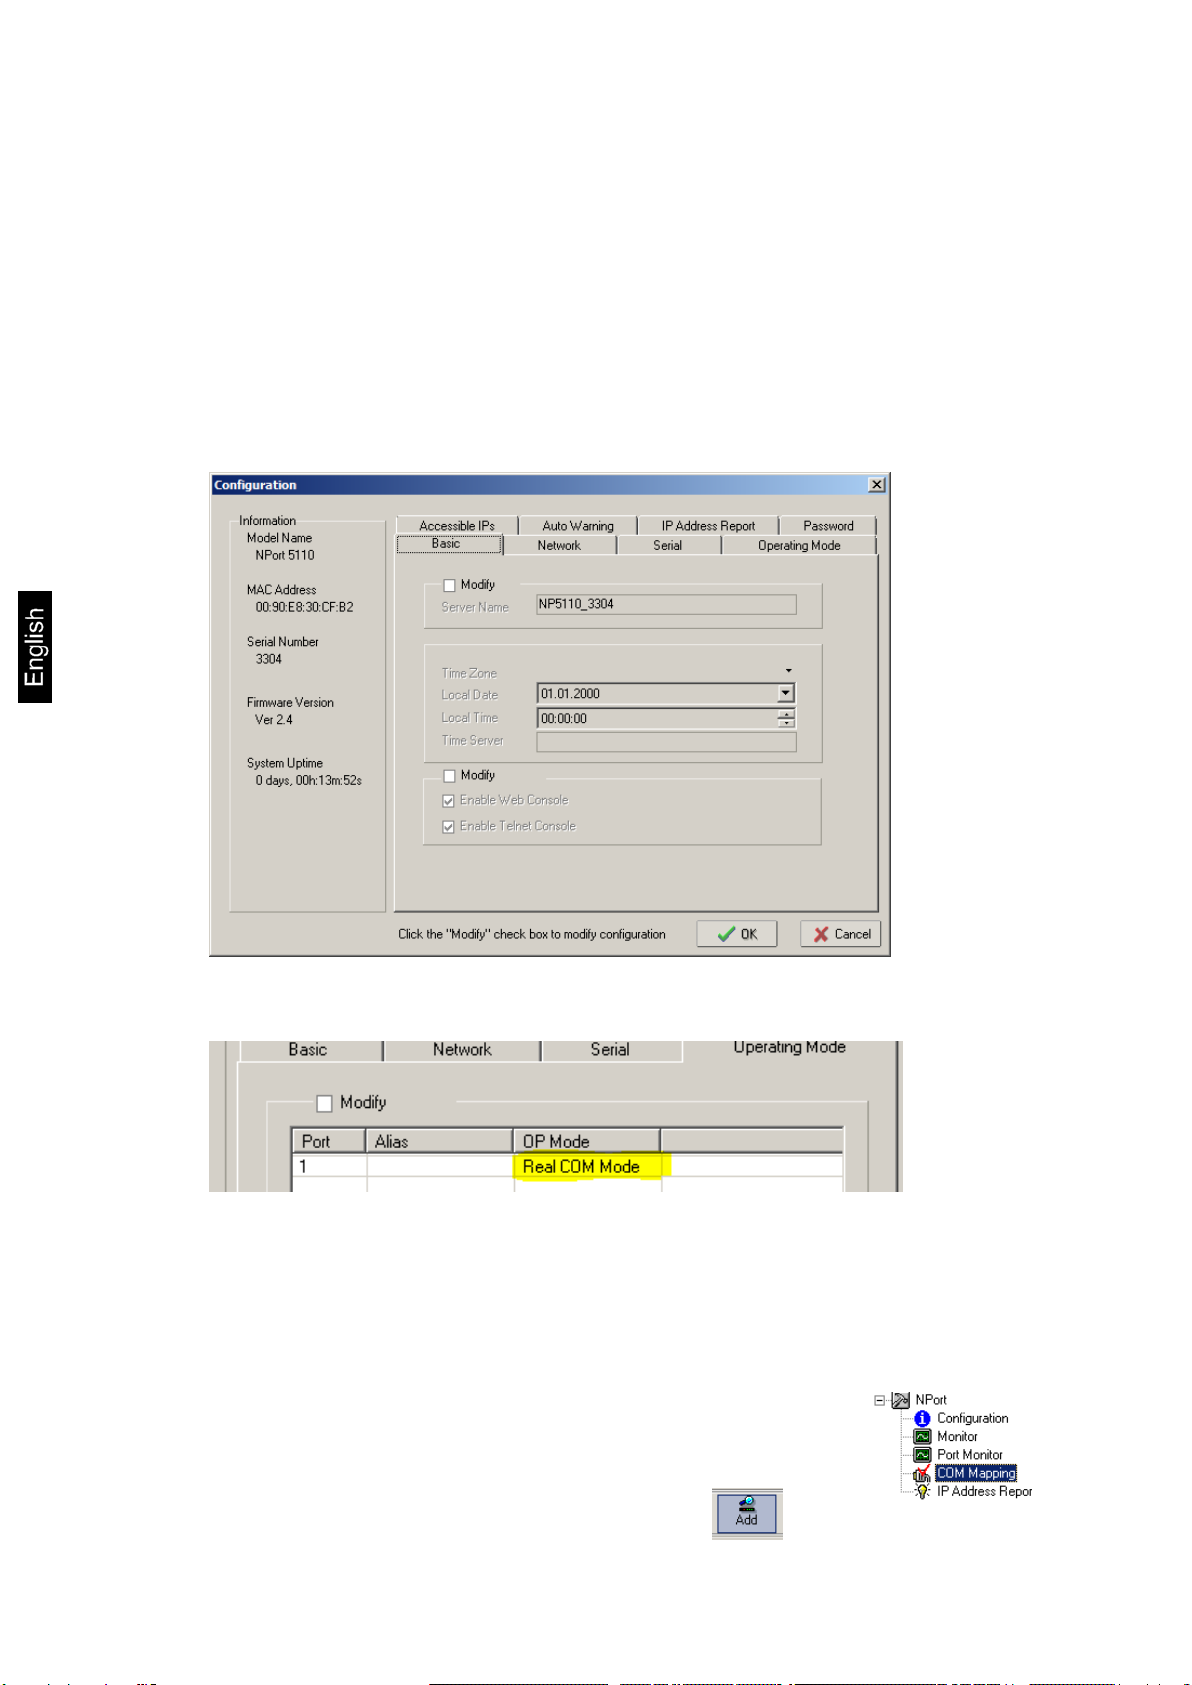
4.1 Software Installation
To use the virtual COM port feature, the required driver has to be installed on the
computer accessing the device. It is included in the software „NPort Windows Driver
Manager”. The following steps install this software on your computer.
Download from website:
https://www.moxa.com/support/support_home.aspx?isSearchShow=1
⇒Extract and run the executable file (exe) you will find there.
Installation requires administrator privileges.
⇒Confirm the installation dialogue boxes with “Next”.
Finish installation.