Kestrel 5 Series User manual

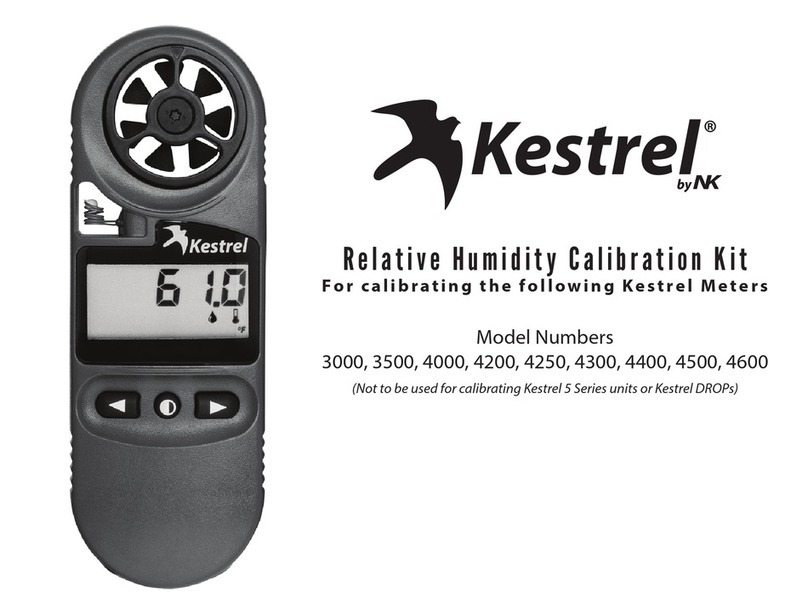
Relative Humidity Calibration Kit
For calibrating the following Kestrel Meters
Kestrel 5 Series, 4 Series and Kestrel 3000-3500 Series
(Kestrel DROPs currently cannot be recalibrated)
Kestrelinstruments.com 800.784.4221

2
©2019 Nielsen Kellerman Co. Kestrel, the Kestrel bird, NK, Nielsen-Kellerman and the
NK logo are registered trademarks of the Nielsen-Kellerman company.
Please refer to Standard Practice for maintaining Constant Relative Humidity by Means
of Aqueous Solutions ASTM Designation E104-85 (reapproved 1996) for additional
information.
●●●●●
While the calibration process is simple, it is important that you follow the
steps carefully. A careless calibration could enter incorrect values into the
unit and degrade its performance.
●●●●●

3
Factory Recalibration / Certication
The Kestrel should be recalibrated if the RH sensor has shown drift in its RH measurement. The Kestrel RH
sensor is specied to develop less than 2% drift over 24 months. You may return your Kestrel to NK for Factory
Recalibration of the relative humidity and related measurements. Recalibration is available with and without
certication of NIST traceability and calibration stickers. Note that NK can recalibrate and certify any of the
values measured by your Kestrel. Please contact NK for more information about Factory Recalibration and
certication.
RH Factory calibration of Kestrel 5 Series units will return units to within +/-2% accuracy spec.
RH Factory calibration of Kestrel 3000-3500 & 4 Series units will return units to within +/-3% accuracy spec.
Field Recalibration
As an alternative to Factory Recalibration, this kit allows you to perform dozens of humidity recalibrations in
the eld to improve sensor accuracy and address the eects of RH drift. This manual explains in detail all of the
steps for recalibrating your Kestrel’s humidity Sensor. This process will take approximately 50 hours, including
setup and calibration. Ensure that you are performing the calibration in a climate controlled environment such
as a home or oce and make sure your calibration location is not near any windows or air conditioning or heat-
ing vents. Even temperature uctuations as slight as 2 deg F while calibrating can negatively impact accuracy,
so if you are not sure that your calibration environment is stable, place the entire Cal Kit inside an insulated
cooler or if a cooler is not available, wrap it in a thick blanket. Further temperature control can be gained by
placing additional containers of room temperature water inside the cooler or blanket, (gallon jugs work ne).
RH Field calibration of Kestrel 5 Series, 4 Series and 3000-3500 Series units will typically return units to
within +/-3% accuracy but actual results can vary depending on the user’s ability to control the calibration
environment.
Please read the complete instructions for your unit before
beginning the recalibration of your Kestrel

4
Contents of the Humidity Calibration Kit
»Two jars with color-coded salt chamber labels, plastic spacer grids and sealing lids
»One jar with no spacer grid (for water)
»One vial with magnesium chloride (MgCl) salt and blue color-coded label
»One vial with sodium chloride salt (NaCl)and red color-coded label
»One RH Calibration Kit insulated bag/carry case
»One color-coded labeled measuring cup
Note: Our calibration process has changed. The changes will require more time but will improve relative
humidity calibration accuracy vs. the previous method. Please familiarize yourself with the new process.
Note: Only place one Kestrel unit in each calibration jar at a time. Attempting to calibrate more than one
unit in each jar at the same time will reduce RH calibration accuracy. If you are attempting to calibrate
multiple units the process can be overlapped so that while the rst Kestrel unit is equilibrating in the
second jar, the second Kestrel unit can begin equilibrating in the rst jar.
Note: We have found that when using this Kestrel Relative Humidity Calibration Kit, setting the second
calibration point to 74.0% RH rather than 75.3% as previously recommended produces a more accurate
calibration. This value is specic to calibrating with this kit. If a dierent method is used for generating a
reference RH for calibration, the expected RH value for that method should be used.

5
Preparing the Calibration Salt Solutions
»For your rst use only, you will need to add water to the provided salts to prepare the saturated salt
solutions for the calibration chambers.
»Note that it is important not to cross-contaminate either salt solution with the other salt. For this reason,
every item is color-coded. Make sure to keep red items with red, and blue with blue, throughout the
mixing and calibrating process.
»You will be mixing the salts with water. We recommend distilled water if available, but clean
uncontaminated tap water will not measurably aect the accuracy of your results.
»For both solutions, your aim is to produce a “slurry”in which you can still see visible grains of salt as well
as a small amount of liquid water above the salt.
1. Open the two labeled jars. Remove the two plastic spacer grids from the jars.
2. Open the sealed vial labeled “Sodium Chloride 74.0% (High)” and empty the salt into the bottom of the
jar with the same label.
3. Fill the small measuring cup to the RED line marked“NaCl” (13 ml.) with distilled or clean tap water.
Add to jar.
4. Using a stirring stick, stir the solution for at least a minute. Please do not shake jar to stir as this will
deposit salts on the side of the jar, aecting the overall solution. Observe the consistency. If necessary,
add a few drops of water to achieve the desired slurry consistency, and stir some more.
5. Place the lid with the same label on the jar and tighten securely.
6. Repeat for the Magnesium Chloride 32.80% (Low) solution, lling the measuring cup to the BLUE line
marked MgCl (5 ml.) and using the BLUE color-coded supplies. You may need to use a stirring stick to
scrape the salt out of the vial or bag.

6
7. Make sure not to pour in more than 5 ml. of water! It is better to start with slightly less water, and add it
a drop at a time, as this solution tends to absorb water quickly and become too wet.
8. Return the two plastic spacer grids to their jars so the feet sit down in the salt slurry.
9. Fill the empty third jar with room temperature water.
10. For Kestrel 4 and 5 Series units, remove the lanyard.
11. For Kestrel 3000-3500 Series units, remove the lanyard keeper and slide the protective case o the
lanyard. Fold the lanyard a couple times to shorten it and ax with a small rubber band so that the full
lanyard length is shorter than the Kestrel 3000-3500 body and that the lanyard cannot come in contact
with the salt solution when the unit is placed upside down in the jar.
12. Only calibrate one Kestrel unit in the jar at a time. Attempting to calibrate more than one unit at a time
will reduce RH calibration accuracy.
Note: The plastic spacers should not be used for the calibration of the Kestrel 4400/4600 and 5400 as they
will not t. When placing the Kestrel 4400/4600 or 5400 in the jar, inserting it upside down is recommended.
The black globe is more easily cleaned when transferred from one salt jar to the next than the bottom of the
Kestrel.
Note: The salt solutions will tend to change over time. The NaCL solution will tend to dry out, and the MgCl
solution will tend to pull humidity from the air and get too wet. For this reason, keep the lids securely closed
on the calibration chambers except when opening them to load a unit for calibration. You may add drops
of water to the NaCl solution to return it to the proper“slurry” consistency if required. You may also place
the MgCl solution in a clean pan in a slow oven to dry it if it becomes too wet, or you may simply purchase
replacement salt jar and remix the solutions from scratch.

7
Setting up the Relative Humidity Recalibration
Routine for Kestrel 5 Series units.
1. Check the battery status on the start-up screen. If the battery indicator does not show near full
battery life remaining, replace the battery with a new Lithium AA battery.
2. Enter the main menu by pressing the gear button in the upper left. Scroll to and select System,
then scroll to and select Humidity Cal.
Ensure the calibration settings are set to the values shown below. If needed, use the key pad to
highlight elds and scroll to the correct value.
Cal Period 24 hr
RH Cal Low 32.8%
RH Cal High 74.0%

8
3. Scroll to highlight the ”Start Low” eld and press the center, select button. The words“Start Low” should
be replaced by the word “Running” and a timer counting down from 24 hours. Note the time the “Start
Low” routine was started and plan to move the Kestrel unit to the next jar in 24 hours.
4. Place the Kestrel in the jar marked 32.8% (Low) with the impeller facing down and tightly close the lid
on the jar, then place the jar in the zipper case.
5. Close the zipper case with all three jars inside and if using an additional insulated cooler and water jugs,
place everything inside the larger cooler with the lid closed. Ensure the zipper case remains level so that
the Kestrel unit will maintain it position above the salt.
6. After the 24 hour Low Calibration period, remove the jar marked 32.8% (Low) and ensure the calibration
timer has nished counting down. When the timer is complete the bottom line will say“Start High”.
7. Remove the Kestrel from the jar marked 32.8% (Low) and wipe o any salt or water that may be on the
unit.
8. Scroll to and highlight the“Start High”eld and then press the select button. Open the jar marked
74.0% (High) and quickly place the Kestrel in the new jar with the impeller facing down and then tightly
close the lid and replace the jar in the zipper case.
9. Close the zipper case with all three jars inside and again, if using an additional insulated cooler and
water jugs, place everything inside the larger cooler with the lid closed. Ensure the zipper case remain
level so that the Kestrel unit maintains it position above the salt.
10. Note the time the “Start High”routine was started and plan to remove the Kestrel unit from the second
jar in 24 hours.
11. Once the timer has nished counting down to zero, the calibration is complete. Remove the unit and
wipe o any salt solution and replace the lanyard if desired.

9
Setting up the Relative Humidity Recalibration
Routine for Kestrel 3000-3500 Series units.
Example Recalibration Schedule
Day 1 Day 2 Day 3
8:30am 9:00am 9:00am 10:00am 10:00am 11:00am
Set up
calibration
jars-30min
Begin
equilibration
in 1st jar-24hr
Start 1st jar
calibration
timer - 1 hr
Begin
equilibration
in 2nd jar-24hr
Start 2nd jar
calibration
timer - 1 hr
Complete
Follow the instructions below that pertain to your unit (two or three button models).
Kestrel 3000-3500 (Three-Button)
1. With the unit turned o, press the center and left button at the same time to start the
RH Calibration routine. (If on, the unit can be turned o by holding down the center
button.)
2. With P1 showing, press the center button again to bring up the rst calibration point
value. Scroll till 32.8 is showing, then press the center button.
3. With P2 showing, press the center button again to bring up the second calibration
point value. Scroll till 74.0 is showing, then press the center button.
4. Do not press any additional buttons at this time.

10
Kestrel 3000 (Two-Button)
1. To set to the RH calibration values, with the Kestrel turned on and displaying the Dew Point
measurement (not Relative Humidity), press the On and Mode button at the same time for
approximately 6 seconds. The screen will display P1.
2. With P1 showing, press the On button again to bring up the rst calibration point value.
Adjust the value till 74.0 is showing by pressing Mode to change the value of the ashing
digit and pressing On to move to the next digit. (In Two-Button Kestrel 3000 units, the order
for the high and low calibration jars are reversed from other Kestrel units.) Once the tenths’
and ones’place values are set, press On again to accept the calibration value. (The tenths’
place value cannot be changed.) The screen will display P2.
3. With P2 showing, press the On button again to bring up the second calibration point value.
Using the same method as above, set the value to 32.8, then press the On button.
4. Press Mode till the Kestrel displays the Relative Humidity measurement and do not press
any additional buttons at this time.
5. Place the Kestrel in the 1st jar with the impeller facing down. (For three button Kestrel 3000-3500 Series
units, the 1st jar will be the 32.8% (Low) RH jar. For Two-Button 3000 units the 1st jar will be the 74.0%
(High) jar.) Ensure the lanyard is hanging on the front side of the unit opposite from the RH sensor hole
in the rear. Ensure the lanyard is not in contact with the salt water solution.
4. Close the zipper case with all three jars inside and if using an additional insulated cooler and water jugs,
place everything inside the larger cooler with the lid closed. Ensure the salt jars remain level so that the
Kestrel unit maintains it position above the salt.

11
5. Let the kit sit for at least 24 hours to ensure the temperature within the kit has equilibrated and the
humidity inside the jars has reached the correct levels.
6. After the 24 hour equilibration period, open the 1st jar and while keeping the jar opening covered as
much as possible, quickly remove the Kestrel unit and start the rst calibration period by following the
instructions for your unit.
Kestrel 3000-3500 (Three-Button)
7. With the screen showing C1 press the center button to start a 60 minute countdown. The
screen will ash between C1 and the remaining number of minutes till the rst calibration
measurement is taken. Once complete, the screen will display C2.
Kestrel 3000 (Two-Button)
7. With the Kestrel turned on and in Relative Humidity Mode, press the On and Mode button
at the same time for approximately 6 seconds to start the RH Calibration routine. The screen
will display C1. Press Mode to start the 60 minute timer till the rst calibration measurement
is taken. The screen will ash between C1 and the preprogramed RH calibration value for
60 minutes till the rst calibration measurement is taken. Once complete, the screen will
display C2.
8. Return the Kestrel to the rst jar and after ensuring the lid is closed tightly, return the jars to the zipper
case and if using, return the zipper case to the insulated cooler. Make a note of what time the calibration
routine will end.
9. After the countdown for the rst calibration measurement has ended, remove the Kestrel from the rst
jar and make sure any salt or water is wiped o.

12
10. Move the Kestrel to the 2nd salt jar and make sure that the jar lid is closed tightly. (For three button
Kestrel 3000-3500 Series units, the 2nd jar will be the 74.0% (High) RH jar. For Two-Button 3000 units the
2nd jar will be the 32.8% (Low) jar.) Return the jars to the zipper pouch and if using, into the insulated
cooler as well. Let the kit sit for an additional 24 hour equilibration period.
10. After the 24 hour equilibration period, open the 2nd jar and while keeping the jar opening covered as
much as possible, quickly remove the Kestrel unit and following the instructions below start the second
calibration routine.
Kestrel 3000-3500 (Three-Button)
11. With the screen showing C2, press the center button to start a 60 minute countdown.
The screen will ash between C2 and the remaining number of minutes till the second
calibration measurement is taken.
Kestrel 3000 (Two-Button)
11. With the screen showing C2, press Mode to start a 60 minute countdown. The screen will
ash between C2 and the preprogramed RH calibration value for 60 minutes till the second
calibration measurement is taken.
12. After ensuring the lid is closed tightly, return the jars to the zipper case and if using, return the zipper
case to the insulated cooler. Make a note of what time the calibration routine will end.
13. After the countdown for the second calibration measurement has ended, remove the Kestrel from the
jar.
14. Press the Mode button to return to the normal mode of operation. Wipe or rinse the unit clean. Your
Kestrel is now recalibrated and ready to take accurate measurements

13
Setting up the Relative Humidity Recalibration
Routine for Kestrel 4 Series units.
Example Recalibration Schedule
Day 1 Day 2 Day 3
8:30am 9:00am 9:00am 10:00am 10:00am 11:00am
Set up
calibration
jars-30min
Begin
equilibration
in 1st jar-24hr
Start 1st jar
calibration
timer - 1 hr
Begin
equilibration
in 2nd jar-24hr
Start 2nd jar
calibration
timer - 1 hr
Complete
1. If the battery indicator does not show near full battery life remaining, replace the batteries with
new Lithium AAA batteries.
2. In the main menu select System, then select Humidity Cal. In some older rmware versions,
Humidity Cal is found directly on the main menu.
Ensure the calibration settings are set to the values shown below. If needed, use the key pad to
highlight elds and scroll to the correct value. Set Period to at least 60 minutes. Adding additional
time, (up to 120 min) may improve calibration accuracy.
Period 60 min
RH Point 1 32.8%
RH point 2 74.0%

14
DO NOT PRESS“START 1” AT THIS TIME.
3. Place the Kestrel in the jar marked 32.8% (Low) with the impeller facing down and tightly close the lid
on the jar, then place the jar in the zipper case.
4. Close the zipper case with all three jars inside and if using an additional insulated cooler and water jugs,
place everything inside the larger cooler with the lid closed. Ensure the salt jars remain level so that the
Kestrel unit maintains it position above the salt.
5. Let the kit sit for at least 24 hours to ensure the temperature within the kit has equilibrated and the
humidity inside the jars has reached the correct levels.
6. After the 24 hour equilibration period, open the 1st jar and while keeping the jar opening covered
as much as possible, quickly remove the Kestrel unit and start the rst calibration period by scrolling
to Start 1 in the Humidity Cal menu and pressing Select. Start 1 will change to say Running 1 and the
number of seconds will countdown till the rst calibration measurement is taken.
7. Return the Kestrel to the rst jar and after ensuring the lid is closed tightly, return the jars to the zipper
case and if using, return the zipper case to the insulated cooler. Make a note of what time the
calibration routine will end.
8. After the countdown for the rst calibration measurement has ended, remove the Kestrel from the rst
jar and make sure any salt or water is wiped o. To conrm the rst calibration period is complete check
that the line showing Running 1 is displaying Start 1 again.
9. Move the Kestrel to the 2nd salt jar marked 74.0% (High) and make sure that the jar lid is closed tightly.
Return the jars to the zipper pouch and if using, into the insulated cooler as well. Let the kit sit for an
additional 24 hour equilibration period.

15
10. After the second 24 hour equilibration period, open the 2nd jar and while keeping the jar opening
covered as much as possible, quickly remove the Kestrel unit and start the second calibration routine by
scrolling to Start 2 in the Humidity Cal menu and pressing Select. Start 2 will change to say Running 2
and the number of seconds will countdown till the second calibration measurement is taken.
11. Return the Kestrel to the second jar and after ensuring the lid is closed tightly, return the jars to the
zipper case and if using, return the zipper case to the insulated cooler. Make a note of what time the
calibration routine will end.
12. After the countdown for the second calibration measurement has ended, remove the Kestrel from the
second jar. To conrm the second calibration period is complete check that the line showing Running 2
is displaying Start 2 again.
13. Press the Exit button to return to the normal mode of operation. Wipe or rinse the unit clean. Your
Kestrel is now recalibrated and ready to take accurate measurements.

16
Using the Calibration Kit to Check Your Unit’s Calibration Accuracy
1. Prep the salt jars and Kestrel unit as described in the section titled Preparing the Salt Solutions and
Kestrel for Calibration.
Kestrel 4 & 5 Series Units
2. Set your Kestrel to display Relative Humidity and go into the settings menu and turn o
Auto Shutdown.
3. Place your Kestrel in one of the two salt jars and let it sit for 24 hours inside the insulated
zipper pouch.
4. Remove the salt jar with the Kestrel inside and read the Kestrel’s RH reading on the display
through the jar.
Kestrel 3000-3500 Series Units
2. Set your Kestrel to display Relative Humidity and place it in one of the two salt jars, then let
it sit for 24 hours inside the insulated zipper pouch.
3. Remove the Kestrel from the salt jar quickly turn it on and return it to the jar for 35 more
minutes.
4. After 35 minutes, remove the jar with the Kestrel inside and read the Kestrel’s RH reading on
the display through the jar.
5. Repeat the process in the 2nd jar. If the dierence between the Relative Humidity reading displayed
on the Kestrel and the intended humidity listed on the jar label is outside the accuracy specication for
your unit you should consider recalibrating your Kestrel using the steps outlined in this manual.


Kestrel® Weather and Environmental Meters are
designed and manufactured in the USA
NIELSEN-KELLERMAN
21 Creek Circle, Boothwyn, PA 19061
Phone: (610) 447-1555
Fax: (610) 447-1577
Web: Kestrelinstruments.com
Email: [email protected]
By
319024_3_19.03.05
Please register your Kestrel Meter at www.Kestrelinstruments.com
Other manuals for 5 Series
1
This manual suits for next models
3
Other Kestrel Test Equipment manuals