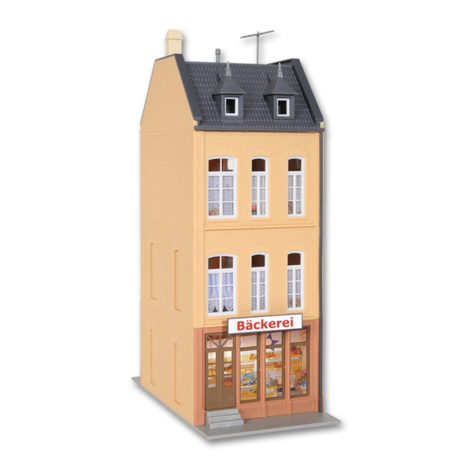
Kibri 38338 User manual

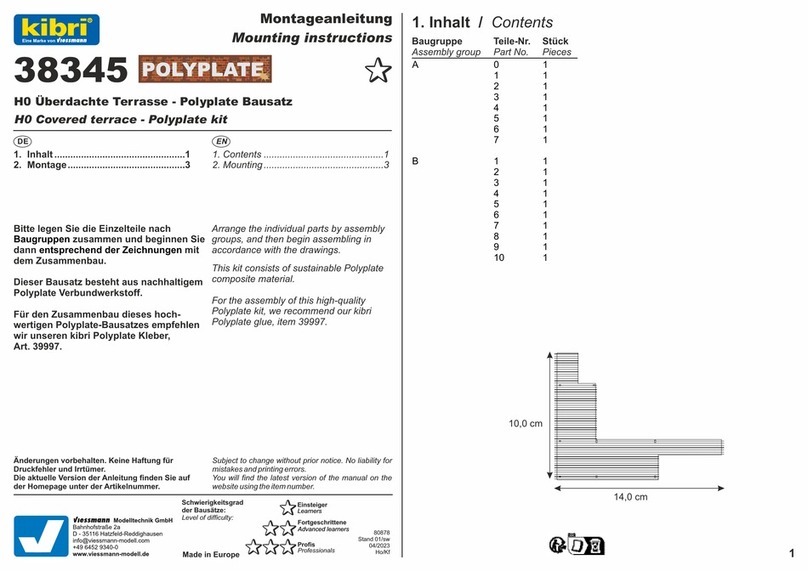
38338
H0 Kubushaus Anna mit Balkon - Polyplate Bausatz
H0 Cube house Anna with balcony - Polyplate kit
80873
Stand 01/sw
04/2023
Ho/Kf 1
DE EN
1. Inhalt .................................................1
4. Montage............................................5
1. Contents.............................................1
4. Mounting .............................................5
Made in Europe
Schwierigkeitsgrad
der Bausätze:
Level of difficulty:
Einsteiger
Learners
Fortgeschrittene
Profis
Professionals
Advanced learners
Bitte legen Sie die Einzelteile nach
Baugruppen zusammen und beginnen Sie
dann mit entsprechend der Zeichnungen
dem Zusammenbau.
Dieser Bausatz besteht aus nachhaltigem
Polyplate Verbundwerkstoff.
Für den Zusammenbau dieses hoch-
wertigen Polyplate-Bausatzes empfehlen
wir unseren kibri Polyplate Kleber,
Art. 39997.
Arrange the individual parts by assembly
groups, and then begin assembling in
accordance with the drawings.
This kit consists of sustainable Polyplate
composite material.
For the assembly of this high-quality
Polyplate kit, we recommend our kibri
Polyplate glue, item 39997.
Änderungen vorbehalten. Keine Haftung für
Druckfehler und Irrtümer.
Die aktuelle Version der Anleitung finden Sie auf
der Homepage unter der Artikelnummer.
Subject to change without prior notice. No liability for
mistakes and printing errors.
You will find the latest version of the manual on the
website using the item number.
Montageanleitung
Mounting instructions Baugruppe Teile-Nr. Stück
Assembly group Part No. Pieces
1. Inhalt / Contents
A 1 1
2 1
3 1
4 1
5 2
6 1
6a 1
7 1
7a 1
8 1
9 1
10 1
11 1
12 1
12 C 1
12 B 1
12 D 1
13 1
14 1
15 1
16 1
17 1
18 1
19 1
20 1
21 1
22 1
23 1
24 1
B 1 1
1/2 1
1/3 1
2 1
2/2 1
3 1
3/2 1
4/1 1
4/2 1
4/3 1
5 1
5/2 1
6 1
7 1
12 1
12/2 1
14,6 cm
B 12/3 2
12/4 1
14 1
15 1
D 1 1
2 1
3 1
4 1
5 1
6 1
7 1
8 1
9 1
10 1
F 1 1
2 1
3 1
4 1
G 1 1
2 1
3 1
4 1
5 1
I 1 2
EL 1 1
2 1
3 1
Tormontagestift 2
Door mounting pin
Baugruppe Teile-Nr. Stück
Assembly group Part No. Pieces
17,6 cm

A12 B
A14
A15
A22
A5
A5
A3
A4
A7 A6
A7 a
A6 a
A10
A12 C
A2
A1
A 9
A17
A16
A12 -D
A 1 A 2 A 3 A 4 A 5 A 6 &
A 7 A 7a
A 6a
A 8 A 9 A 10
A12
A13
A 11 A 12 + A 13
A 12 B
A 12 C
A 12 D
A 15 + A 14
A 16 + A 17 A 18
A 19 A 20 A 21 A 22 A 23
A23
A 24
Baugruppe A / Assembly group A
2

B 3 B 1
B 1/2
B 5/2B 3/2
B 12/2
B 2/2
B 2
B 6 B 5
B 4/1
B 4/2
B 7
B 12/4 B 1/3
B 4/3
B 12
B 12/3
B 15
B 14
Baugruppe B / Assembly group B
3
LICH T / LIG HT LICH T / LIG HT
KABE L / WIR E
LICH T / LIG HTLICH T / LIG HT
D 1
LICH T / LIG HT LICH T / LIG HT
LICH T / LIG HTLICH T / LIG HT
D 3
D 4
D 2
D 1 D 2 D 3 D 4 D 5
D6
D 6
D8 - D10
D 10
D 8
D 9
D7
D 7
Baugruppe D / Assembly group D

G1
F1
G3
F3
F2
G2 G4
F 1 F 2 F 3 F 4
G 1 G 2 G 3 G 4
G5
G 5
i1
i1
I 1
EL- 21 3
EL 1-3
2 x Tormontagestift
Door mounting pin
4
Baugruppe F / Assembly group F
Baugruppe G / Assembly group G
Baugruppe I / Assembly group I

Bei Verwendung von Viessmann Art. 6003 werden für die Außenbeleuchtung
2 LEDs aus dem Rahmen genommen und in den Ausschnitten von Bauteil A 16
verklebt.
Die Kabel sollen durch den Durchlass in Bauteil A 17 ins Haus geführt werden.
When using Viessmann item 6003, 2 LEDs for outdoor lighting are removed
from the frame and glued into the cutouts of component A 16.
The cables are to be routed into the house through the opening in component A 17.
Bei Verwendung von Viessmann
Art. 6002 werden die Durchlässe
am Bauteil D 1 zum Einsetzen
der LEDs herausgelöst.
When using Viessmann item 6002,
the openings on component D 1
for inserting the LEDs are removed.
A 16
A 17
D 1
D 2
A 14
A 12 D
I 1
A 15
A 2
A 4 A 3
Bauteil A 16 nicht kleben!
So wird die Leitungsführung
und Montage der Hausfront
mit Eingang ermöglicht.
Do not glue component A 16!
This facilitates the cable routing
and the installation of the building
facade with entrance.
Zwischendecke
False ceiling
5
2. Montage / Mounting
1
2
Die vormontierte Zwischendecke wird gegen die Bauteile I 1, A 3, A 4 und I 1 im
Erdgeschoss geklebt. Die weiße Seite der Bauteile A 3 und A 4 muss nach innen zeigen.
The pre-mounted false ceiling will be glued against components I 1, A 3, A 4 and I 1 on the
ground floor. The white side of components A 3 and A 4 must face inward.
3
Verkleben Sie zunächst das
Bauteil I 1 im Obergeschoss.
Achten Sie auf die Position
der Tür!
First, glue component
I 1 on the upper floor.
Pay attention to the
position of the door!

A 12 C
A 12 B
A 1
A 12
Steckzapfen nicht kleben!
Do not glue dowel pins!
Bei Verwendung von Viessmann Art. 6002 wird die Kopplung wird mit etwas
Kleber zwischen die Bauteile EL 1 und EL 2 geklebt.
Diese Bauteile sind Identisch.
When using Viessmann item 6002, the coupling is glued between some adhesive
between the components EL 1 and EL 2. These components are identical.
EL- 21 3
A 13
I 1
I 1
A 11
Eingangsfront
Entrance facade
Steckverbinder
Connectors
Bei Verwendung von Viessmann Art. 6003 wird für die Außenbeleuchtung eine
LED aus dem Rahmen genommen und in den Ausschnitt (Bauteil A 11)
geklebt. Hierbei sollten die Kabel nach unten verlaufen.
When using Viessmann item 6003, an LED for outdoor lighting is removed from the
frame and glued into the cutout (component A 11). In this process, the cables
should run downwards.
+-
4 5
6
A 16
6
Zum Einsetzen der Eingangsfront der Garage,
heben Sie das Bauteil A 16 etwas an.
When inserting the garage entrance facade,
slightly lift component A 16.

Die Bauteile A 9 & A 10 können mit
leichter Drehung angeklebt werden.
The components A 9 & A 10 can be
attached with a slight twist.
Die Fassadenteile B 2, B 2/2, B 3 und B 3/2 werden durch A 5 an der Unterkante
und der Oberkante des Gebäudes positioniert.
Abschließend werden die Balkonseiten B 5 montiert.
The facade components B 2, B 2/2, B 3 and B 3/2 are positioned by A 5 at the bottom
and top edges of the building. Finally, the balcony sides B 5 are installed.
Die Fassadenteile B 4/1, B 4/2, B 1 und B 1/2 werden an den Rillen auf den
Bauteilen A 1, A 4 an Unterkante und der Oberkante des Gebäudes positioniert.
Die Holzintarsien sollten zur Abstandskontrolle angehalten werden.
The facade components B 4/1, B 4/2, B 1 and B 1/2 are positioned on the grooves on
building elements A 1 and A 4, at the bottom and top edges of the building.
The wooden inlays should be used for distance control.
B2
B 4/1
B 4/2 B 1 B 1/2
B 4/3
B 2/2
B 3/2
B 12
B 14 B 15
B 3
B4/3
B 1/3
7
A 9
A 10
6
A 5
A 6b
A 6a
A 7b
A 7a

B 7 B 6
A 8
B 5
B 5/2
G5
D7
D 7
G 5
G 5
Das Balkongeländer wird gedreht und auf
A 6 geklebt. Die übrigen Zinkeindeckungen
werden auf die Wände A 5 und A 7
aufgebracht.
The balcony railing is rotated and glued
onto A 6. The remaining zinc coverings
are applied to the walls A 5 and A 7.
Die Bauteile
B 12/3 (rechts und Links)
B 12/2 (oben) und
B 12 (vorne) werden
zuerst als Rahmen
angebracht und
bilden die Einfassung
für die Holzfüllung B 12/4.
The components
B 12/3 (right and left)
B 12/2 (top) and
B 12 (front) are first
assembled as a frame and
form the enclosure for the
wooden panel B 12/4.
B 12/2 B 12 B 12/3
B 12/3 B 12/4
Die Stufenbauteile A 23
werden aufeinander geklebt.
The components A 23 of the
stairway are glued together.
A 23
8
8Das Bauteil G 5 wird in das
Geländer A 8 eingelegt und
mit etwas nicht ätzendem
Klebstoff fixiert.
Die Baugruppe wird in die
Zinkeindeckung vom Rahmen
D 7 geleimt.
The component G 5 is inserted
into the railing A 8 and fixed with
a non-corrosive adhesive.
The assembly group is then
glued into the zinc covering
of the frame D 7.
9
10 Schutzfolie abziehen.
Remove protection foil.
Mit der Klebeseite auf das
Glas aufdrücken.
Press adhesive side
onto the glass.
Die fertigen Fenster werden von
innen montiert.
The finished windows are mounted
from inside.
Knicken Sie das Eckfenster F 7 vorsichtig in der Mitte.
Eine Tischkante oder ein Lineal ist dabei hilfreich.
Ziehen Sie nun die Schutzfolie ab und kleben die
Fensterscheibe auf.
Schneiden Sie diese bündig zu.
Cautiously bend the corner window F 7 in the middle.
A ruler or a table's edge can be helpful for this.
Now remove the protection foil and stick on
the window glass. Cut alongside the frame.
Das Balkongeländer A 8 vorsichtig aus
dem Rahmen trennen, leicht zerbrechlich!
Carefully detach balcony raling A 8 from
the frame – it is somewhat fragile! Klebstofffilm
Adhesive film

F4
F4
F1
F2
Faltfenster
Faltfenster
F3
F3
F1
Böden A 19 – A 21 werden in das Haus gelegt.
Die Bodenbauteile A 18 und A 22 bilden das Erdgeschoss.
Flooring panels A 19 – A 21 will be laid in the house.
The floor components A 18 and A 22 form the ground floor.
Die Seiten des Garagendaches D 6 werden
umgefaltet und anschließend aufgeklebt.
The sides of the garage roof D 6 are folded and then glued.
Bei Verwendung von Viessmann Art. 6002 werden die Durchlässe am Bauteil
D 3 zum Einsetzen der Beleuchtungskomponenten herausgelöst.
When using Viessmann item 6002, the openings
on component D 3 for inserting lighting
components are removed.
D 3 D 2
EL 3
9
11
A 19
A 20
A 21
D 6
A 18
A 24
A 22
12

Der Stecker muss gut mit Sekunden-
kleber in den Bauteilen EL 3 und D 3
verklebt und eingepresst werden.
Achtung!
Der dünne Kontakt ist
leicht zerbrechlich.
The plug must be securely glued and
pressed into components EL 3 and D 3
with super glue.
Caution!
The thin contact is easily breakable.
EL- 21 3
D 5
D 8
D 10
D 9
D 4
D8 - D10
D7 D 10
D 8
D 9
Das montierte Dach wird vorsichtig in die Führungen gesetzt und
mit leichtem Druck in den Kern gesetzt.
Das Dach benötigt keinen Kleber.
Anschließend werden die Abdeckungen aufgebracht.
The assembled roof is carefully placed into the guides and inserted into
the core with slight pressure.
The roof does not require adhesive.
Afterwards, the covers are applied.
10
Die Verbinderecke EL 3 mit den eingebauten Kontakten wird mit den Bauteilen D 4
eingefasst.
Achten Sie hierbei auf die Ausschnitte am Bauteil.
The connector corner EL 3 with the
built-in contacts is surrounded by
the components D 4.
Please pay attention to the
cutouts on the component.
D 4
13
Das Dach ist abnehmbar. Beginnen Sie beim Abheben des Daches immer
in der Ecke mit dem Stecker EL.
Beim Aufsetzen des Daches gehen Sie in umgekehrter Reihenfolge vor.
Arbeiten Sie dabei sehr vorsichtig, da die Kontakte der Verbindung leicht
abbrechen können.
The roof is removable. When removing the roof, always start with the corner containing
the plug EL.
When putting the roof back on, follow the reverse order.
Be very careful during this process as the contacts of the connection can easily break.
Other Kibri Toy manuals
Popular Toy manuals by other brands

Italeri
Italeri 1356 instructions

Fisher-Price
Fisher-Price GREAT ADVENTURES 77110 quick start guide

LEXIBOOK
LEXIBOOK DANCE MAT PARTY instruction manual

Winfun
Winfun Little Piano Tunes manual

Agora Models
Agora Models OPTIMUS PRIME Pack 05 Build instructions

Thinkway Toys
Thinkway Toys neopets Acara Instruction guide

Mega Construx
Mega Construx POKEMON WONDER BUILDERS DEINO GMD24 manual

Freedom
Freedom 20 instructions

Rapido Trains
Rapido Trains FPA-2 Operation manual

Hangar 9
Hangar 9 Piper J-3 Cub 40 Assembly manual

Fisher-Price
Fisher-Price IMAGINEXT B1837 instruction sheet

Twister
Twister 400 SPORT V2 instruction manual