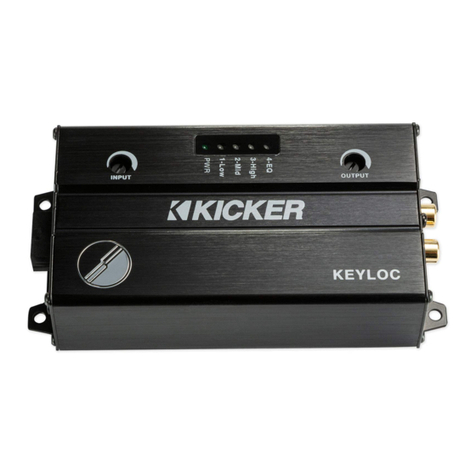
Kicker KEYLOC User manual

2English
Contents
Overview........................3
Specifications........................ 4
Installation ......................5
Mounting............................... 5
Wiring ................................... 6
Operation.......................9
Signal Identification .............. 10
Signal Restoration................ 11
Line-Output Conversion....... 16
Troubleshooting............17

3
Overview
IMPORTANT SAFETY WARNING
PROLONGED CONTINUOUS OPERATION OF AN AMPLIFIER, SPEAKER, OR
SUBWOOFER IN A DISTORTED, CLIPPED OR OVER-POWERED MANNER
CAN CAUSE YOUR AUDIO SYSTEM TO OVERHEAT, POSSIBLY CATCHING
FIRE AND RESULTING IN SERIOUS DAMAGE TO YOUR COMPONENTS
AND/OR VEHICLE. AMPLIFIERS REQUIRE UP TO 4 INCHES (10CM) OPEN
VENTILATION. SUBWOOFERS SHOULD BE MOUNTED WITH AT LEAST 1
INCH (2.5CM) CLEARANCE BETWEEN THE FRONT OF THE SPEAKER AND
ANY SURFACE. KICKER PRODUCTS ARE CAPABLE OF PRODUCING SOUND
LEVELS THAT CAN PERMANENTLY DAMAGE YOUR HEARING! TURNING UP A
SYSTEM TO A LEVEL THAT HAS AUDIBLE DISTORTION IS MORE DAMAGING
TO YOUR EARS THAN LISTENING TO AN UNDISTORTED SYSTEM AT THE
SAME VOLUME LEVEL. THE THRESHOLD OF PAIN IS ALWAYS AN INDICATOR
THAT THE SOUND LEVEL IS TOO LOUD AND MAY PERMANENTLY DAMAGE
YOUR HEARING. PLEASE USE COMMON SENSE WHEN CONTROLLING
VOLUME.
In addition to providing you with a preamp-level signal
for use with aftermarket amplifiers, the KEYLOC
revolutionizes the audio installation and tuning
process by automatically detecting the available
frequency response for an input signal, and detecting
and defeating factory EQ, time-delay or single all-pass
filter.
This DSP-powered dynamo strips the factory audio of
coloration and filters, while correcting and maximizing
available frequencies. This allows you to get to the
important work of tuning your audio system with the
ease and confidence that come from knowing you’re
working with a clean signal.
With a simple, step-by-step detection and calibration
process, your aftermarket installs are about to get a
lot easier, with results you can hear!

4
Model: KEYLOC
Rated Output per channel
1KHz @ 14.4V, ≤ 1% THD+N 10V
Length [in, cm] 5-1/2, 14
Height [in, cm] 1-3/8, 3.5
Width [in, cm] 2-3/4, 7.1
Frequency Response 20Hz–20kHz
Signal-to-Noise Ratio >90dB, A-weighted, re: rated
power
Input Sensitivity Lo: 250mV–10V - Fixed 60Ω Load
Hi: 1V–40V
Specifications

5
Installation
Mounting
Choose a structurally sound location to mount the
KEYLOC. Make sure there are no items behind the
area where the screws will be driven. If possible,
mount the KEYLOC behind the dash or in the climate-
controlled passenger compartment. Drill four holes
using a 7/64” (3mm) bit and use the supplied #8
screws to mount.

6
Wiring
Disconnect the vehicle’s battery to avoid an electrical
short. Then connect the ground wire to the KEYLOC.
Make the ground wire short, 24” (60cm) or less, and
connect it to a paint-and-corrosion-free, solid, metal
area of the vehicle’s chassis. Keep the audio signal
cable away from factory wiring harnesses and other
power wiring. If you need to cross this wiring, cross
it at a 90 degree angle. Connect your source units
speaker outputs to the KEYLOC speaker inputs.
When interfacing into factory speaker wires it is
recommended to splice and solder, If you need to
use wire taps make sure you use proper sized wire
taps to ensure a solid connection.
If your head unit has a remote output you can
connect this to the remote input of the KEYLOC. If
your head unit does not have a remote output, the
KEYLOC can use the DC offset that is present on
the speaker outputs of most factory head units. To
measure for DC offset, connect your multimeter’s
negative lead to the vehicle’s chassis ground, the
positive lead to the speaker wire you are interfacing
with, and set the multimeter to ‘DC volts’. When the
source unit you’re using is on, you should see DC
voltage from between 2.5V–6V. The KEYLOC will
sense this DC offset to turn on, and output 12V on
its own remote output (up to 100mA) to turn on your
aftermarket amplifier(s).
Test the output voltage of the audio source before
selecting the input level setting. In general, if your
input signal is coming from the source unit, use the
LO Level Input Sensitivity setting. If your input signal
is coming from a factory amplifier, use the HI Level
Input Sensitivity setting. The LO range can accept

7
125mV-10V. The HI range can accept 1V – 40 V. The
KEYLOC can output up to 10V of preamp RCA level
output, adjustable with the Output Gain knob.
In the LO range, there is a 60Ω load for use with
newer smart radios that shut off their outputs if they
do not detect a speaker. If there is a need to load a
source unit that has an output voltage greater than
10V, please use the KISLOAD products instead of the
KEYLOC’s built in load resistors.
Install a 2A fuse between the KEYLOC and battery.
The fuse should be within 18” (45cm) of the power
source and in-line with the harness’ yellow power
cable, which is connected to the KEYLOC. Connect
the preamp-level RCA outputs to your amplifier.
12V
battery
fuse
R+
L+
R-
L-
remote in
(from source unit
remote out
(to amplifier)
input sensitivity
LO
HI
bare-metal
chassis
ground
ground
≤18”
(45cm)
speaker level inputs
(from source unit)

8
RCA Outputs (to amplifier)
USB for internal use only

9
Operation
The KEYLOC is a 2-channel DSP based active line
output converter with the following features.
Automatic Turn-on: DC offset remote input turn-on,
and remote output turn-on (100mA) to turn on other
products.
Frequency Response Correction: Smooths
frequency response of two channels from your
source unit via EQ correction. It can fix EQs with Qs
ranging from 0.5-10 with up to +/- of 12dB of boost
or cut.
Factory Time Delay Defeat: Ranging from .06mS
– 10mS, the algorithm is accurate down to .06mS.
ALL-Pass Filter Defeat: The KEYLOC can correct
up to three all-pass filters on one channel. The
All-pass filters can have a Q ranging from 0.5–3.5,
as long as they do not interact with the other All-Pass
filter’s phase.
Passive Frequency Detection: Before running the
KEYLOC setup process, it is in passive frequency
detection mode. You can use this mode to detect
what band of frequencies are available on the given
speaker outputs that the KEYLOC is connected to.

10English
Low | Mid | High | EQ
Frequency Detection
Low Mid High
20Hz–200Hz 200Hz–2kHz 2kHz–20kHz
Signal Identification
The KEYLOC will help you identify the correct OEM
wires to which you should connect using the following
steps:
1. Turn the Input Gain on the KEYLOC all the way
down.
2. Turn the audio source up to at least 1/2 volume.
3. Play the Pink Noise track from
4. Turn the Input Gain up slowly until Low, Mid, and
High LEDs begin to light up.
The Low, Mid, and High LEDs will turn on to indicate
the frequency range that has been detected. They
will alternately blink for left and right channels every
half second. If both channels are the same, the
LED(s) will be solid. The LED that lights up first will be
the best application for the signal you are currently
receiving. The more gain you must add to light up the
remaining LEDs, the less signal is available for those
applications.
Status LEDs
Power

11
Signal Restoration
Once the KEYLOC has been wired and mounted,
you’re ready to analyze and repair the signal from your
source unit. These are custom audio files that, when
played from your source unit to the KEYLOC, will
allow the KEYLOC to determine what frequency,
coloration, and staging corrections to make.
During the key process if you accidentally push the
KEY button before playing the NOISE FLOOR track,
the KEYLOC will have an error and all LEDs will flash.
You must then press the KEY button to exit the KEY
process. You will need to re-enter the KEY process to
start again if you do this.
KEY Button
LR

12
Automatic Setup:
1. Verify the input gain of the KEYLOC is turned all the
way down. Set the source unit between ½ and ¾
volume, or just before it starts to clip. Make sure all
tone controls (Bass, Mid, Treble) are set to flat. It is
very important that the source unit’s audio outputs are
not being clipped for the KEYLOC to properly flatten
the EQ. DO NOT USE A 0dB SINEWAVE TEST
TONE. The GainMatch track will sweep frequencies
from 20Hz–20kHz. Watch the wave form on the
oscilloscope to see if your source unit is clipping. As
the GainMatch track sweeps, slowly turn the source
unit up until you see any clipping on the oscilloscope.
Turn the source unit down until you no longer see any
clipping (KICKER has observed factory source units
that exhibit clipping at as low as 1/3 volume at certain
frequencies). This will be the loudest unclipped
volume level available from the factory source unit. If
you do not have an oscilloscope and you do not get
the desired flattening results from the KEYLOC after
you run the setup process, turn the source unit down
¼ from where you started and run the setup again.
2. Press and hold the KEY Button for 8 seconds. You
will see the LEDs sweep from 1 – 4 and then 4 – 1.
Release the KEY Button and LED 1 will light up, LEDs
2 – 4 will be off.
Press
Release
>
>>>
>>

13
3. Play track: GainMatchSweep from the source unit.
4. Turn the KEYLOC input gain knob up, watching
LEDs 3 and 4, until either starts to blink.
5. Turn the KEYLOC input gain knob down until both
LEDs stop blinking. Wait for 10 seconds to verify the
LEDS have stopped blinking.
6. Stop track: GainMatchSweep, then play track:
Noise floor
7. Press the KEY Button. LED 1 will begin to blink.
When the Noise floor is detected, LED1 will stop
blinking and LED2 will start blinking.
8. Play track: FullTest. While the track is running
you will see the LEDs progress from LED1 to LED4.
The FullTest track is 22 minutes long, however most
corrections will only take between three to eight
minutes.
9. The LEDs will begin to flash once the KEYLOC
has collected enough data and is processing the test
results.
10. The LEDs will sweep back and forth when
the algorithm has completed, and audio will begin
passing. Press the KEY button to exit the set-up
mode.
11. LED4 will turn on to indicate the available
frequency ranges. To toggle the EQ correction ON/
OFF, press the KEY button once. If LED4 is ON, EQ
correction is on. If LED4 is OFF, EQ correction is off.
To reset to factory: Enter the main menu by
pressing and holding the KEY button for 6 seconds.
You will see the LEDs sweep from 1 – 4. Release the
KEY Button and LED 1 will light up.
Press
Release
>> >

14
Click the KEY button until LED 3 is illuminated, then
hold the KEY button until all LEDs are illuminated.
Release the KEY button and the unit will restart. Your
KEYLOC is now reset back to factory.
Error Codes:
If the power LED and any combination of LEDs begin
to blink, it indicates an error in the setup process.
press the KEY button to reset the device.
LEDs 1, 2, 3, 4 - ON
Unable to find the noise floor. This indicates there
is too much signal, or it is too noisy. This usually
happens when the Noise Floor track is not playing
before beginning Step 7.
LEDs 2, 3, 4 - or 1, 3, 4 - ON
Unable to interpret frequency response. This usually
indicates the input is clipping or it is too noisy.
Navigating the Menu:
After the Auto setup process has completed, you’ll
be able to navigate the KEYLOC menu using the KEY
button and LEDs. To enter the menu, press and hold
the KEY button for 4 seconds. You will see the LEDS
sweep 1-4 - release the KEY button. Quick-press the
KEY button to cycle through the menu options:
LED1 - Allpass or Time-Delay defeat ON/OFF
Solid: Time-Delay correction is active
Blinking: Time-delay/allpass defeated
Press and hold the KEY button for 2 seconds to
toggle defeat ON/OFF

15
LED2 - Gain Match Status
LED 2 indicates Left/Right Channel gain matching
status.
Solid: On
Blinking: Off
LED3 - Reset KEYLOC
Hold the KEY button for 10 seconds
LED4 - Exit the Menu
Hold the KEY button for 1 second to exit the menu

16
Line-Output Conversion
After Auto Setup is complete, use the Output Gain
to match the output voltage of the KEYLOC to the
input sensitivity voltage of your amplifier. If you’re not
using gain match capable electronics or a voltmeter/
multimeter, listening for audible distortion is always the
next best way to set your gain.
Sending a high voltage signal to your amplifier when
possible is always the best practice. To set the
Output Gain, turn the KEYLOC Output Gain and the
input gain of your amplifier all the way down. With
audio playing, turn the KEYLOC Output Gain up until
you have achieved your desired volume level or you
begin to hear distortion, then reduce the Output Gain
until it’s gone.

17
Troubleshooting
If the KEYLOC becomes frozen or stuck during algorithmic calculation, does
not appear to be working, or gives an error code, check the obvious things
first such as blown fuses, poor or incorrect wiring connections, incorrect
setting of gain controls, etc.
Tips for SETUP:
1. If you have issues getting a smoothed EQ response on an Real-Time
Analysis, go back and verify that the INPUT GAIN match of the KEYLOC is
set correctly. If there are tall peaking filters in your analysis, it can take two or
three sweeps of the GAIN MATCH track to ensure proper gain matching
(It’s recommended to wait 10 – 15 seconds to make sure the gain match
LEDs are not flashing). If there’s still an issue where the frequency response
is not being fully corrected, it is suggested to turn the input gain down ¼ of
a turn and run the KEYLOC setup process again.
2. If the issue persists, it is very likely that the output of your source unit is
being clipped. Use the GAIN SWEEP track and an oscilloscope on the
output of your source unit to verify that the signal coming from the source
unit is not clipping. If there is any clipping, slowly turn down the volume on
the source unit until all clipping is eliminated.
3. In most aftermarket systems in which you will not be using a fully active
DSP after the KEYLOC in the signal chain, you will likely want to turn off the
All pass/Time delay defeat for the best stereo imaging. See page 13.
4. To keep the noise floor (hiss) low, we have designed the KEYLOC to not
add more than 18db of gain to any one frequency. In most applications, this
should correct the frequency response to a nearly linear response of +/-
1.5dB in the frequency bands available.
5. During the KEY process, if you accidentally push the KEY button before
playing the NOISE FLOOR track, the KEYLOC will error out and all LEDs will
begin to flash. You must then press the KEY button to exit the KEY process.
Re-enter the KEY process to start again.
No power? With a Volt Ohm Meter (VOM) check the following: +12
volt power terminal (should read +12V to +16V) Remote turn-on terminal
(should read +12V to +16V) Check for reversed power and ground
connections Ground terminal, for proper conductivity.
Power on, no signal? Check the following: RCA connections Test
audio source signal, either with a “known good” output device or other
means.
No or low output? Check the balance and fader controls on source
unit. Check the RCA (or speaker input) and speaker output connections.
Check the volume level on your source unit, to include the volume level of
any connected phones or MP3 players.

KEYLOC frozen or stuck in operating procedure? Cycle the power
Reset the remote Reset the KEYLOC
Alternator noise-whining sound with engine’s RPM? Check
for damaged RCA (or speaker input) cable Check the routing of RCA
(or speaker input) cable Check the source unit for proper grounding
Check the gain settings and turn them down if they are set too high.
CAUTION: When jump starting the vehicle, be sure that connections
made with jumper cables are correct. Improper connections can result in
blown fuses as well as the failure of other critical systems in the vehicle.
Learn more about equalizers and processors we have.
Other manuals for KEYLOC
2
Table of contents
Other Kicker Media Converter manuals