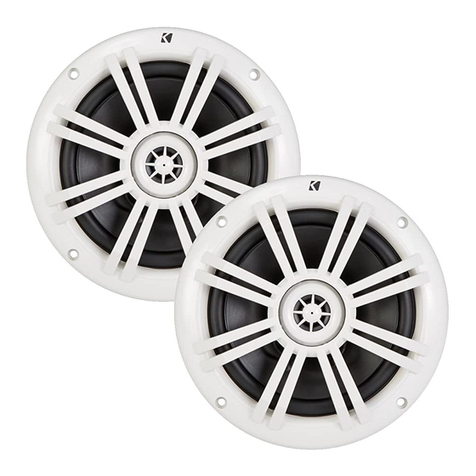
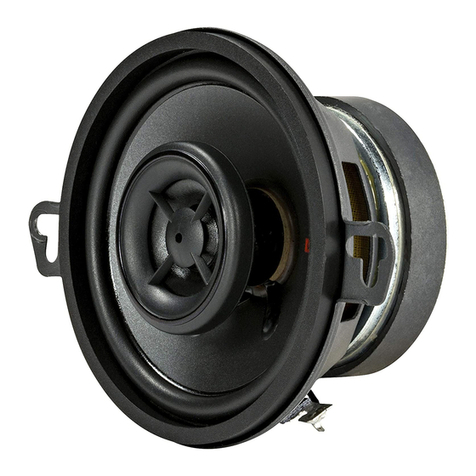
Kicker SSMB Series User manual

Kicker SSMB Series Midbass Drivers
Recommended Applications / Version 2.0
Dec 1 , 2003
SSMB Technical Manual

FEATURES
•Ultra Slim Midbass Drivers Gives you
real
low frequency output from factory locations. Never before have
you seen this amount of low end from the front of the car without adding an exotic subwoofer enclosure. They
are a mere 2 inches deep (SSMB6) and 2 1/4 inches (SSMB8).
•Tri-Tech™ Cone with Röhm Rohacell® Foam Sandwhiched cone material of foam, poly and woven carbon
fiber. Provides a very light yet very strong cone for extended frequency response and superior cone control over
the midbass’ entire operating range. This new high-tech cone is found in our new SS component systems as well.
•Santoprene Surround Tough, flexible surround with long throw capability to control extreme cone excursions.
Santoprene also holds it’s shape well over time, is moisture and UV resistant and offers excellent damping.
•Blackened One-Piece Motor Structure Provides enhanced heat transfer for cool operation and maximum
power handling. The heat is transferred from the pole-piece to the back plate, effectively acting like a radiator in an
engine. This lowers the operating temperature of the voice coil.
Note: The increase in temperature increases the
impedance of the speaker.
This results in lower output and is referred to as Power Compression.
—High-Temp Kapton®Voice Coil Former Heat is the primary enemy to the life of a speaker, which is one of
the reasons we use Kapton® voice coil formers. Kapton® is a man-made product that is light, durable and is very
efficient at thermal heat transfer. The Kapton® former does not retain heat and allows it to easily pass to the pole-
piece. This prohibits the heat from breaking down the glue joint between the former and the cone or the former
and the coil windings. During high excursion and prolonged exposure to heat, Kapton® holds it’s shape and does
not expand or contract. As a bonus, Kapton® is also a very quiet material during operation and does not discolor
the music by adding unwanted sound.
—LPOD ( Low Profile/Open Design ) Basket. The basket not only looks impressive, but it is extremely
functional. This stamped steel basket provides a solid anti-resonant foundation for the motor assembly insuring
that all the parts work together in harmony and prevent shifting or misalignment. Without a solid foundation, the
speaker’s various parts could shift under extreme excursion causing premature failure and add unwanted noise to
the music. If misaligned, the voice coil could rub the inner wall of the motor structure thus exposing the bare
windings, which would cause speaker failure. The same thing happens if the coil former rubs the pole-piece. The
damaged former exposes the windings causing speaker failure. When other speakers are pushed to their limits
they tend to make noises that add coloration to the music. When your LIVIN’ LOUD you only want to hear the
music the artist intended you to hear, NOT a bunch of unwanted ringing.
•Spring Loaded Nickel Plated Terminals On a High Performance Midbass like the SSMB Series drivers, you
would expect nothing less than a High Performance terminal. They allow the installer to use the maximum gauge
wire to minimize power losses for the ultimate midbass response extension in the front of the vehicle.
Features
Kicker SSMB Series Midbass Drivers
Recommended Applications / Version 2.0
Page 2

Model Frequency Power Cut Out Top Mount Bottom Mount Sensitivity Magnet
Response Peak / RMS (in. / cm) Depth(in. / cm) Depth(in. / cm) (1 W / 1 M) Weight(oz.)
SSMB6 30-500 250 / 125 5
55/8 / 14.29 2
2/ 5.08 2
25/16 / 5.87 88 22
SSMB6 30-500 250 / 125 7
71/4 / 18.42 2
21/4 / 5.8 2
29/16 / 6.51 89 25
Available in 4 ohm models only.
Specifications
SSMB6
SSMB8
5 5/8"
2"
7 1/4"
2 1/4"
6 1/2"
8 1/16"
Kicker SSMB Series Midbass Drivers
Recommended Applications / Version 2.0
Page 3

Installation Instructions
Your KICKER drivers are specifically designed
for mounting in free-air applications. While the
speakers do not require a sealed enclosure for
optimum performance, it is important to iso-
late the sound coming off the front of the
driver from the sound radiating from the back
of the driver. This isolation is usually accom-
plished by using the correct size driver in a fac-
tory speaker location. If the panel is not strong
enough to withstand the bass without flexing,
it is a good idea to use a reinforcing panel. See
diagram below.
Kicker SSMB Series Midbass Drivers
Recommended Applications / Version 2.0
Page 4
Mounting
Package Tray
Grill
KK
II
CC
KK
EE
RR
LL
II
VV
II
NN
''
LL
OO
UU
DD
SS
PP
LL
RR
AA
TT
EE
DD
11
77
00
++
KK
II
CC
KK
EE
RR
LL
II
VV
II
NN
''
LL
OO
UU
DD
SS
PP
LL
RR
AA
TT
EE
DD
11
77
00
++
Reinforcing
Panel

Push Grill into place
and snap onto driver
Figure 1
To Crossover
Stagger Holes
For Wiring &
Use Grommets
(When Factory Are Not Avail.)
(Optional)
Figure 2
Kicker SSMB Series Midbass Drivers
Recommended Applications / Version 2.0
Page 5
Cautions must be observed when mounting speakers through the package tray of a car, watch for wiring har-
nesses, trunk springs, hinges, and folding seat mechanisms. When running the wires be careful not to damage
them with seat bolts or door sill screws.
If custom door mounting locations are desired for your drivers, be careful to avoid interference from window
and door lock mechanisms. The first step is to find a location on the door panel that will accept the size of speaker
chosen. Then remove the door panel from the door, and check for the operation of the window all the way up and
down. If metal must be cut to mount the speakers, try to avoid structural metal and braces. On models with grills
included, mount as indicated in the diagram on the bottom of the page. Figure 1.
If factory door speaker wiring is not available to connect your speakers to, it is necessary to run wire through the
door jamb. This wire should be kept away from sharp edges and the possibility of getting pinched. An existing boot
in the door jamb is the ideal place to run the wires, but sometimes this does not exist or is inaccessible. Drilling
holes to run wires through is very tricky, and caution must be exercised not to drill into other wiring or mecha-
nisms. Any time a wire is run through a bare hole, it is necessary to insert a rubber or plastic grommet first to pro-
tect the wire. See Figure 2.
Mounting cont.

Passive Crossovers
A passive crossover is a circuit employing capacitors and/or coils. Passives are placed on speaker leads between
the amplifier and the speaker.
When a cap or coil is placed in the speaker’s circuit they will separate the frequencies to the speaker at 6 dB per
octave. The three most commonly used filter networks are highpass, lowpass and bandpass ( a combination of a
capacitor and a coil). A speaker’s impedance and the component’s values determine the frequencies that are fil-
tered.
100 MFD
100 MFD
High Pass Low Pass
Capacitor Choke (inductor)
High Pass Curve Low Pass Curve
6 dB/Octave High Pass 6 dB/Octave Low Pass
Kicker SSMB Series Midbass Drivers
Recommended Applications / Version 2.0
Page 6

Passive Crossovers
Passive crossover networks come in different sizes and flavors. You must decide which one will work best for
your system. Here are some basics before you get started building a passive crossover network.
Capacitors:
A capacitor is known as a highpass filter, which simply means that at its crossover point (i.e. 2kHz) frequencies
HIGHER than 2kHz will pass through. Frequencies lower than 2 kHz will gradually become less and less audible.
When choosing a capacitor the voltage rating should be considered. A minimum rating of 50V is required.
Capacitors with higher voltage ratings will have the ability to handle more power.
A capacitor performs this task by changing its impedance as the frequency of the signal changes. The impedance
of the capacitor is small at frequencies higher than the crossover point. This is known as the passband range.
Frequencies BELOW the crossover point will cause the capacitor to have a gradual increase in impedance.
Consequently, this rise of impedance from the capacitor will cause frequencies BELOW the crossover point to
become less and less audible.
A capacitor’s value is expressed in farads and when placed in series with a speaker it forms a 6dB per octave high
pass.
100 MFD
100 MFD
Inductors:
Inductors, chokes or coils are known as Lowpass filters. Inductors are electrically opposite to the capacitor, and
their values are expressed in henrys. There are many different types of inductors: Air core, Iron core and Laminated
Steel are the most common. Air core inductors do not suffer from saturation (smearing in the audio signal) up to
their power handling limit but are more expensive due to the need for more copper wire for a given value. Iron
core or Laminated Steel core inductors can suffer from saturation as you approach their power limit but are less
expensive than an Air core inductor at the same value. Because inductors are low pass devices, frequencies LOWER
than the inductor’s crossover point (i.e. 100 Hz) will pass through. Frequencies HIGHER than 100Hz will gradually
become less and less audible.
An inductor performs this task by changing its impedance as the frequency of the signal changes. The imped-
ance of the inductor is small at frequencies LOWER than the crossover point. This is known as the passband range.
Frequencies HIGHER than the crossover point will cause the inductor to have a gradual increase in impedance.
Consequently, this rise in impedance from the inductor will cause frequencies HIGHER than the crossover point to
become less and less audible.
When an inductor is placed in series with a speaker, it forms a 6dB per octave low pass.
Highpass
CC
6 dB/Octave Highpass
6 dB/Octave Lowpass
LL
Choke or Coil (Inductor)
Lowpass
Kicker SSMB Series Midbass Drivers
Recommended Applications / Version 2.0
Page 7

Passive Crossovers
BANDPASS FILTERS:
A bandpass filter is the combination of highpass and lowpass filters. Bandpass filter assign a specific BAND of fre-
quencies to pass through to the speaker. The most common is a bandpass filter in the mid-bass frequencies
( 90Hz - 300Hz).
Configuring such a filter using a capacitor and an inductor is simple. Both devices are placed into series with the
speaker’s voice coil; the capacitor first inline followed by an inductor. The frequencies entering the bandpass will
meet the capacitor first. Frequencies HIGHER than 90Hz will pass through. The signal will then run through the
inductor and roll off frequencies above 300Hz. This scenario will cut off frequencies BELOW 90Hz and rolloff fre-
quencies ABOVE 300Hz at a slope of 6dB per octave.
+ Speaker
+ Amp
Capacitor Choke
90Hz 300Hz
Kicker SSMB Series Midbass Drivers
Recommended Applications / Version 2.0
Page 8

6 dB / Octave High and Low Pass Filters
Frequency
Response
Speaker Impedance
2 Ohms 4 Ohms 8 Ohms
L C L C L C
80 4.1mH 1000uF 8.2mH 500uF 16mH 250uF
100 3.1mH 800uF 6.2mH 400uF 12mH 200uF
130 2.4mH 600uF 4.7mH 300uF 10mH 150uF
200 1.6mH 400uF 3.3mH 200uF 6.8mH 100uF
250 1.2mH 300uF 2.4mH 150uF 4.7mH 75uF
400 .8mH 200uF 1.6mH 100uF 3.3mH 50uF
600 .5mH 136uF 1.0mH 68uF 2.0mH 33uF
800 .41mH 100uF .82mH 50uF 1.6mH 26uF
1000 .31mH 78uF .62mH 39uF 1.2mH 20uF
1200 .25mH 66uF .51mH 33uF 1.0mH 16uF
1800 .16mH 44uF .33mH 22uF .68mH 10uF
4000 .08mH 20uF .16mH 10uF .33mH 5uF
6000 51uH 14uF .10mH 6.8uF .20mH 3.3uF
9000 34uH 9.5uF 68uH 4.7uF .15mH 2.2uF
12000 25uH 6.6uF 51uH 3.3uF 100uH 1.6uF
6dB / Octave High Pass 6dB / Octave Low Pass
Component Values
Kicker SSMB Series Midbass Drivers
Recommended Applications / Version 2.0
Page 9
CL
If you are using two woofers wired in series use the table for 8 Ohm, likewise, if you
are using two woofers wired in parallel use the table for 2 ohm.

12 dB / Octave High and Low Pass Filters
CL
L
C
Frequency
Response
Speaker Impedance
2 Ohms 4 Ohms 8 Ohms
L C L C L C
80 5.6mH 700uF 11mH 330uF 22mH 180uF
100 4.5mH 500uF 9.1mH 270uF 18mH 150uF
130 3.5mH 470uF 6.8mH 200uF 15mH 100uF
200 2.3mH 330uF 4.7mH 150uF 9.1mH 75uF
250 1.7mH 220uF 3.6mH 100uF 6.8mH 50uF
400 1.1mH 140uF 2.2mH 68uF 4.7mH 33uF
600 .75mH 100uF 1.5mH 47uF 3.0mH 26uF
800 .56mH 68uF 1.0mH 33uF 2.0mH 15uF
1000 .45mH 55uF .91mH 27uF 1.8mH 13uF
1200 .38mH 47uF .75mH 22uF 1.5mH 11uF
1800 .25mH 33uF .50mH 15uF 1.0mH 6.8uF
4000 .11mH 14uF .22mH 6.8uF .47mH 3.3uF
6000 75uH 10uF .15mH 4.7uF .33mH 2.2uF
9000 50uH 6uF .10mH 3.3uF .20mH 1.5uF
12000 38uH 4.7uF 75uH 2.2uF .15uH 1.0uF
12dB / Octave High Pass 12dB / Octave Low Pass
Kicker SSMB Series Midbass Drivers
Recommended Applications / Version 2.0
Page 10
If you are using two woofers wired in series use the table for 8 Ohm, likewise, if you
are using two woofers wired in parallel use the table for 2 ohm.
Component Values

6dB & 12dB / octave Bandpass Filters
Frequency
Response
Speaker Impedance
2 Ohms 4 Ohms 8 Ohms
L C L C L C
80-200 1.6mH 1000uF 4.7mH 500uF 9.1mH 250uF
80-400 .8mH 1000uF 1.6mH 500uF 3.3mH 250uF
100-250 1.2mH 500uF 2.4mH 270uF 4.7mH 150uF
100-400 .8mH 500uF 1.6mH 270uF 3.3mH 150uF
Frequency
Response
Speaker Impedance
2 Ohms 4 Ohms 8 Ohms
L1 C1 L2 C2 L1 C1 L2 C2 L1 C1 L2 C2
80-200 2.3mH 300uF 5.6mH 700uF 4.7mH 150uF 11mH 330uF 9.1mH 75uF 22mH 180uF
100-250 1.7mH 220uF 4.5mH 500uF 3.6mH 100uF 9.1mH 270uF 6.8mH 50uF 18mH 150uF
100-400 1.1mH 140uF 4.5mH 500uF 2.2mH 68uF 9.1mH 270uF 4.7mH 33uF 18mH 150uF
6 dB / Octave Bandpass
12 dB / Octave Bandpass
80-400 1.1mH 140uF 5.6mH 700uF 2.2mH 68uF 11mH 330uF 4.7mH 33uF 22mH 180uF
L2
C2
L1
C1
12 dB / Octave Bandpass
Kicker SSMB Series Midbass Drivers
Recommended Applications / Version 2.0
Page 11
If you are using two woofers wired in series use the table for 8 Ohm, likewise, if you
are using two woofers wired in parallel use the table for 2 ohm.
LC
6 dB / Octave Bandpass

Tweeter
+
_
Crossover
Midrange
SSMB Midbass
Input +
Input -
C1
C2
Output +
Output -
L1 L2 C3
C4
R1
Output +
Output -
SOURCE UNIT
Other
Channel
+
_
+
_
Midrange
Midbass
-+-+-+
Wiring
Kicker SSMB Series Midbass Drivers
Recommended Applications / Version 2.0
Page 12
Crossover Component values:
C1: 10.0 µF Mylar, 100Vr
C2: 200.0 µF Electrolytic, 100Vr
L1: 1.9 mH Laminated steel bar core, Dcr<0.20 W
L2: 1.9 mH Laminated steel bar core, Dcr<0.20 W
C3: 200.0 µF Electrolytic, 100Vr
C4: 29.0 µF Electrolytic, 100Vr
R1: 3.0 W10 W
Your Midbass driver has two spring loaded terminals. The red terminal is connected to the positive wire and the
black terminal is connected to the negative wire from the source unit or amplifier. Since your midbass drivers have
a limited frequency range it is recommended to use a bandpass crossover. Use either a passive unit to connect into
an existing system or for higher performance, an electronic crossover and a dedicated amplifier. See the following
diagrams for the wiring option that best suits your system.
Kicker recommends using the SSMB series midbass drivers in conjunction with the Resolution Series or Kicker
Series Components. This will create a seamless sound stage.
In the most basic wiring diagram, the SSMB6 / SSMB8 would be wired into the output of an existing system. Be
sure to use a passive crossover on the midbass driver, an example is provided below. We locked our engineer away
in a room, armed with only a sliderule and a calculator and these are the numbers he came up with. If you feel the
values listed do not fit your needs, you can design your own. You may need to go through some trial and error
before getting it right.
Hint: Take the easy way out, USE the numbers we provide, he worked so hard on them !
As you will see, he has included a
Zobel Impedance Compensation Network i
n the schematics. An impedance
compensation network is wired in parallel with the speaker to counteract the rise in impedance with the increasing
frequency caused by the inductive reactance of the voice coil.

Wiring cont.
-+-+-+
Tweeter
+
_
+
_
Crossover
Midrange
SSMB Midbass
Signal Out
Signal In
Other Channel
Input +
Input -
C1
C2
Output +
Output -
L1 L2 C3
C4
R1
Output +
Output -
Midrange
Midbass
In another basic wiring diagram, the SSMB6 / SSMB8 would be wired into the output of an existing system that
contains an amplifier. The additional power will give you more impact from your midbass drivers. Once again, be
sure to use a passive crossover on the mid bass driver, an example is provided below. The frequencies shown are
only guidelines and not the only ones available for use. Some testing should be done on your system before build-
ing a passive crossover system.
Kicker SSMB Series Midbass Drivers
Recommended Applications / Version 2.0
Page 13
Crossover Component values:
C1: 10.0 µF Mylar, 100Vr
C2: 200.0 µF Electrolytic, 100Vr
L1: 1.9 mH Laminated steel bar core, Dcr<0.20 W
L2: 1.9 mH Laminated steel bar core, Dcr<0.20 W
C3: 200.0 µF Electrolytic, 100Vr
C4: 29.0 µF Electrolytic, 100Vr
R1: 3.0 W10 W

A dedicated amplifier can be used to run the SSMB6 / SSMB8 midbass drivers. This design is preferred by audio-
philes. It allows each speaker to work in the bandwidth in which they were designed for. This design will give the
installer total control over the speakers and will only be limited flexibility of the electronic crossover. If the
crossover being used is a 2-way crossover, it does not have a bandpass setting. The low pass out of the crossover
will feed the mid bass amplifier, assuming the crossover has the ability to low pass the midbass speakers high
enough for the systems needs. Many crossovers have a multiplier switch, which allows the user to select between
1x and 20x the frequency. For example, if the switch is set to 1x, the crossover will be set at the frequency that has
been selected. If the switch is set to 20x, the frequency will now be set at 20x the setting indicated. If using a x2i
this will not be necessary due to the frequency range of the crossover. See the diagram on the following page.
When using a Kicker x2i Electronic Crossover:
1. If the amplifiers that are being used are not Kicker, make sure the amplifiers have a highpass crossover. Refer to
their owners manual if you are unsure. Figure 1.
2. Connect the SSMB series speakers up to the amplifier that is being fed the signal out of the low pass section of
the Kicker x2i crossover.
3. Select the lowpass frequency on the x2i crossover that will be the upper limit of the SSMB speakers. The fre-
quency selected will be between 150Hz-300Hz. Figure 2.
4. The amplifier crossover switch at this time should be set to highpass. This will select the frequencies that will be
eliminated from the SSMB midbass speakers. Depending on the system the frequency will be between 50Hz-200Hz.
Figure 3 and Figure 4.
5. The amplifier driving the upper frequency speakers should be connected to the highpass out on the x2i
crossover and the frequency selected.To eliminate any frequency gap, the frequency setting should be the same
as the lowpass used for the SSMB series speakers.
6. If there is a subwoofer in the system, use the crossover that is in the source unit or the crossover that is in the
amplifier. The amplifier crossover is recommended, especially if using the Kicker KX series amplifiers with a fully vari-
able crossover.
Remember to be careful setting the gains and make sure they are not clipping the amplifier and causing harm to
the speakers. For more information on setting system gain controls please refer to the KQ30 Technical Manual or to
your buddy who has installed a few stereos in his dad’s garage!
Wiring using an x2i Crossover
Kicker SSMB Series Midbass Drivers
Recommended Applications / Version 2.0
Page 14
40
45
50 70115
230
300
Low Pass
XOVER
OFF
HI PASS
LO PASS
50 200
X-OVER
FREQ. (Hz)
Fig. 1 Fig. 2 Fig. 3 Fig. 4

Wiring using an x2i Crossover
Kicker SSMB Series Midbass Drivers
Recommended Applications / Version 2.0
Page 15
Tweeter
Midrange
+
_
+
_
+
_
+
_
Crossover
Other Channel
SSMB Midbass
Components 250Hz -Up
SSMB6 / SSMB8 60Hz-250Hz
Other Channel
Rear or
Sub Out
From Source
Front Out
From Source
2-Way
Electronic Crossover
+
_
Subwoofer Up to 80Hz
Other Channel
Set Crossover switch to OFF Position
Set Crossover switch to HI PASS Position
Set Crossover switch to LO PASS Position
R

A dedicated amplifier can be used to run the SSMB6 / SSMB8 midbass drivers. This design is preferred by audio-
philes. It allows each speaker to work in the bandwidth in which they were designed for. This design will give the
installer total control over the speakers and will only be limited flexibility of the electronic crossover. If the
crossover being used is a 3-way crossover, chances are it does not have a bandpass setting. The High pass out of
the crossover will feed the mid bass amplifier, assuming the crossover has the ability to low pass the midbass
speakers high enough for the systems needs. Many crossovers have a multiplier switch, which allows the user to
select between 1x and 20x the frequency. For example, if the switch is set to 1x, the crossover will be set at the
frequency that has been selected. If the switch is set to 20x, the frequency will now be set at 20x the setting indi-
cated. If using a x3i this will not be necessary due to the frequency range of the crossover. See the diagram on the
following page.
When using a Kicker x3i Electronic Crossover:
1. If the amplifiers that are being used are not Kicker, make sure the amplifiers have a highpass crossover. Refer to
their owners manual if you are unsure. Figure 1.
2. Connect the SSMB series speakers up to the amplifier that is being fed the signal out of the Rear Highpass sec-
tion of the x3i crossover.
3. Select the highpass frequency on the x3i crossover that will be lower limit of the SSMB speakers. The frequency
selected will be between 30Hz-150Hz. Figure 2.
4. The amplifier crossover switch at this time should be set to “LO PASS”.
.This will select the frequencies that will be
eliminated from the SSMB midbass speakers. Depending on the system the frequency will be between 100Hz-
200Hz.Figure 3 and Figure 4.
5. The amplifier driving the upper frequency speakers should be connected to the “Front High Pass” out on the x3i
crossover and the frequency selected and the multiplier switch set, if necessary. Figure 5 and Figure 6.
6. If there is a subwoofer in the system, use the “Low Pass” output on the x3i. The amplifier crossover does not
need to be set.
Remember to be careful setting the gains and make sure they are not clipping the amplifier and causing harm to
the speakers. For more information on setting system gain controls please refer to the KQ30 Technical Manual or to
your buddy who has installed a few stereos in his dad’s garage!
When using an x3i Crossover
Kicker SSMB Series Midbass Drivers
Recommended Applications / Version 2.0
Page 16
50 200
X-OVER
FREQ. (Hz)
XOVER
OFF
HI PASS
LO PASS
35
40
45 5065
100
400
High Pass
35
40
45 5065
100
400
High Pass
1x20x
Frequency
Multiplier
Fig. 1 Fig. 2
Fig. 5
Fig. 3
Fig. 4 Fig. 6

When using an x3i Crossover
-+-+-+
Tweeter
Midrange
+
+
_
+
_
+
_
Crossover
Other Channel
SSMB Midbass
Components 250Hz -Up
SSMB6 / SSMB8 60Hz-250Hz
Other Channel
Front Out
From Source
Rear Out
3-Way
Electronic Crossover
+
_
Subwoofer Up to 80Hz
Other Channel
Parallel
On Off
When using
both inputs!
Set Crossover to OFF Position
Set Crossover to LO PASS Position
Set Crossover to OFF Position
R
Kicker SSMB Series Midbass Drivers
Recommended Applications / Version 2.0
Page 17

When using a Bandpass Capable Crossover
A dedicated amplifier can be used to run the SSMB6 / SSMB8 midbass speakers. This design is preferred by audio-
philes. It allows each speaker to work in the bandwidth in which they were designed for. This design will give the
installer total control over the speakers and will only be limited to the flexibility of the electronic crossover. This lay-
out assumes you are using a 3-way crossover with Bandpass capability built in. This differs from most 3-way
crossovers which offer 2-Highpass and 1-Lowpass outputs. (Like the Kicker x3i) The highpass output on the
crossover will feed the amplifier driving the the upper frequency speakers. The Bandpass output on the crossover
will feed the amplifier that is running the SSMB series speakers. Last, but not least, the lowpass output on the
crossover will feed the amplifier driving the subwoofers. Each speaker will be working in precisely the bandwidth
they were designed for. See the diagram on the following page.
When using a 3-Way Electronic Crossover:
1. In this scenario the amplifiers do not need to have any crossover capability, the electronic crossover will assume
all of the responsibility.
2. Make sure the signal that is feeding the amplifier driving the upper frequency speakers is coming from the high-
pass out on the crossover.
3. Then make sure the signal that is feeding the amplifier driving the SSMB series speakers is coming from the
Bandpass output on the crossover.
4. Finally, if all other connections have been made correctly, this should be easy... the final set of RCAs need to be
connected to the low pass output on the crossover and to the input of the amplifier that is driving the sub-
woofers.
Remember to be careful setting the gains and make sure they are not clipping the amplifier and causing harm to
the speakers. For more information on setting system gain controls please refer to the KQ30 Technical Manual or to
your buddy who has installed a few stereos in his dad’s garage!
Kicker SSMB Series Midbass Drivers
Recommended Applications / Version 2.0
Page 18

When using a Bandpass Capable Crossover
-+-+-+
Tweeter
Midrange
+
_
+
_
Crossover
+
_
Other Channel
+
_
Other Channel
+
_
Other Channel
+
_
Electronic Crossover
From
Source
Components 250Hz - Up
Input High Pass
Band Pass
Low Pass
SSMB Midbass
SSMB6 / SSMB8 60Hz-250Hz
Set Crossover to OFF Position
Subwoofer Up to 80Hz
If you have more questions about the installation of your Kicker component, see the Authorized KICKER Dealer
where you made your purchase. You may contact us via the Technical Services page on www.Kicker.com or call our
Technical Services line at (405)-624-8583.
Kicker SSMB Series Midbass Drivers
Recommended Applications / Version 2.0
Page 19

Kicker SSMB Series Midbass Drivers
Recommended Applications / Version 2.0
Page 20
Graphs
In the first comparison we looked at the RMB6 vs. the F6.5d and in the second comparison we looked at the
SSMB8 vs. F8d. As you can see...QUITE IMPRESSIVE considering the mounting depth of the SSMB6 is 1 inch less than
the F6.5d and the SSMB8 is a full 1 3/8 inches less than the F8d. You can see why we are so
EXCITED
about these
new drivers.
RMB6 vs. F6.5d
RMB8 vs. F8d
C
RMB6 Freeair
F6.5d Freeair
10 Frequency 50 100 Hz 500 1K
C
Graph 1 > Acoustic On Axis Response: SPL, PhasedB
90
85
80
75
70
65
60
55
50
C
RMB8 Freeair
F8d Freeair
10 Frequency 50 100 Hz 500 1K
C
Graph 1 > Acoustic On Axis Response: SPL, PhasedB
90
85
80
75
70
65
60
55
50
This manual suits for next models
2
Table of contents
Other Kicker Speakers manuals

Kicker
Kicker KM10 User manual

Kicker
Kicker KSS50 User manual

Kicker
Kicker KM44CW User manual

Kicker
Kicker CSS65 User manual

Kicker
Kicker PS42 User manual

Kicker
Kicker KMTC9W User manual

Kicker
Kicker PowerBar KPB1 User manual

Kicker
Kicker KMFC User manual

Kicker
Kicker Street Series User manual

Kicker
Kicker SS Series User manual

Kicker
Kicker KM6200 User manual

Kicker
Kicker DS35 User manual

Kicker
Kicker KSS50 User manual

Kicker
Kicker KM620 User manual

Kicker
Kicker PS5250 User manual

Kicker
Kicker PSC57 User manual

Kicker
Kicker KM4 User manual

Kicker
Kicker 49ST4TW User manual

Kicker
Kicker KS Series User manual

Kicker
Kicker KSC350 User manual