KidBuild INSTAGRAM & YOUTUBE COUNTER User manual

Side 1 | 10
INSTAGRAM & YOUTUBE COUNTER
Author: Lars Weimar
Version: 1.0 Datum: 20201001
Version: 1.1 Datum: 20201013
Version: 1.5 Datum: 20201110
Version: 3.6 Datum: 20210317
Version: 3.9 Datum: 20210419
Version: 4.2 Date: 20210601

Projects [not] only for Kids www.kidbuild.de
S i d e 2 | 10
TABLE OF CONTENT
Instagram & Youtube counter ..................................................................................................... 1
Table Of Content........................................................................................................................................... 2
Introduction ................................................................................................................................................... 3
Scope Of Delivery ......................................................................................................................................... 4
Requirement On Your Side ........................................................................................................................... 4
Installation..................................................................................................................................................... 4
Configuration................................................................................................................................................. 6
Register Counter As Device .......................................................................................................................... 6
YouTube Settings.......................................................................................................................................... 6
Functions ...................................................................................................................................................... 7
Instagram Settings For API ........................................................................................................................... 8
Instagram Configuration Steps ...................................................................................................................... 9
Uplaod The License ...................................................................................................................................... 9
Connections ................................................................................................................................................ 10
Extensions .................................................................................................................................................. 10
Used Licenses............................................................................................................................................. 10

Projects [not] only for Kids www.kidbuild.de
S i d e 3 | 10
INTRODUCTION
This manual will help you to get the social counter running. We will run through configuration steps
like wifi settings, credentials, wich counter should be visible and something else.
The counter is based on a microcontroller. Microcontrollers are not very hungry regarding power
consumption and the best choice for small units.
The microcontroller owns some peripherial connections, called IO (input / output). Now it is
possible to control external parts like a display, push-buttons or sensoric t hings. The software of
the microcontroller knows wich hardware is connected and get instructions from the program how
to use the external devices.
This allows the microcontroller to connect to your wifi network who has access to the internet via
your router. The microcontroller get his time and date from the internet automatically, synchronized
with the ntp-protocol (network-time-protocol).
The main functions can be controlled with the push-button. You will find the description later. All
other settings must be done on the webpage who runs on the social-counter directly. There are
several methods to configure the counter the first time.

Projects [not] only for Kids www.kidbuild.de
S i d e 4 | 10
SCOPE OF DELIVERY
ESP8266 module (e.g. NodeMCU, Lolin, etc.) called microcontroller
Push-button
Display module 8x32 dot-matrix
Cables
Pre-uploaded firmware (ready to run)
not included:
(Optional) 5V mobile phone power supply with micro USB connector
(Optional) temperature / humidity sensor
REQUIREMENT ON YOUR SIDE
You need internet connected wifi at the destination place of social counter.The counter supports
only WPA2. Public captive portals are not supported.
INSTALLATION
The counter need a 5V power supply with minimum 2A (available in the shop). The power cord
must be with a micro-usb connector.
After first start of the social-counter (factory default) you will find a captive-portal as wifi-
accesspoint. You have to search a wifi network with the following name: „Kidbuild Social Counter“.
You are able to connect with any device with browser support like mobile smart phone, tablet or
laptop.

Projects [not] only for Kids www.kidbuild.de
S i d e 5 | 10
The counter will redirect you automatically to his web-page after connecting to the wifi. If this does
not work, please open the browser and type in: http://192.168.4.1 . Now you must connect the
counter to your local wifi network. Please fill in the forms and klick on save.
Advanced users are able to define fixed IP´s. If you will do that, please uncheck the DHCP
checkbox. Advanced form will be displayed.
If your counter are not able to connect to the defined network after saving the settings, the counter
will fall back to captive-portal after timeout. You have to wait a while.

Projects [not] only for Kids www.kidbuild.de
S i d e 6 | 10
CONFIGURATION
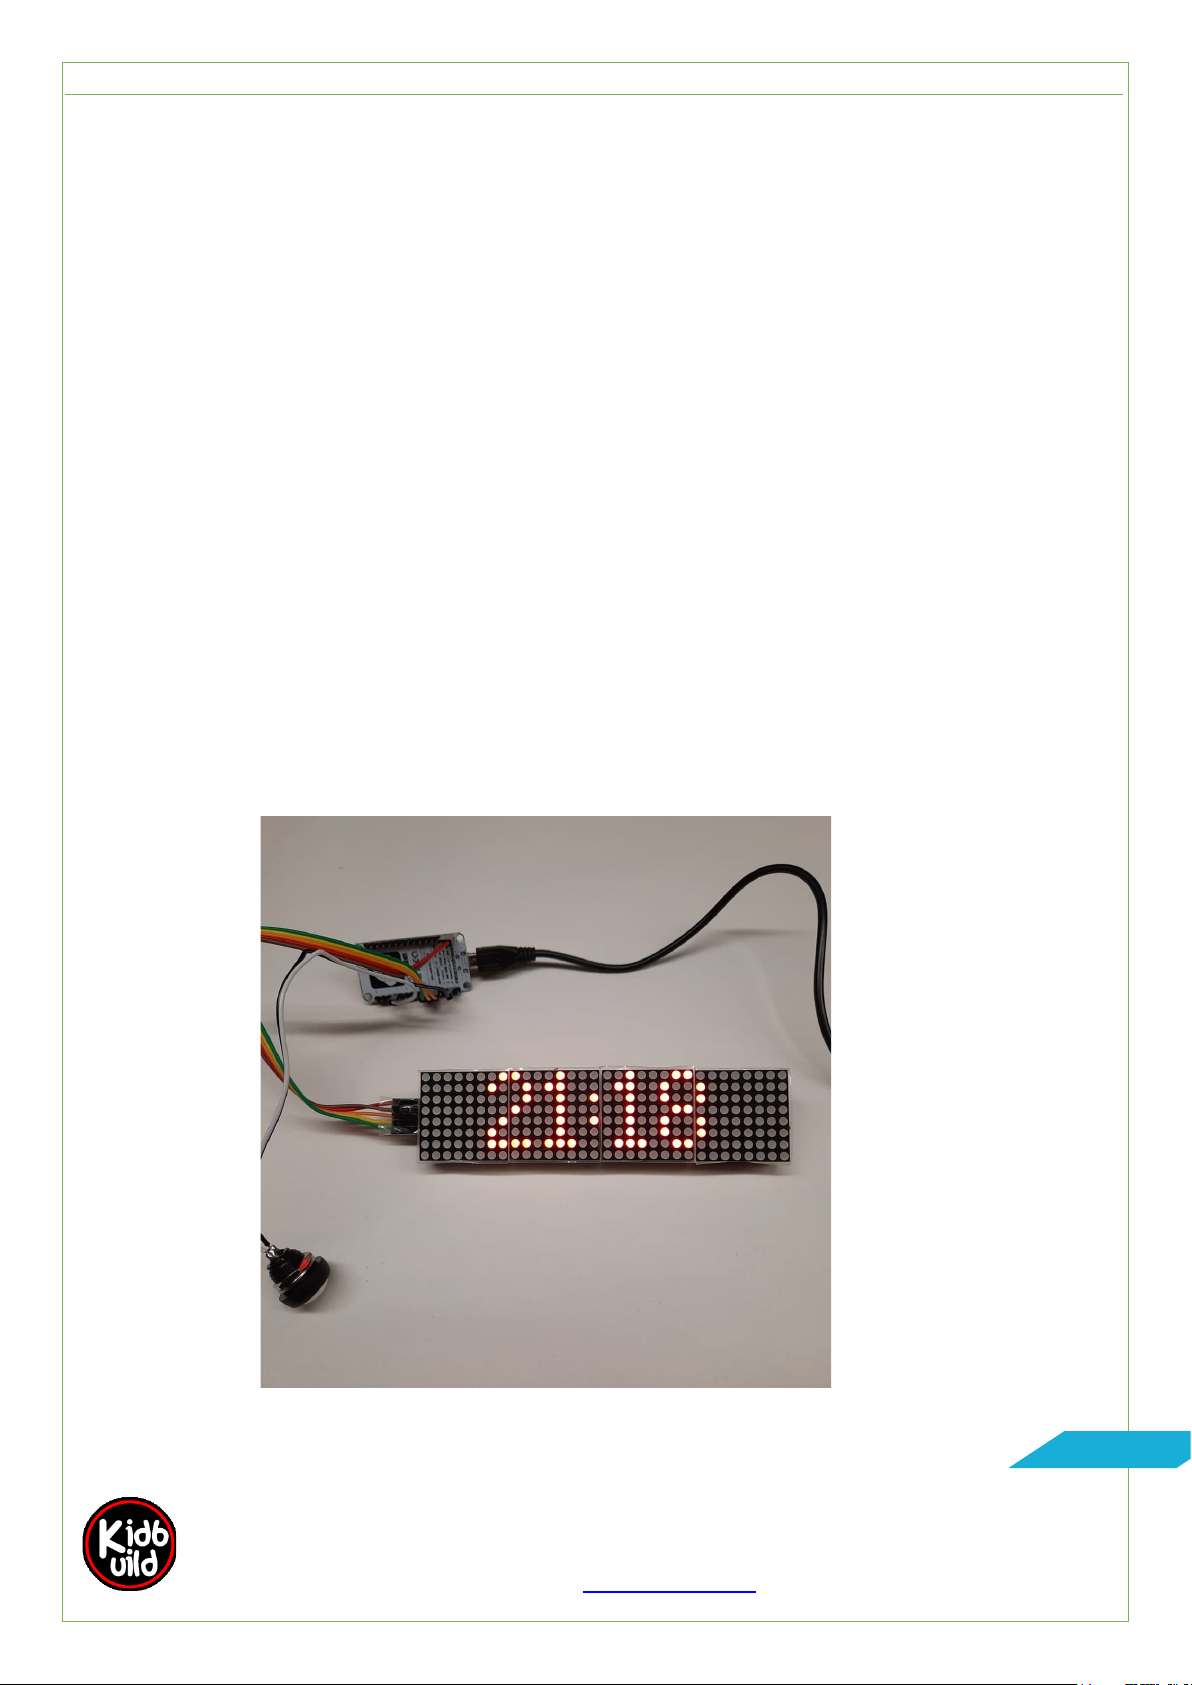
If the counter show´s you the correct time, the installation part was successfully. The counter is
now connected to the internet correctly!
REGISTER COUNTER AS DEVICE
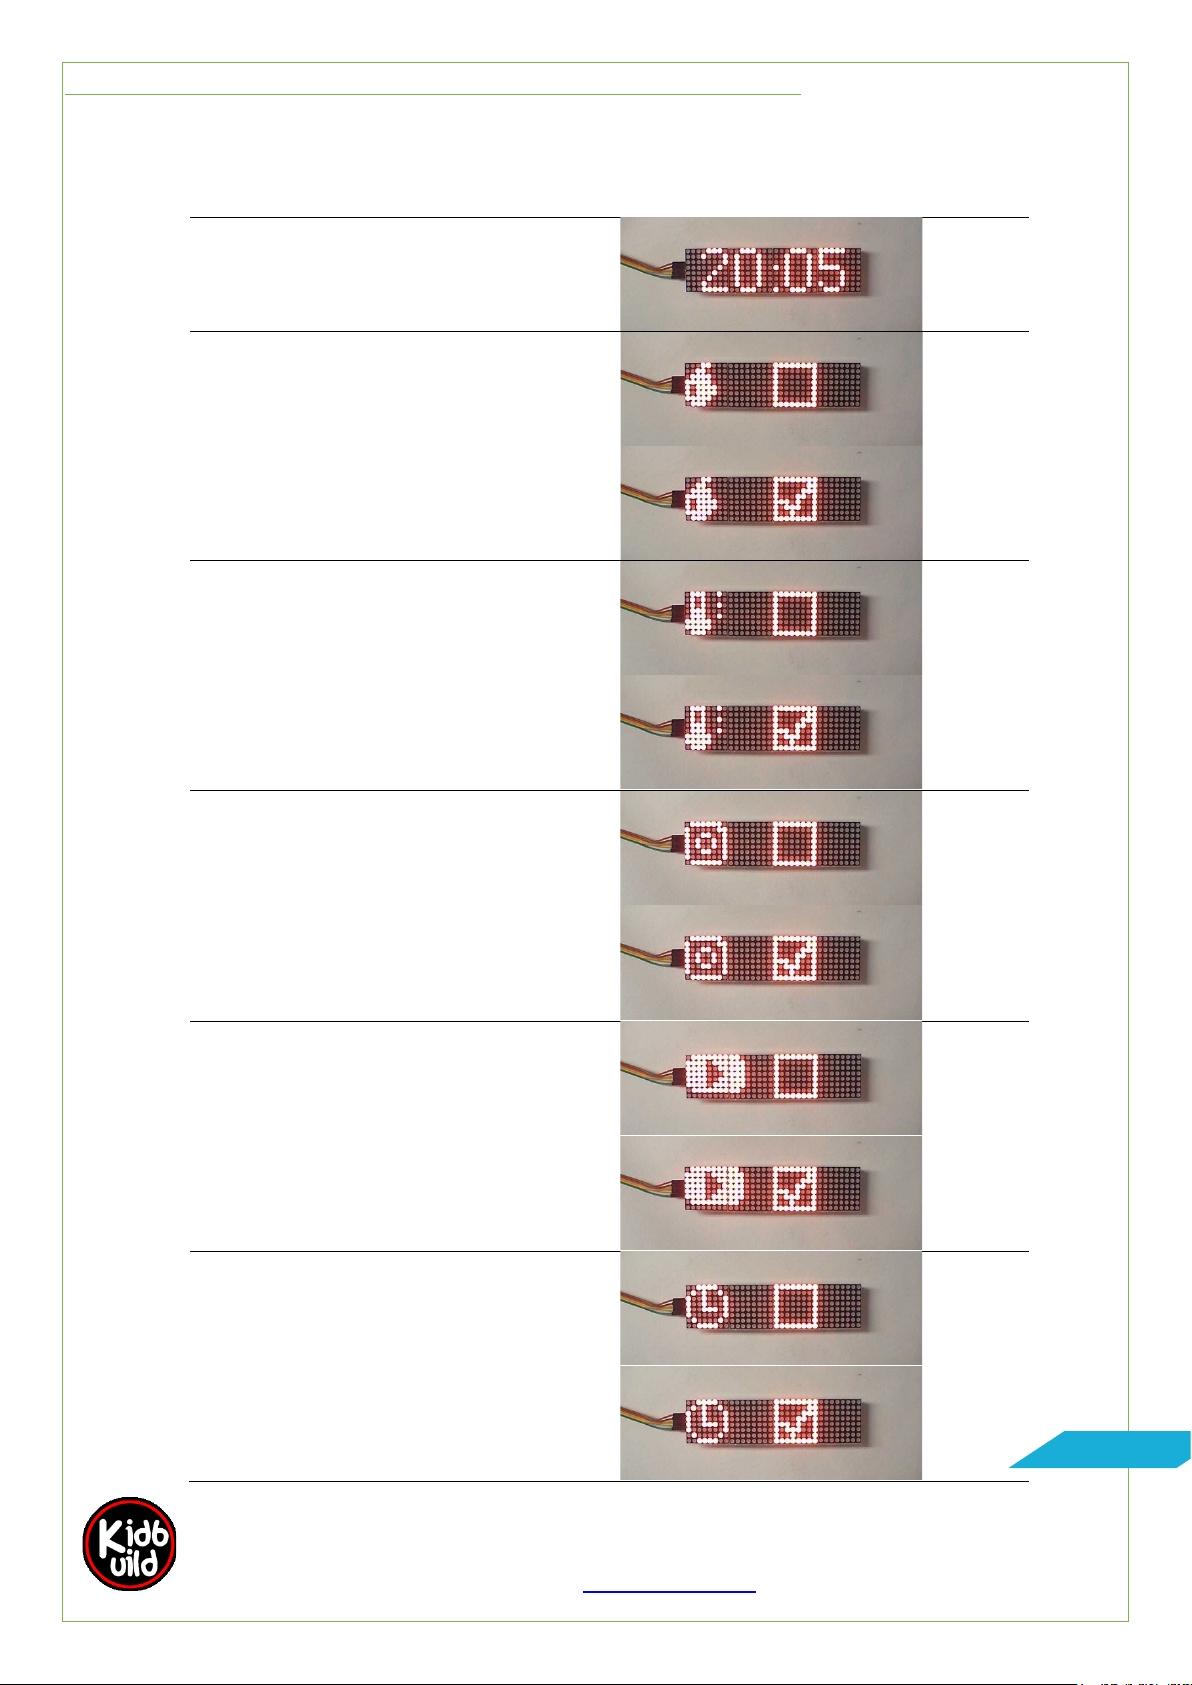
To get the live Instagram follower, you must register the counter as a device. This can be done with
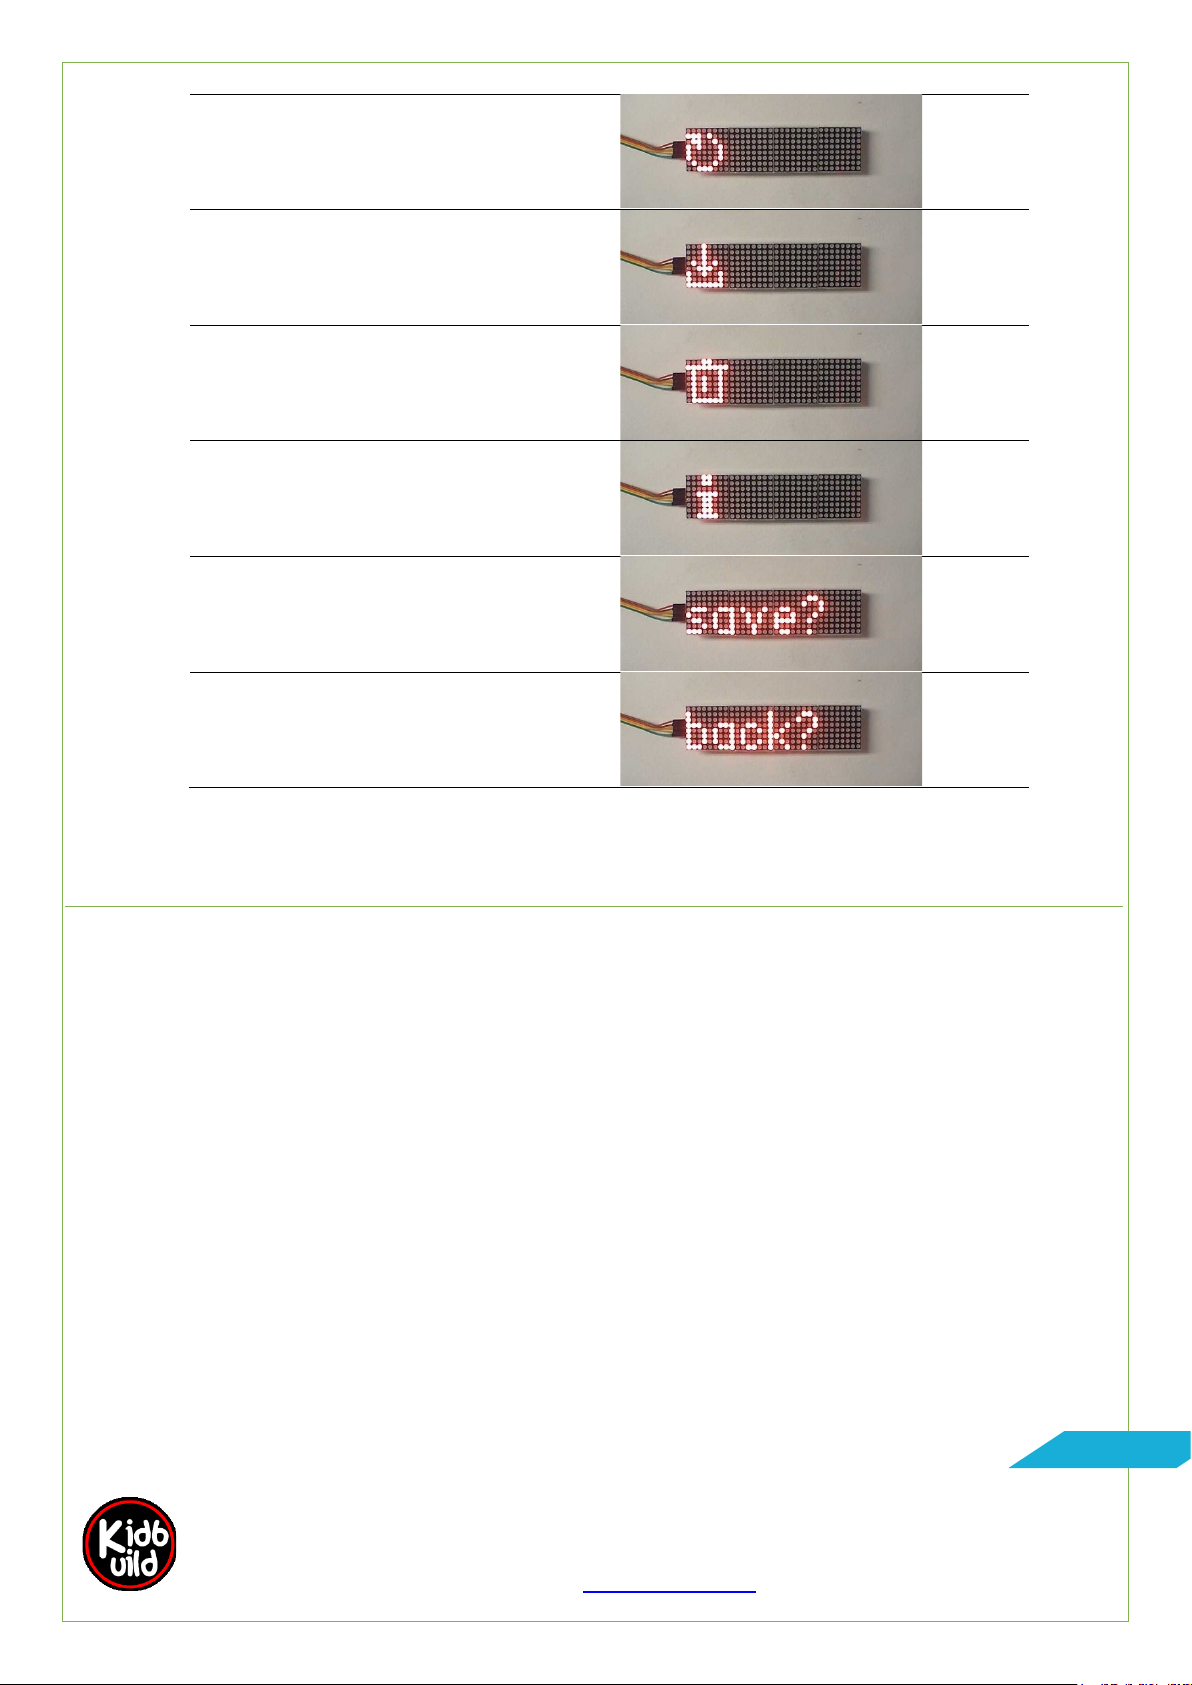
the push-button of the counter. You can access the menu by pressing the push-button shortly. The
menu mode will appear. By pressing the push-button shortly again, you will go through the menu.
To enable or disable the setting, press the push-button long (about one second or longer). With a
short press, you will go forward in the menu. You have to save the settings in “save” menu with
long press.
To activate the Instagram follower display, you have to go to the “Instagram Logo” and press long.
Now wait some seconds and the counter will show you a CODE. The counter will repeat the code
as long as you need to register the device. Do not stress yourself. The timeout for registering is 5
minutes. You can repeat the registering process after timeout.
To register the code, open a browser on your favourite device (computer, laptop, tablet, etc.) and
open the page: https://www.facebook.com/device
Type in the CODE and register your counter as a device. After successfully registering the CODE,
the social-counter will take a while to get all informations (not longer then two minutes). If the
counter shows you “OK”, all settings are done. The counter will show your Instagram followers.
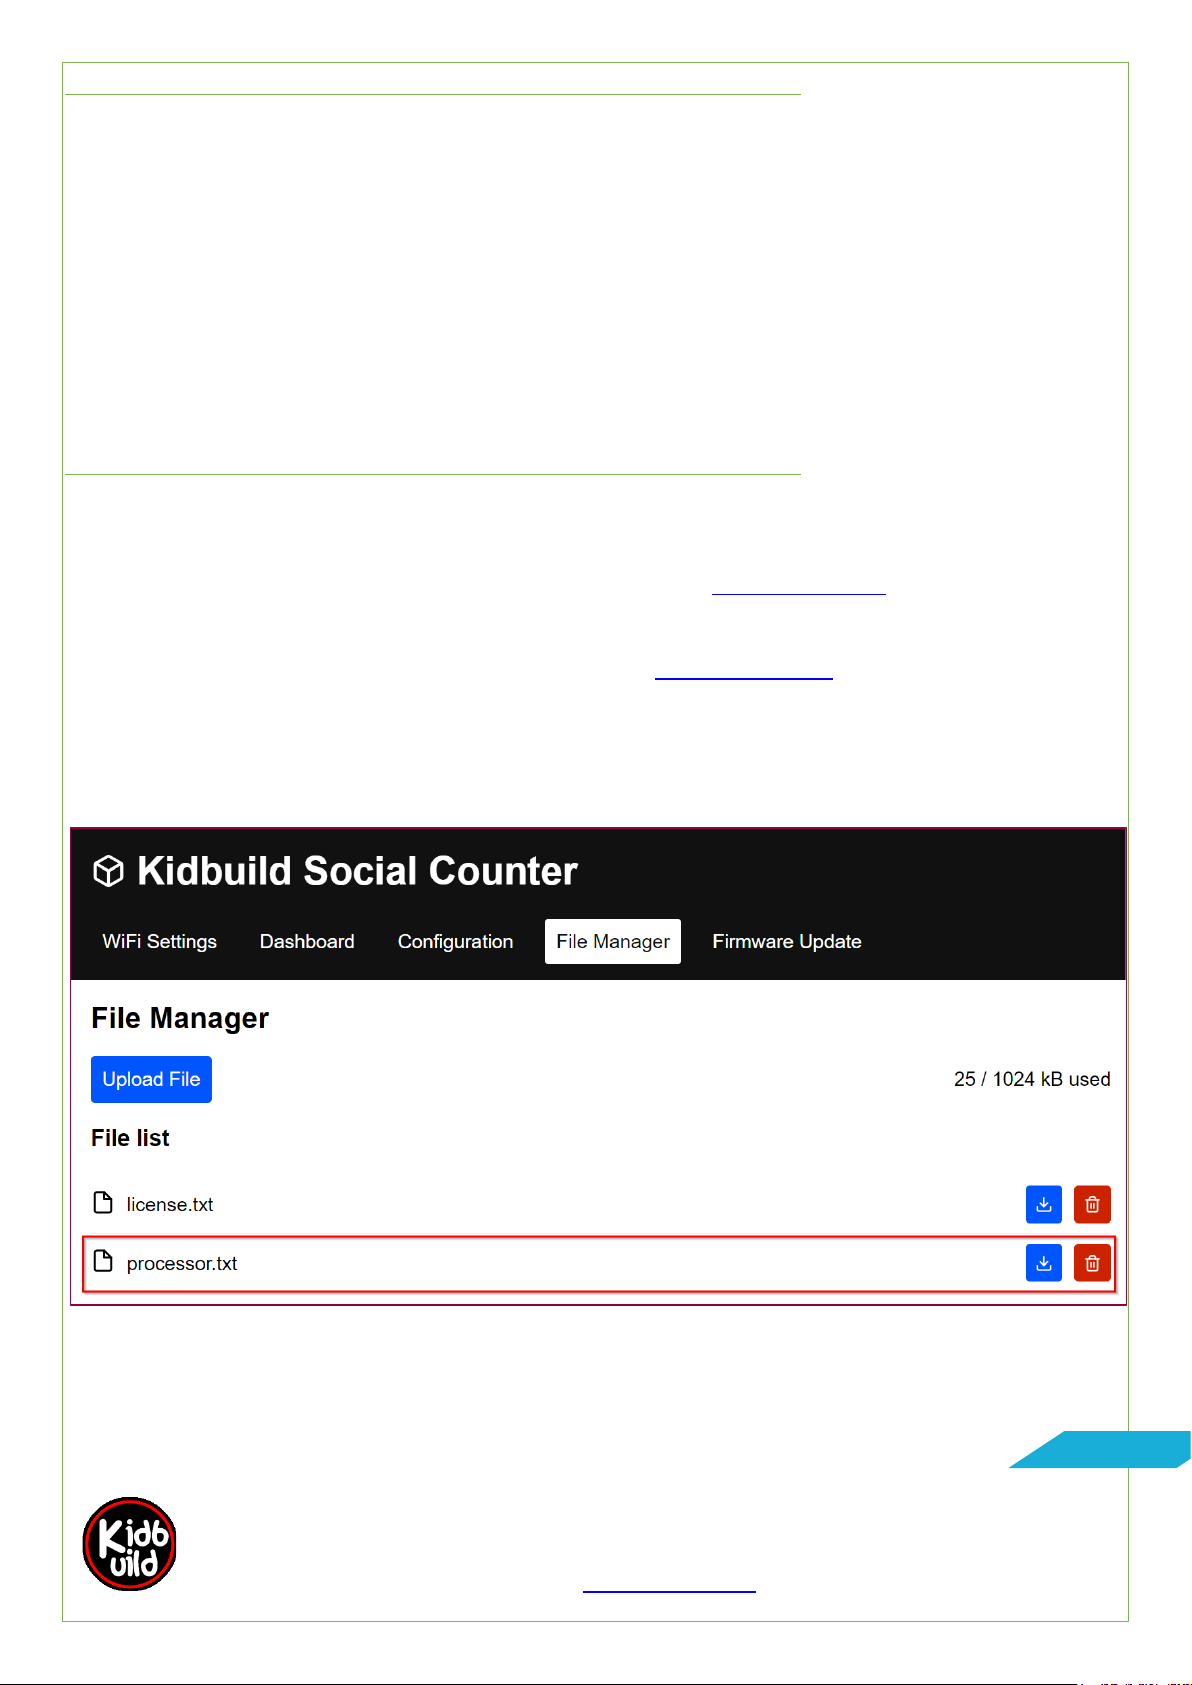
This procedure are also possible via the web-browser on the “configuration” page of the counter.
Known issue: Apple devices are not allowed to open the facebook device page. This is blocked by
Apple. Please use an other device to type in the CODE on facebook device page. Thanks.
YOUTUBE SETTINGS
1. Please fill in the field „YouTube API KEY“ your generated API-Key described in the
link: https://developers.google.com/youtube/v3/getting-started
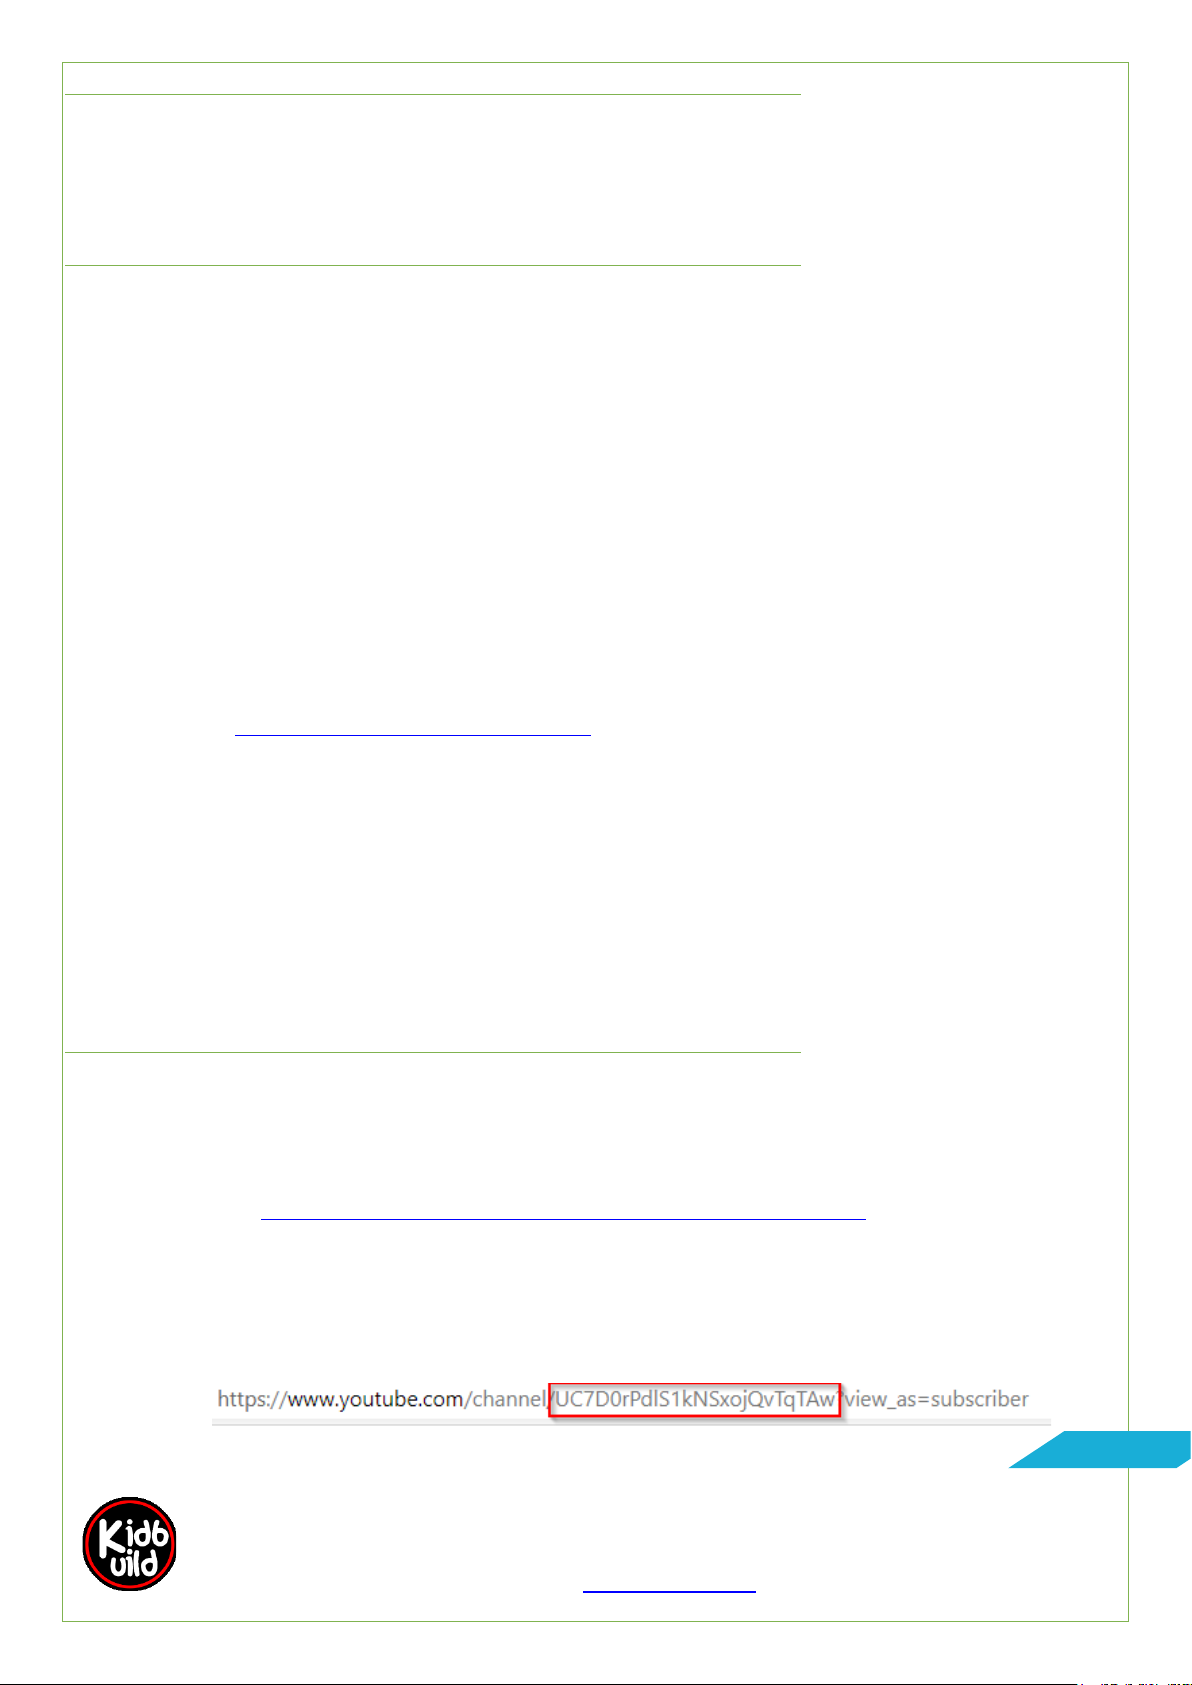
2. Please oben a browser and go to your youtube channel. Fill in the field „YouTube
Channel ID“ your personal Youtube Channel ID like the screenshot. You will find it
after open „My channel“.

Projects [not] only for Kids www.kidbuild.de
S i d e 7 | 10
FUNCTIONS
This is an overview about the functions with the push-button. Short presses will guide you through
the menu, long presses changes between enable / disable.
Shows the humidity. This function
needs separate sensor.
Shows the temperature. This function
needs separate sensor.
Activate DEVICE registration
process.
If you uncheck, all Instagram settings
will be lost and you must re-register
your DEVICE. This can be done with
enable again.
Shows the YouTube subscribers, if
the YouTube API-Key and YouTube
Channel-ID is saved in configuration.
Shows the time. There is also a date
icon to activate the date.

Projects [not] only for Kids www.kidbuild.de
S i d e 8 | 10
Long press restarts the counter
Long press downloads and installs
the newest firmware.
Long press delete the settings to
factory default. The license will not
be deleted.
Long press will show you
informations like wifi quality, firmware
version and IP-address.
Long press save the changes and
leave the menu.
Long press leave the menu without
saving changes.
INSTAGRAM SETTINGS FOR API
You have to do some settings on Instagram and Facebook to prepare the Facebook API for
the social-counter. There are some requirements from Facebook.
The Instagram account must be public. Private accounts will not be
working.
You must convert your personal account to a business account.
This is free without costs.
You need a Facebook account with Instagram connected site.

Projects [not] only for Kids www.kidbuild.de
S i d e 9 | 10
INSTAGRAM CONFIGURATION STEPS
- Create a Facebook account
- Login to Facebook and create a Facebook Site.
- Connect the Facebook site with your Instagram Business Account
After that you have to register the social counter as a device, described above.
UPLAOD THE LICENSE
The counter software is protected. If you buy the counter via www.kidbuild.de or the “Firmware
only” you get the rights to use the software for free. Otherwise you will see a message in the
display. The license key is bundeled with the used hardware. If you buy a “Firmware only” you get
One license will only work with one hardware.
We will generate the license.txt key and send this back to you. Please upload the license.txt to the
same folder as processor.txt and restart the counter.

Projects [not] only for Kids www.kidbuild.de
S i d e 10 | 10
CONNECTIONS
ESP8266 NodeMCU
8x32 LED Matrix MAX7219
D6
CLK
D7
CS
D8
DIN
3V Pin
VCC
GND
GND
ESP8266 NodeMCU
Taster
D3
Pin
GND
Pin
ESP8266 NodeMCU
Temperatur / Luftfeuchte
Modul
D2
Data
GND
GND
3V Pin
VCC
EXTENSIONS
The counter can show you the temperature & humidity by connecting a separate sensor. In some
kits the sensor is included, in some not. Please read the description in shop for more informations.
You can order the sensor to upgrade the functionality.
USED LICENSES
In this product the following licenses are used:
https://github.com/esp8266/Arduino/blob/master/LICENSE
https://github.com/MajicDesigns/MD_MAX72XX/blob/main/LICENSE
https://github.com/MajicDesigns/MD_Parola/blob/main/LICENSE
https://github.com/adafruit/Adafruit_Sensor/blob/master/LICENSE.txt
https://github.com/maakbaas/esp8266-iot-framework/blob/master/LICENSE
Table of contents